Moving side cars into a sub-directory would be a HUGE negative move AFAIC
How would you move pictures around after processing?
3 Likes
I don’t know how moving side cars into a sub-directory worked in Ex4. I didn’t have the app long enough to find out. (Ex4 was unusable on a 5K iMac)
I actually don’t see the problem. This is a professional app. I would expect users to be sophisticated enough to make their own choices. If there was an option to create a sub-directory in the same directory as the processed images (or where ever the user chose to place the side car files) they would be responsible to maintain the association. Not what I do - but I see no reason to artificially limit a pro level user’s workflow choices.
I also create web sites. This type of decision making is entirely left up to the content creator - and is far more complex. But it is not rocket science.
EDIT: I am speaking to the general philosophy here. I actually do not want to see - at this point - DXO do anything other than deliver on improvements to the core feature set of PhotoLab. The backlog is significant enough without distractions such as side car sub-directories. 

3 Likes
A photographer would have to move the whole subdirectory with the pictures. This is a real workflow issue when some of the photos should go to a permanent archive and some should be deleted. Browsing folders of images with XMP and .dop sidecars can be a challenge with some software.
The solution for me is not to use image browsing software which is not sophisticated enough not to filter by file extension. These days I shoot a lot of RAW + JPEG with my Fuji X cameras - better image browsing/culling software can show just a single image rather than both, but duplicate images is equally an annoyance with simple image browsers.
It turns out that FastRawViewer, my main culling application and cheap as chips, ignores .dop and .xmp files out of the box. There’s even an option to add custom file extensions to ignore.

There’s a secret free trial available here (via latest 1.5 beta which works just fine for me), good until 5 May 2019.
LilyView which I use for previewing finished images as it supports hiDPI monitors (4K/Retina) also ignores non-image files.
Adding to @uncoy’s post…
The ancillary software in one’s work is critical. For me Adobe’s Bridge is a perfect companion to my workflow with PhotoLab. Bridge has the option to show files in the sub-folders of the selected “parent” folder; in this case the “.dop” files which show up with the image files. Below (Figs. 2 & 3) are some of its features in regard to sub-folder~directories included with your images. TIFF, PNG - virtually any file type - would show up too if there were any.
These kinds of (flexible) capabilities makes for efficient file management.
Fig.1 - Desktop screen shot
The folder~directory set-up on my computer showing a “dop” subfolder mixed in with other file types.
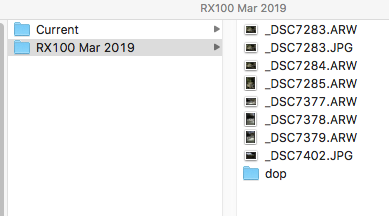
Fig.2 - Bridge screen shot - the “dop” folder itself also shows up if desired.
Files Sorted by Name - note the “Filter” panel at left which can isolate selected “File Types” on the fly.
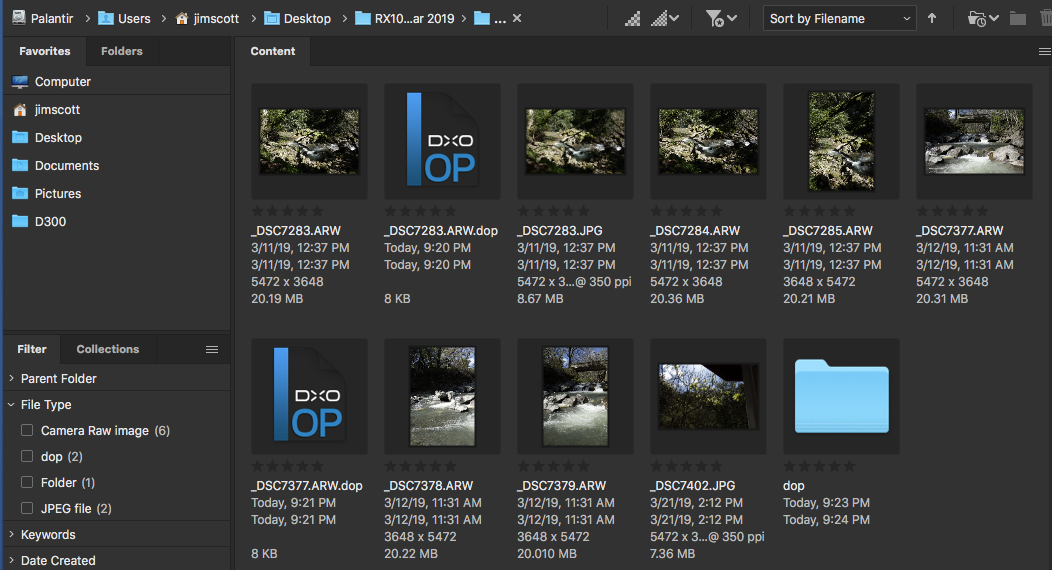
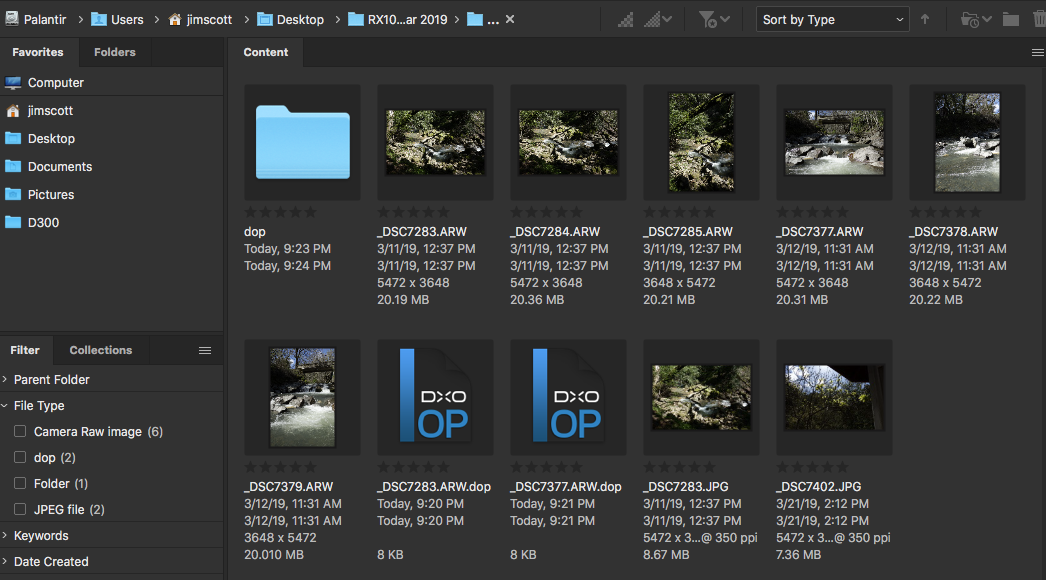
Fig.3 - Bridge screen shot
Files sorted by Type - “Filter” panel available as with the “Name Sort”.
Adobe Bridge CC is free, but it’s part of CC - so if you have PS CS6 and install Bridge - and don’t like it - it’s almost impossible to remove Bridge CC without also damaging your CS6 licensing.
I tried Bridge, didn’t like the new one as well as the one that came with CS6, lost my PS CS6 license info when I uninstalled CC Bridge. That was on a Sunday - and I needed to get some work done. Did a bare metal recovery to get back to Bridge CC plus PS CS6.Will eventually go to an image taken pre Bridge CC, unless I go to a new desktop PC before that and have to go through the whole delicense old / license new rigamarole.
Just thought I’d mention this as it was a major pain for me.
1 Like
Hi All. I’m new here, and had quite a few of the same thoughts and (mis-)understandings as Mabel so this thread has been helpful. I shall have a go at creating my own preset to allow unconstrained cropping as that’s a continual minor annoyance.
I have one other question - perhaps due to my misunderstanding the [product or using it in an abnormal way. If I make various changes in Customise e.g. cropping, geometric corrections etc) and then apply the “No correction” preset, it seems to lose all my changes, and they seem irretrievable. Is this indeed what happens, or am I imagining it? If so, is this a bug, or a deliberate design feature?
Judging from the user interface, I’d guessed the RESET button was for resetting (i.e. reverting to the original) and the PRESETs are to apply some combinations of rendering parameters, but not to obliterate work already done.
YES for the first assertion.
NOT really for the second.
I explained all this in a tutorial
http://dxo.tuto.free.fr/Efficacite/Efficiency.html#B2_Lautoreglage_de_depart
Pascal
2 Likes
The Presets, as you’ve found out should be applied first at the beginning of an edit session. Using one changes all the settings you’ve already made to that of the preset. Presets aren’t additive.
Mark
1 Like
Thanks for the information. Seems like the presets should come with a health warning! 
I’m new to post processing. I looked at all the goodies on offer, and found some obvious useful stuff like geometric corrections and cropping, and the sticking plaster thingy for getting rid of distractions in the background, and local adjustments, and some of the sliders etc for changing the rendering characteristics, but then I started experimenting with the presets as a way of trying to check out the different “atmospheres” or rendering styles on offer. I didn’t realise that they override everything else.
Products like this have a huge learning curve …
Take time to read the links above 
Pascal
1 Like
Sorry Mark but not. That’s not correct
Pascal
In what way is it not correct? When I select a different preset it resets everything, including sliders the preset doesn’t use. I can undue it, of course, using CTRL-z, but on the PC the presets are not additive. If there is a way to make them additive I would certainly love to learn how.
Mark
That is correct Only for “1-DxO Standard” and “4- No correction”.
All others presets are partial (complementary).
You can also add your Personnal presets IF they are Complete presets.
All is describe on the link above
Pascal
1 Like
That seems to be correct Pascal. If you make a very obvious change (such as cropping off half the photo) and then click on the preset button, then the previews show very clearly that “1-DXO Standard” and “4-No Correction” will lose this cropping, but the others will retain it. Even still it is to me surprising that if you click on “1- …” or “$- …” the effect is permanent, and the cropping is not recoverable by choosing a different preset.
The controls and displays ought to convey to the user what will happen, but in this case they don’t seem to.
1 Like
Hello guys,
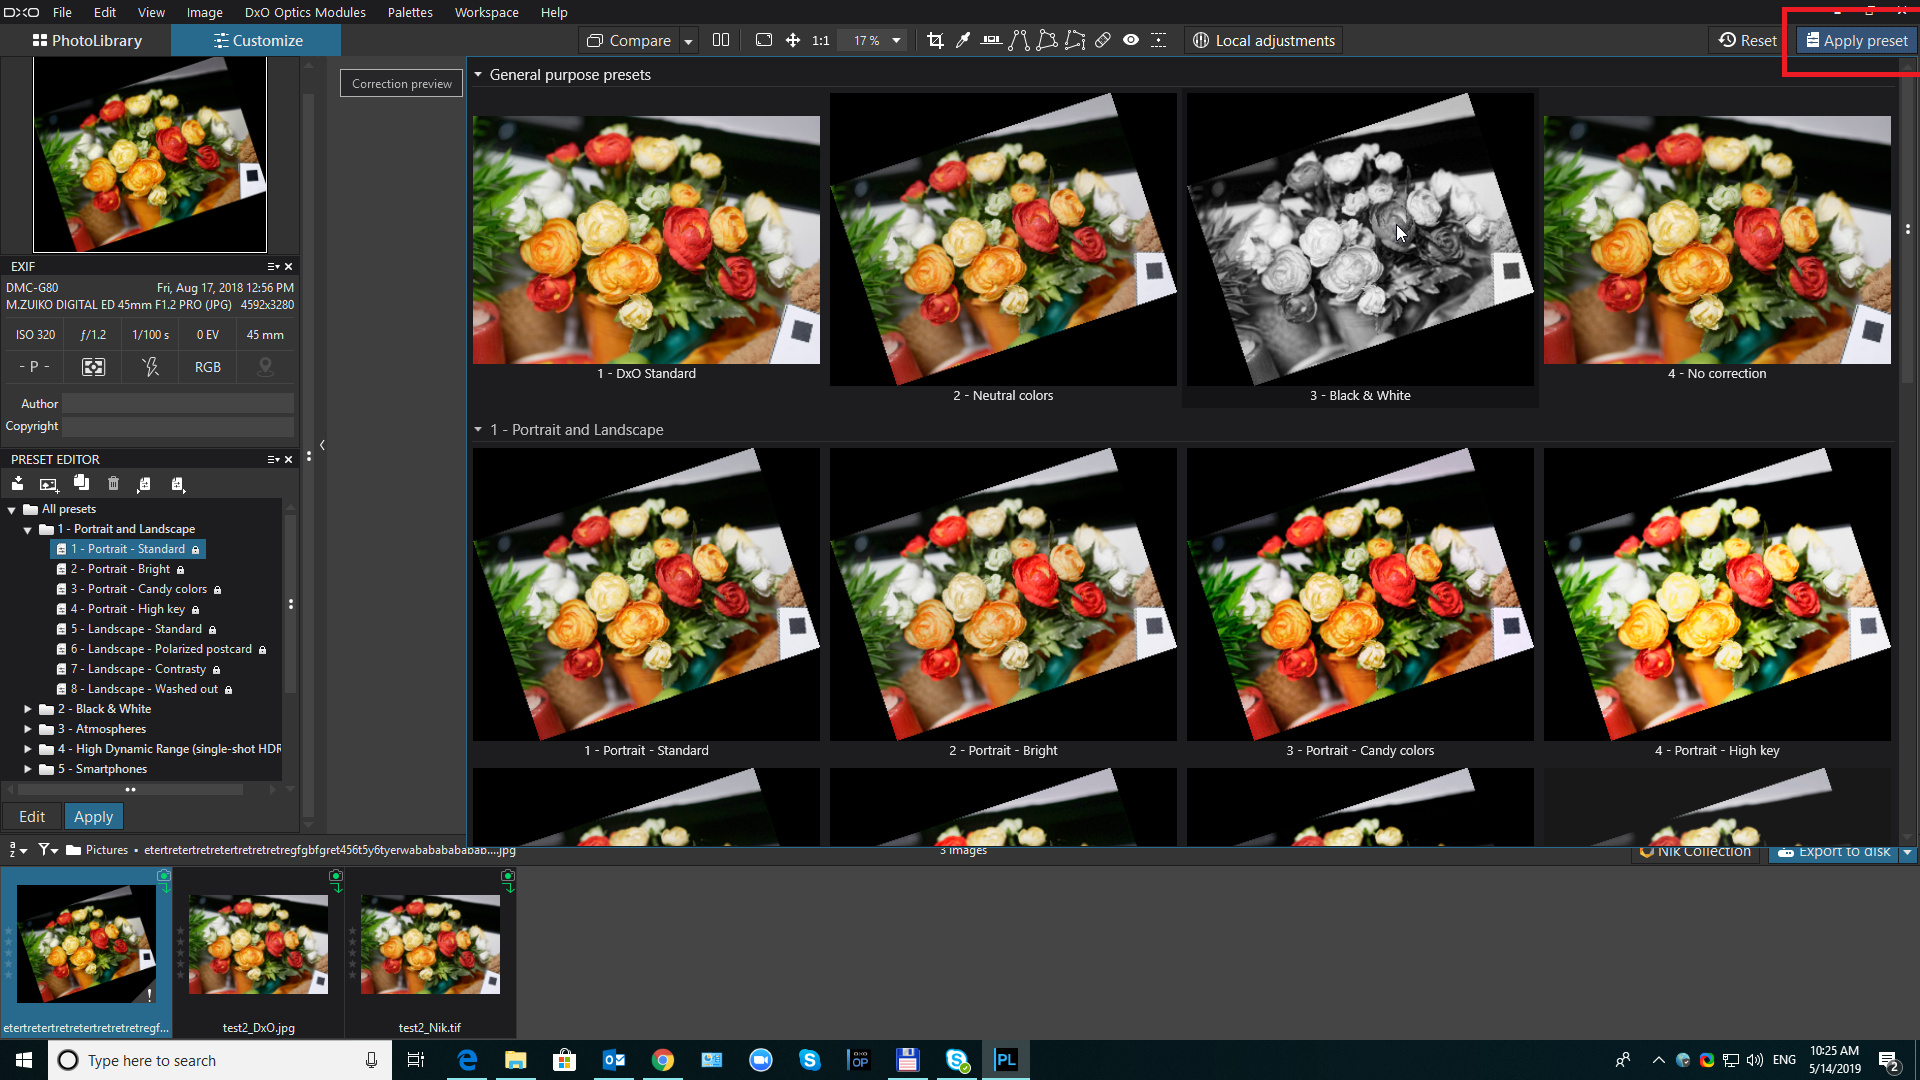
So to be clear, presets are divided into 2 groups: complete and partial. Complete presets will affect all the settings while partial will only affect the settings which are included in the preset. You can easy check which corrections are included in the preset in the Preset Editor mode:
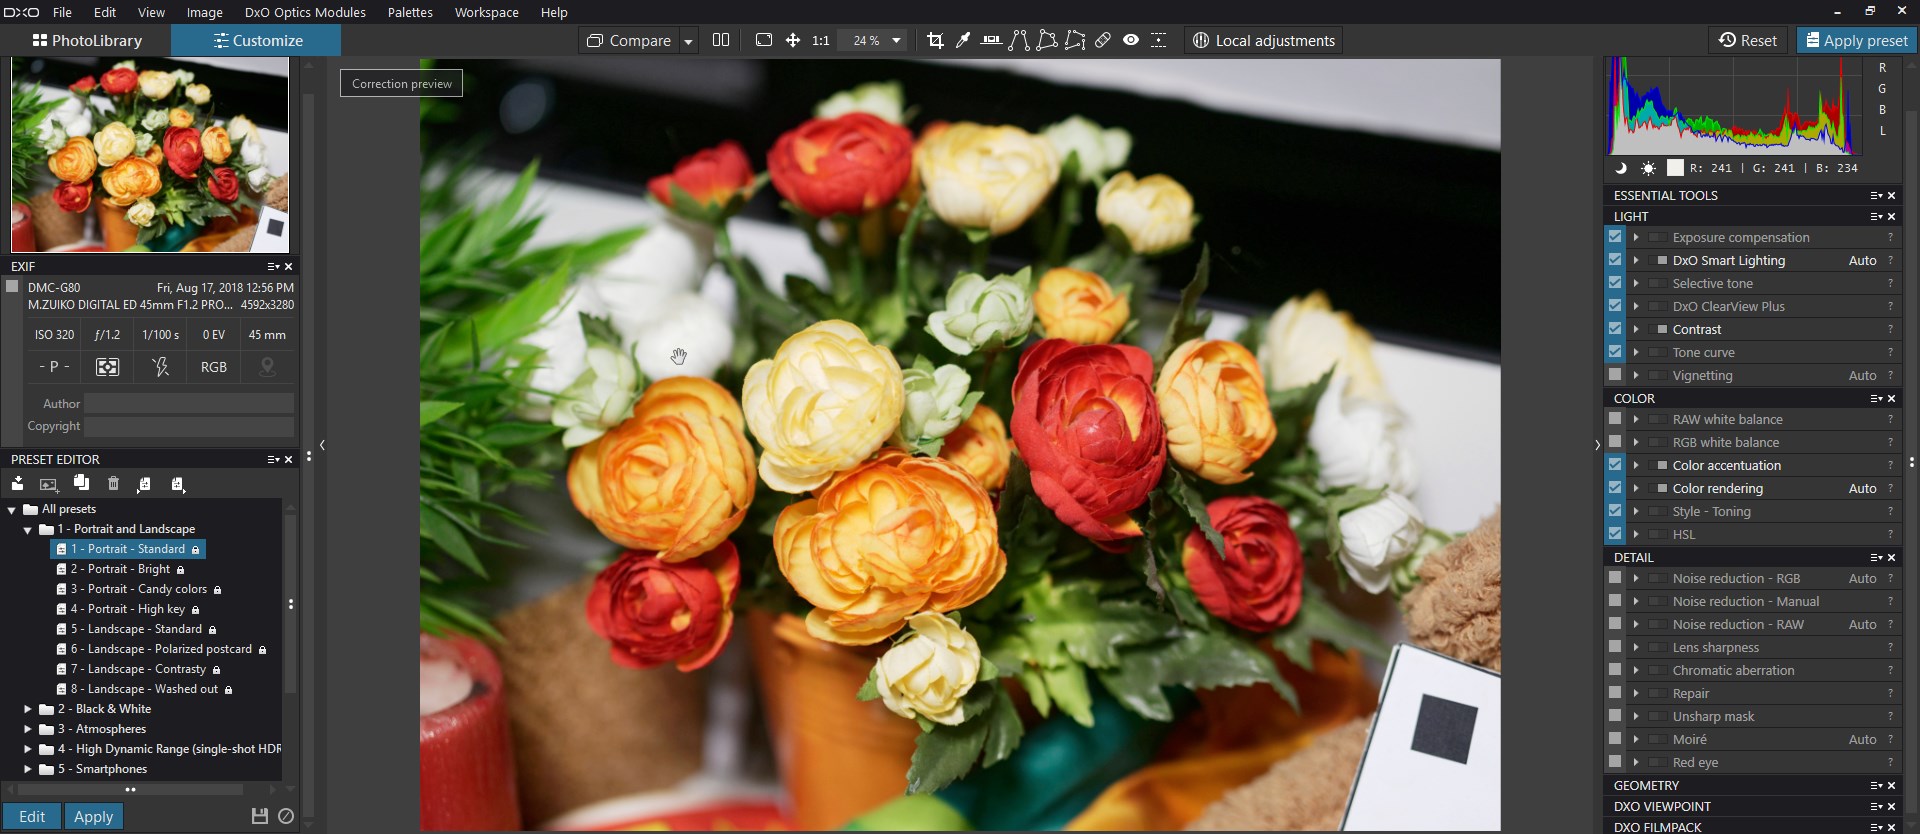
The ones in blue are the settings which are included and will be affected when applying the preset.
Second, when you press “Apply preset” button you will see the presets preview where it’s visible if the correction will be affected or not (I mean the main correction like Crop, Geometry, others) like:
Regards,
Svetlana G.
4 Likes
Thank you Svetlana. I created my presets when I first purchased PhotoLab 1 a year-and-a-half ago. Frankly, I had forgotten that partial presets could be set up.
Mark
1 Like