A lot of the time, it’s not under-exposing, it’s just that the RAW file can look under-exposed when compared with the (already processed) jpeg preview. You should never expect RAW images to look the same as you see them on the back of the camera, or even in Finder because you are only seeing the preview.
This is the same with all RAW processing software because a user might prefer what you consider under-exposed. Which is why you can setup your preferred options in a custom preset.
Take note of Peter’s post
No problem.
Here’s a screenshot of an image that has a wide dynamic range, as seen in Preview, which shows the internal jpeg preview…
… and here is a screenshot of it opened in PL…
You can see that the darker areas are even darker.
Using the Smart Lighting tool in Spot Weighted mode can really help bring this detail out without making it look too much like an HDR.
Go to the Smart Lighting tool and choose Spot Weighted…
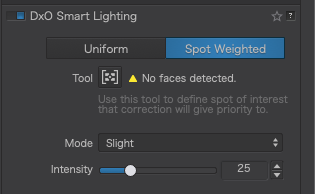
Select Medium mode to start with (this can be changed later) and click on the tool…
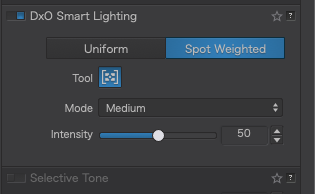
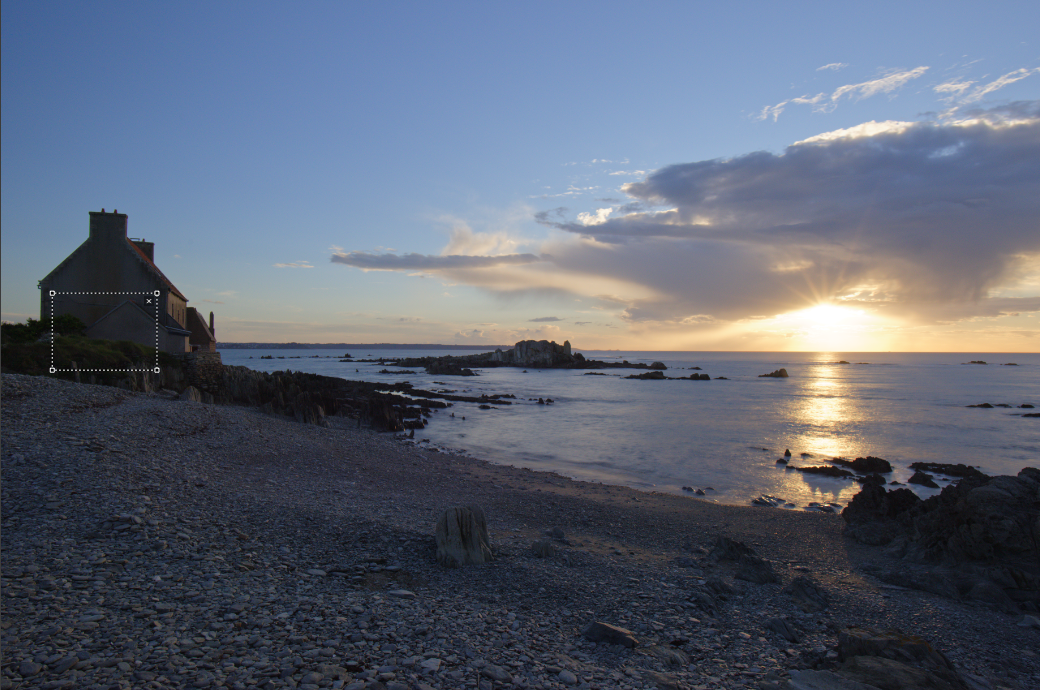
Then draw a rectangle in the darkest area that you want to see detail in…
… followed by another in the brightest area…
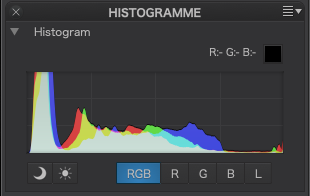
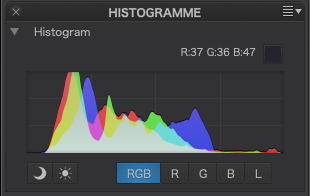
This gives you a starting point with the tonal range better distributed and the shadows and highlights brought further into the histogram, which will help when applying a tone curve or other tonal adjustments.
Before…
After…
One tool that does amazing things for shadow detail is the Fine Contrast for shadows…
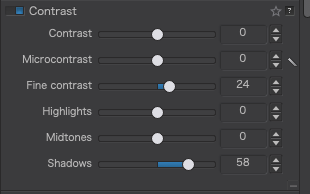
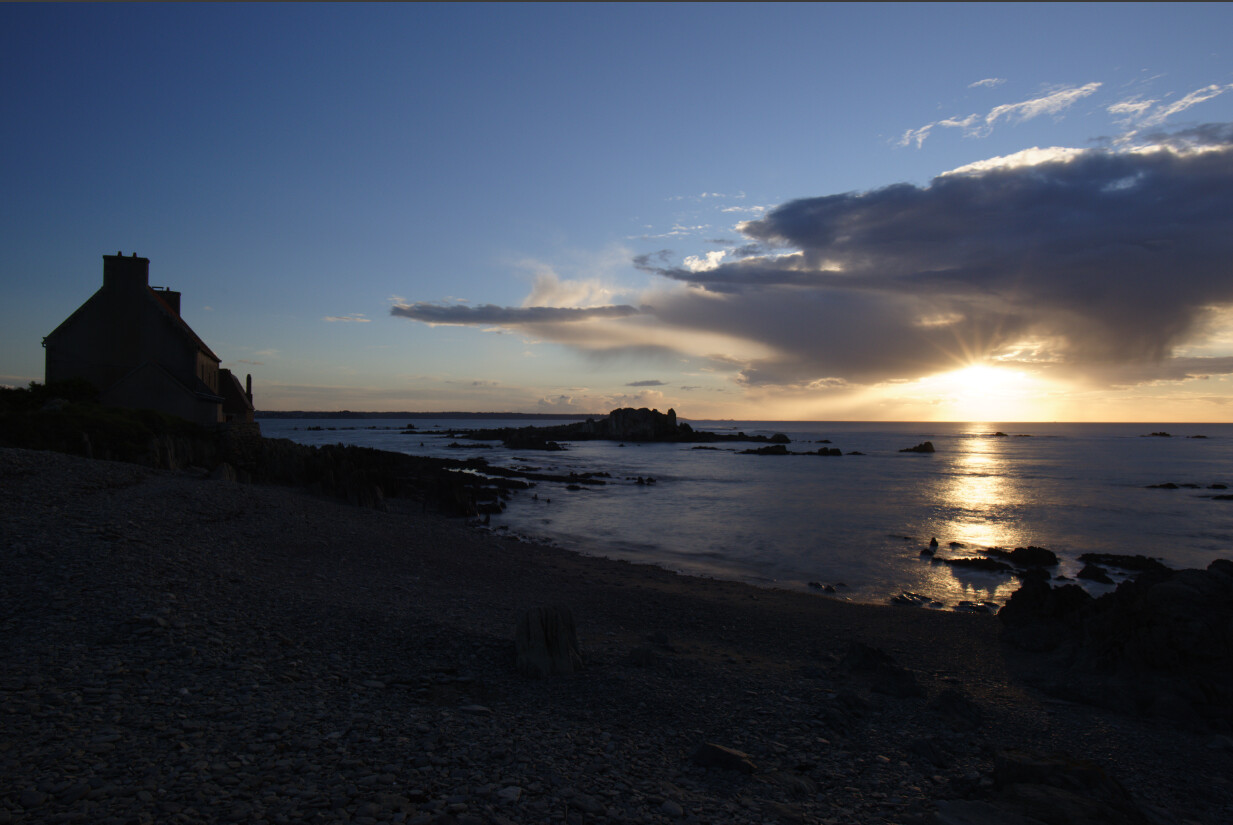
And here is the finished result…
Marie, if I may clarify something? PhotoLab’s RAW processing is excellent and images only appear to be over or under-exposed. That is natural when you are trying to fit a 14-bit image into an 8-bit display.
What PhotoLab gives is a wonderful starting point and the tools for extracting every last bit of detail available. Don’t touch it! 
For the best results, if you are shooting RAW, I have found that you need turn off all “smart” “auto” “dynamic”, etc exposure stuff on the camera because all that is doing most of the time is only affecting the jpeg image the camera generates for the back of the camera or the preview image or if you are shooting jpeg instead of RAW.
Personally, I would never use auto-anything or any of the “shooting modes” when shooting RAW since they only give a false (limited) impression of the amazing depth and richness of detail that you can bring out of the RAW file when processing it in PL.

 . Which tool is this and how do I access it?
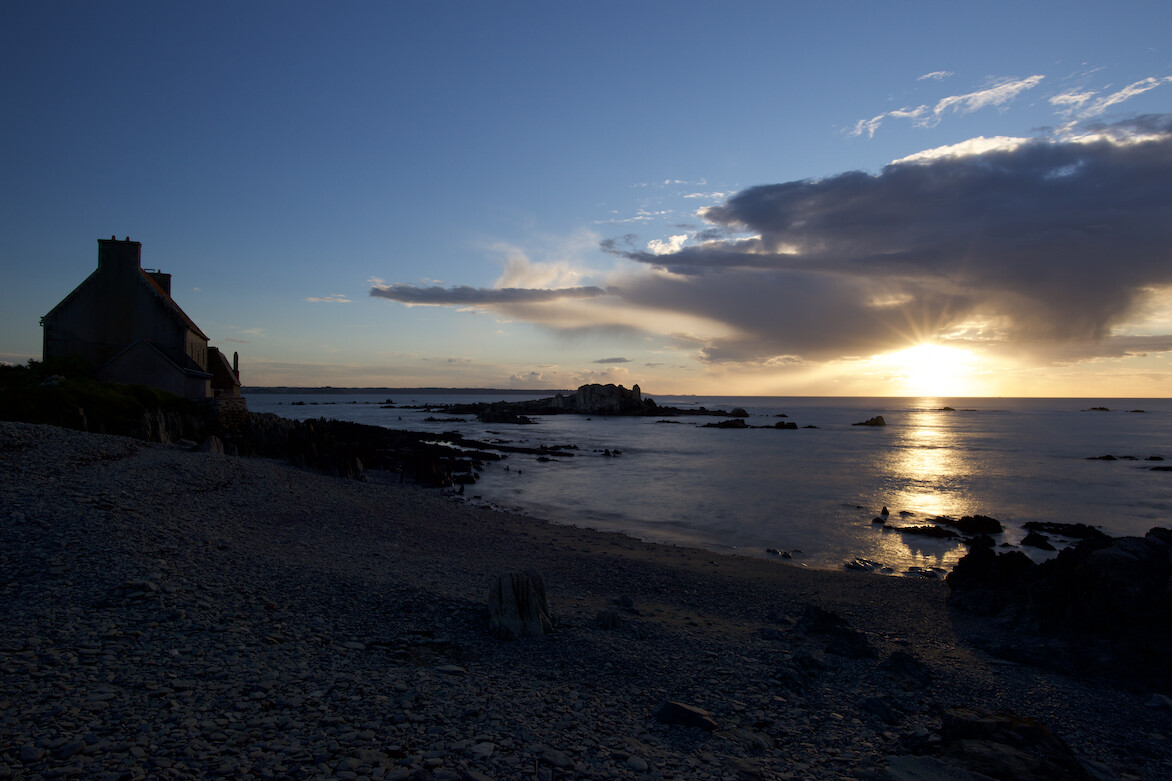

 )
)