Lack of DNG support needs to be adressed

How does Photolab really handle DNG DXO??

@nwboater

Thanks and good luck with the use of the improved Lightroom. I think it looked interesting too.

I have been using C1 for a little while now as my main converter and concerning DNG interchange between C1 and Photolab I found a few things to mention concerning using DNG as an interchange format.

If I started with a RAW-file - in this case an old NEX ARW-raw - imported it to Capture One - editing it and exporting it as a DNG IT WAS NOT POSSIBLE TO OPEN IT IN PHOTOLAB.

BUT - If I instead first opened it in Photolab and exported as a DNG (with “All corrections except color rendering” WHAT EVER THAT MEANS) I could open it in C1 without any problems AND IF I REEXPORTED IT FROM C1 to PHOTOLAB IT WAS THEN POSSIBLE TO BOTH READ AND REEXPORT TO C1 AGAIN - BUT AFTER DOING SO A COUPLE OF TIMES SUDDENLY I COULD NOT EXPORT IT AT ALL!

There seems to be the case that Photolab has a liking for it´s own flavour of DNG, at least in my test.

I also really wonder why there are exceptions when exporting DNG from Photolab when it comes to “Color Rendering”. What does that mean??? Is this a problem because of the new color support of a wider gamut or what. Can anyone enlighten me?

They seem to have changed the wording on the web site with the latest “freshening” of the content. It currently says:

I recall it previously used to say (or may still say somewhere else I cannot find) that it will open “native files from supported cameras” (which in some cases may be DNG files) and “DNG files converted from original camera files_only_ using Adobe DNG Converter” (or, I suspect, any products that include it, like LR, PS), and finally, “PhotoLab/PureRAW’s own Linear DNG format.”

Anything else is off the table, so if it works, count yourself lucky.

My library consists almost entirely (not counting really old JPEGs) of camera-native DNG files and converted-to-DNG files as specified (converted directly from a supported camera’s proprietary format using Adobe DNG Converter). Every one of them opens fine every time and I can send them back and forth between Lightroom and PhotoLab without issue.

The exception I have is some Adobe-converted DNG files that come from an old, unsupported camera. Fortunately, I only shot with that camera for about a year.

1 Like

Untill the DNG usability is fixed I won’t be upgrading to PL6 and in that case not to any other PL version.

A DNG is supposed to be in the same color space as the raw data the original imaging device generated.

So - simple explanation - using and applying a camera profile is skipped in dxo when writing a DNG . Because the next program that opens that DNG , will interpret the data the same as the original device data.

Simply put, if dxo would have used a camera profile and converted to working profile (and then writes that as DNG), the next program will ALSO use their own camera profile and convert to their own working profile … So it gets done twice, and things become unusable.

3 Likes

Thanks for your answers guys!
It sure looks like DXO will gave some homework to do with their DNG implementation.

2 Likes

Most effective and beneficial for everyone would be for DXO to explain, inform and educate users on how their software work and why it’s doing what it does.

Soo many users are still fighting to understand the concept of non-destructive editing or parametric editing of raw matrix sensor data or not-yet debayered data.

They are so used to editing pixel data in pixel editors like PS so grasping a non destructive workflow is a new uncharted territory.
And it does not help when moving in and out of and between applications which some do pixel editing while others do not.

Most people also don’t really understand what a camera RAW file is, what’s actually inside of it… and what steps a camera (and raw converter software) does to create a displayable image from it.

And, to be clear, they don’t have to. Photographers <=> technical-wizard people. You can be both, but it’s not a requirement :slight_smile: .

The step ‘demosaicing’ often gets confused for ‘the entire process of creating a displayable image’ for instance, and this is simply not correct. Then the whole concept of colour spaces / matrices / working profiles / output profiles… colour management is a difficult topic in its own right, it doesn’t make it easier in this file format :slight_smile: .

And DNG is one of those formats that even the more technically inclined people seem to get wrong, or don’t understand fully. And it’s a format that can do a lot, and not every program uses it all the same (this is not DxO specific). So it’s just a hard format to understand.

DxO has always been like this (yes, I know people don’t like it and I understand that, but it’s the fact at the moment)

  • DxO Photolab (and the older Optics Pro) can only read formats from cameras they officially support.
  • DxO can read DNG files if those are produced by a camera they support.
  • DxO can read DNG files if they are created by Adobe DNG Converter, and the source file is from a camera DxO supports.

Adobe DNG Converter has multiple compatibility options and compression options. I’m guessing that not all of them work for use in DxO Photolab. Not picking any of the resizing and compression options is usually the safest bet.

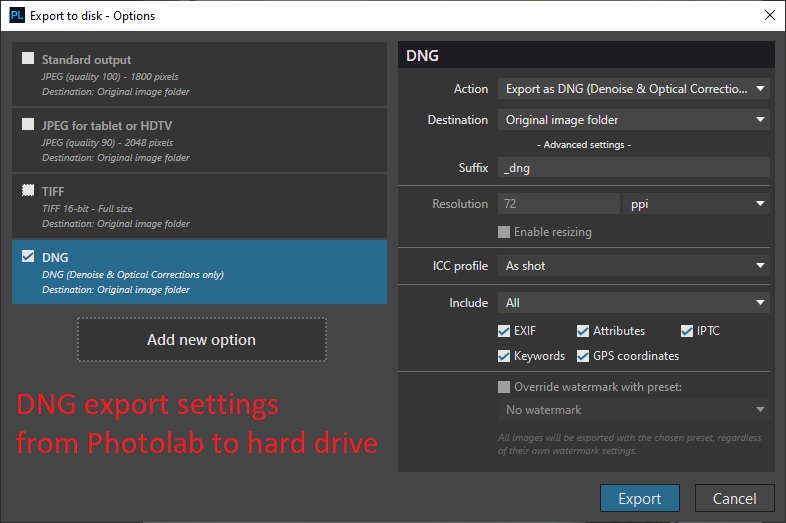
Now, a few versions back, DxO Photolab got two export options when writing DNG files:

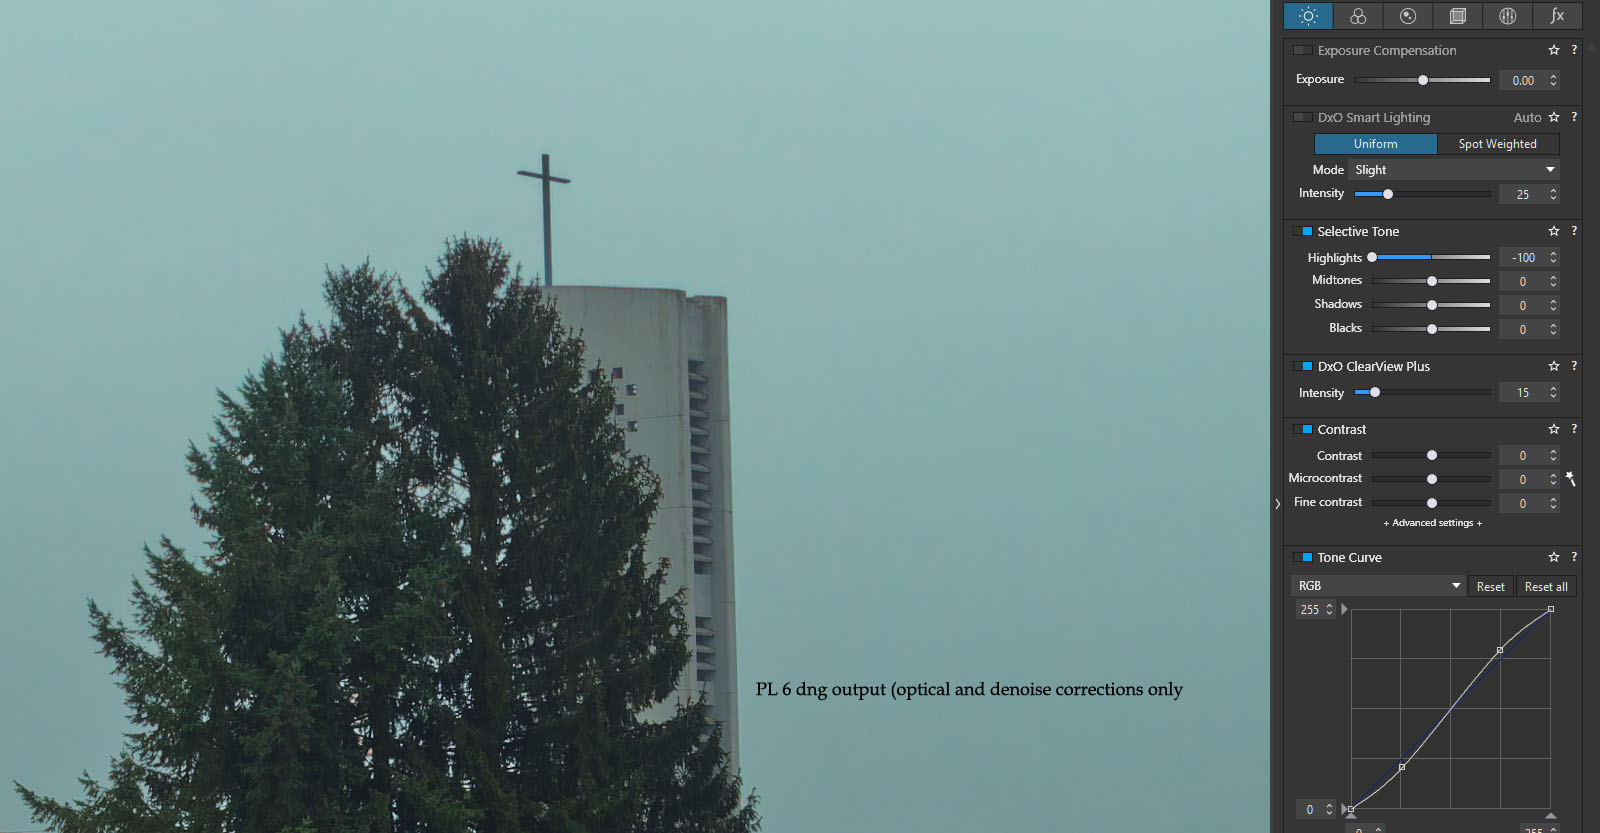
  • Do ‘optical corrections and denoise only’ (The Pure-raw kind of approach)
  • Do all edits

Since then, they support to opening DNG files created by DxO Photolab itself, if they are written with the ‘optical corrections only’ mode. This is specially made for the workflow where you apply corrections and heavy denoising to a file. And then open the DNG back in DxO Photolab to apply your edits, this time making the UI and exporting quicker since most of the heavy work is already done when writing the DNG file.

I believe since that version, it’s also possible to open DNG files created by DxO Photolab itself in the ‘do all edits’ mode… although the result you get might be a bit ‘trial and error’.

So, only files by supported cameras (in their native format or saved by Adobe DNG Converter without funky options), and DNG files written by DxO Photolab itself (in recent versions, and maybe depending on the DNG-export option picked).

This whole process might be possible to fake(by taking a linear DNG and applying metadata to it, to make DxO Photolab believe it’s from a certain camera). But this is far from user-friendly or a future-proof method of doing things :).


For the technical curious:
I’ve experimented once with trying to make my own RAW compressor, based on some modern image formats out there.
I’ve succeeded in:

  • Taking an original raw file from my Olympus (ORF) or Sony camera (ARW)
  • Using the tools from libraw to convert the data inside into 4 monochrome tif files (R, G1, G2, B).
  • Lossy compress those files with JPEG XL or HEIC or any other image compressor of your choice.
  • Then, decompress them back to tif.
  • Use imagemagick to re-assemble the 4 tif files back to one big monochrome bayer-data tif file.
  • Use the dng_validate tool from the DNG SDK to turn that tif into a valid DNG as if Adobe written it.
  • Use exiftool to copy over all metadata from the original raw file to this new DNG.
  • Make DxO Photolab 5 open that DNG and have all corrections (like denoising, lens fixes, lens-sharpening) available.

In the end the compression in lossless mode turned out to be not good enough to make this worthwhile (simply 7zipping the raw files often got very close and is way safer), while in lossy mode… well, it’s lossy. And I don’t want to permanently throw something away. So I didn’t do anything with it.
But it was a good learning experience to see what DxO Photolab needs in a RAW / DNG file to even make it think it’s supported. For instance, I had it all working including denoising and lens corrections, but ‘lens-sharpness’ would not be available. Turned out DxO needed more of the MakerNotes of the original RAW file to be copied over. Why it needs that, I have no clue. But simple ‘camera maker / camera model’ in exiftool would only get you so far.

6 Likes

I made a quick test between DNG and TIFF format…
-I opened RAW image in Photolab 6
-I made sure all settings are OFF (no settings)
-I then exported the image to HDD as DNG format
-I exported the same image as TIFF format
-Opened both images in Capture One Pro 22 and on both images I only moved Highlights slider far to the left.


The results are not the same as you can see from attached jpegs (print screens from Capture One).

I can make 2 conclusions:
-I’m doing something wrong with export settings when exporting to HDD
-DNG and TIFF formats are not the same – does note behave the same. From print screen look like
TIFF format is inferior.

Would someone be so kind to make the same test if possible?

There’s a third factor.

C1 might be parsing tiff and dng differently.

I just tried the same thing in Photolab with those two files.
Photolab 6 also gives me different results.
Interesting.
DNG file is OK and TIF also lack comtrast and colors.
No matter what, fromm my results TIFF is not the same asDNG.

Whoever says they are the same shozld do the same experiment.

1 Like

You could try setting the ICC profile to something specific rather than “as shot”. There may be some differences in how the “original” profile is perceived in the two formats.

It shouldn’t be if those two formats are the same.
Anyhow, I found my way here.
DNG it is.

Still, I made those two files with Photolab.
Could also be that Photolab can’t do TIFF oroperly thats why TIFF format shows as rubbish in my test.
Are we talking about another work around in Photolab?

Would you be able to upload your files, raw, sidecar and both exports for us to take a look at and compare?

You can do your own test in no time.
Just open a RAW photo in Photolab and export as DNG. Then export the same file as TIFF.
Open both files in Photolab and do the same adjustment for both files….something extreme as
moving Highlights slider all the way to the left.
It will only take you a minute.
I wonder if you will get the same results as I did.

If I export with Original profile from PL5 (What PL6 calls “As shot” it seems; I don’t have PL6) then I see differences between TIFF and DNG exports in Exposure X7 without tweaking any settings: the renderings are slightly but noticeably different.

My guess is that this has to do with the fact the PL writes linear DNGs whose contents aren’t completely equivalent to the RGB data in a TIFF without some further processing by the rendering application. I certainly don’t know all the details, but it’s not obvious to me that you should expect another application to render these exports identically.


I did the experiment and here is a screenshot of a Sony RX-100iii raw file viewed in PL6


This is the 16bit tiff exported and viewed in PL6

And finally here is the PL6 dng export (optical and noise corrections only) viewed in PL6

But you don’t have the same adjustments for both files.
If I see correctly you applied some ClearView on TIFF file and not on DNG file.

ooops…good catch. Thanks!

I uploaded the wrong screenshot. I had noticed that myself, corrected it and then uploaded the wrong one.

Now it should match the others…in settings that is.

I did the same test in Capture One 22.
I opened RAW file (no adjustments).
Exported to HDD as DNG and then exported the same file also as TIFF.
Opened both files (DNG and TIFF) in C1P and did the same adjustment to both files.
Guess what; they don’t behave the same.
I can push DNG file exactly the same as RAW file but I can’t do the same with TIFF file.

So; no matter what could be the reason …. If I don’t get the same end result from TIFF as I can get from DNG at least to me those two file formats are not the same.