Initial Camera Settings for PL4, Nikon Df

Owh, the subjects tangle a bit due mikes questions.
1 to get a white wall white (or snow) and not 18%grey you need to overexpose by max 2ev, headroom of rawfiles. Use ETTR to home in to this point.
2 to have as less noise in the shadow part( of your interest in the scene) of a highdynamic scene use ETTR to get as much of the image to the right part of the histogram without blowing the white’s.
Two different scene’s and goals but in brought daylight the same outcome

Every other case panelty’s are popping up.
Longershutter : Shotnoise
Higher iso, lower DR and more amplified noise and “signal”
Wider aperture, well depth of field can be too small.
Pick you poison.

Peter

But only if it doesn’t push the highlights into over-exposure before processing :wink:

Hi Freixas
You have correctly set out what a raw file is and its relation to colour space. I would like to build on your comments to help clarify any misconceptions and thought a few diagrams would underscore what you have written. Conceptual only, no math, and corrections welcomed as this is what I believe happens but have been wrong before :slight_smile:

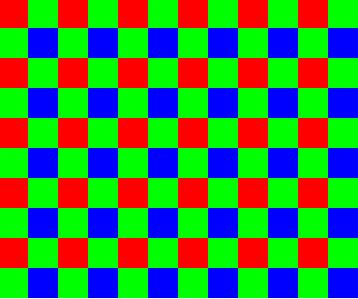
A Bayer array looks like this:
Bayer Array

EG your 20 megapixels camera only has 10 million green, 5 million red and 5 million blue sensor elements / pixels.

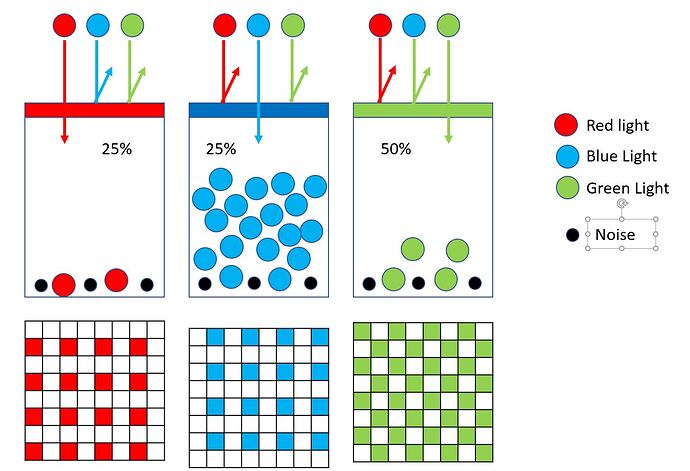
Now imagine blue light from the sky is striking your sensor:

The coloured filters above the pixels only lets through the appropriate portion of light so very little data / signal reaches the adjacent Red and Green pixels. That sensor data gets saved in a 16 bit grey image.

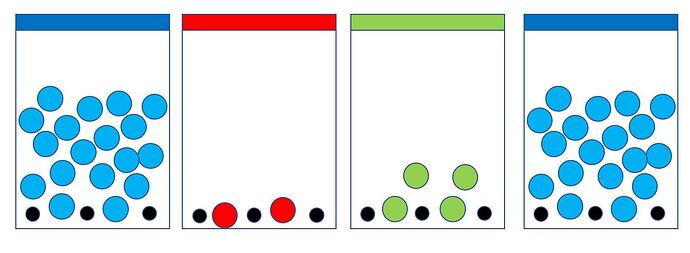
Now if we look at four pixels we get:

During demosaicing the algorithm will look at the two blue Bayer elements and decide that the colour of the light falling on these four pixels is in fact the same and must be largely Blue. So therefore it will interpolate the colour of the Red and Green array elements and also use the Red and Blue information to determine the original colour of the light. Giving:

Note that the overall signal (luminance) in the blue array element is increased to account for the light lost due to the filter, the colour (RGB values now exist) and the correct shade of Blue obtained.

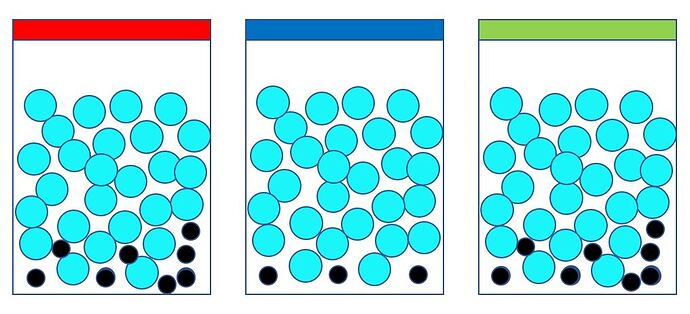
I think this is why we can often see noise in a blue sky for example, when we think that there is plenty of light/signal and noise is perhaps unexpected as the sensor has very little information in the Red and Blue array elements and their signal needs to be significantly amplified?

I hope I have helped expand on why colour space, white balance etc don’t really apply to raw data as Freixas posts and that 66% of the resulting image is interpolated and was not actually captured!.:slight_smile:

For me I marvel at what the engineers at DXO achieve given what they have to do :slight_smile:

1 Like

Isn’t not 2 green? Instead of 2 blue?
Or is it four random pixels.

Bayer demosiaced jpg looks bit wierd, i think it’s rgb which combines to lightblue.
If the rgb boxes are luminance , lightness, glow, it think it’s level green level blue level red… Mostly blue.

Indeed, i assummed r,g,b,g as resolving to 1rgbpixel, but that’s waisting space…

found this on my pc:
camera sensor to view

Two weeks ago, I didn’t know how to even spell kalibrait. :slight_smile:

Amazingly, it is all starting to come together. Between all the replies, and Joanna’s “on-line course” here in this forum, it mostly makes sense. Well, the “why to do it” makes sense, but the reality of working in my overly bright living room, with huge windows to the South and West, makes it a chore when I “follow the instructions”. Apple knows what my iMac needs to do, to be easy to work on no matter what.

I don’t “tangle” things deliberately. Eventually most of the confusion melts away, and I’m left with something that supposedly works. I guess all this is like a “foundation”, and until I get the foundation right, the complexities of PL4 can’t and won’t work as I expected.

Or, to put things crudely, the wondrous tools available in PL4 can’t do what they should, until the foundation (calibration/adjustment) is solid. Yesterday and today, I’m moving backwards, not forwards, trying to configure my equipment so I can then get back to learning PL4. :slight_smile:

Everything is easy, once you know how to do it.

(So thank you all for putting up with me, and helping me!)

This is incorrect. Note that no pixel has more than one pixel between itself and a like filtered pixel in a horizontal or vertical direction. The four pixels you picked do not actually occur in a line anywhere.

Also, four pixels do not resolve to three and the three you picked do not match the four that they were supposedly derived from.

I’m afraid that your example confuses rather than clarifies.

You are right to question the explanation. See my correction above.

It is definitely not four random pixels. Interpolation works best when using spatially close pixels.

I know, and it doesn’t matter, isn’t bad. But in this case it was objective and how to use ETTR or not.
and the headroom a rawfile has so overexpose 2 stops. And then the “noise part runs in to play”
like overexpose and lower in post gets more noise or not.
Understanding technical limitations helps to make choices which influences your startingpoint in PL.

And everyone is learning every day. misconsumption, wrong idea’s, Digital camera’s are very complex now a day’s and easy to use as point and click but getting more out of it is walking on drifting ice floe. Every choice is bumping another awake.
Don’t be frustrated it will get easier to remember which things are “logic”.
:slight_smile:

Interesting, why would you want that?
To get the filmdays dynamic range and preparing your shot for black and white?

I don’t believe you’ll get the results you want. Raising ISO doesn’t affect make the sensor more sensitive.

Let’s say you take a well-exposed image at base ISO. The amount of light reaching the pixels is such that the brightest light sources just about fill the pixels’ wells. No ISO boost occurs–the voltages go directly to the ADC (analog-to-digital converter), which turns them into 12 or 14 bit numbers.

Now you bump up the ISO by one stop. To compensate, you drop the shutter speed or narrow the aperture by one stop. The highlights only fill the wells to about half their max. The ISO gain then spreads out the voltages so that a half-full well reads the same as the full well in the first exposure.

Now for the big question: Do pixels record analog or digital values? The signal is analog (a voltage) but the source of the signal is photons (digital). If you have an analog signal and boost it, you get more resolution. If you have a digital signal and boost it, you just get more spacing between the numbers.

Let’s try an example. We have a 12-bit ADC (values range from 0 to 4095). We have three pixels that receive, say, 10,000, 10,100, and 10,200 photons. Let’s assume this translates to values 32, 32, and 33. In other words, the 12-bit resolution means that we can’t tell the difference between 10,000 and 10,100 photons.

So you think: if I could just expand the values, I could separate these two shades. So you boost ISO one stop and reduce the shutter speed one stop. Now you have values, 5,000, 5,050 and, 5,100. The ISO boost turns them into 10,000, 10,100, and 10,200. You still get values 32, 32 and 33. But because you’ve reduced the amount of light, the image will be noisier.

Another approach: you leave the exposure the same, but boost the ISO one stop. Now you get values 10,000, 10,100, and 10,200 boosted to 20,000, 20,200, and 20,400 which result in the final recorded values of 64, 65, and 66. So, yes, now you’ve increased the resolution of the sensor, but clipped all the highlights.

This assumes a perfect sensor. If a sensor’s noise floor is equal to a single ADC step, it can’t resolve the difference between 10,000 and 10,100 photons anyway. Boosting noise doesn’t get you anywhere.

Your best exposure comes from making sure any important highlights just fill a pixel’s well. You use ISO for cases where you can’t do that.

The right way to increase dynamic range is to buy a camera with a bigger ADC, although again this is limited by the capability of the sensor. Or you can use HDR if your subject is not moving.

Fair enough. The typical meanings I could assign to “compressing the dynamic range” would seem to be doable with post-processing or other methods. For example, I can compress the dynamic range of a print by simply lowering the lights in a room.

I suppose a neutral density filter does the same: you are compressing the dynamic range of the light going into the camera. But if you compensate for the neutral density filter with the exposure, you get the same image as without it (except for the motion blurs, but that’s not dynamic range compression). If you don’t compensate, you get underexposed images. If you compensate for the underexposure with ISO, you get noisier images (vs. the proper exposure).

I’m not seeing any dynamic range compression coming out of the techniques you mentioned, but perhaps I’m missing some part of your process.

Let me clarify that dynamic range compression in post makes total sense: you can map the tonalities any way you like.

Have fun. The neutral density filters are useful even if things don’t work out the way you hope.

1 Like

I took a look but am still in the dark. I still see no compression, just a reduction in the dynamic range (a compressed signal can be expanded back to its original; a reduced signal cannot).

I’d be curious to see an actual explanation of what you’re hoping to achieve if you’re willing to take the time.

It’s a static one level charge per pixel. It a analoge voltage but digital latent image.
So the resolution is the same.
What’s different is the sampling, the readingsteps, the low charged pixels get a more detailed “number” and the highlight samples are read closer to clippingpoint border.

If shotnoise , capture noise (straylight) due shuttertime is bigger then your electronic noise made by the gain you should get cleaner images in high iso.

For any exposure, a higher ISO will always give a better image unless you have a true, ISO-invariant camera (in which case, the ISO setting doesn’t improve or degrade anything). But you lose dynamic range. And more light gives better results.

Let’s work this out with an example (I’m doing this for my benefit as well).

I have a scene that is just a blank wall evenly illuminated. All pixels received the same amount of light. I’ll photograph it in two ways: in the first, I will expose it to nearly fill the pixels’ wells, in the second, I will just partly fill the well and then use the ISO boost to raise the signal to the same level as the first case.

Neither image will have a dynamic range problem since there is just a single light level and thus, no dynamic range (or a 1:1 range).

The signal-to-noise ration (SNR) increases with more photons (an increase is good). So let’s say that the first image has an SNR of 1024:1 and the second has an SNR of 8:1.

The first image has no ISO boost, so its SNR remains 1024:1. The second image has an ISO boost. Because noise and signal are amplified by the same amount, its SNR remains 8:1.

Let’s say there is some downstream noise (including in the ISO gain circuit). Because the signals are at the same level, they are equally affected by the noise. The first image will still remain ahead of the game.

I think you are misunderstanding my use of the word “resolution”. If I changed it “sampling resolution” would it make more sense? You seem to be saying the same thing I did, just using different words.

yes. :slight_smile: glad we say the same in different words. then the change it’s true is higher. :sweat_smile:

This is something where my brain starts wondering.
Noise: the base noise every pixelwell has when capturing photons in 1/1000 or 1sec. don’t know if this pure electronic reading noise of each well or more.
then the shotnoise made by light entering the imperfected glass. (like a smooth waterbeam poored trough a sieve there will be separation of this smooth beam. this is “noise” And the noise will jump in the “wrong well” adding photon’s where it not should be.
This noise will always be worse when shuttertime is raising. and will make the black/white edge more blurry. (white part photons end up in the pixel next to it which should be black (empty)
How much this effect is against the real fullwellexposure advantage i really don’t know.
far beyond my knowledge.
So in longer exposures the 1024:1 can be 900:1. (total guessing here :wink: )
The noise as sensor heating issue’s add that up by this and the max shuttertime is lowering again.
This capture is then run through the ADC.
So in the end a high iso like for my m43 g80 in 3200iso for night skyshots would be better. (also because of turning earth issue’s)
(And in the area of this:
nachtkaart
i recon i get more “noise” due light pollution then stray light :smiley:

i will test this tonight base iso, 400 800 1600 3200 6400.(with long SS reduction enabled.)
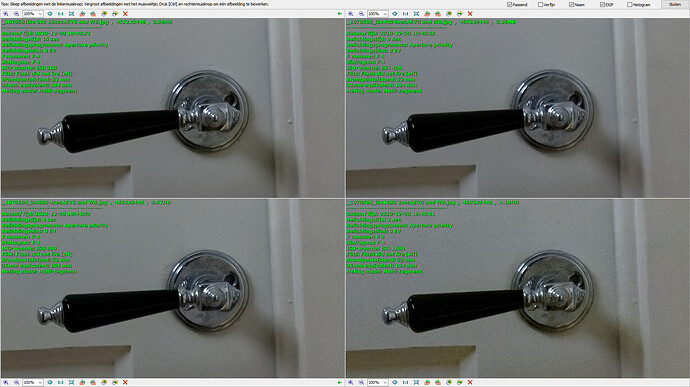
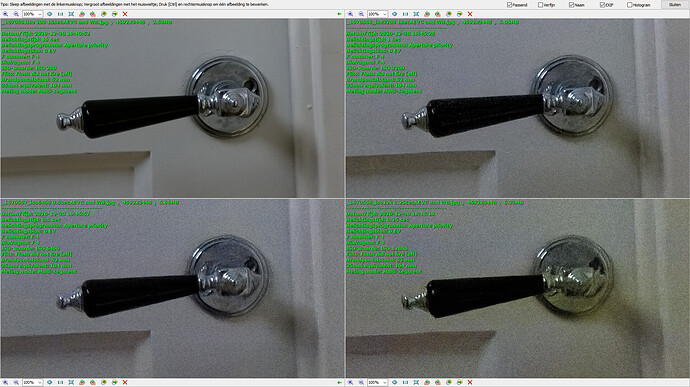
on a door and grip.

@freixas;

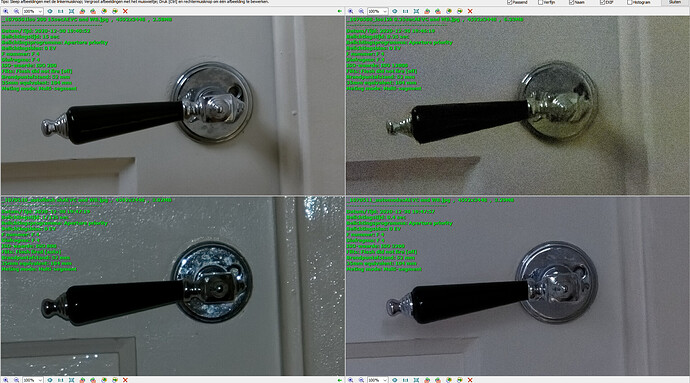
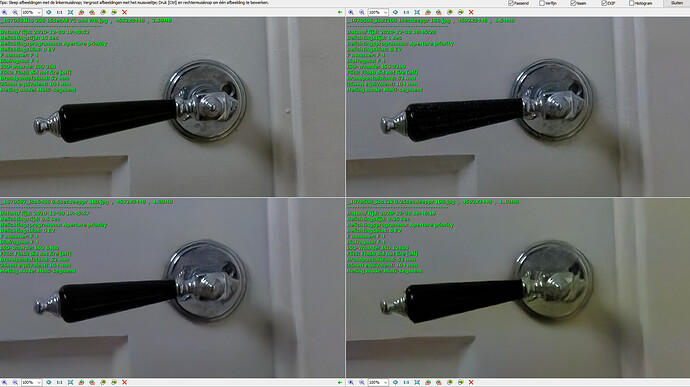
fast test:
tripod, 10sec shutterdelay. autofocus on knob and then in turned MF so it doesn’t changed.
four compare shot: auto exposure comp and wb picker. deep prime default.
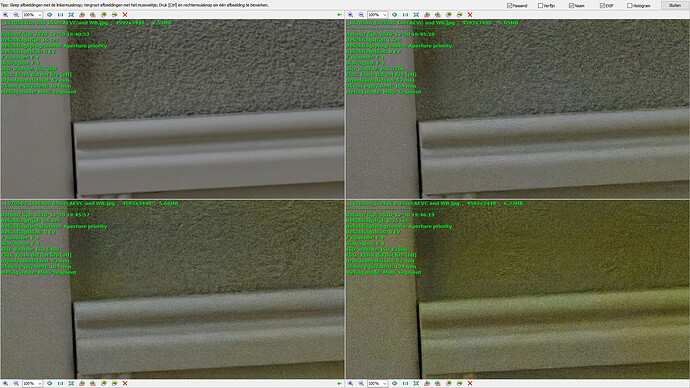
iso200 EC auto 2.39EV,
iso 1600 EC auto 2.35EV
iso 3200 EC auto 2.34EV
iso 6400 ecauto 2.27Ev
iso 25K 2.09EV


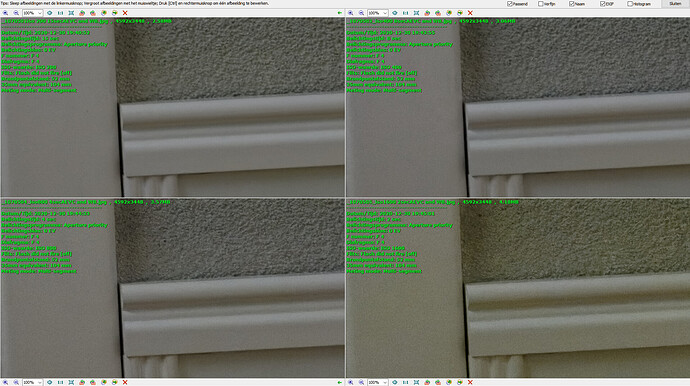
yellow noise…


snakeheadflash is bad for your paintingskills :wink:

Last one deep prime at 100% hohohohold your horses!


:flushed:

got my marbles back from the floor.
conclusion

  1. 15sec on a stationary scene is always better then higher iso! (seems that my g80 isn’t very iso invariant iso raising ruins alot.
  2. 3200iso for sky is better because i don’t have a earth rotation compensation rigg to have no motionblur/stripes.
  3. straylight, that i need to test in a outdoor scene. (no bouncing light in a house hallway because of multi light sources.(streetlights, stars, windows, skyreflection))
    (i think i will soon :wink: ) But sensor heating and shotnoise in long 15sec shot doesn’t make a difference when i have long shuttertime noisereduction… (you hear the clack and 15sec countdown.)
    if any one wants the rawfiles tell me.

Hey, nice experiment! I’m not sure why you were surprised, though. High ISO improves an image only when you keep the exposure the same. I assume your shots had a constant aperture, so you were trading shutter speed for ISO, correct?

Some people think of exposure as the shutter speed/aperture/ISO triangle. When I talk about exposure, though, I mean shutter and aperture only. This is what controls the amount of light reaching the sensor.

You took 4 exposures with decreasing amounts of light. This will decrease your signal-to-noise ratio. This is true even with an ISO invariant camera.

If you want to do a test that shows how higher ISOs are better (for a non-invariant camera), then you need to keep the exposure the same and only vary the ISO. For example, 1/60 second, f/11, ISO 100 vs 1/60 second, f/11, ISO 1600. Ideally, you want a scene in which the highlights are not clipped at ISO 1600. Then you boost the ISO 100 image (which will look underexposed) by +4 EV. The images should now look about the same exposure-wise, but the ISO 100 image will have more noise–all downstream noise, which is what the higher ISO reduces (shot noise will be equivalent).

Somehow this doesn’t sound practical to me. The amount of light reaching film doesn’t change when you use film with a higher or lower ASA speed, but the exposure certainly changes. Use the wrong ASA film and you get over or under exposure, unless you adjust things based on that ASA value.

If the amount of light reaching the sensor was the most important thing, why not set the camera to that value and tape over the adjuster, leaving only aperture and shutter speed to be selected?

For the tests you are all doing, which I struggle to understand, what practical changes do you recommend when you’re about to take a photo?

Also, isn’t the reason for selecting “AUTO ISO” to allow you to select the depth of field you need, and an appropriate shutter speed to capture the action, if any, and to allow the camera’s electronics to select an ISO to work with those two values?

Just a clarification: I was responding to something Peter said, not referring to your experiments.

However, in the process of looking at your example and running through some possible exposures, I think I may finally have a clue as to what your attempting. Let’s look at two exposures:

  • ISO 100, f/16, 1/40
  • ISO 1600, f/16, 1/640

I picked these setting just because the second one matches what you were using. Given your shot was in full sunlight, I imagine you are using that neutral density filter your ordered. It was a +3, right? So, two more shots:

  • ISO 100, f/16, 1/320 (without filter)
  • ISO 1600, f/16, 1/10240 (without filter–oops! can’t be done)

Well, at least 3 shots total. I’d expect all the shots to have equivalent tonality, but the ISO 1600 one would have more noise (with DeepPRIME potentially compensating). If not, then there are indeed some interesting effects going on.

If we actually had any sunlight here, I’d give it a go myself. It’s dark, gloomy and we’re in a rainy winter where I am. I have a full set of neutral density filters, so I’d be ready to go if there were any light.

Thinking about digital ISO and film ASA will get you in trouble. I think I’ve already posted a link to my white paper on ISO in this long thread, but there are lots of references on the web.

I came from a film camera background and I treated ISO like ASA for the longest time.

You should always try to maximize light without clipping important highlights, assuming you are aiming for maximum IQ (image quality).

ISO is what you use when you can’t maximize light.

You got it. This maximizes the light given all the constraints for getting a good photo. You use the slowest shutter speed you can get away with (given all constraints) and the widest aperture (given all constraints). This maximizes the light (given all constraints). Auto ISO then makes the best of whatever light you manage to capture.

Mike had mentioned an interest in photographing birds. Flighty birds in forest with rapidly changing light and strong constraints on shutter speed and aperture make auto ISO invaluable.