I have an new folder in my photos but don’t know how to get the folder into PL or even individual images, I get a “NU Error error 8” message.
There is no import feature in PhotoLab. In the PhotoLibrary just open a folder with images already in it.
Mark
You can also work with your photos using Projects. That might be more in tune with what you’re trying to do.
From his post it seems that @Losthwy’s confusion over accessing images may be more basic than settings up projects, but perhaps I’ve misunderstood his issue. In any case, perhaps his handle Losthwy, which I assume is short hand for Lost the way indicates he is not a technical user. I hope he responds so we can help him resolve this issue.
Mark
I just read your profile and realize you are new to all this. If you have basic questions, please don’t be afraid to ask. You may run into some stumbling blocks along the way but we can help you understand how get started with PhotoLab and then provide additional assistance as your knowledge increases. Thanks to @Wolfgang for mentioning your profile to me.
Mark
1 Like
Yes the issue is how to correctly import photos into the Photo Library and then access them in DXO.
In that case, you need to know that there is no import mechanism in PhotoLab.
Simply go into the library view and unfold the tree view until you get to a folder in which you have put your files on your hard disk.
This implies that you have already transferred the images from the memory card from your camera to your hard disk.
Your bio says that you are “old school” so, if you don’t understand the basics of getting your images onto your computer, don’t worry, there are a few of us “oldies” who can take you through it step by step 
My first question. Are you images already on your hard drive? Dr you know where they are? In other words, are they in a folder under the Pictures folder? Do you know how to use your Windows file manager?
Mark
1 Like
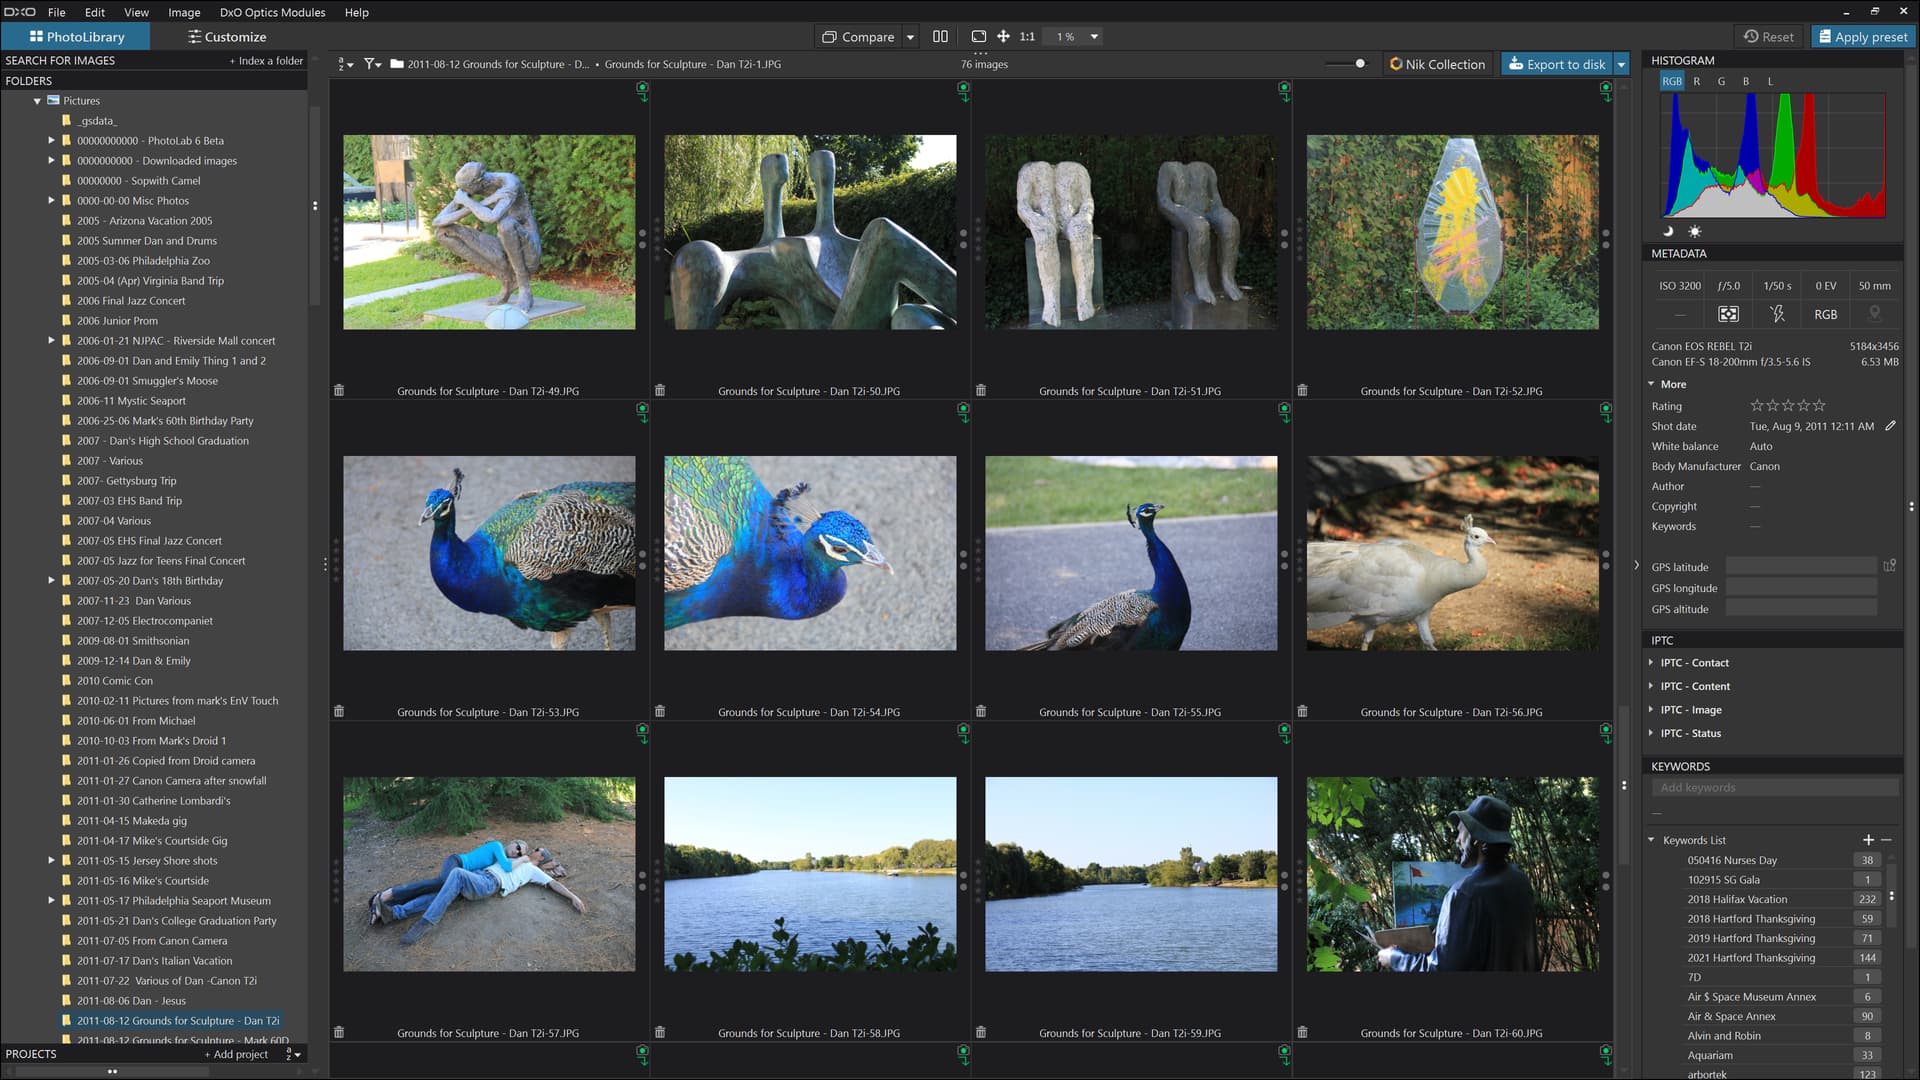
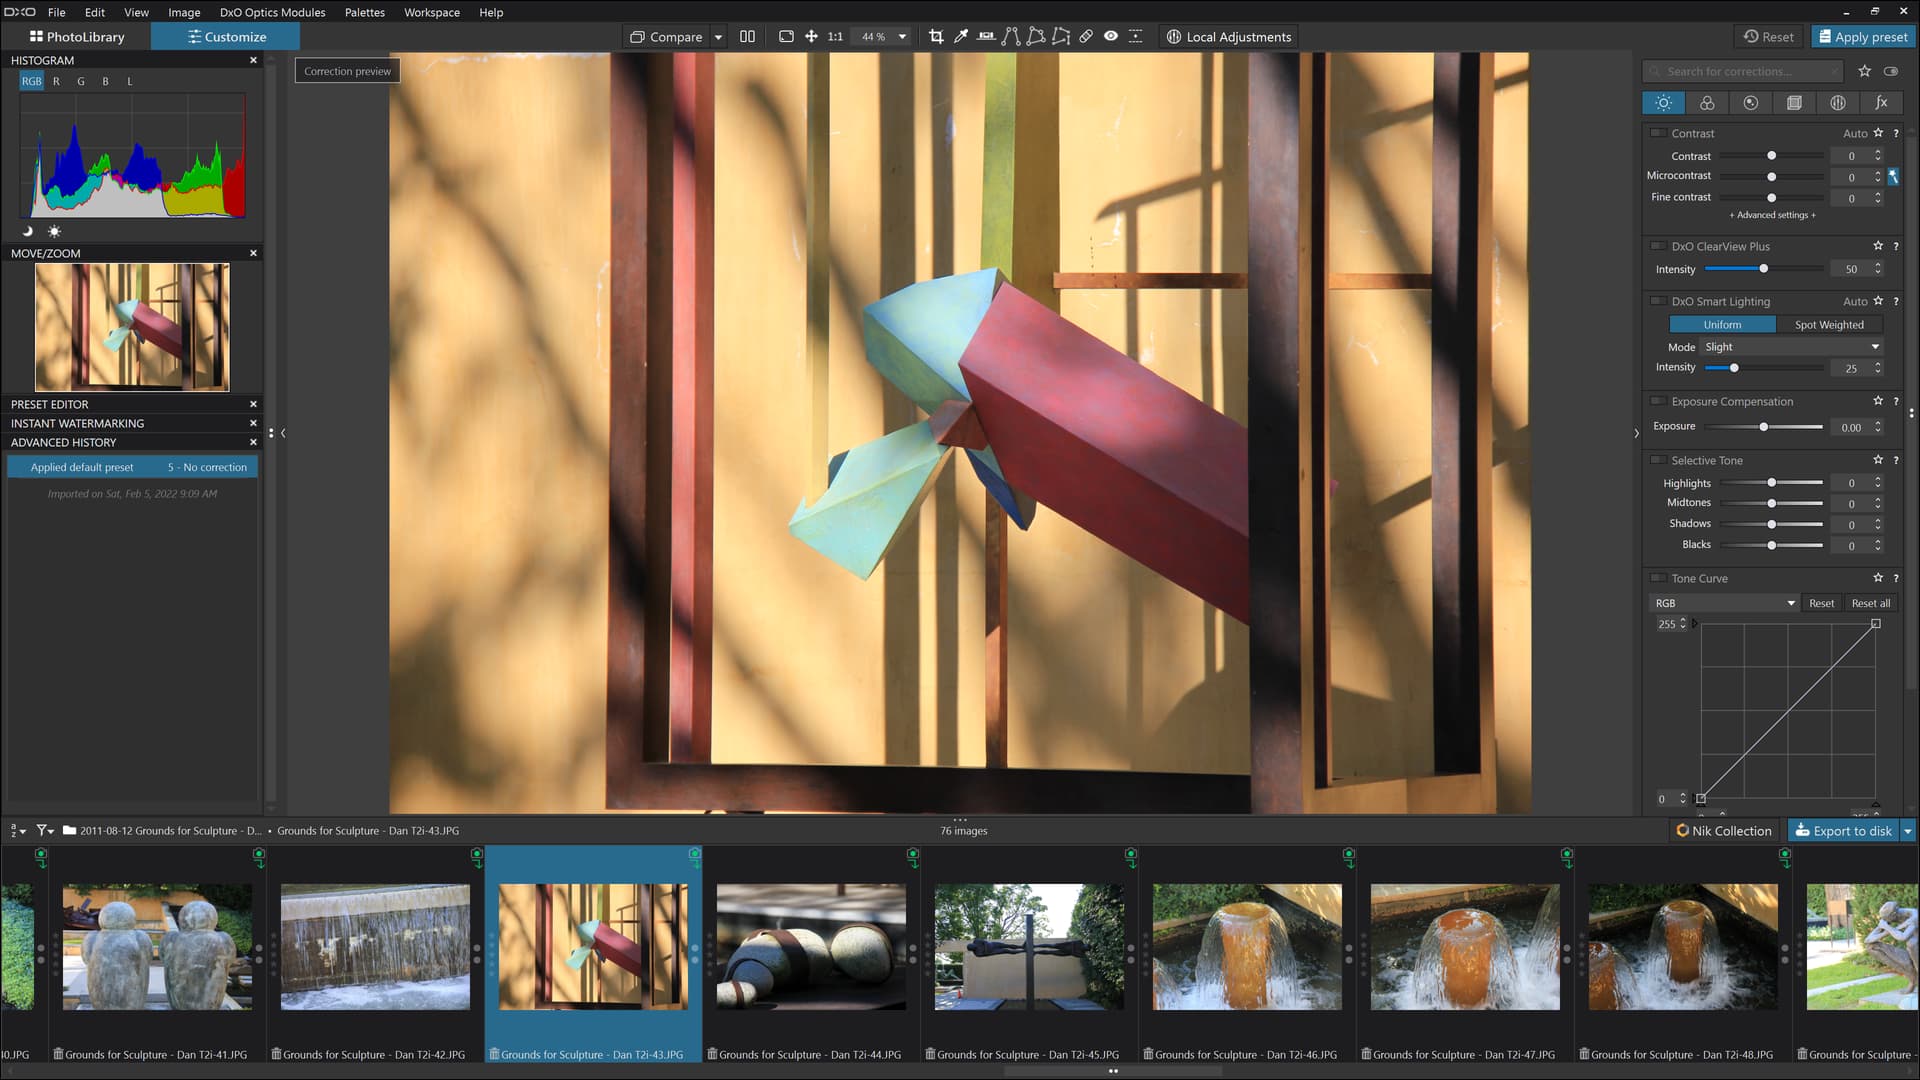
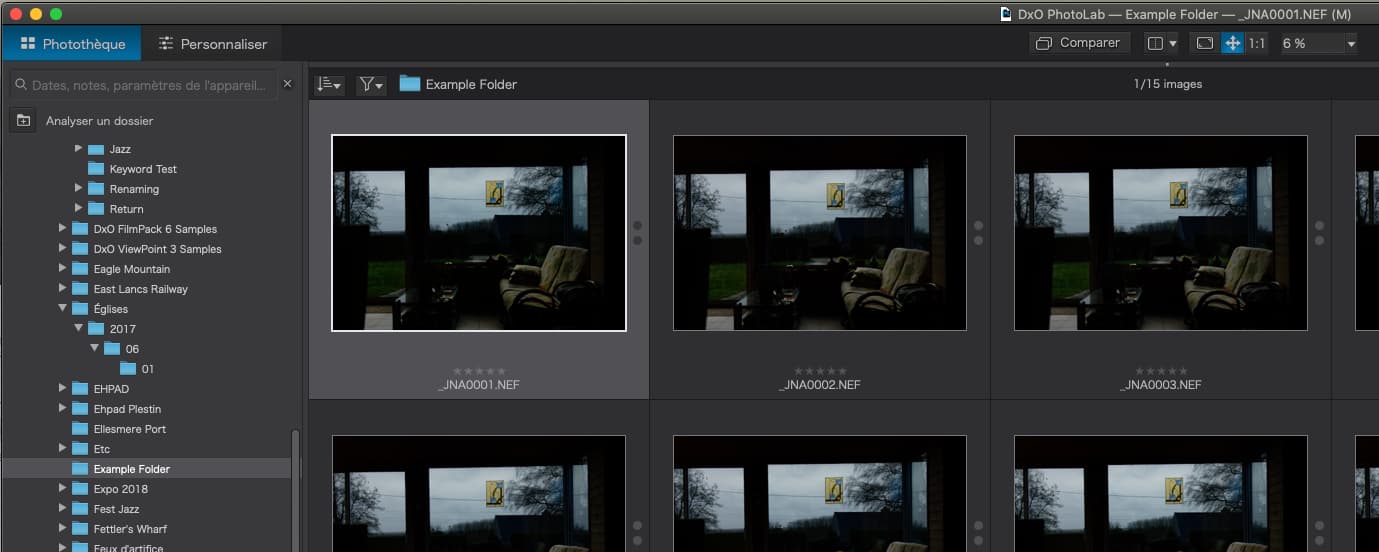
If you know how to use your Windows file manager and know where you images are on your hard drive, start PhotoLab and select the PhotoLibrary tab, There you will see a file manager a bit like the Windows version. Use it to point to the Pictures folder on your hard drive and all your image folders should be included below it, Select a folder with images in it and they will all be displayed in the PhotoLibrary. You can select a image to edit by double clicking on it or or you can use the Customize tab to go straight to edit and select an image from the image browser at the bottom of the screen.
Mark
PhotoLibrary tab
!
Customize tab
Yes, the images are dowloaded to the computer. And no, I have no idea how to use a file manager on my iMac. I did just mange to finally see the images by trial and error but have no idea how I did it. 
Hi @Losthwy. It’s late here in France but, if you can wait until tomorrow, I’ll write you a step by step of what to do on a Mac with screenshots.
I just realized you are on a Mac, rather then a Windows user. @Joanna will be able to assist you… She is extremely knowledgeable and will be able to get you up and running quickly. With her assistance you will be an expert in no time.  .
.
Mark
Thanks. I just realized I am accessing the photos in DXO NOT from my Photos Library but from the memory card that is inserted in the iMac.
1 Like
Thanks. Looking forward to it.
1 Like
Dear @Losthwy
maybe you can took a look at Tutorials - TuTo DxO . It’s written by one of the forum members and I thing a very good starting point to work with DXO
Edit : maybe starting here Image Browser - TuTo DxO
Have fun
1 Like
Also have a look at the videos on the DXO academy and on youtube:
https://www.youtube.com/c/DxOLabs - also watch previous versions of DXO, especially if they cover basics
and my final recommendation - read the manual
Good morning. One Mac image transfer tutorial coming up 
Your iMac uses an app called Finder to help you organise and find your files, using a hierarchy of folders.
By default, macOS creates a “Pictures” folder under your user account and, although you are not obliged to put your pictures there, it can serve as a useful and ready-made location.
Now you can organise your picture files how you want, but I prefer to have sub-folders for pictures from either a geographical place or a special subject.
Then I create a hierarchy of Year/Month/Day folders under each main sub-folder…
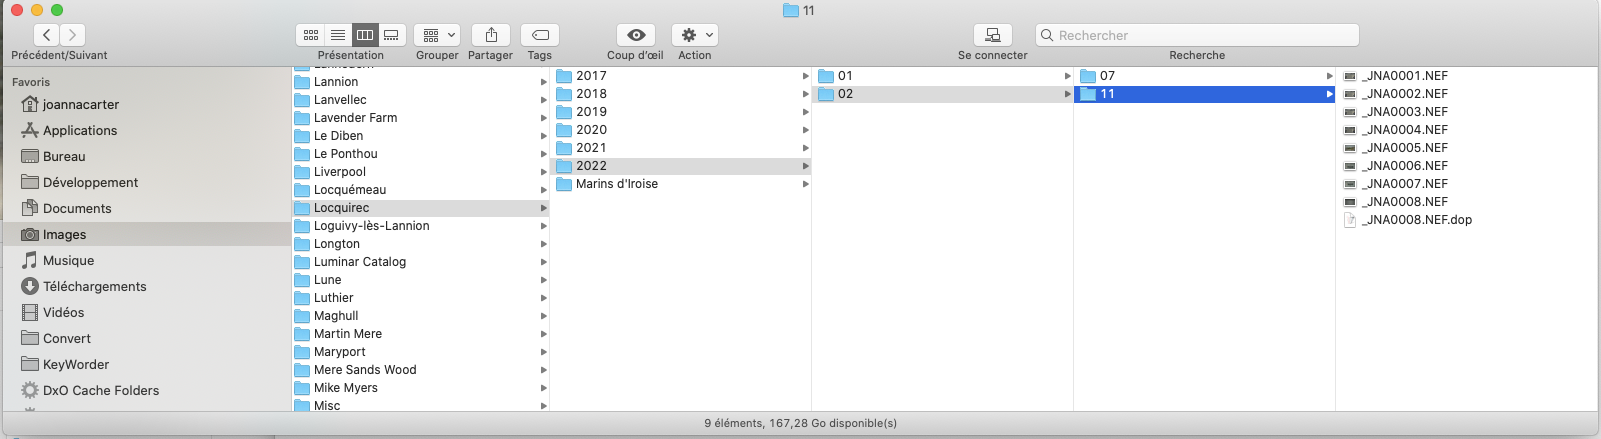
But you could just use the entire date in one sub-folder if that suits you better. Or you could make the top level folders the date and create any sub-folders if you want to divide the pictures taken on that date. It is entirely up to you.
When you need to transfer files from your camera, before you use either of the following two methods, I would advise you to open a new Finder window and navigate to the folder where you want to put your pictures, creating any necessary sub-folders on the way.
Put this window on one side of your screen, ready to receive the pictures and then choose from one of the following two ways of transferring your files.
On a Mac, there are two main ways of getting the pictures you have taken from your camera to the hard disk on your computer…
- by connecting your camera to your iMac with a USB cable
- by removing the memory card from your camera and inserting it into a slot on your iMac
1 - Using a USB cable
The easiest way to get image files from your camera via a USB cable is to use the “Image Capture” app that comes with macOS. It is to be found in the Applications folder (the name you see here is in French because I live in France)…
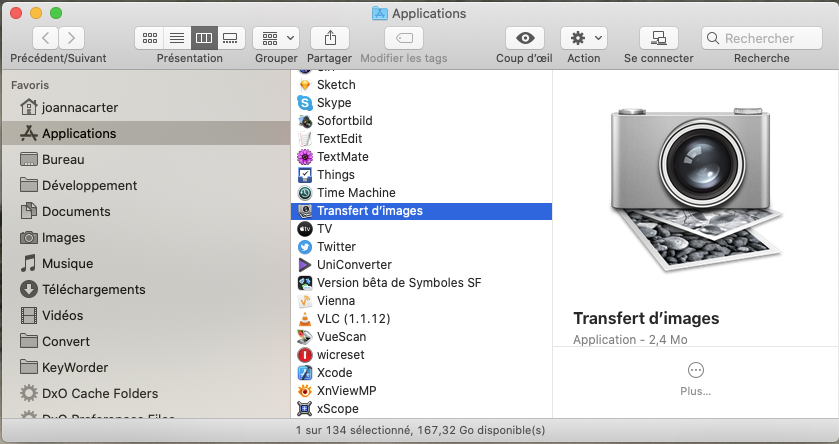
I have switched Image Capture to run in English for this demo
When you open it…
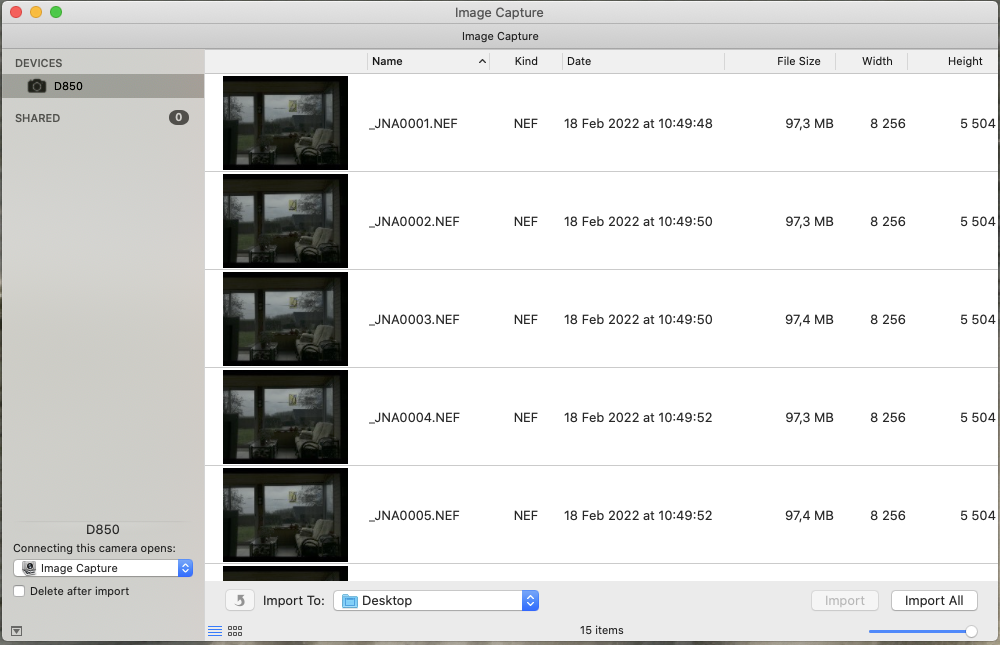
… you will see small thumbnails of your image files and a drop-down to choose which folder you want to save them into on your hard disk.
If you use Image Capture, you can now go to the “Import to” drop-down at the bottom…
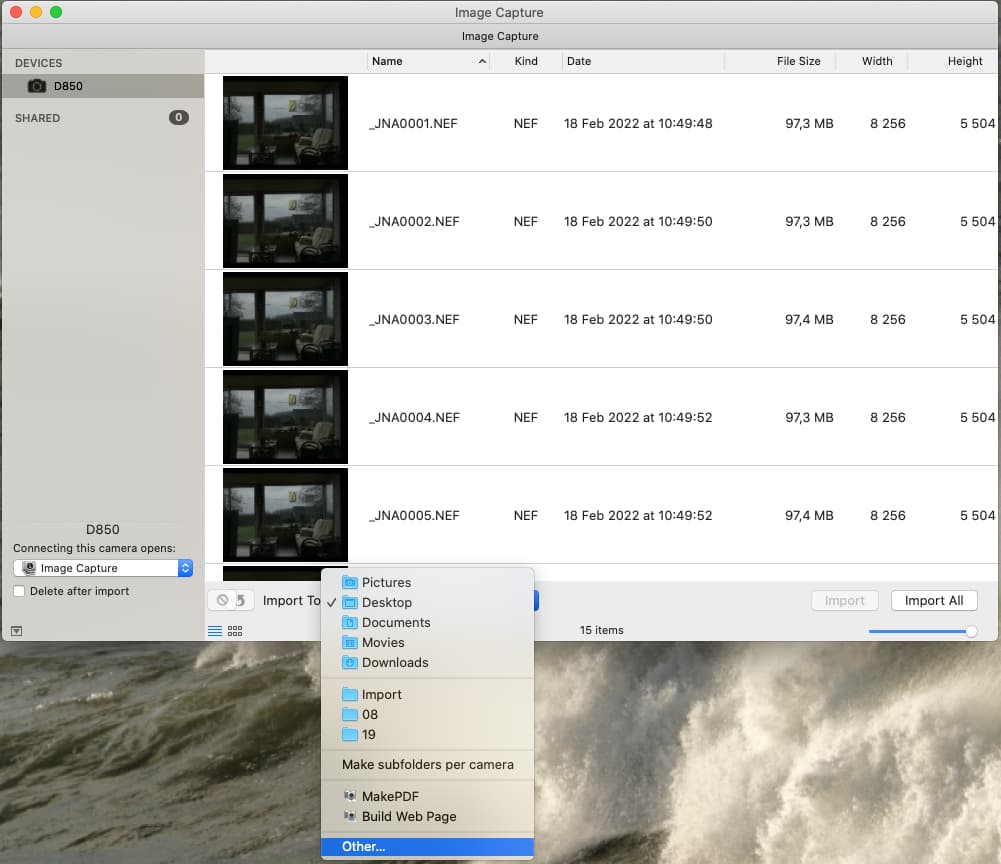
… and choose a suitable folder…

Then, either click on “Import all” or, if you don’t want to import all in one go, select just those files you want to import and click on “Import”
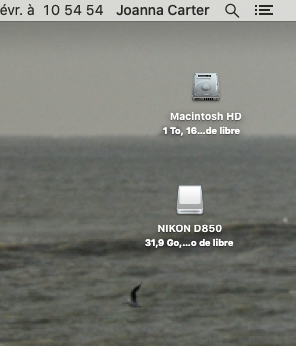
Using the memory card
As you insert the memory card into your iMac (or an adapter) an icon may appear on your Desktop…
… or you will find it in the sidebar of Finder…
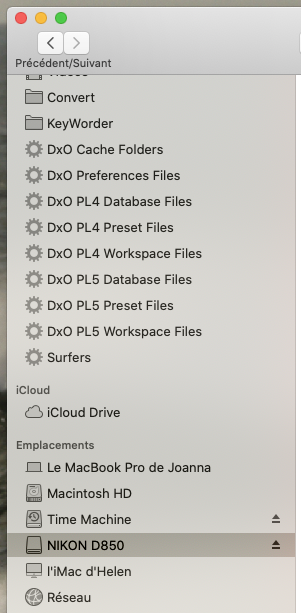
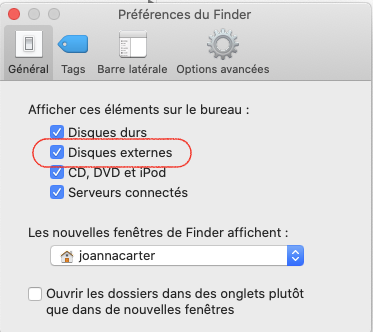
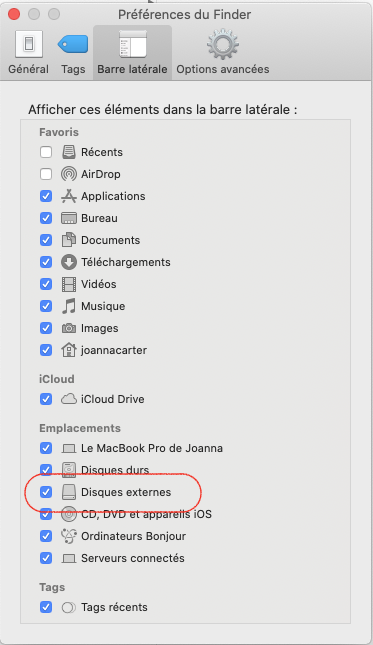
If it doesn’t appear in either place, you will need to go the Finder Preferences…
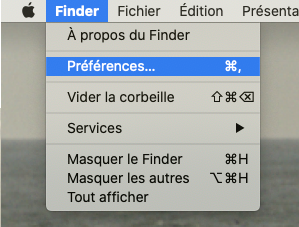
… and check showing external disks in either the General tab…
… or the Sidebar tab…
Either way, once you can see the card, then all you need to do is transfer the files from the card to the folder structure we created earlier.
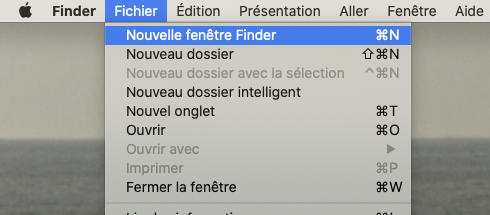
If you are not using Image Capture, open a second Finder window by either double-clicking on the card icon on your Desktop or by going to the Finder menu and selecting “New Finder window”…
… and selecting the memory card in the sidebar.
So, you end up with two windows…

… and you can simply drag the files from the card window to the window with folder you have created and/or chosen…
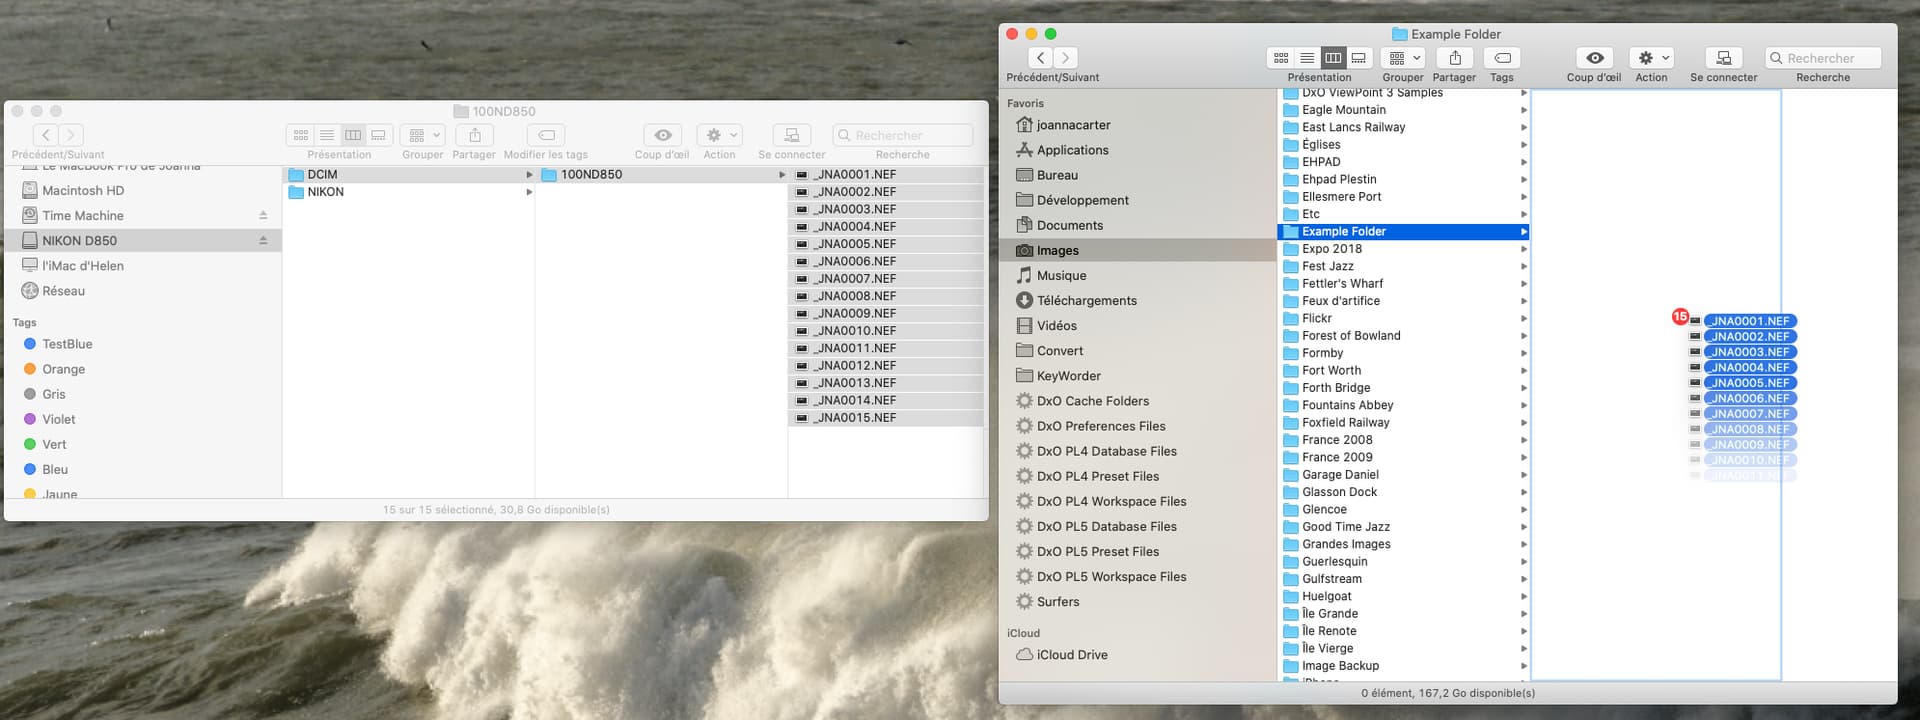
This will copy the files into the folder and, to save messing around formatting your memory card, you can use Finder to delete the files directly from the card after you’ve copied them.
Opening PL
Once you have your files in place, simply open PL and navigate to the folder you have just placed the files in and double-click on one of them to open it in the edit window…
If anything isn’t clear enough, don’t hesitate to come back to me.
4 Likes
Thanks Joanna. I will try this today. I printed it out as a reference. Appears to to very detailed and through. BIG Thanks!
1 Like
Joanna still having issues with downloading images. I tried first with a USB cable but the Mac didn’t recognize the camera. I have no idea why. I was able to get the photos all downloaded into “Pictures” as individual shots. That’s as far as I got. Lost as how to get them all into a file.