Somewhere along the line, I got my brain twisted the wrong way. I never learned to visualize any size format (except when I was shooting color slides). I always felt “my” picture was somewhere within the frame, and I had to eliminate all the wasted stuff, leaving only the “good” stuff. My short experiences with 4 x 5 were to keep any important stuff away from the edges - and that stuck with me.
@Joanna reminded me of all the possible convolutions of positioning the film and the lens, but all I remember doing was to raise the lens to eliminate perspective issues. I even have a Nikon lens right now with this built-in - “perspective control”. I sort of wish I still had my darkroom, and my old cameras, and all the rest, but I have no room to set them up even if I did still have them. Joanna reminds me of the good (having all that control) and the bad (lugging all that gear with the huge tripod with me).
Manual focusing on a modern DSLR, especially with a lens designed for autofocus can be very tedious and will often result in a number of focus misses. However, while not everyone’s cup of tea, manual focus is quick, easy and very accurate on a mirrorless camera. Mirrorless offers a few tools to do this. First is the adjustable focus peaking which highlights edges of objects in your choice of color and sensitively. When the highlights are maximized you are in focus. It is very easy in use. You can also using focus peaking in conjunction with viewfinder of rear LCD screen magnification. When using manual focus lenses with longer focus rings throws, nailing focus can be quite easy and precise with often better results than can be achieved with many AF lens.
My Nikon Z fc also has a third feature that aids manual focusing with both AF lenses and my two Voigtlander manual focus lenses designed specifically for Nikon Z mounts. The Voigtlanders have electrical contacts much like an AF lens which communicate with the camera. When manually focusing them, or an AF lens, the red focus area square turns to green as it would in autofocus mode when focus is achieved.
Thanks, Mark. You are reminding me that both my Nikon D780 and Leica M10 offer “Live View”, so I can view the digital image on the rear screen, or with the Leica on the Visoflex accessory that mounts in the hot-shoe. If my camera is on a tripod, this is a good way to verify correct focus. If I’m turning the focus ring on the lens, the Leica actually enlarges that area, making correct focus even easier.
It’s not my favorite way to focus, but with both cameras it offers an accurate and fast way to do so. Sorry, I forgot about this when I responded earlier.
Leica sells a “Visoflex” that can go on top of the camera, and display the Image as seen by the lens, with all the focusing aids available.
It converts the RangeFinder Leica into a DSLR, with precision manual focusing. I bought one, but don’t carry it with me.
On a mirrorless camera you can do this with the Viewfinder up to you eye. When handheld it is much more precise than using the rear LCD screen. Remember, mirrorless viewfinders are electronic, not optical.
I’ve only tried this twice, and both times I felt like I was watching a television monitor, not “live”. The viewfinder in the Nikon DSLR is #1 on my list, and the viewfinder on the Leica is way behind, but “adequate”. Since you are using one, can you comment on this? Is it something people just get used to? Am I being unfair in describing how they look to my eyes?
My opinion (not fact) is that the viewfinder on a current Nikon DSLR is as good as it gets for most uses. If I was photographing birds, I guess I would want a Nikon Z9, along with a whole new set of lenses.
…not that it matters, but I wish more people here were posting photos. @Joanna’s photos encourage me, as I learn I have so much more to look forward to. One of my current goals is to take what I learn, and capture one new photo every one or two days, trying to incorporate what I’ve learned. I suspect my grade is perhaps a “C” at best, but I keep learning, and trying, and again and again. Maybe all the rest of you are so good at PhotoLab that you don’t see any purpose in posting?
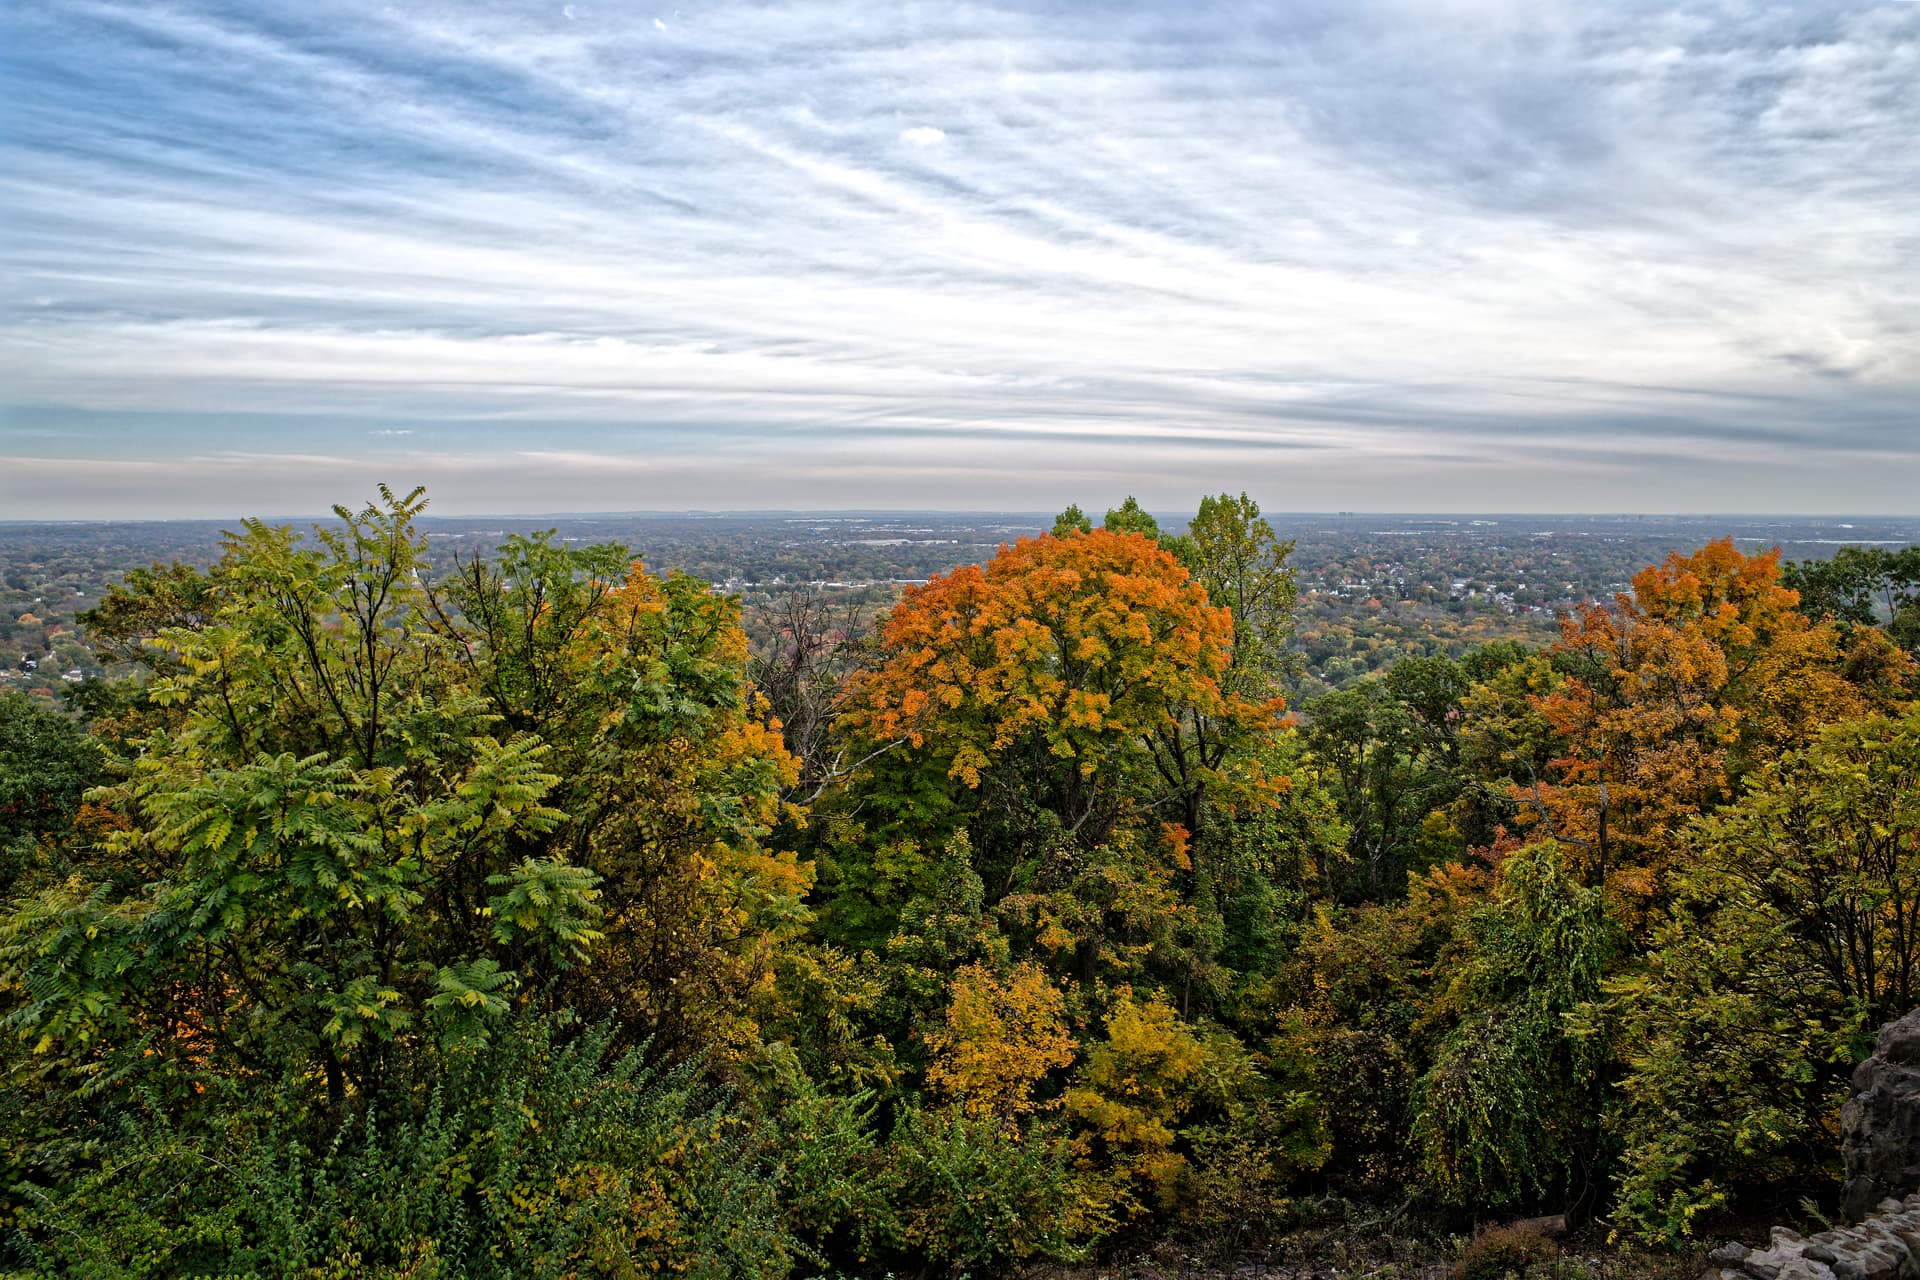
You wanted a photo, Here is an image taken at dusk using a manual focus TTArtisan 17mm f/1.4 lens on my Nikon Z fc, and processed in PhotoLab 6 Elite. The light was very low and I struggled with colors a bit.
Your image looks acceptably sharp in the large size display, but it seems to have “barrel cushion distortion” in the middle of the image, which should be impossible. The horizon appears curved, maybe because it’s such a wide angle lens? I was wondering if PL6 can correct that? Anyway, I don’t know what to say about the image, other than that you’ve captured some lovely colors. I don’t know where I’m supposed to look, but the bright orange leaves in the middle of the image pull my eye right to them. I’m also confused, because it doesn’t look like “dusk”; it looks like you took it in mid-day. Having seen it’s from your Z fc, and knowing how inexpensive it must be, if I ever had one of those cameras, I’d buy this lens. Would make for a wonderful travel lens!
It was captured at the end of October at close to 5:30 PM. It was probably darker at that time of day up here in New Jersey than it would have been in Miami. The reason it doesn’t look darker is because I processed it in PhotoLab and increased the exposure compensation a bit, lifted some shadow detail, added a bit of vibrance, used the color wheel to bring out more of the oranges and reds in the fading light, and brought out the detail in the sky.
The sun was below the horizon I often find that some handheld auto focus lenses struggle to nail focus as the light fades. The arcing horizon is because the lens has some distortion and there is no PhotoLab lens profile for this lens. I manually adjusted for barrel distortion in the version attached to this post. While there still appears to be a slight curvature iin the center of the horizon it is actually due to a difference in elevation.
Since this is a very inexpensive Chinese lens there are also some field curvature issues It is not a great shot. The only reason I posted it was because it was captured with a manual focus lens with all manual settings in quickly fading light. The goal had been to capture vibrant fall colors but the day got away from us and we arrived at the top of Washington Rock, the first of the Wachung Mountains in GrreenBrook NJ, too late in the day. In 1777 George Washington used this point to view the troop movements of the British Army far below.
EVFs are a big turn-off for me. I shoot Pentax which is well known for its bright, high coverage OVFs. I had a discussion in a Pentax forum about this issue and I specified what it would take for me to switch to an EVF.
“Retina” quality. If I can see the pixels, it’s game over.
Extremely low latency. If the movement I see in the viewfinder does not match with my physical movement, it’s game over. Ask an audio technician how little delay most people can detect when monitoring their own voice through headphones.
It can’t be slathered with readouts. When I look through my OVF, I’m not looking at a picture. I’m looking at the subject. I may glance at key indicators on the periphery as needed, but none of these obscure my view, except briefly the focus point.
That last point is technically easy to accomplish but I feel may be the most important point for me. I’ve heard people say being able to see “the picture you will get” is an advantage, but I am not convinced. I operate a camera, not a television.
My principle opponent on the matter gave me an example that met my first two criteria. If I recall correctly, it was a $10,000 camera. So yeah… I might be a while, waiting on that tech to trickle down.
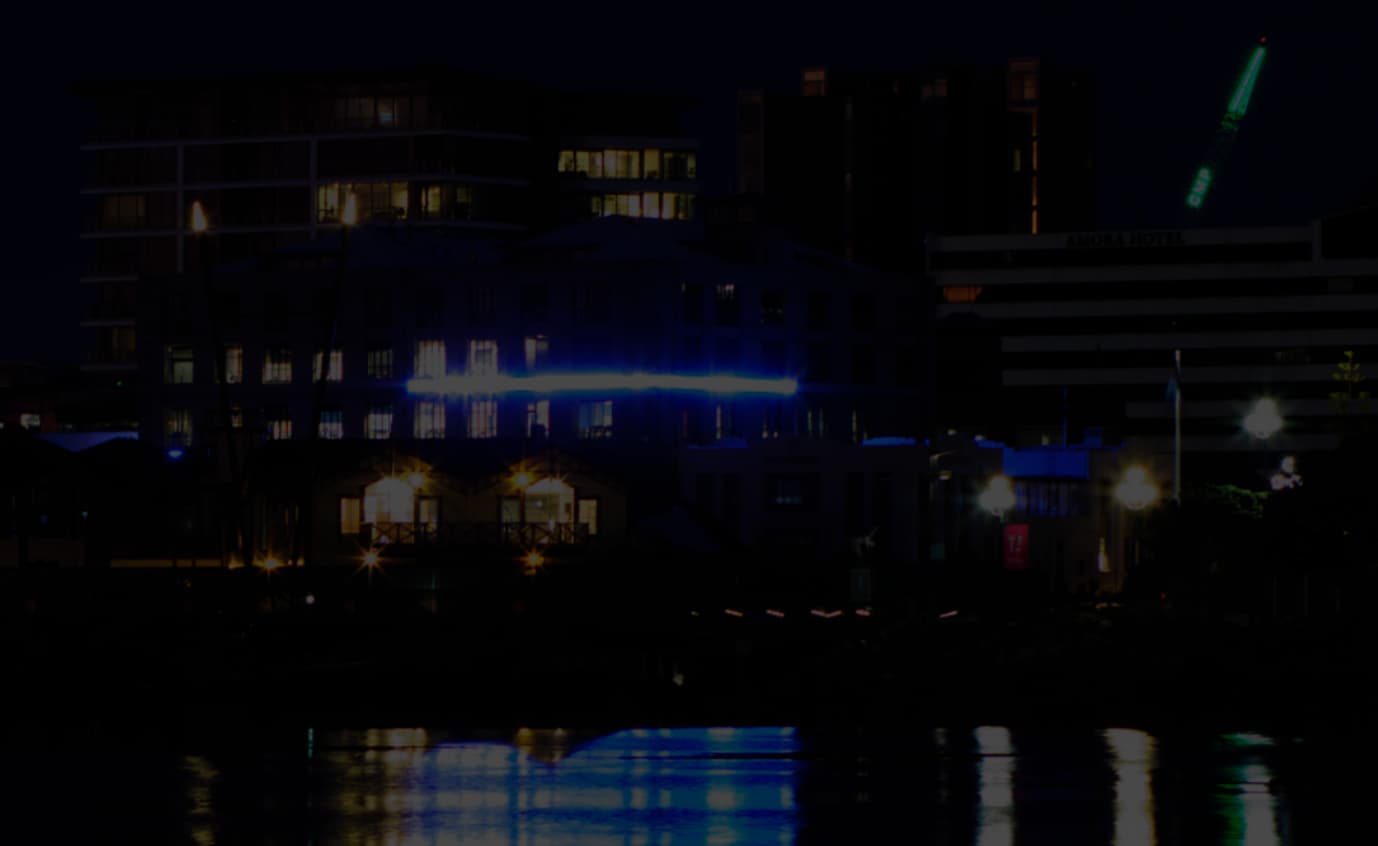
Sticking with the water and buildings theme, this is a shot I took on my way to work one morning in July when it was still dark, or almost dark. You want to know why it’s called blue hour?
If I had the opportunity again, I would lower the exposure quite a bit to avoid the huge blowout of the lights. Particularly the electronic sign on the building just right of centre. It’s actually a stock ticker for the NZSX. At the time I was mostly “on my way to work” and was therefore not spending as long as I might otherwise in setting up shots. They were all just opportunities that presented themselves in the moment.
I do love the photo and have this as my lock screen wallpaper at work on a 32" 2.5K monitor.
Do yourself a favour and give up on your journalistic Leica with short lenses. You seem to specialise in finding subjects that are way too far away to fill a 50mm shot. Take out the Nikon with the longest zoom you’ve got, then you can vary the framing and composition in the camera rather than “wasting” almost three quarters of the frame on surrounding “stuff”.
I know and love the blue hour. And I like this shot as well, with the buildings and their reflections fairly much filling the frame.
Yup. That is something I eventually started to get right (most of the time). Spot metering on the brightest part of a scene and placing the exposure at +2EV from there.
The big problem with modern digital sensors is that the exposure range is unevenly shared between shadows and highlights.
My Nikon D850 has a dynamic range of 14.6 stops at 100 ISO, but that is split between around -11.6EV and +3EV.
You know that 0EV represents 18% grey and that is the brightness that the meter always tries to achieve.
So, I took a sheet of textured kitchen paper and photographed it in ⅓ stop increments from 0 to +4 EV. I then viewed the files in PL and determined at which level I was no longer able to recover detail.
It turned out that I could go as far as +3EV, but I was then starting to struggle to recover highlight detail without affecting everything else too much. To be on the safe side, I decided that +2EV was the best choice for something that was pure white but that had detail I wanted to recover easily. If the brightest part of an image is cream coloured (or somewhere above 18% grey) I will then estimate somewhere between 0EV and +2EV to “place” the brightness appropriately.
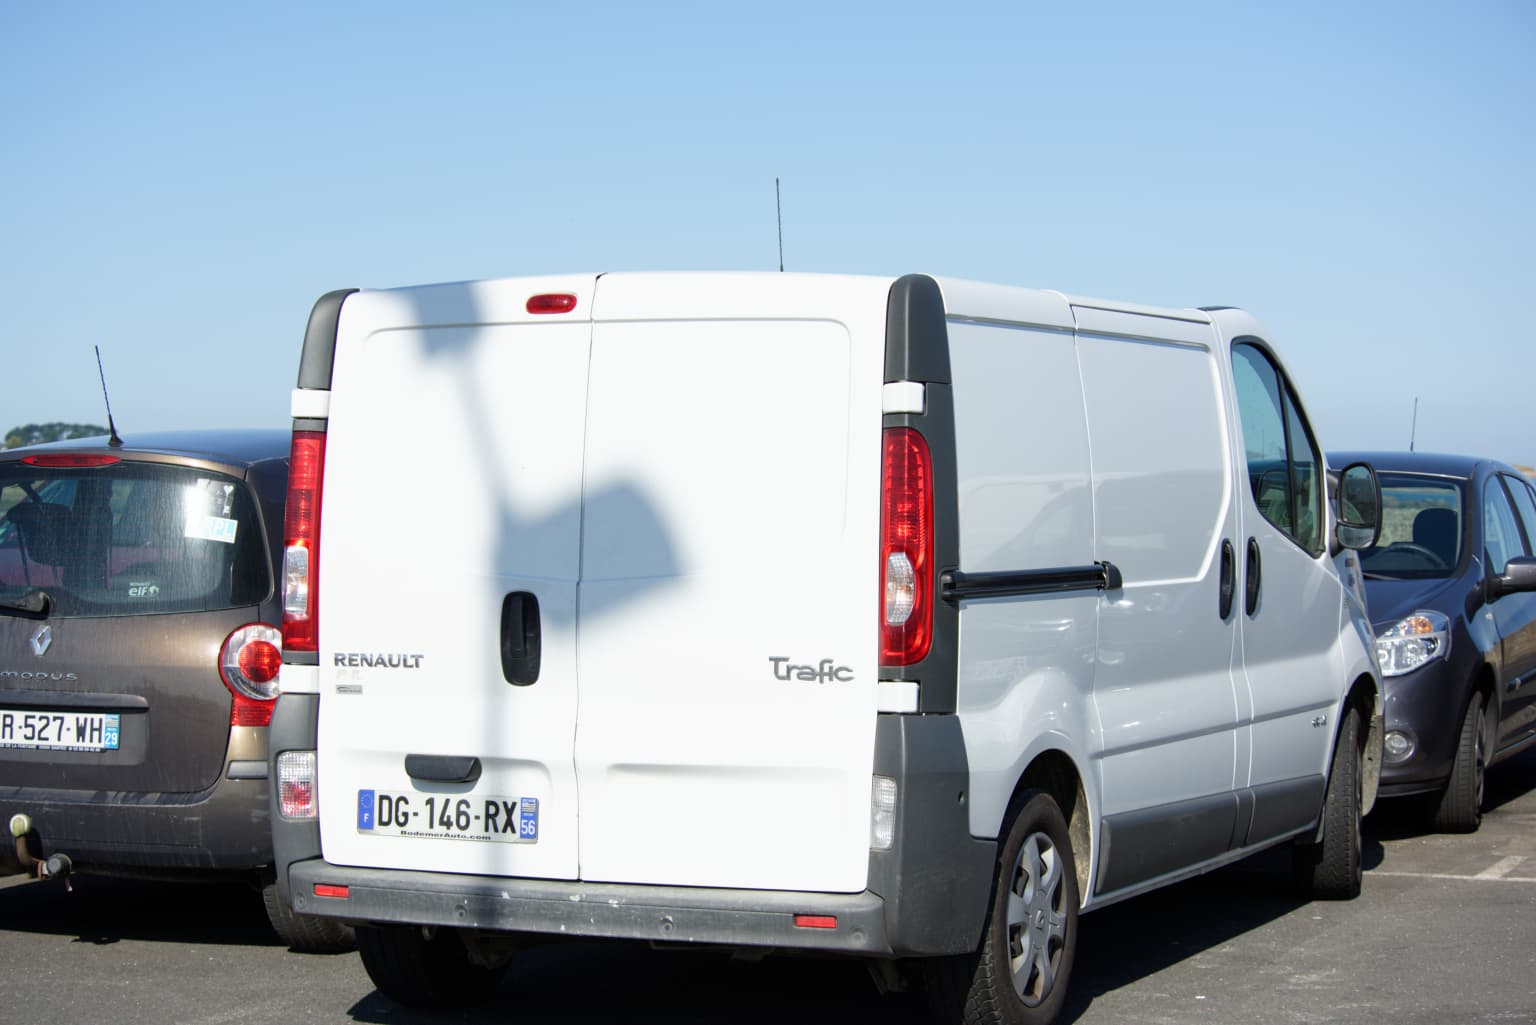
As a result, photographing a white van in bright sunlight gives me the following difference:
You can see that the van panels are truly white but you can still just about see the creases in the panels.
You will need to test your camera to see what its limits are but, once you have determined them, you will not over-expose anywhere near as many photos.
I’m really enjoying this thread but to say it’s wandered off topic is an understatement - perhaps a mod would consider a lift and shift of the guidance and wonderful sample shots from everyone to another new one? Perhaps a sticky “Advice, experiences and examples”?
I love your photo, did you shoot in raw? If so, you can still recover data from the washed out area. If it was hand-held, you have VERY steady hands too!! By the way, I have noticed the blue color in photos taken in the wee hours of the morning, but I’ve never found out why the sky looks so blue. At one point I thought it was my eyes, and tried to correct the color later. Just curious…
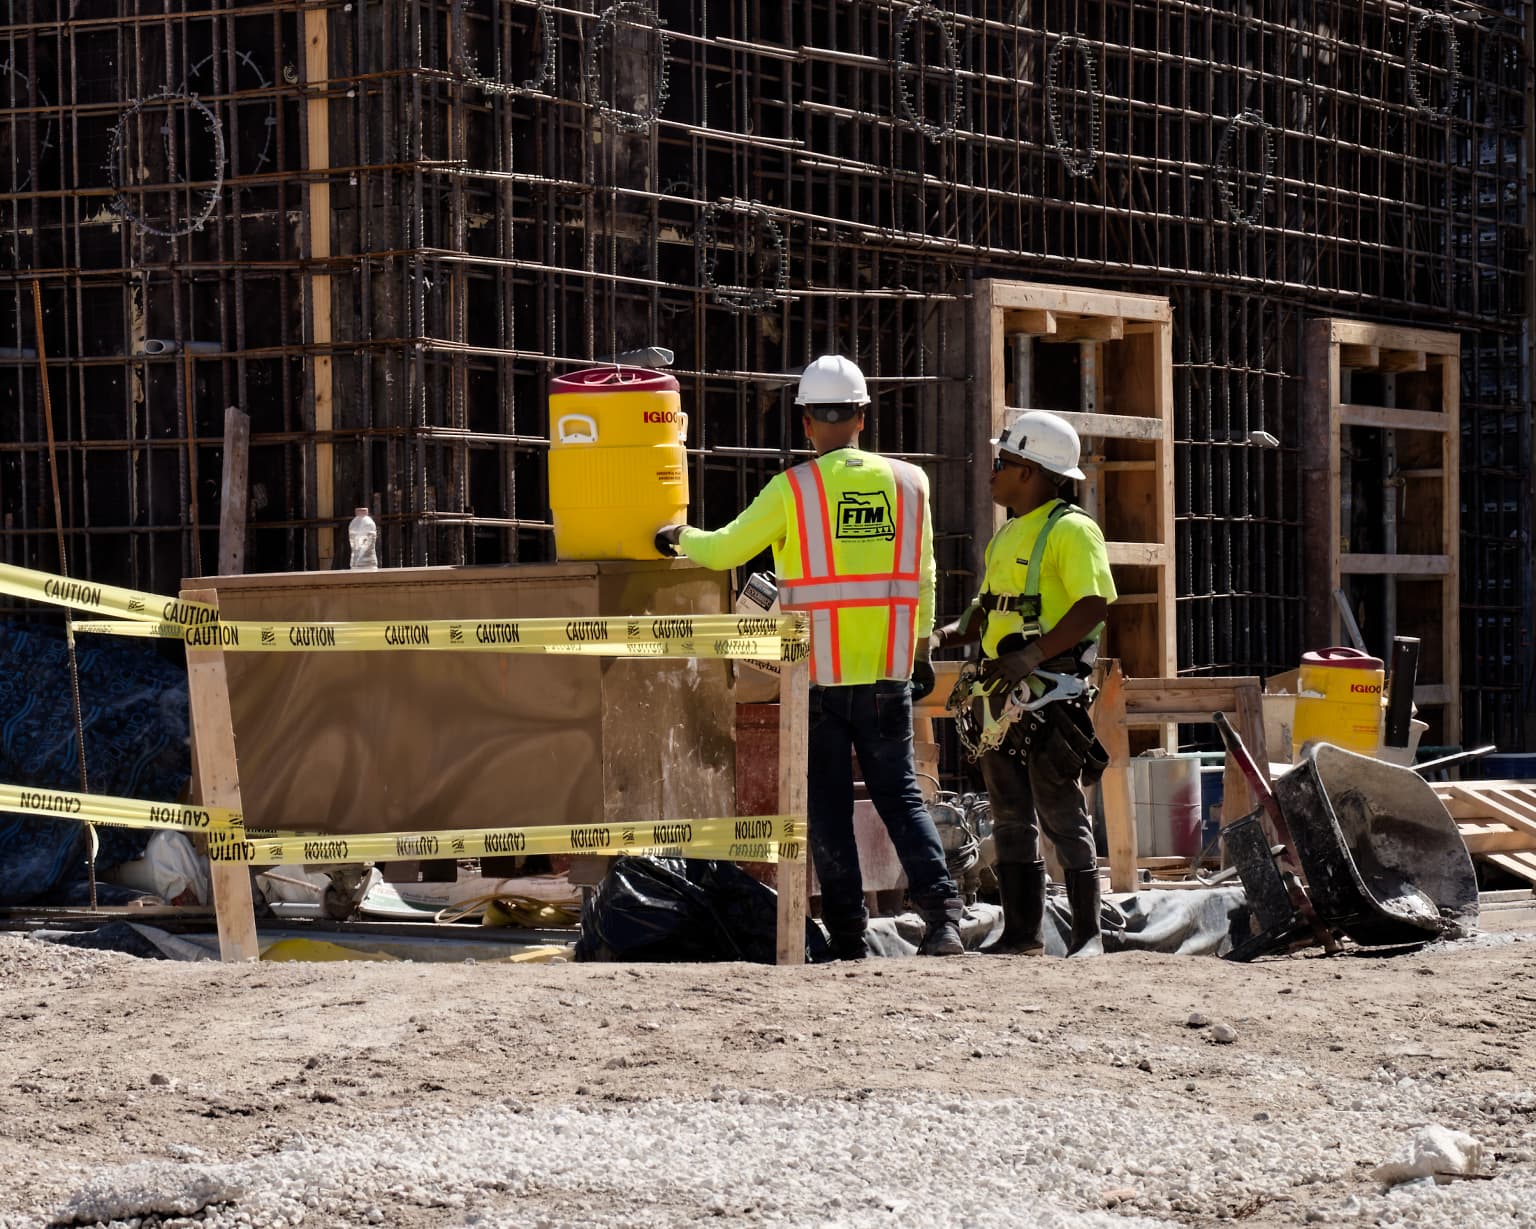
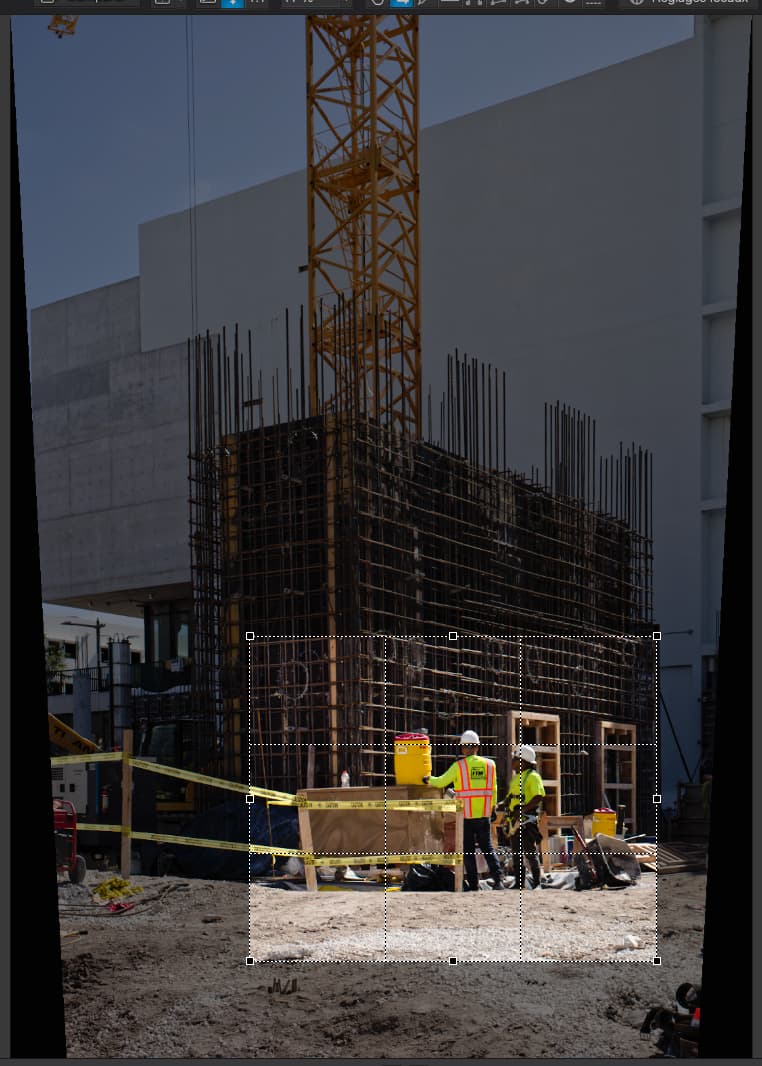
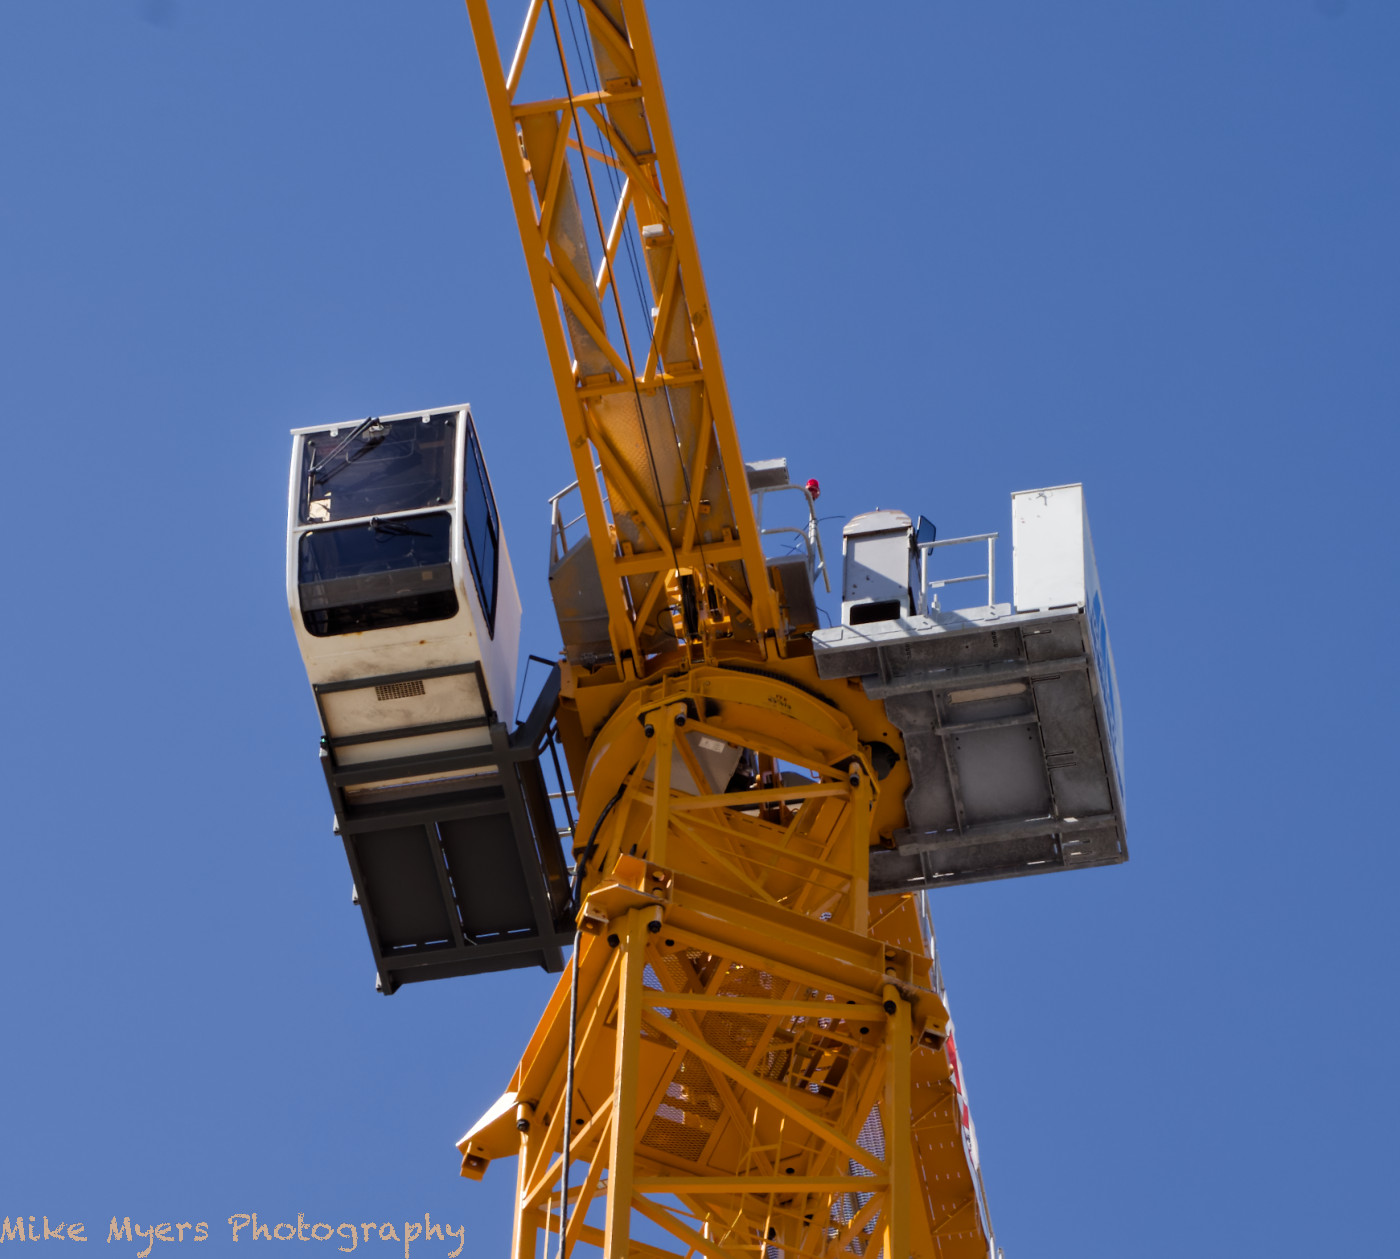
Hmm, in retrospect, you have a valid point. Unfortunately, I don’t think that clearly. The huge pile is what caught my attention - I stopped in my tracks, backed up, and spent several minutes trying to wait for the guys to do something that would look good in my photo. I never realized what I had captured until late last night when I was posting the photo. I did see several other photo opportunities that would have worked out well if I had brought my 300mm lens on my Nikon, including this one that I didn’t like because I can’t see the crane operator behind the dark windows… maybe he hadn’t gone up there yet.
We’ve covered photographic basics quite often as a result of an initially technical, PhotoLab related post. As long as DxO does allow us to wander off, it seems okay to write whatever we like. The thread title should be related to what’s going on in the thread and if we cover several areas, the title will always be mostly wrong.
We can avoid this, if the person, who starts to get off-topic opens a new thread with fitting title - instead of switching the topic.
For anyone with a specific new topic in mind, it might be better to do as @platypus suggests, and start a new topic. The new thread I started is for small discussions that probably don’t require a whole new topic.
Sort of. From memory, I rested the camera on a low wooden thing. It took the weight, but I still had to hold it at the appropriate angle.
Thanks. Yes, I always shoot RAW. Ever since the bright sunny day when I changed my battery and forgot to dial back in a required +1 EV and struggled to recover hundreds of photos from an event that would never be repeated.
As for recovering the highlights. I just went into PL and (on a virtual copy) reset, then lowered the exposure by 4 stops. As you can see, the stock ticker and larger lights are completely blown.