If the maximum printed size is less than 24cm x 36cm, there is no point in scanning at anything more than 2400ppi. I know 7Mpx seems like a low resolution file but, don’t forget, a 24 Mpx image can be printed up to 63cm long without having to use interpolation.
Dear Joanna,
tahnks for the first info 
What do you think. is scanning with higher resolution also a pro/contra for the visibility of grain?
As often, I propose to have a test batch run by your provider and decide after you’ve seen the results. Maybe a few images want a crop and some rotation and then, a few extra pixels can come in handy.
1 Like
So much to reply to, and so many questions… In order…
1 - I deliberately put the watermark in this location - nobody else does it this way, so what I did is “more unique”. I rather like it now, maybe because I’ve gotten used to it. It also leaves more of the image as-is, not being over-written. I’ve been doing it like this for about a year, and have never found anyone else doing it this way, which is a good thing.
2 - Resolution - I don’t know what the eventual purpose for the image might be, so I decided to treat the negative as if I want to make a digital copy, and later I would decide what might be done to/with it. The scanner specs noted 7200dpi, so that’s what I started using, but the files were too big, so I went to 3600. My choices from the drop-down menu are Auto, Custom, 7200dpi, 3600dpi, 1800dpi, and 900dpi. Are there any good reasons not to set it at 3600 and forget it? You are suggesting 2400dpi. Maybe I should just select 2400 until/unless I might have a reason to do something unusual. Again, right now, I’d just like to make a digital copy of the negative, so I won’t need to go back to the film and do it again. The most likely use is to post the image on my SmugMug gallery, and people can select any size at which they want to view the image.
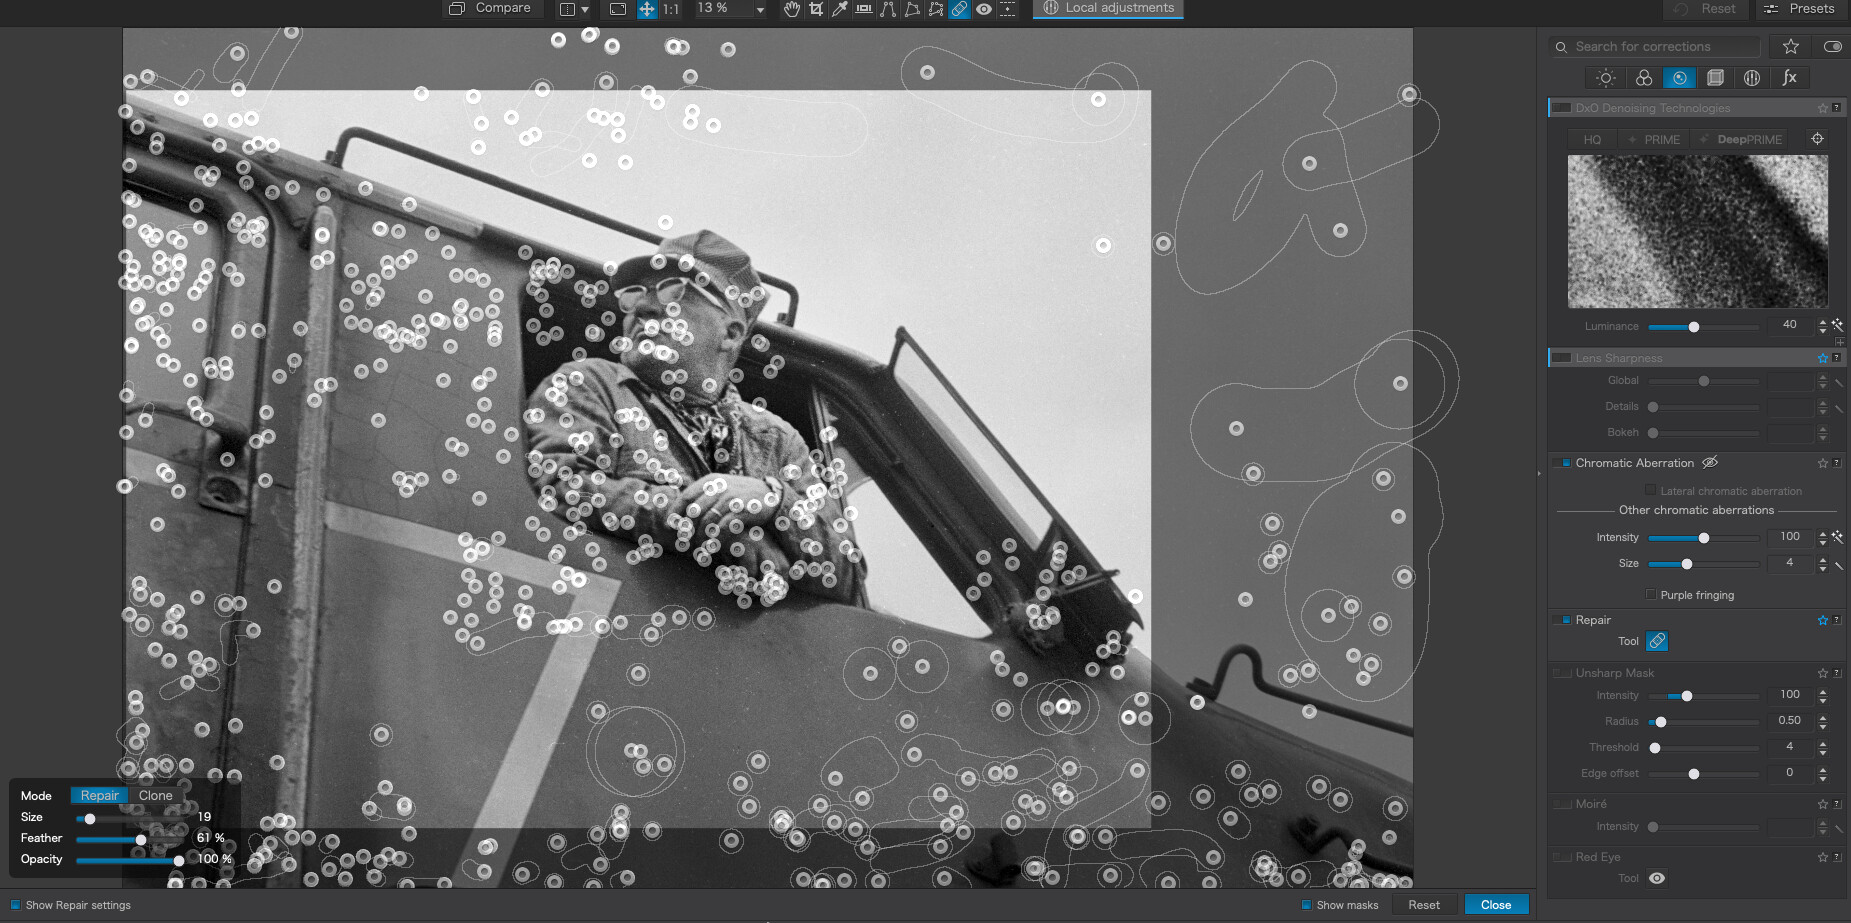
3 - How do I get to view the source of a repair, as you show in your image? That’s one of the questions I forgot to ask. With the information you show, it’s obvious. I undid mistakes when I noticed them, but obviously I missed some. Can I turn “on” those before/after circles?
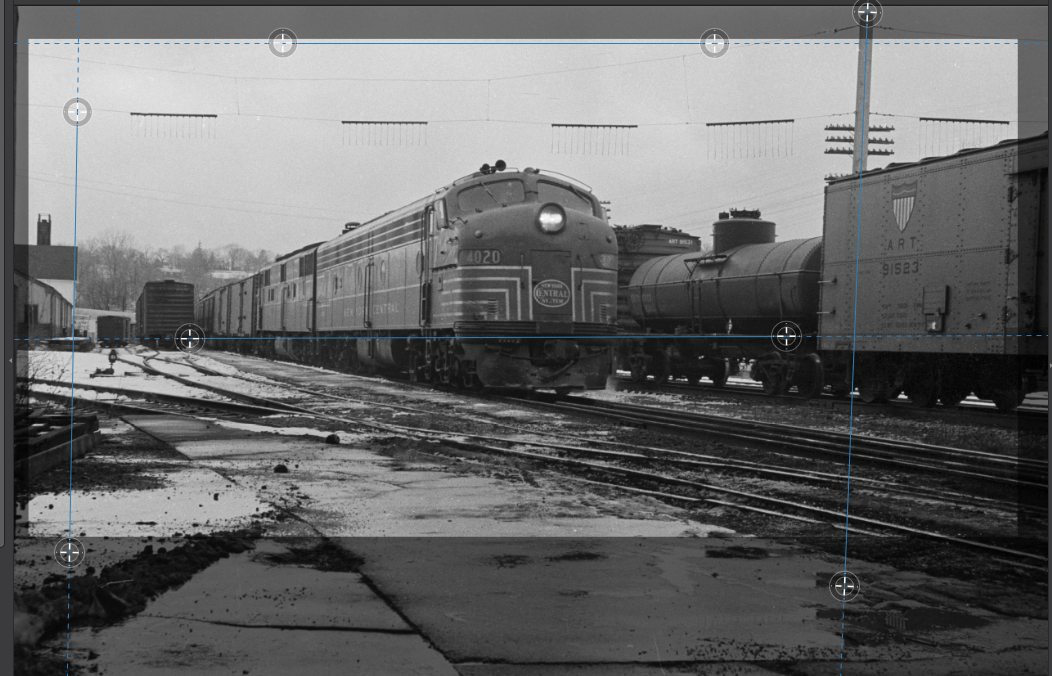
4 - In the original image the station at the left was leaning one way, and the pole at the right was leaning the other way. I tried using the “parallel” tools to make both of them vertical, and I used the horizon tool at some point to make the engine look “level”. The pole must have been at an angle, and what I paid the most attention to was the engine and freight cars. The final cropping at the bottom came much later, when I decided that area I cut away was too distracting.
5 - “It is well known that geometric corrections can displace repairs; and it also saves you a lot of time and effort not having to de-spot unnecessary areas.” ----- I had no idea. I’ll remember this for the future. Yes, I made a guesstimate of the horizon, but I didn’t trust the telegraph pole - I tried the telegraph pole, and the whole image was tilted as a result. Everything came down to a guesstimate. …but I was very wrong about this - without the telegraph pole, fixing the tilt from my camera would have been trivial. Had I realized then that the pole was tilted, that would have saved a lot of needless work. I’ll definitely remember this for the future, and maybe re-do the image from the beginning.
6 - Your “quick export” is a rather pleasing image, but it looks too “shiny”. Knowing the engines were anything but shiny, and especially the tank car, it looks “wrong” to me. On the other hand, the tilted telephone pole looks just like what it was, tilted. For most people, your “quick export” is a better image, but the “shiny-ness” bothers me. I dunno. For most people, what you did makes for a better image. How did you do this? …the tank car in my image looks realistic to me, and in the quick export it doesn’t, unless maybe it had been raining. Maybe I will split the difference.
1 Like
There is a drag rotate in the horizon tool. The slider right in the Horizon palette. A way to make the slider more sensitive to small adjustments when holding down option or shift. I’d like to have a modifier key which would work on almost every slider to making small adjustments much easier. I’m often forced to type in a value for the final adjustments.
6 - Your “quick export” is a rather pleasing image, but it looks too “shiny”. Knowing the engines were anything but shiny, and especially the tank car, it looks “wrong” to me. On the other hand, the tilted telephone pole looks just like what it was, tilted. For most people, your “quick export” is a better image, but the “shiny-ness” bothers me. I dunno. For most people, what you did makes for a better image. How did you do this? …the tank car in my image looks realistic to me, and in the quick export it doesn’t, unless maybe it had been raining. Maybe I will split the difference.
[/quote]
I find the detail and realism in your version much more persuasive Mike (@mikemyers).
This would be a huge improvement!!! Instead of constantly guessing, I could visibly adjust the image until it looked best. I find this to be very annoying in PL4, as I’m not that great at always having the camera perfectly horizontal!!!
1 Like
If it’s only for viewing on a screen, then the resolution really only needs to be about 120ppi but a scan at that resolution is going to be rubbish. 2400ppi will be fine.
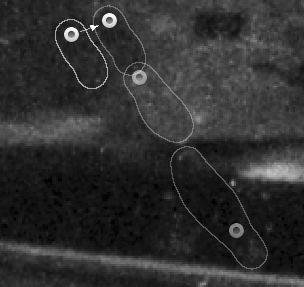
Check the “show masks” box

Then, depending on the size and position of the dust/hair, I tend to use Clone rather than Repair in tight spots, well zoomed in.
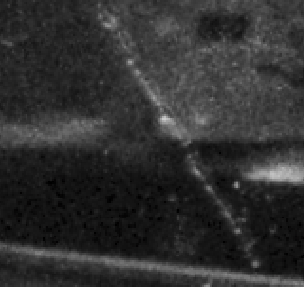
Heres a hair at the front of the loco (zoomed in to 200%)
The problem with the repair that you did was that you ended up with a repeat pattern
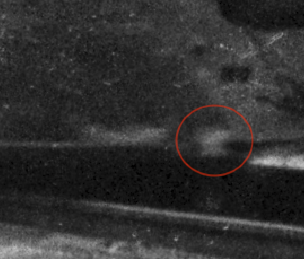
Here’s the source of that repeat
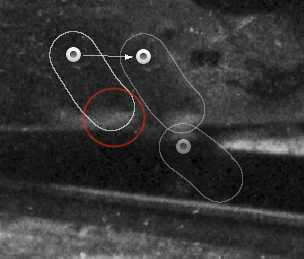
I moved the source up and left a tad
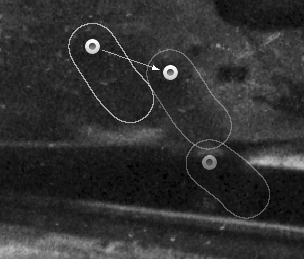
Then I deleted your repair and working close in, I used the Clone tool instead of the Repair tool and did this
I would have used the 8 points tool
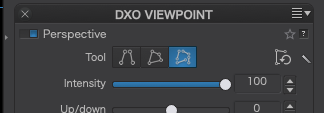
… to take care of both the verticals and the horizontals with one tool
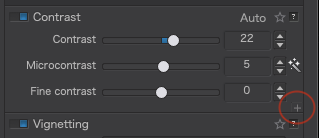
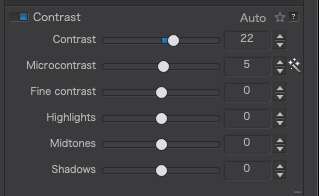
We’ve had this conversation before  My adjustments were only ideas but you might like to investigate the selective fine contrast tools a bit more.
I will turn on the “show masks”, and hopefully it will show me the information you’ve posted.
I never used the “8 points tool” yet - sounds like a better way than what I’m now doing.
I need to read up on the difference between “clone” and “repair”. I thought repair meant the software would “see” the white spec, and make it more like the surrounding area. I guess I was wrong.
I need to find the “selective fine contrast tools” - how do I access them?
Sort of. it’s like an “intelligent” version of cloning that can blend in the repair better if it is complex or highly textured. Cloning is good old-fashioned stick this on top of that.
Click on the little + sign
Basic difference is replacement strenght.
You can test this your zelf.
Find a pole in the sky or other background and try repair with a blob /circle acces show mask and try to replace the pole with sky. You will see that by repair it stayes glansing through whatever slider you move.
Cloning has the ability to replace 100% the original pixels.
You need Filmpack for that.
Oh my gosh - I never noticed “show masks” before. I see this will be a great tool to use AS I’m making corrections, not after. Wow.
Yep, I already bought “Filmpack”, and now that I look, I do have those tools. I haven’t used them much before. I need to do this much more often to stay on top of things, along with all the other software I have and sometimes use.
I’ll try your example of using “clone” and “repair”; I didn’t think much about it before, so I unintentionally got sloppy. 
Question - as I’m using the REPAIR tool, is there any way to move the image around, other than clicking on the “HAND” at the top of the screen? Can I move the image around while I am still USING the repair tool?
In Windows if you are zoomed in and want to move the image around while using the repair tool you can hold down the space bar and the mouse pointer turns into a hand so you can move the image. When you release the space bar the pointer goes back to the repair tool. I suspect it’s the same on a Mac. You can also use Move/Zoom window to move around the image.
Mark .
I like the photo and wanted to try it with a vintage look…
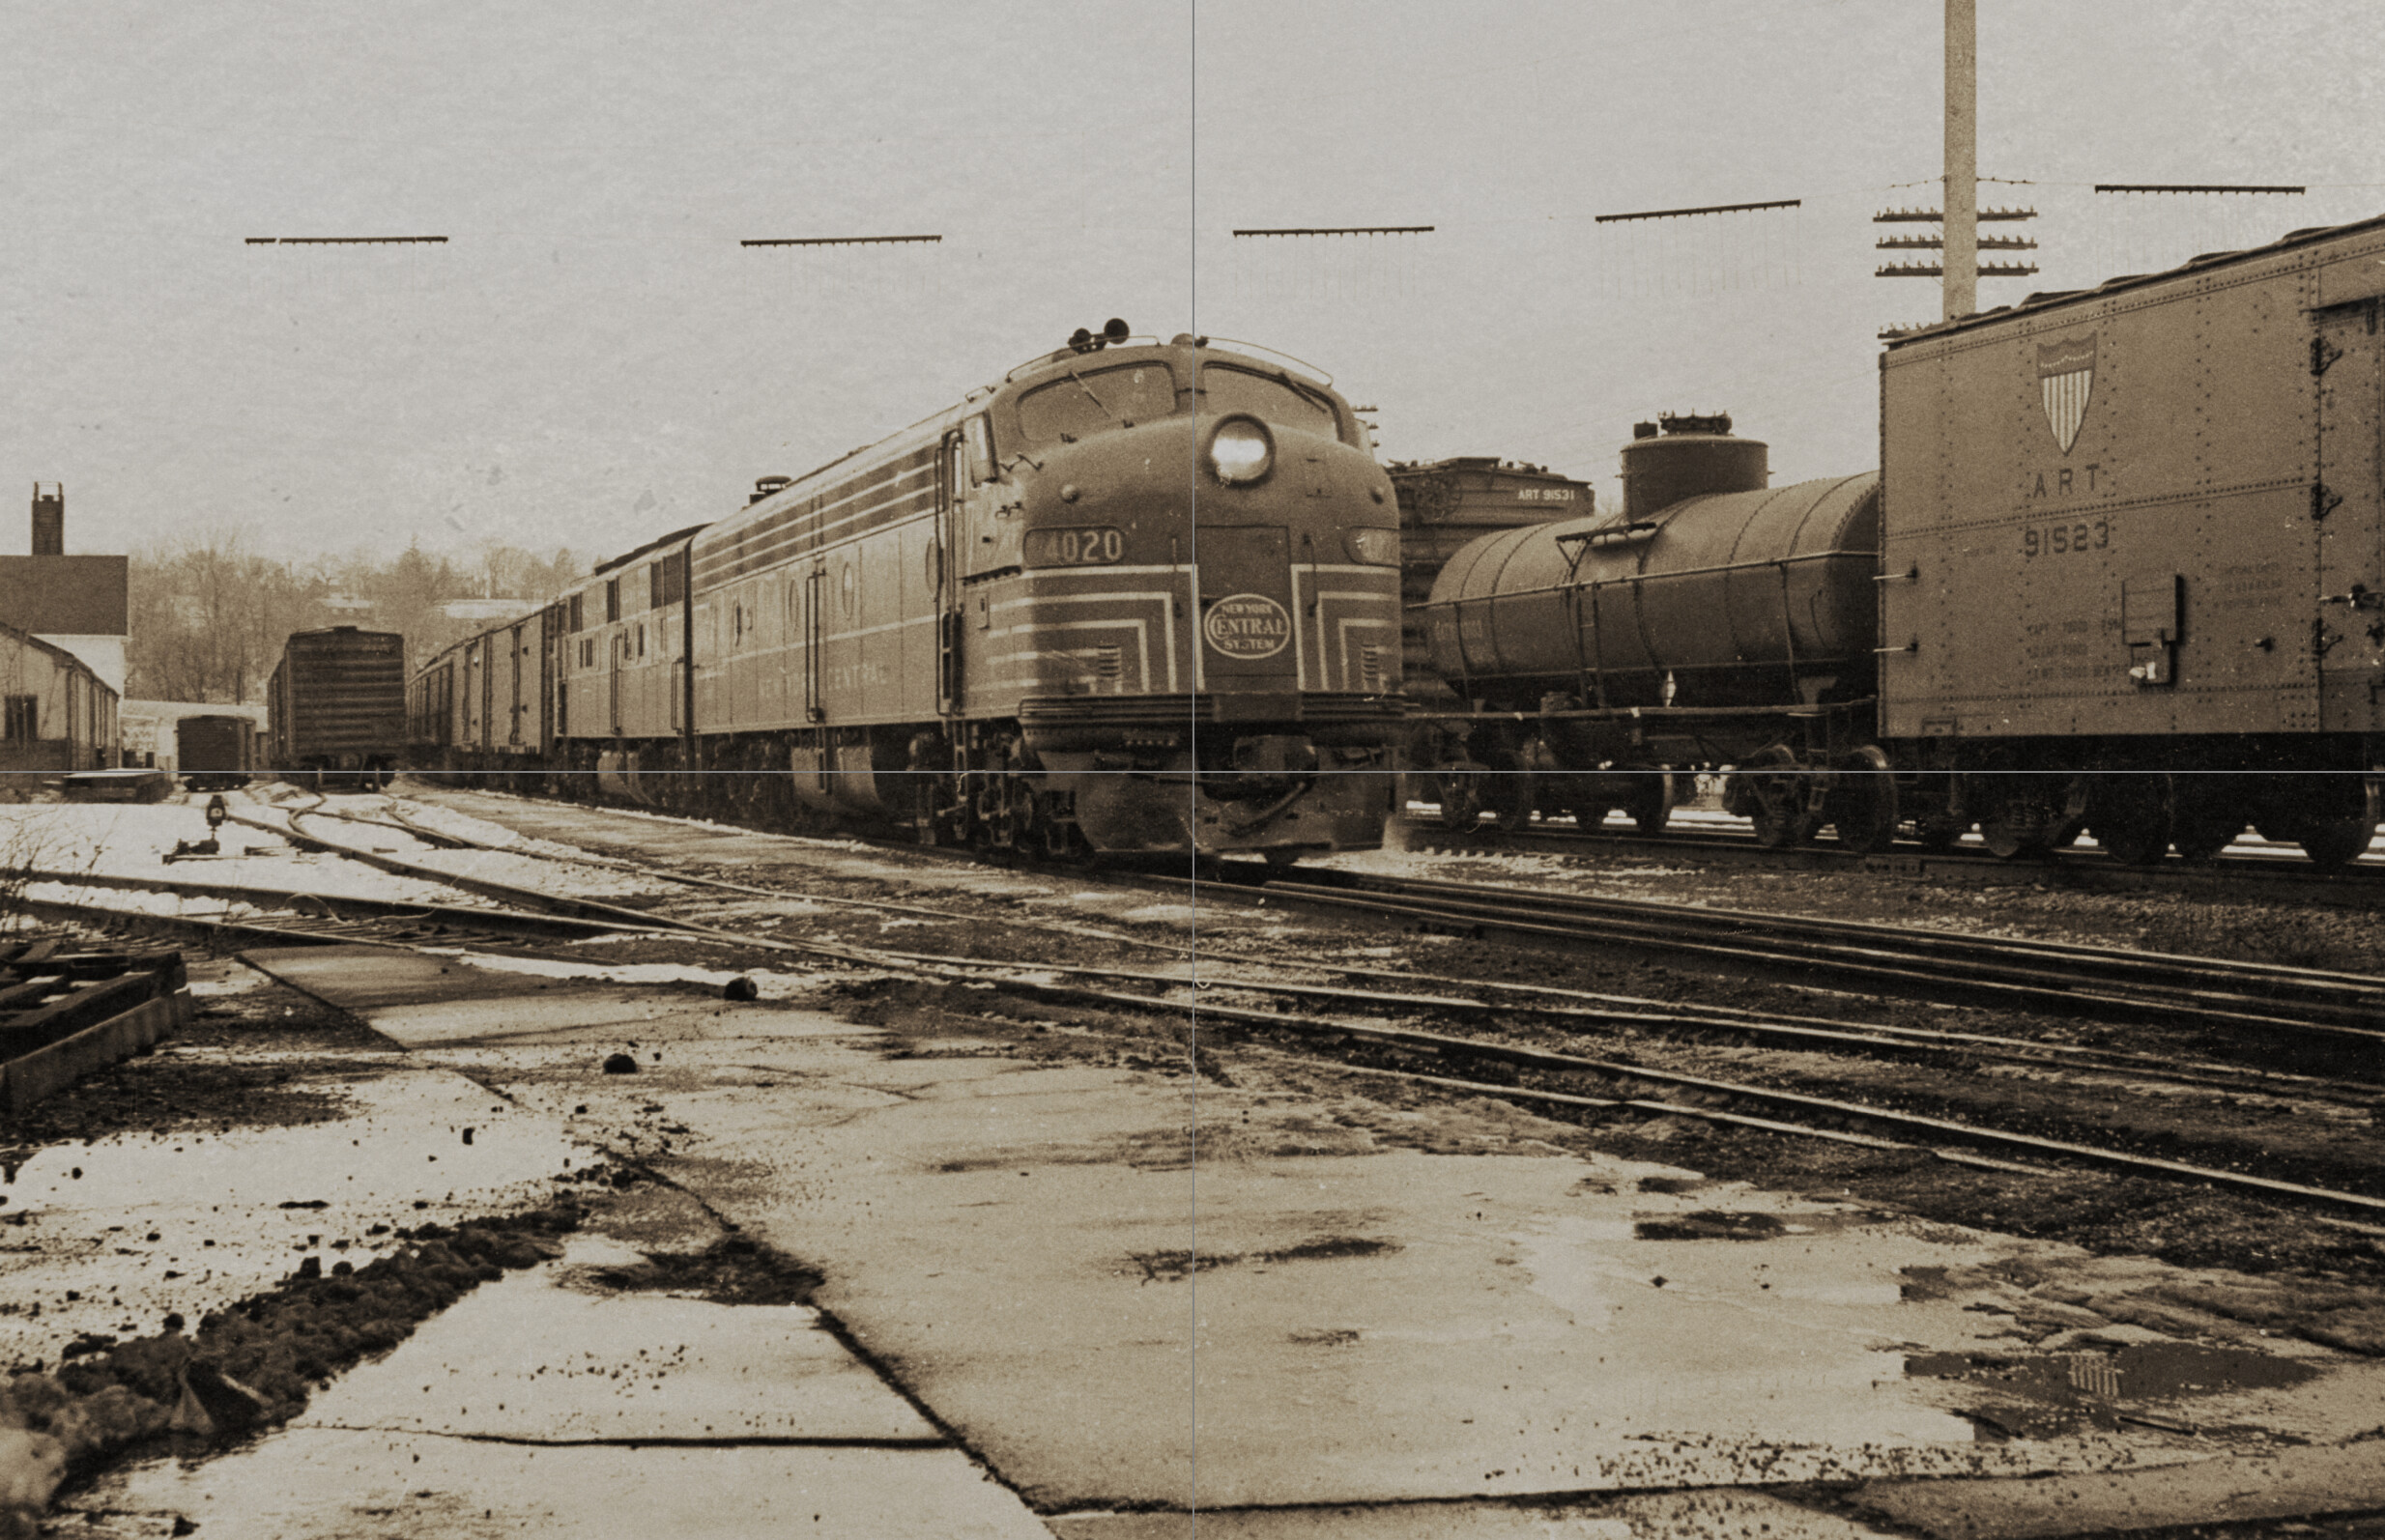
As we can see, some details are gone (as is some lint) and with a few retouches in the foreground, all seems set - if this the look one is after…
As for the slight angle of the image…
- Train tracks are usually quite level around depots and stations.
- considering the size of a human against the loco, things at the hight of the lens should be horizontal. To illustrate, I left the grid (set to 999) to give me the center of the image.
- I set horizon to -2 and perspective/verticals to 4 to account for the above. This straightens the building and the boxcar, but leaves the pole slightly slanted. The locomotive looks to lean left, which adds a touch of dynamics…
Maybe, I’d crop off some of the foreground too…
1 Like
Good point! And yes, some sensitivity on that would be a way of doing it. My personal preference is like in various other applications where you drag a handle which is placed off the edge of the image. It feels more “direct”. But I’d settle for the slider with fine tuning!
1 Like
see difference clone and repair
rule of use is basicly:
Use repair if the spot is a free floating or surounded by it’s own pixels you would use to repair.
(blending in and recreating the structure by adding surounding pixels, move source around to find best optional replacement.)
Clone is for those moment you need to repair a part of something by using a specific part as source.
and fine tune with opactiy and feathering.
So repair tries to merge , blend both layers in one new and clone means copy paste area.
Win10 space bar is moving around
1 Like
there are more way’s to rome.
using arrows up and down, typing in angle as in 1.05.
using preview as inbetween.
dragging the slider
combine perspective and horizontool.
and yes it would be a lot faster if the release of the point left or right of the horizontool would activate the preview. But downside of that is you can’t carefully place the line without distoring the image.
and i use grid (ctrl+G) in different width’s 25grid or 50 grid or 75grid. (preference display)
one thing i would like to have is a opacity slider in the corner to hide the grid a bit when watching the image instead of 100% or 0% active not active.
First thought - the “vintage look” is perfect. I hadn’t thought about making the image look old, but it certainly works.
Second thought - I don’t like the foreground any more now than before, but it does add something to the image. It gives things a rough “atmosphere”
Question - in PL4 how does one add a “tint” the way you seem to have done?
In retrospect, I like the image even more WITH the foreground. It adds to the overall effect. Thanks!!
Wow, this works perfectly on a Mac - but how would I ever have known that, had you not posted it? Nice trick!!! Big time saver.