Photo-DKO
(Dirk Offringa, Windows 10, RX570, PL6E-VP3-FP6, Fujifilm shooter)
21
I guess so. I also bought the FilmPack, but because of such issues the whole integration-concept falls a bit apart. If we apply a Filmpack preset in PL5 and then export to Lightroom as a DNG for the tonal editing not only we have issues with the color rendering but also, if we do significant tonal edits, these will act upon (by degrading them) the grain of the Fimpack sims which are exceptionnaly good. So the workflow is really convoluted: export to DPL5, apply optical corrections, Noise reduction and a filmsim but NOT the corresponding grain layer, export back into Lightroom and do the tonal edits, export back again in PL5 to apply the grain layer, export back into Lightroom for final export and/or print. Whoah!!!
But the basics of DXO’s offering (DeepPrime, the optical corrections, the film sims) are top-notch so I signed up for EA willing to help getting this into the right direction
Speaking of film sims, there are some REALLY weird renderings here and there…but that’s another story!
1 i am not a LR user so can’t say anything about that but ibelieve you on your word.
Second, indeed highlight recovery is on this forum more then once a topic.
I am not experienced enough to know why dxo has the tonality control build like they did.
I remember to get frustrated using dxoplv1.2 wile i was used to SP7pro, excelent colorcontrol on panasonic body’s and highlight recovery ,my only raw developer before PL.
V5 is improved alot in things but not in tonality, luminance levels
Yes we got more tools to do things but the plain selective tones and plain contrast controls arn’t evolved much. Yes clearview is evolved but contrast balance is stil no slider, you need to use tonecurve. Nor a dedicated blacklevel, yes fine contrast and microcontrast but dragging tonecurve does a better job in dehazing.
Yes, yes and yes.
Point is, i did tried twosteps development but hated the what to do in which.
Counterproductive double work hides in the corner. So i stopped and got myself diving deep in PL’s quirks in order to understand and work out workarounds.
I don’t judge about if LR is better or not ,i hear it often so some of it is true.
Let’s operate positive and support dxo to get it right.
Personally, I almost always use PhotoLab’s Local Adjustments to apply highlights and shadow edits . I find that these adjustments rarely need to be applied globally in any software regardless of how well those tools are implemented.
Using the local tools, I can, for instance, extract details from deep shadow without having an effect on any other part of the image. Any global shadows or highlights tool, no matter how well designed, will start to affect other areas of the image to at least some degree. Using local adjustments gives me a far more control and no concern about overlap.
Mark
1 Like
Photo-DKO
(Dirk Offringa, Windows 10, RX570, PL6E-VP3-FP6, Fujifilm shooter)
25
That can also be done in any other PP software, I don’t see the point. I understand that someone who never uses a certain tool, doesn’t care much about how it works… but many use it all the time and they definitely DO care
I did not say you should not use global adjustments and I was not suggesting I did not care about DxO’s implementation of those sliders. However, as a long-time user and member on this site I do know that many people who use PhotoLab often overlook the use of the poweful local adjustments that are available.
Further, I can also assure you that this is far from a new topic. It has been discussed here periodically for years. Those of us who use PhotoLab as our primary editor have developed various workarounds. For some of us, that workaround is the use of local adjustments, which I would still continue to use even if the global sliders were more effective.
Mark
Photo-DKO
(Dirk Offringa, Windows 10, RX570, PL6E-VP3-FP6, Fujifilm shooter)
28
I noticed that. Is there a particular reason for this issue to pertain? I understand that there are workarounds (there always are for anything) but if the issue has been raised many times, it looks more like a problem to be adressed than a feature… CaptureOne had the same issue with a particular implementation of tonal controls, but they finally added the conventional HSWB sliders which was a huge relief for the userbase. Anyway, let’s work together and see where this will lead us!
I think I see what you mean…but if the histogram can be moved in this way, it means that processing shifted the histogram outside of its frame somehow. If a histogram that is based on RAW exits out at the right side, highlights are definitely blown. If we can recover highlights (bring them back into the histogram frame), we simply fix something that an other operation has broken before. Using an appropriate colour rendering (try the gamma-2.2 setting) can mitigate such a situation.
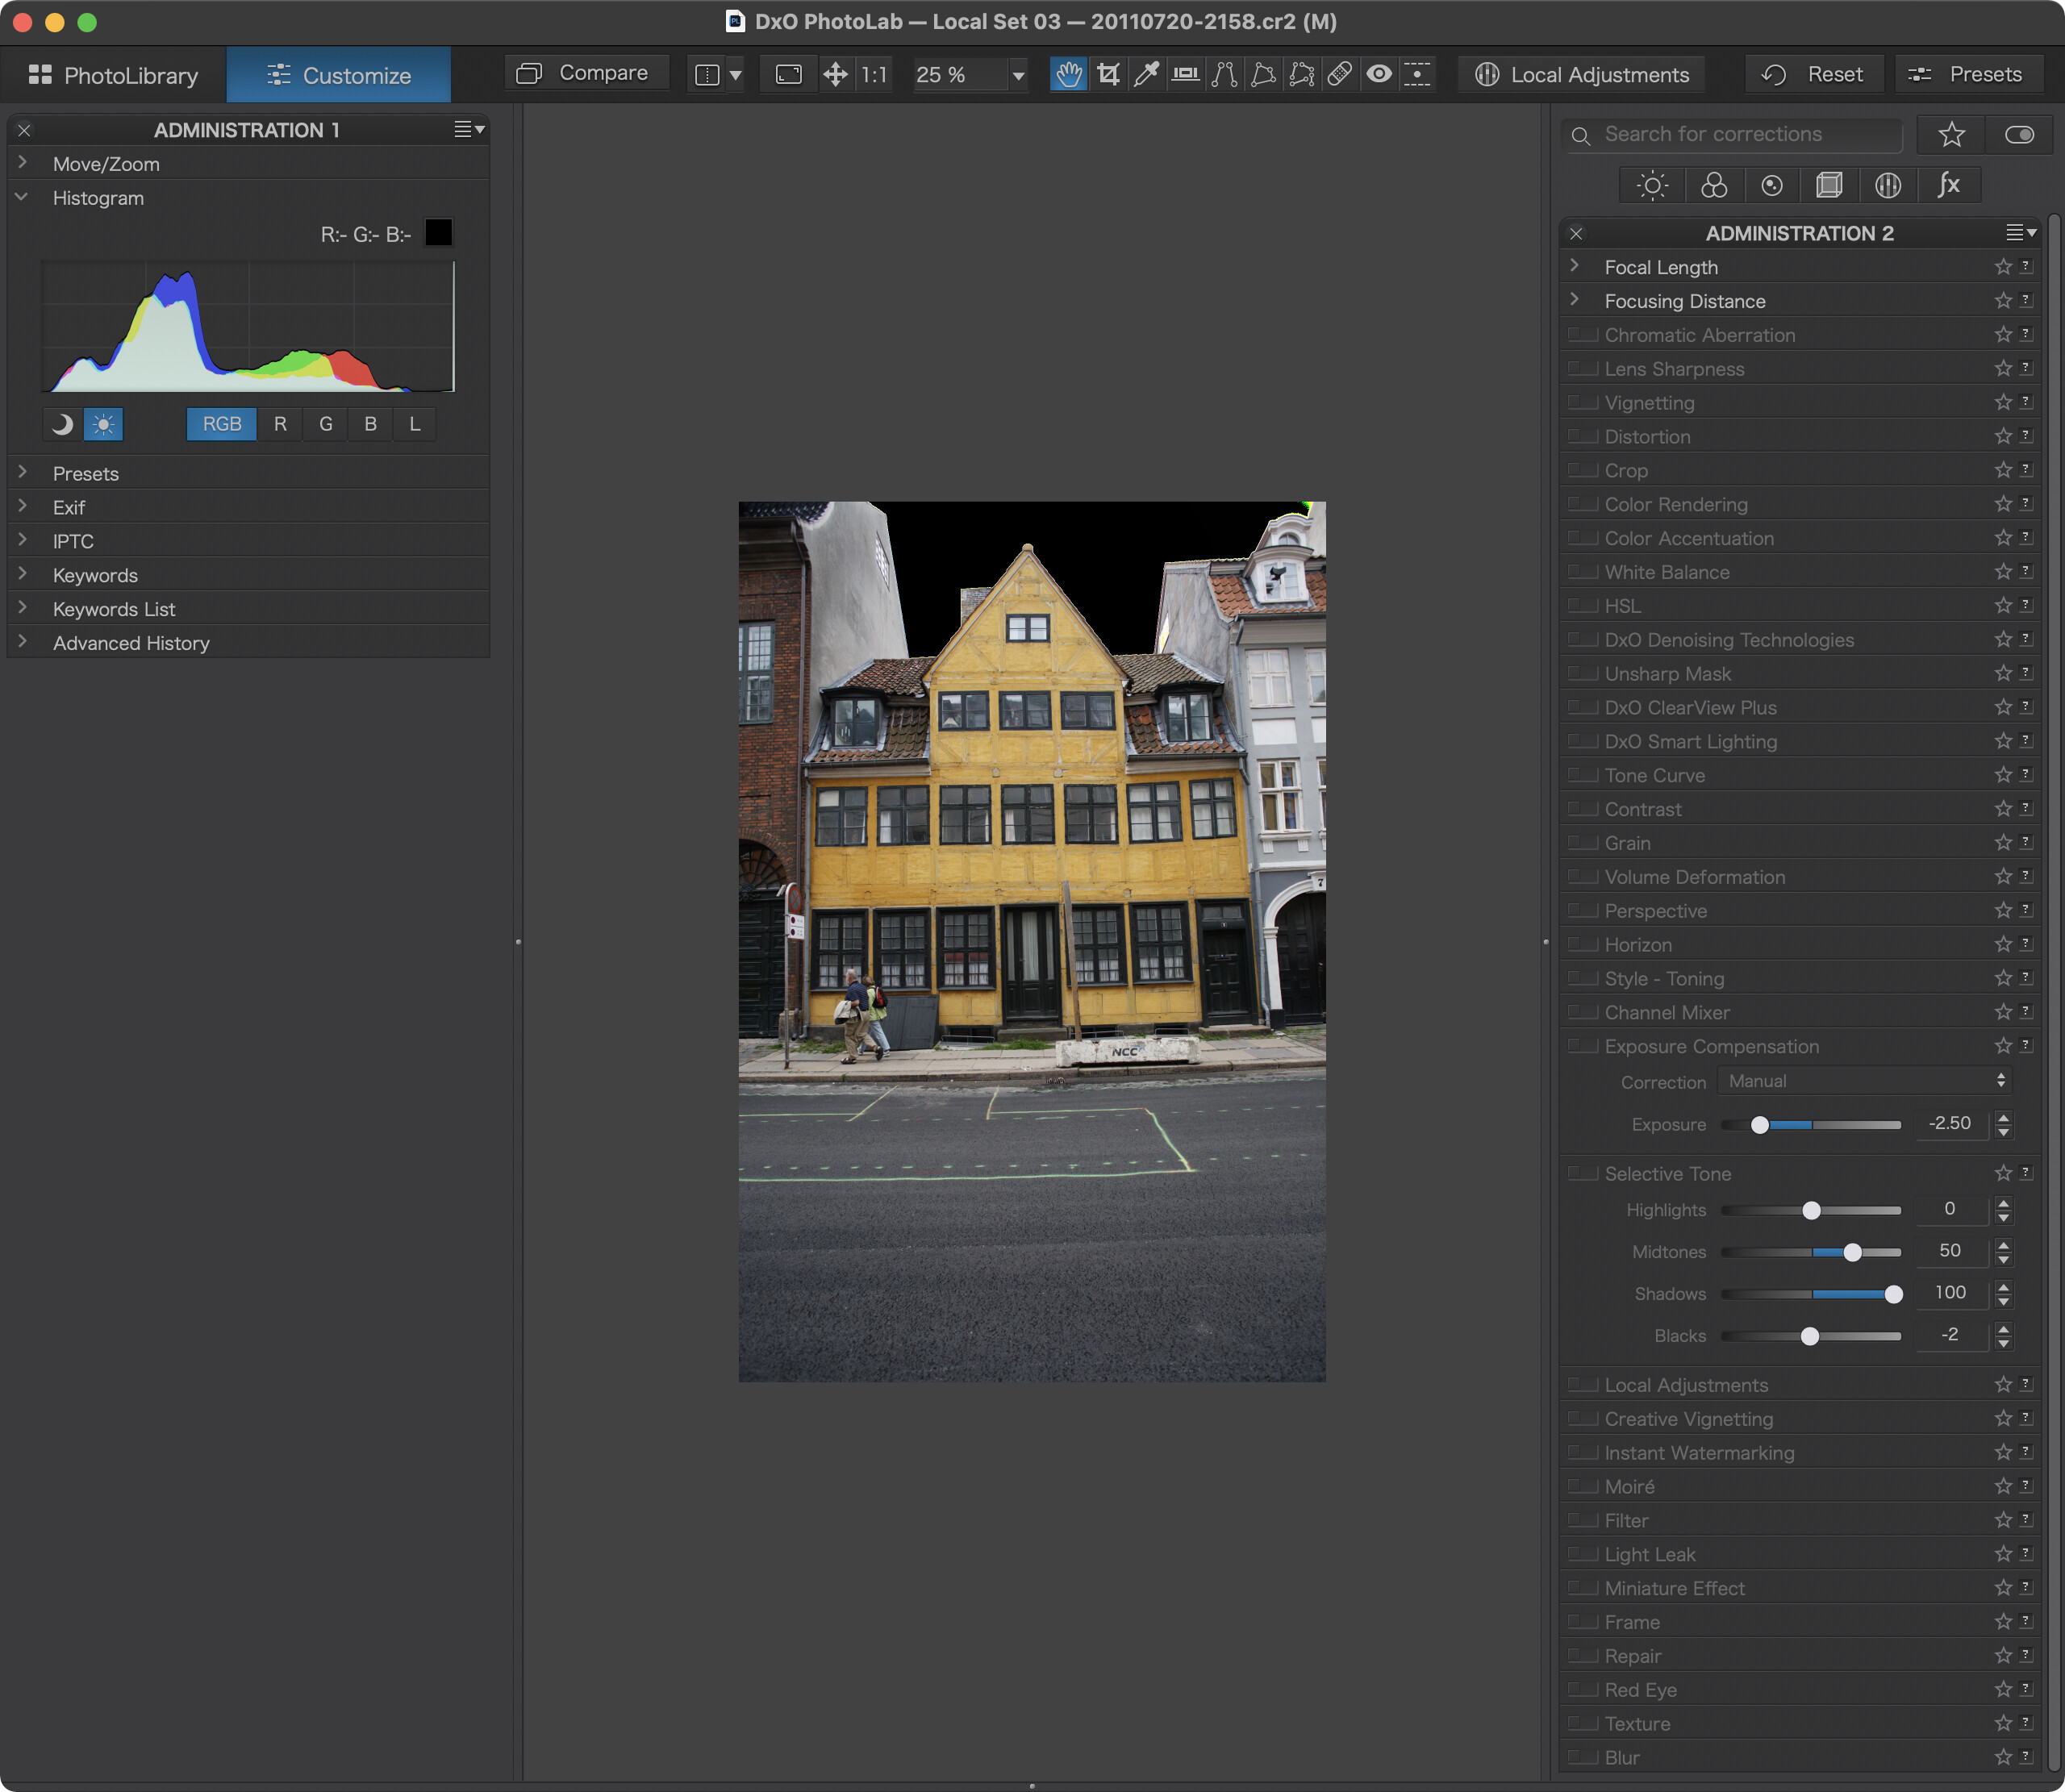
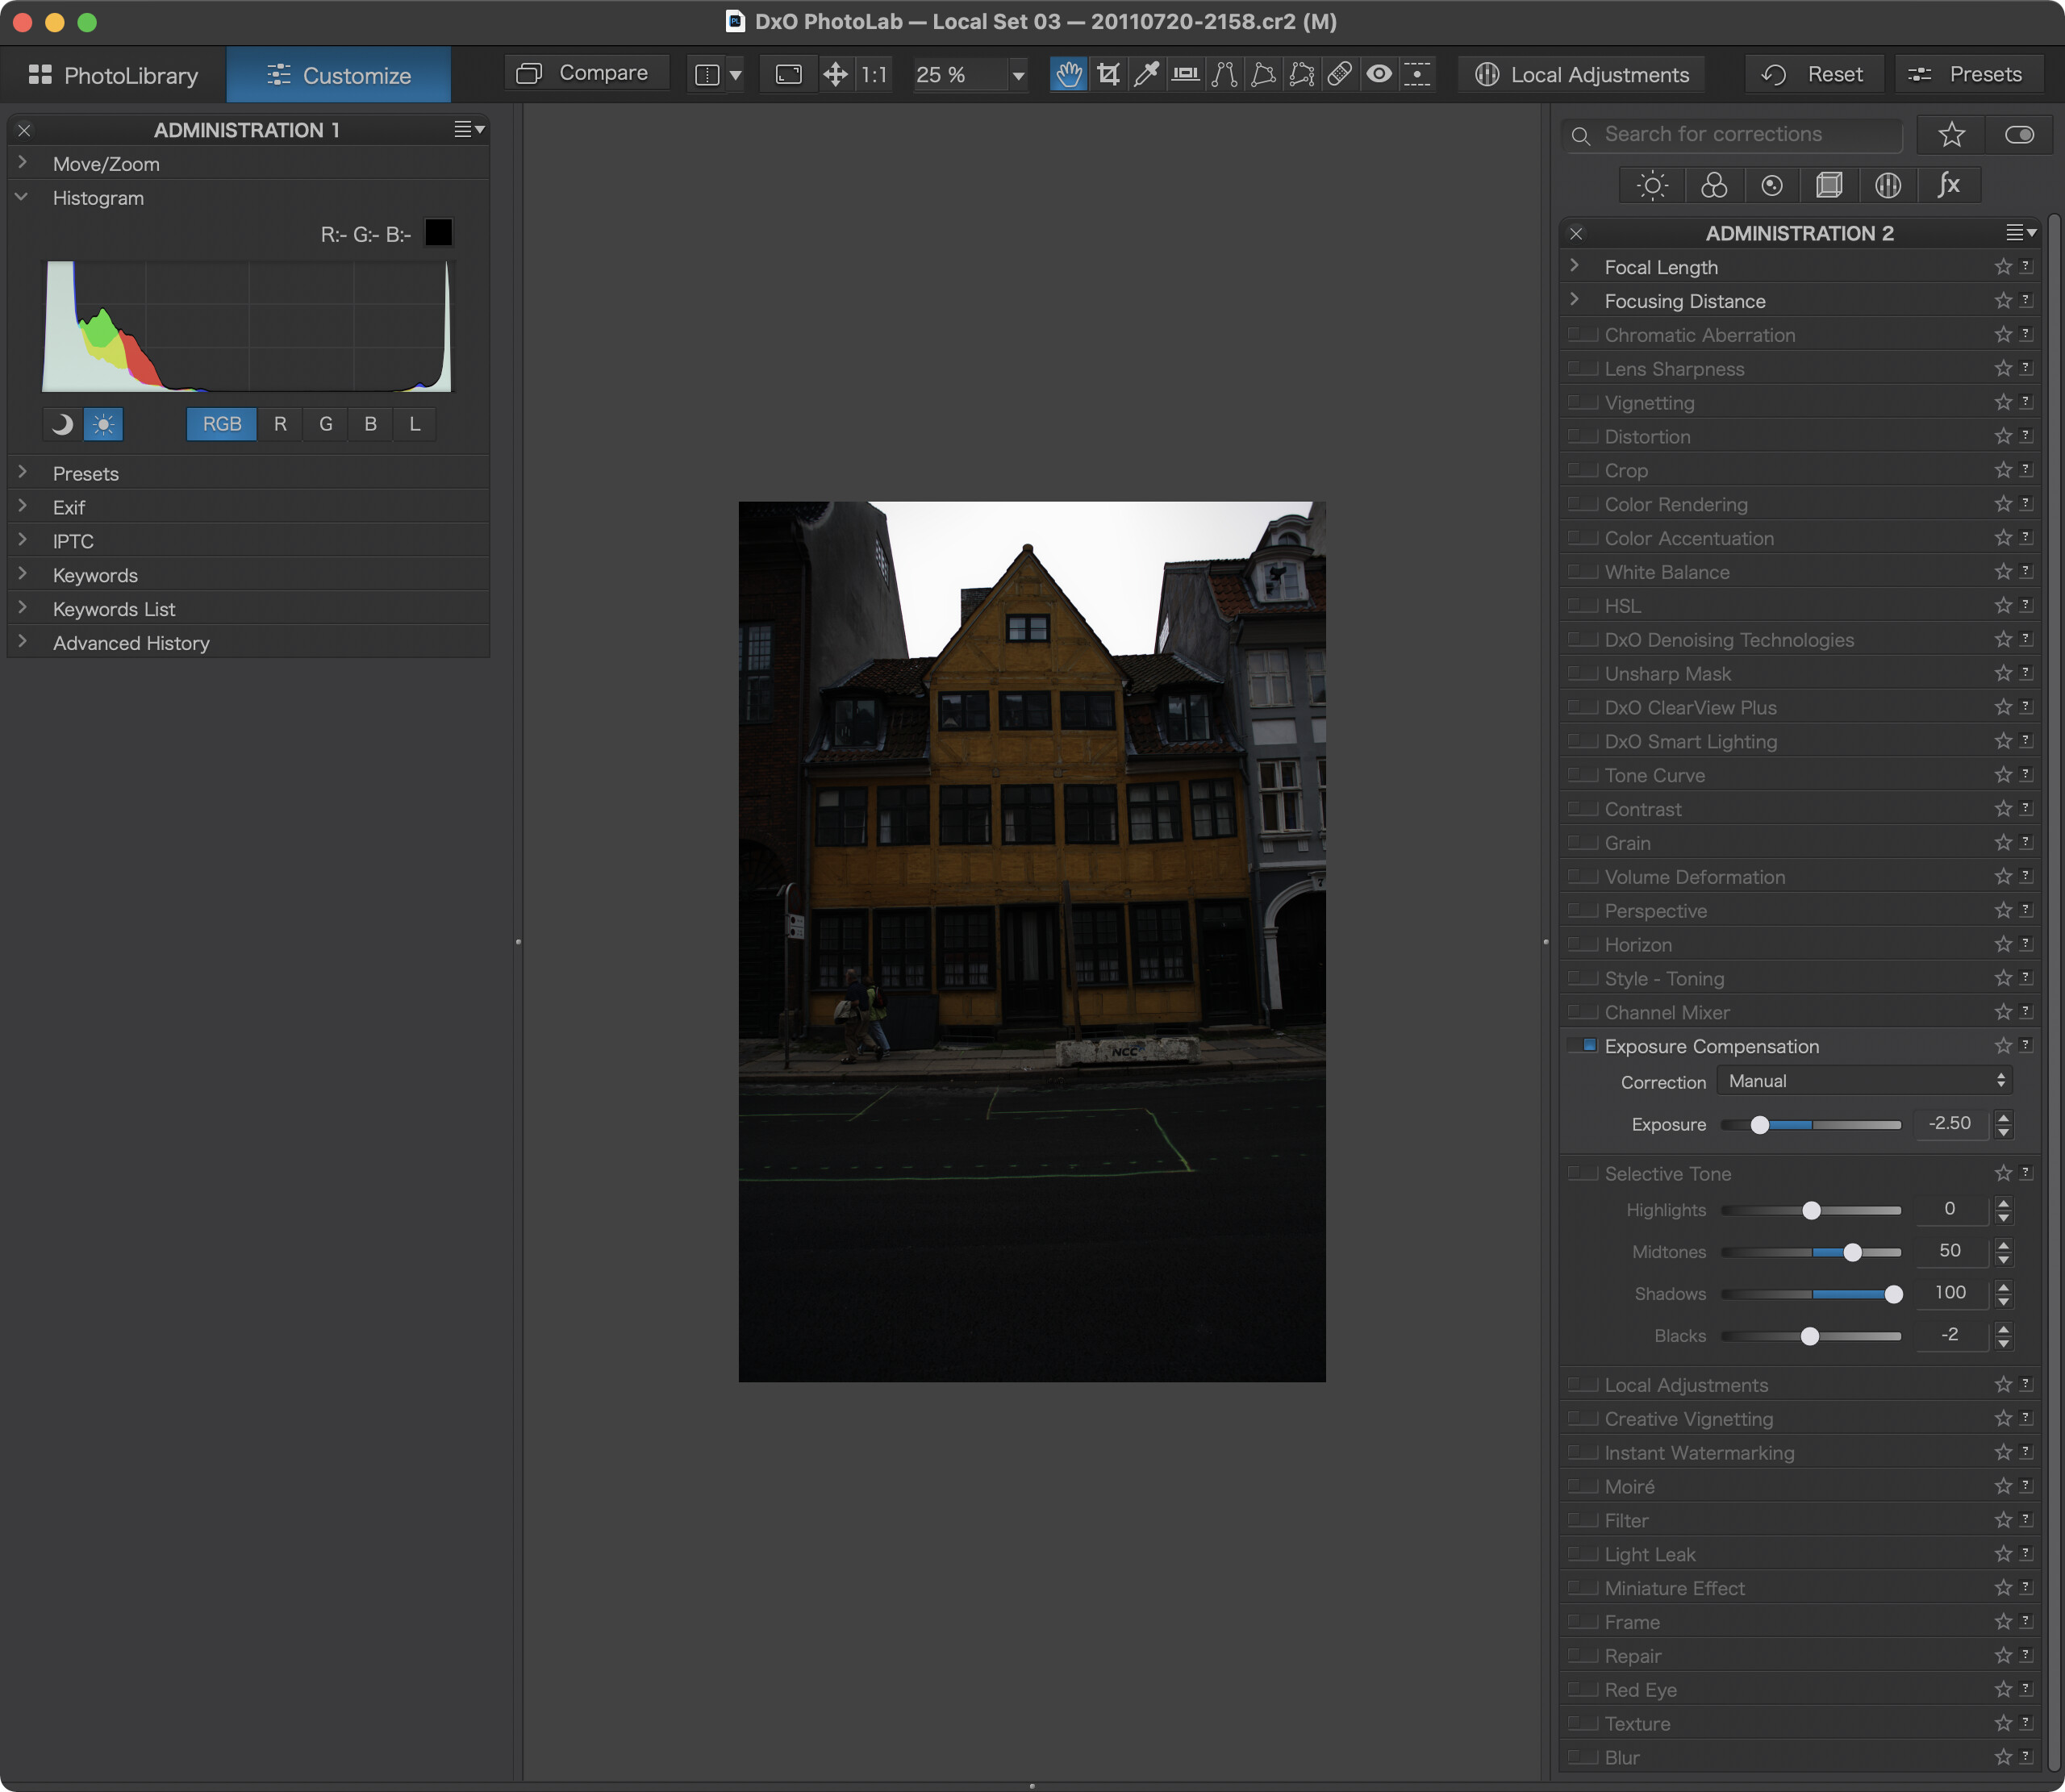
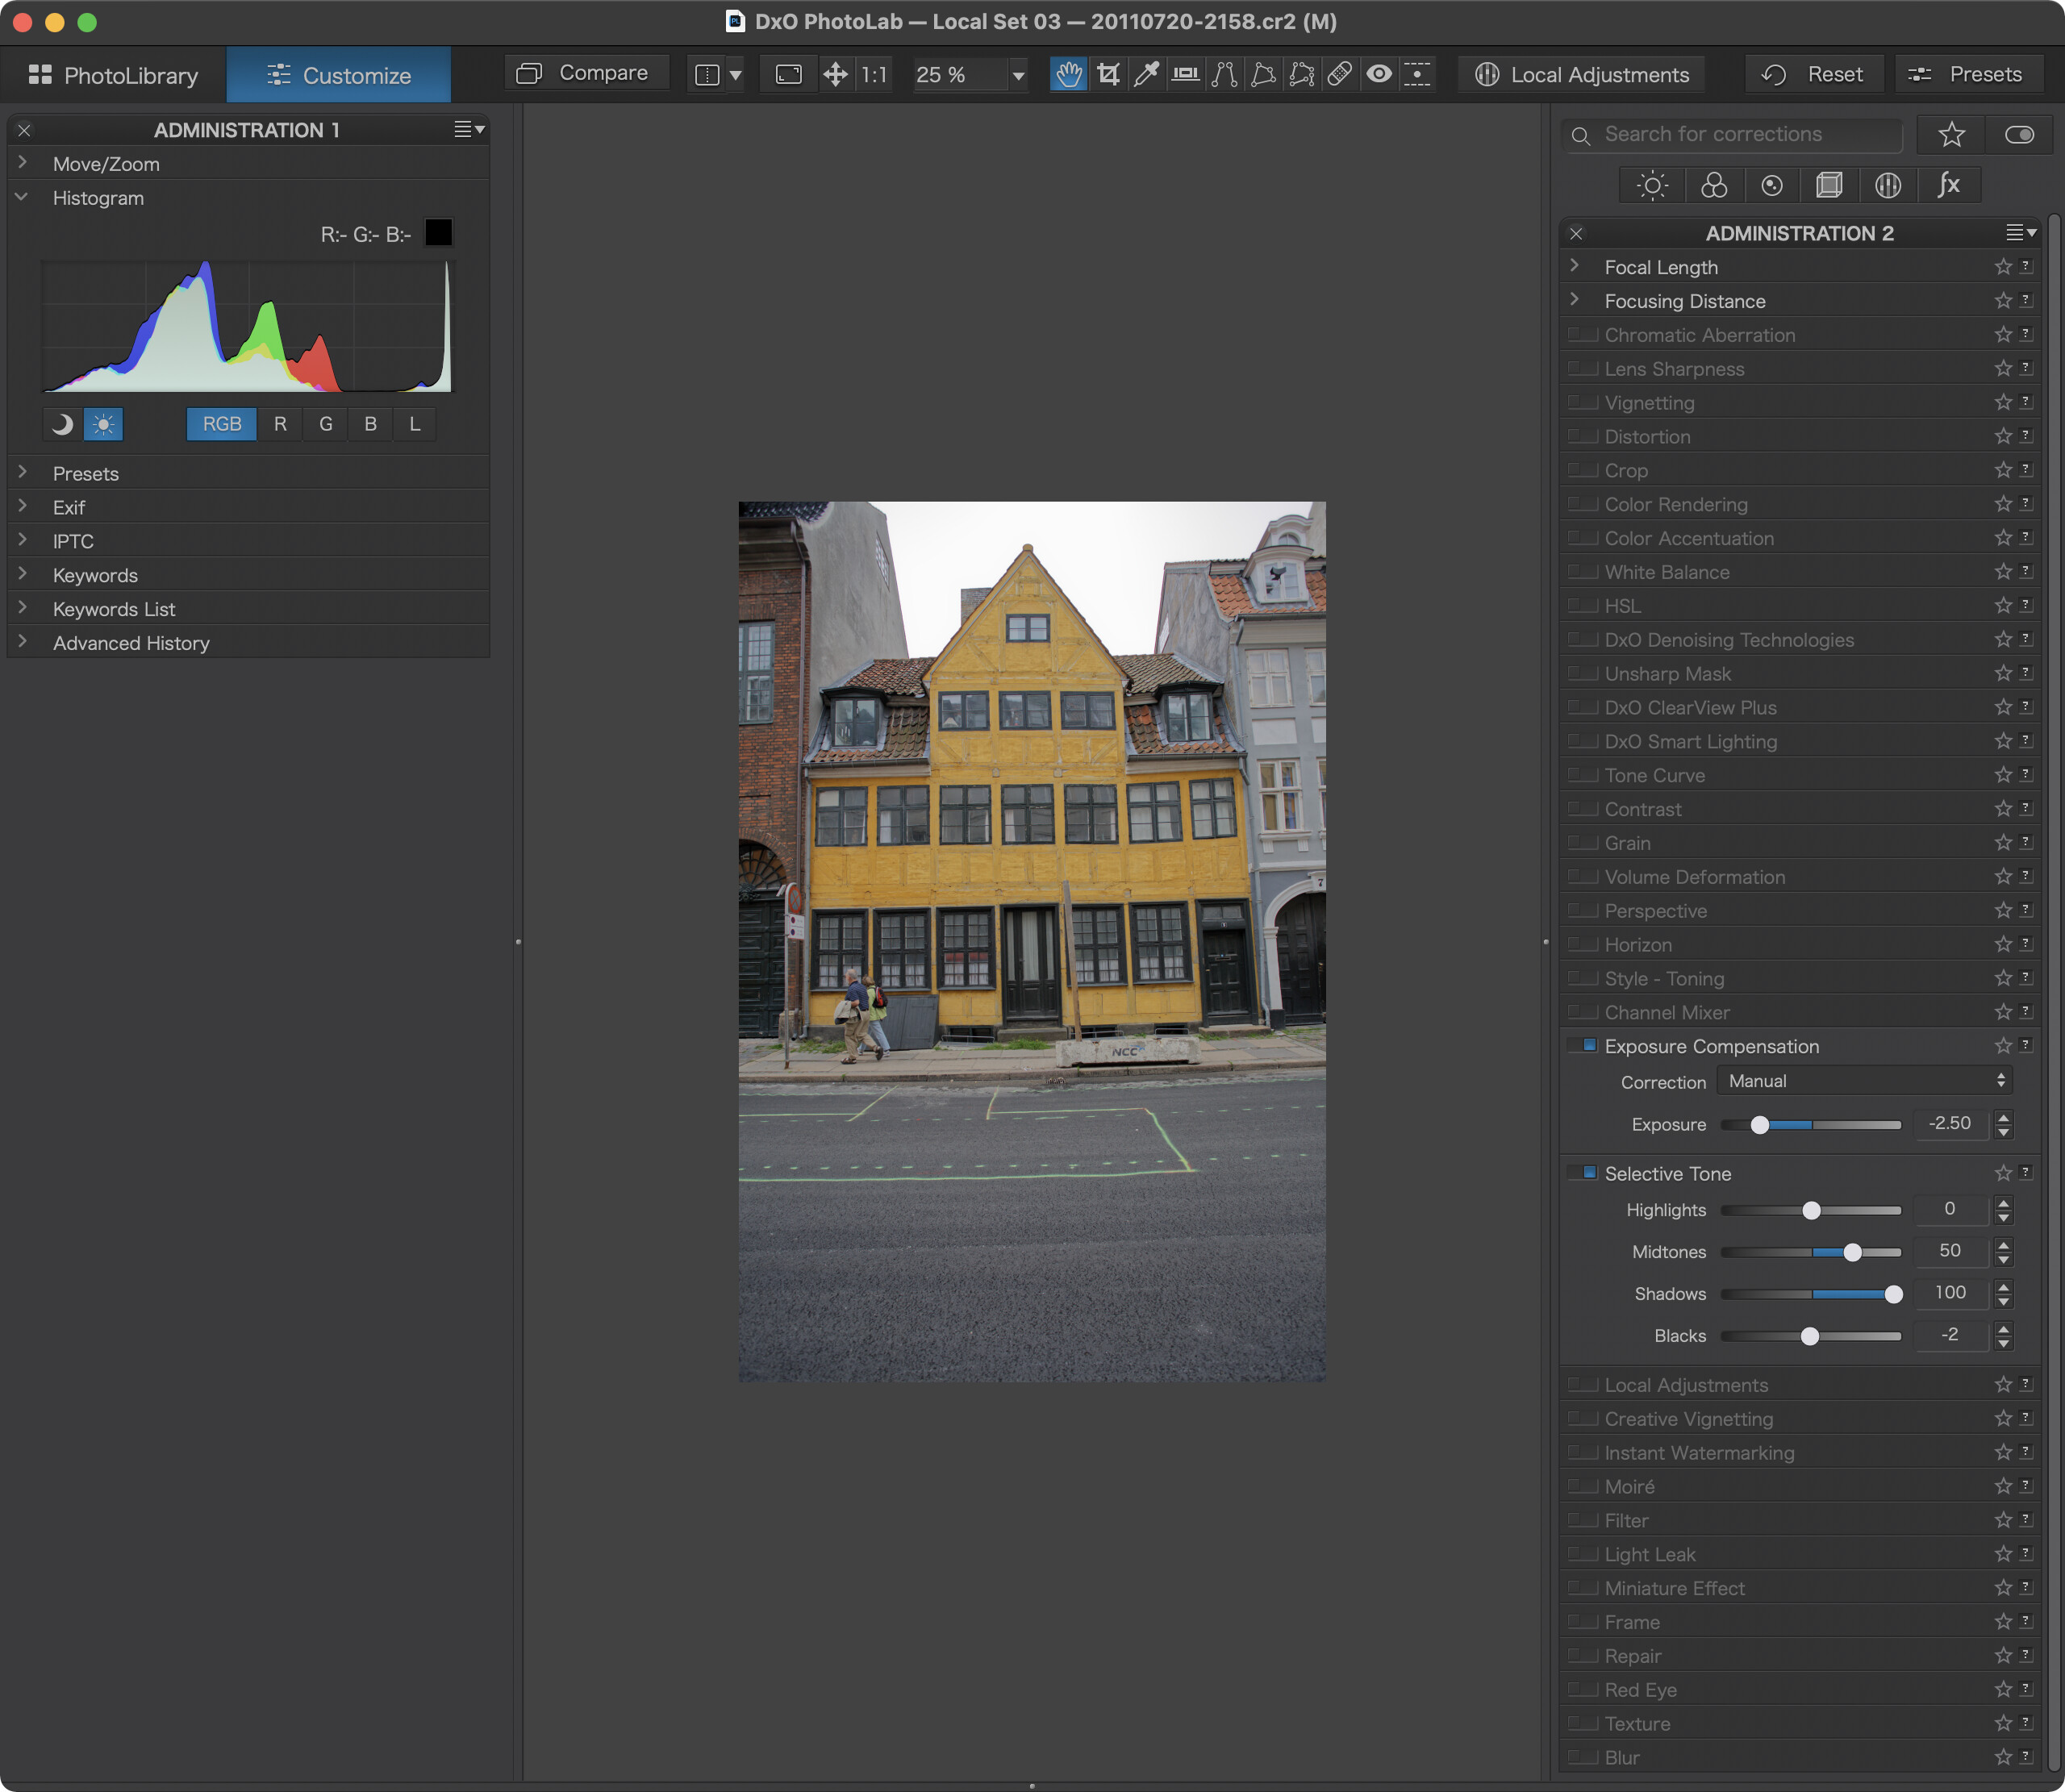
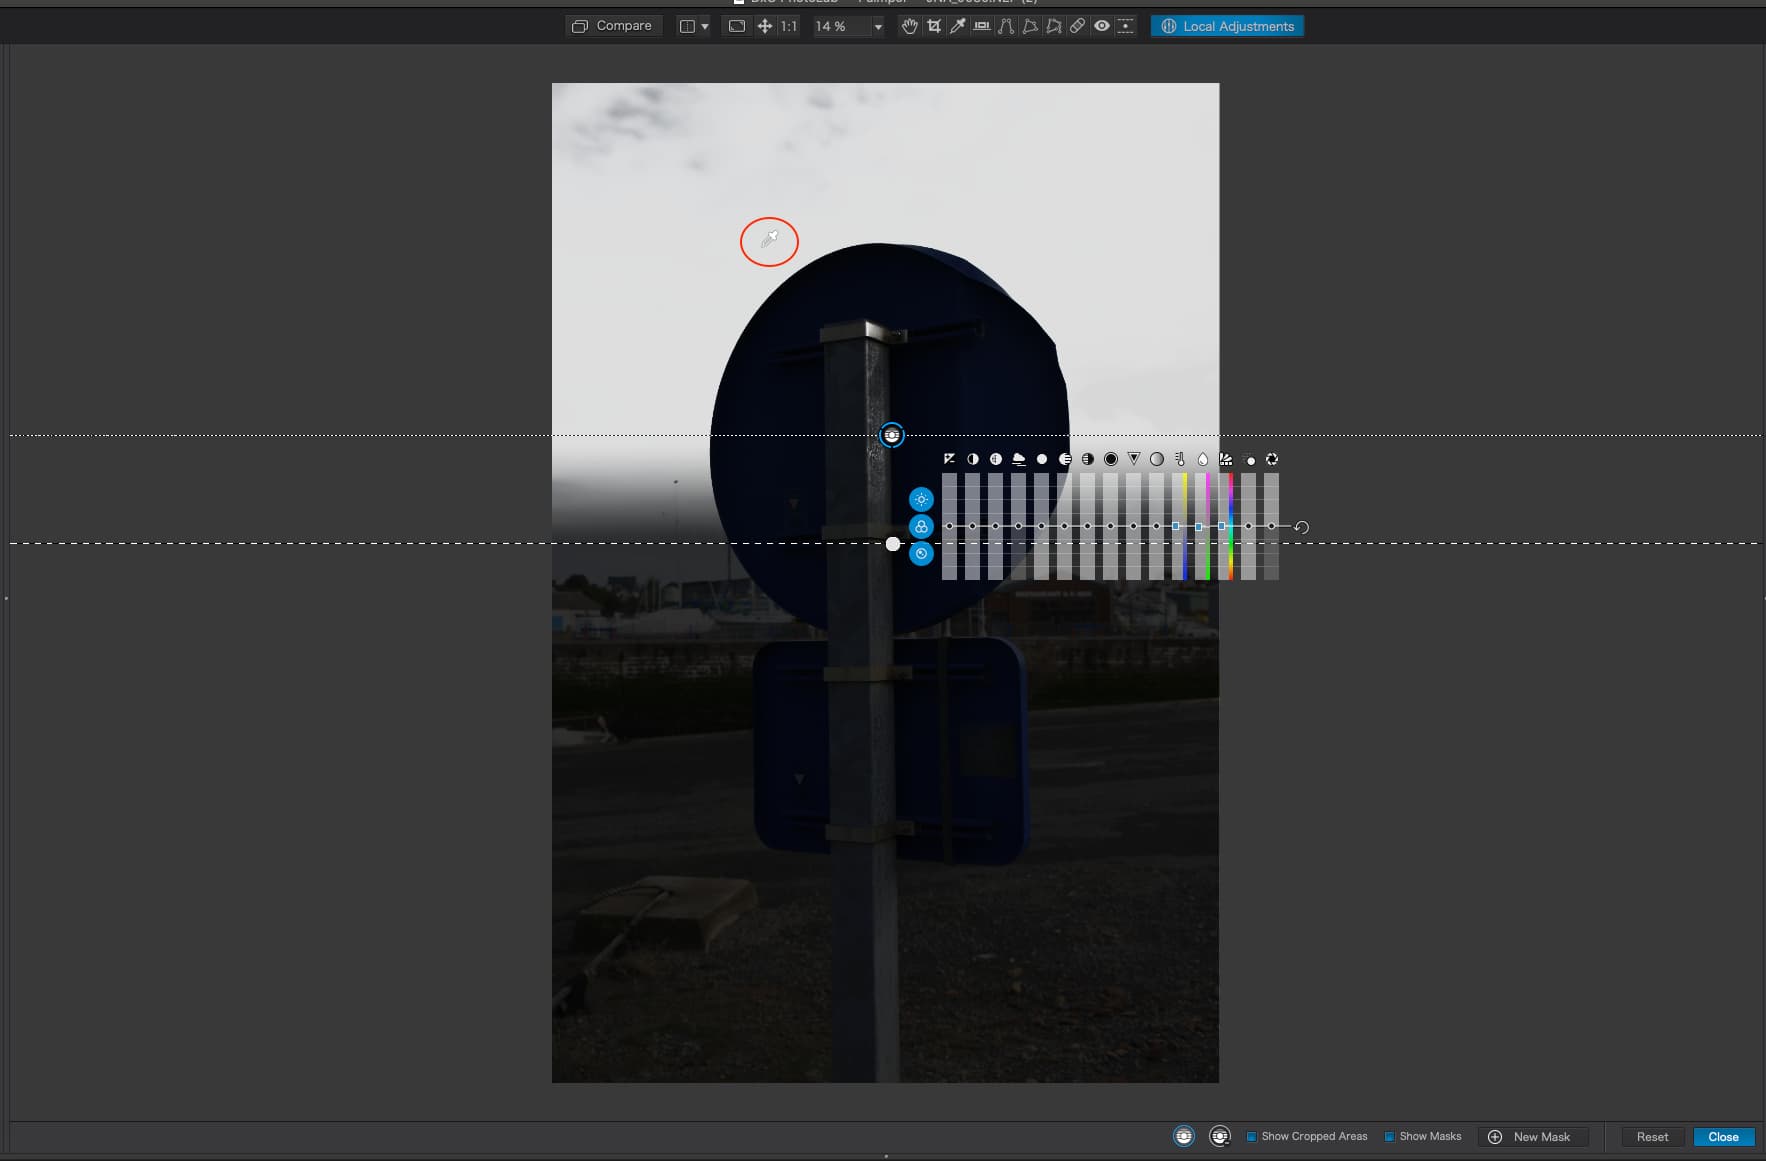
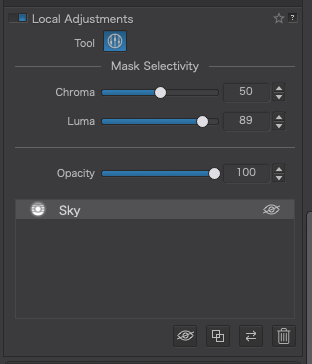
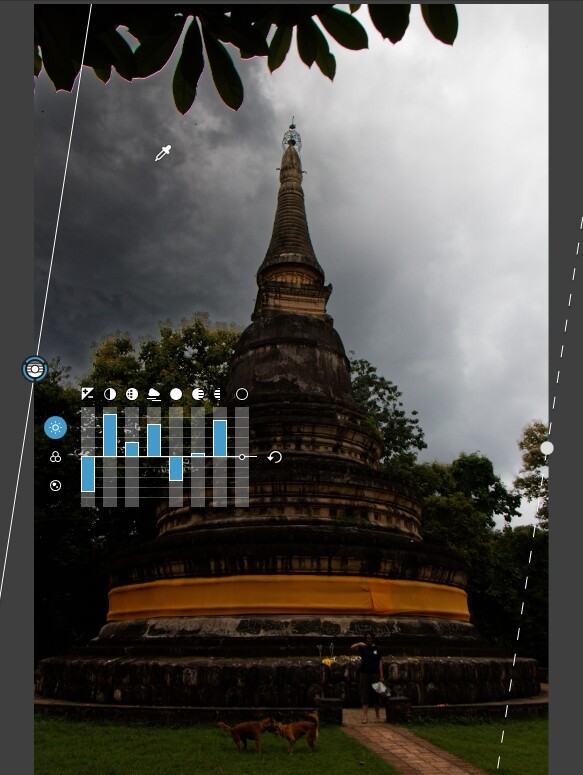
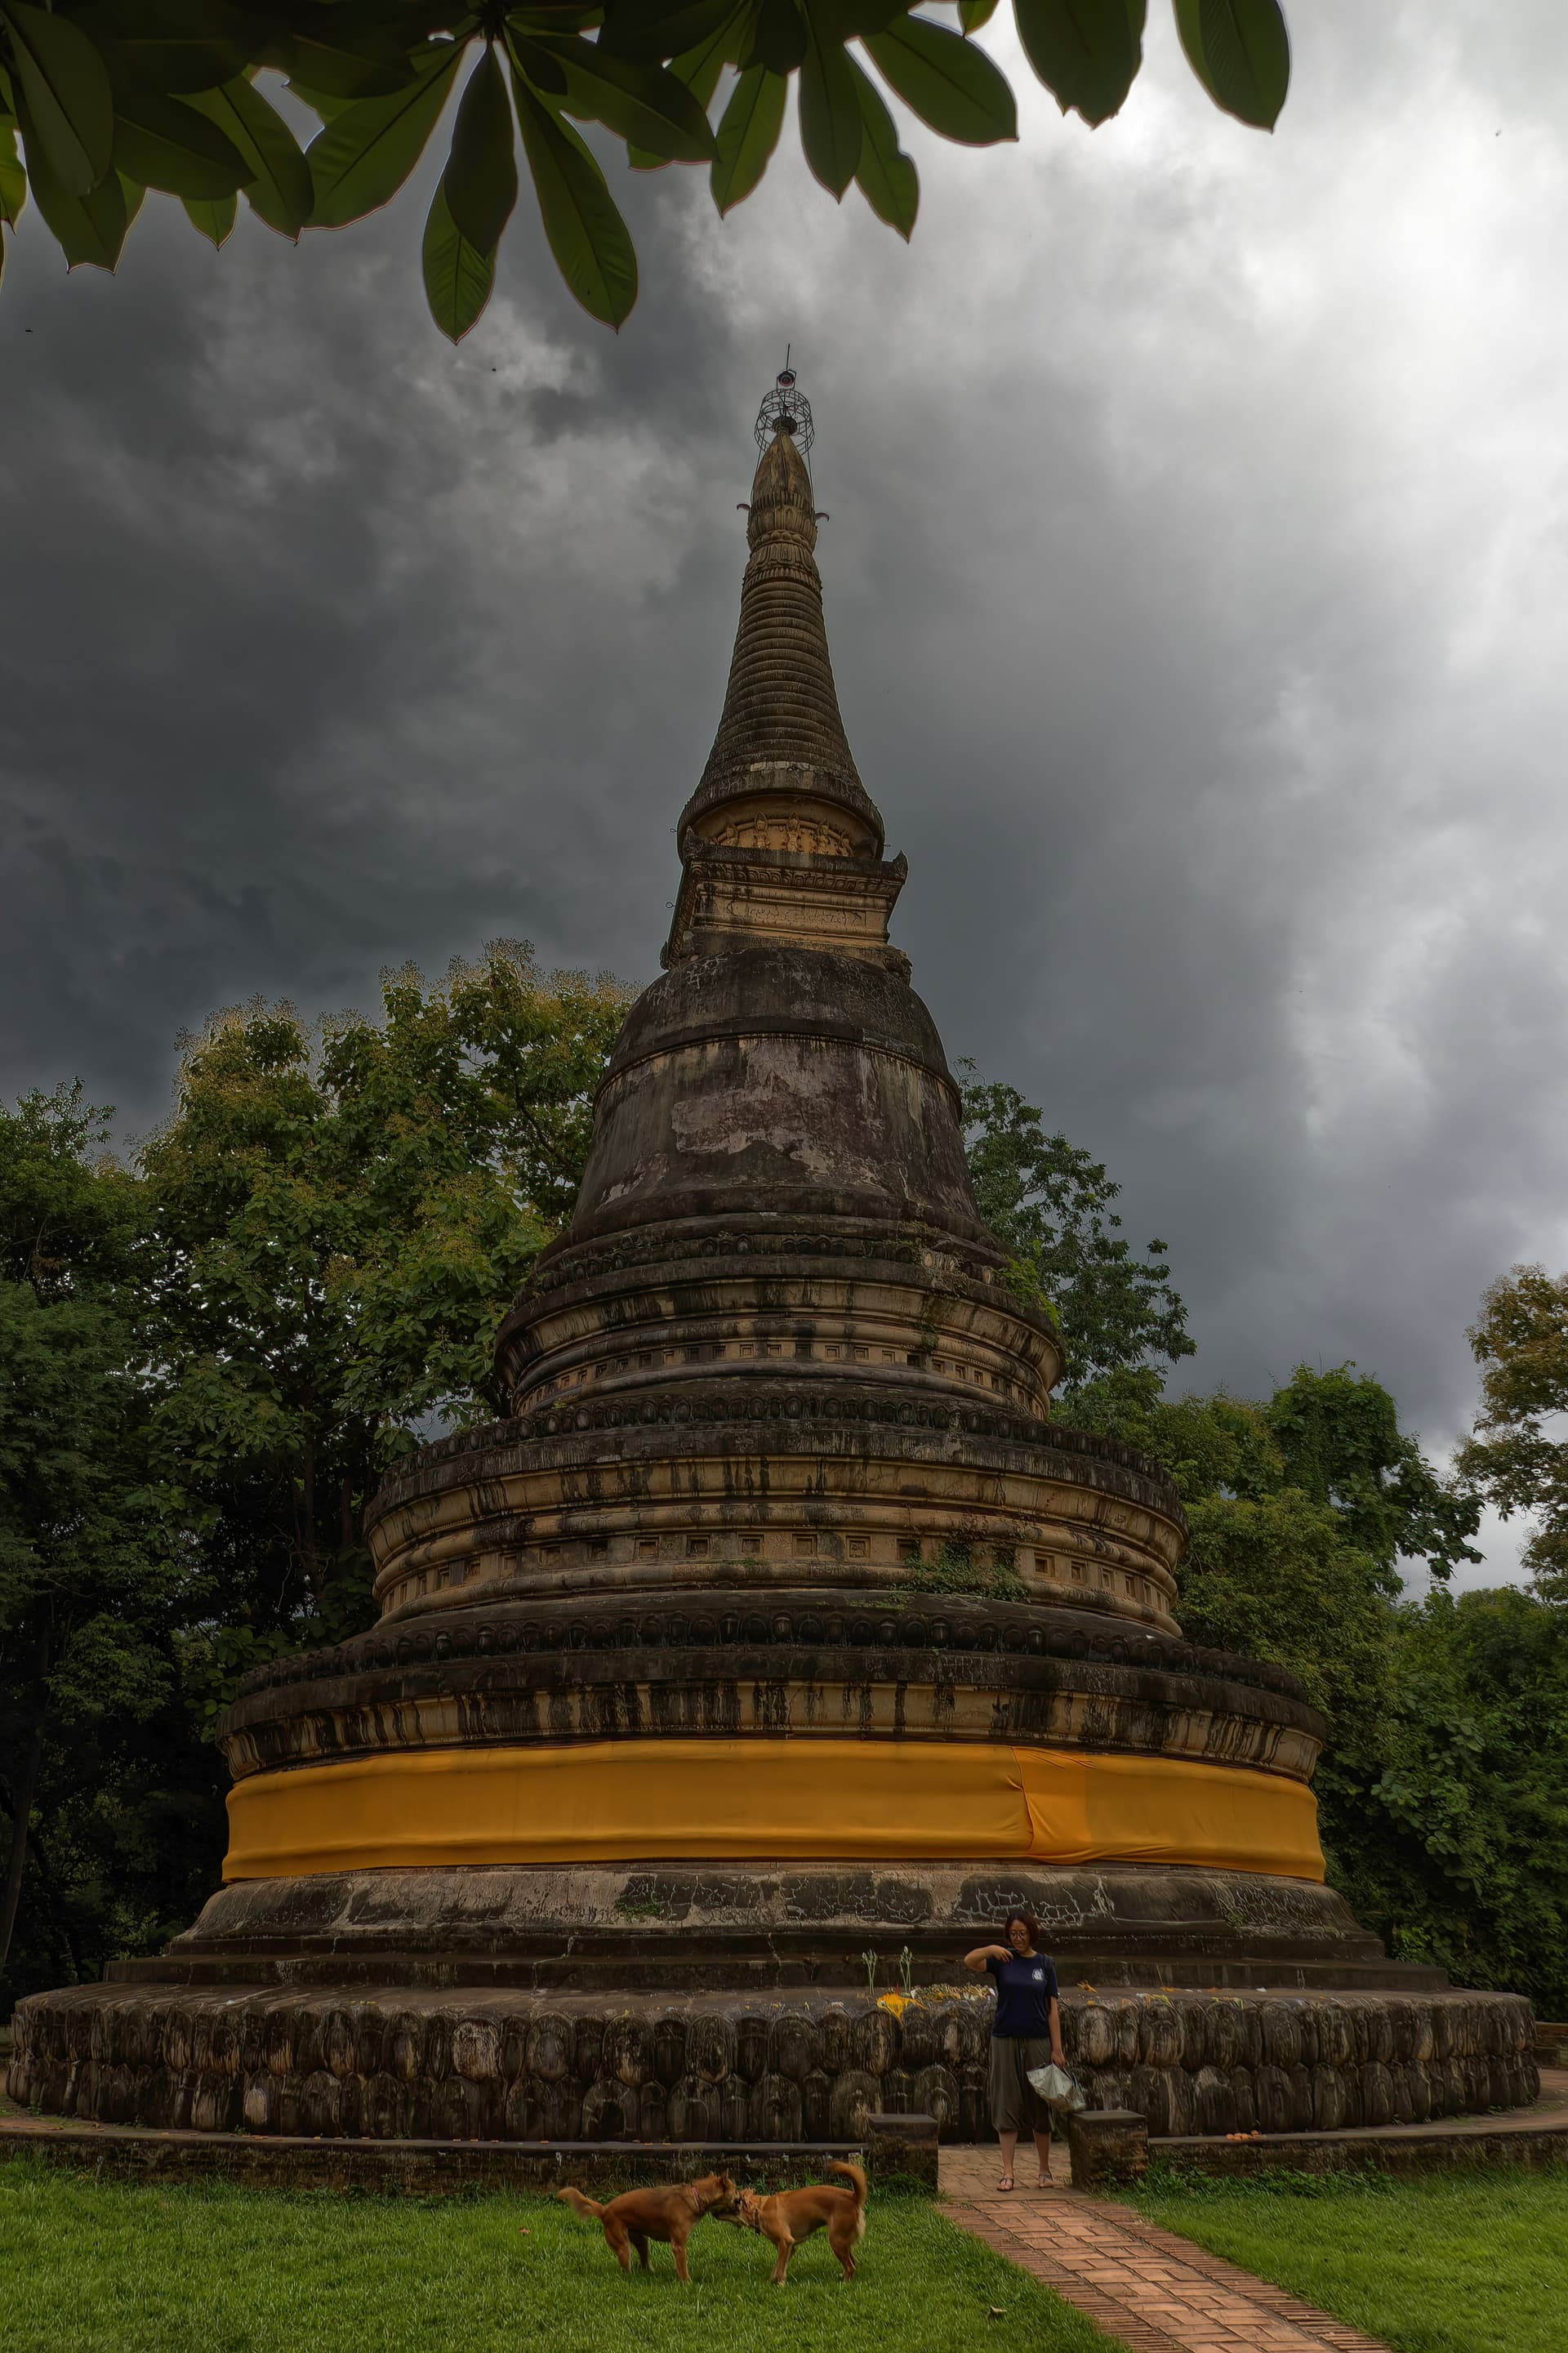
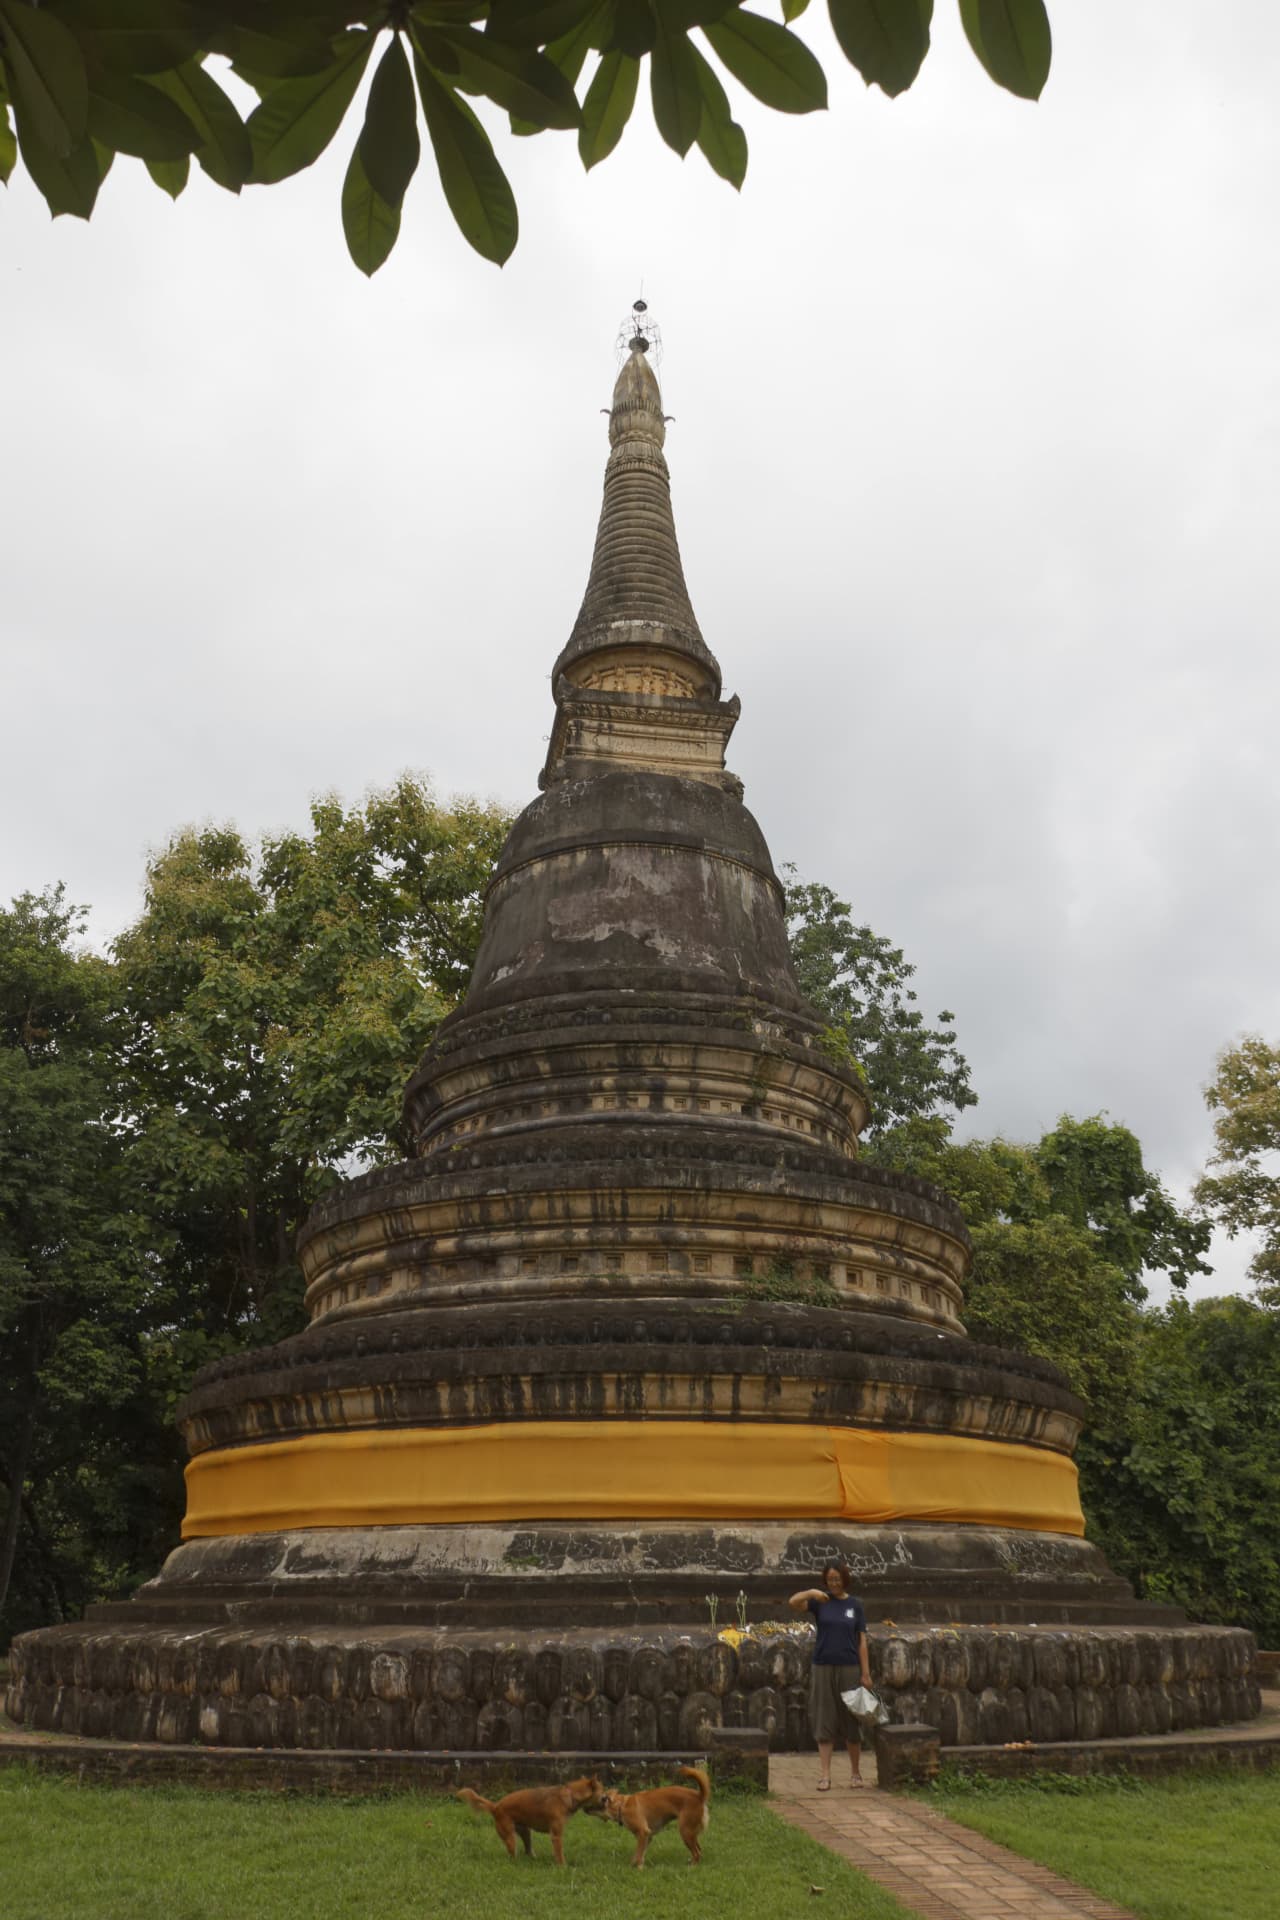
Addendum: The range of selective tone correction is limited indeed, but it can be worked around easily as you can see in the screenshots below. They still document a workaround though…
No Correction: Black sky from overexposure warning
While there is no overexposure warning, the sky is featureless because a) weather was overcast and b) the sky is overexposed. Again, we can’t bring back something that is not there…
I then went on to add just a bit of global Fine Contrast and Highlights Fine Contrast, just as I would have done even if the sky didn’t need “recovering”…
This Control Lines tool has really changed the whole game for me. It provides such a fine level of control of what does and doesn’t get corrected - far more than Control Points did.
As we see from the examples above, we can use available tools to work around the shortcomings of the selective tone tool…be it with local adjustments or by “blitz&restore”
When I started digital darkrooming 20something years ago, I often used selective tone tools in Lightroom and less so in OpticsPro. Nowadays, I can mostly do without STT.
Before we judge LR’s recovery modes as better then what DxO cooked up in selective tone , and if you have filmpack elite selective contrast combination, i think we need to understand what LR 's highlightslider does inside the image.
Only lumination? Auto recovery by recreating details? A combination of contrast(detail edge-ing) and lumination?
To understand dxo’s highlightblinkies you must know its LRGB channel driven.
Lumination as in white over exposure blunt too much photon’s.
Red channel saturation, green channel saturation, blue channel saturation.
Colorsaturation you can handle in colorsection , saturation protection, color profiles.
And now even better in local adjustments upoint technology .as @Joanna shows in controlpoints and controllines due the chroma part in the selector.
So lumination part of highlight blown section is basicly all three rgb channels even high saturated.
So by turning down chroma selection to zero you should get a adjustable (in selectivity) highlightslider if you point the eyedropper to a blown area slide the luminosity selection slider upwards until you selected the desired range of lumination, brightnes.
Turn down exposure done.
Why i think of this?
Luminosity masking is a selective tone technique.
So dxo has the tool build in right?
If they make a highlight slider in selective tone with a bandwidth selector and default coupled on the contrast counter part i think it would work.
Technically correct, although most people tend to call ‘recover highlights’ what happens when the default look clips too much of the recorded highlight data. That is mostly happening with LR. It presents a default starting point with quite a bit blown out, and you can then lower a slider to use more data and apply local contrast at the same time. This makes it easy if that is what you want. It makes LR/ACR absolutely useless if it isn’t what you want.
I find that I have way less issues (or need to mess) with the highlights in PL compared to LR.
When I do use the highlight slider in LR, i get more and more annoyed with the hue shifts it tends to cause.
Setting exposure and contrast with some form of smart lighting on (the default ) gets me where I want to be almost all of the times. Tweaking the highlight contrast slider a bit if it doesn’t.
In the rare cases where it affects parts of an image where I don’t want it, the masking is there to control it way easier then masking in LR tends to be.
These days I do most of my lighting and color edits in Darktable, starting from a DxO DNG. But there the workflow is also completely different compared to LR . Everyone coming from LR/ACR looking for a replacement thinks 'why is it not just as easy ’ while everyone working with it for some time can’t go without it. Sort of the same as the PL tools. I’d you manage to let go of things you are used to in LR (hard, and no hard feelings if you don’t want to) the PL tools can click in your head and suddenly everything becomes doable without thinking about it.
I’ve tried a lot of raw editing processing software . Luminar stuff , ACDSee , Photolab, Rawtherapee , Darktable… None of them has a highlight slider like LR/ACR. (C1 kinda does ). This makes it hard to switch software if you are used to using it a lot , but doesn’t make all those alternatives bad. They just require a different workflow in your head.
And like I said , completely understandable if that isn’t something worth investing your time in. Specially if you are a pro and the quicker you can do your edits the better.
But I haven’t used ACR for a loooong time and never used Lightroom. I still have the photo subscription for Adobe to get access to Photoshop for plugin support and certain actions I do quicker in PS. But I don’t miss the LR/ACR controls one bit. I still have access to them , but it never occurred to me to use them since PL and Darktable clicked in my head.
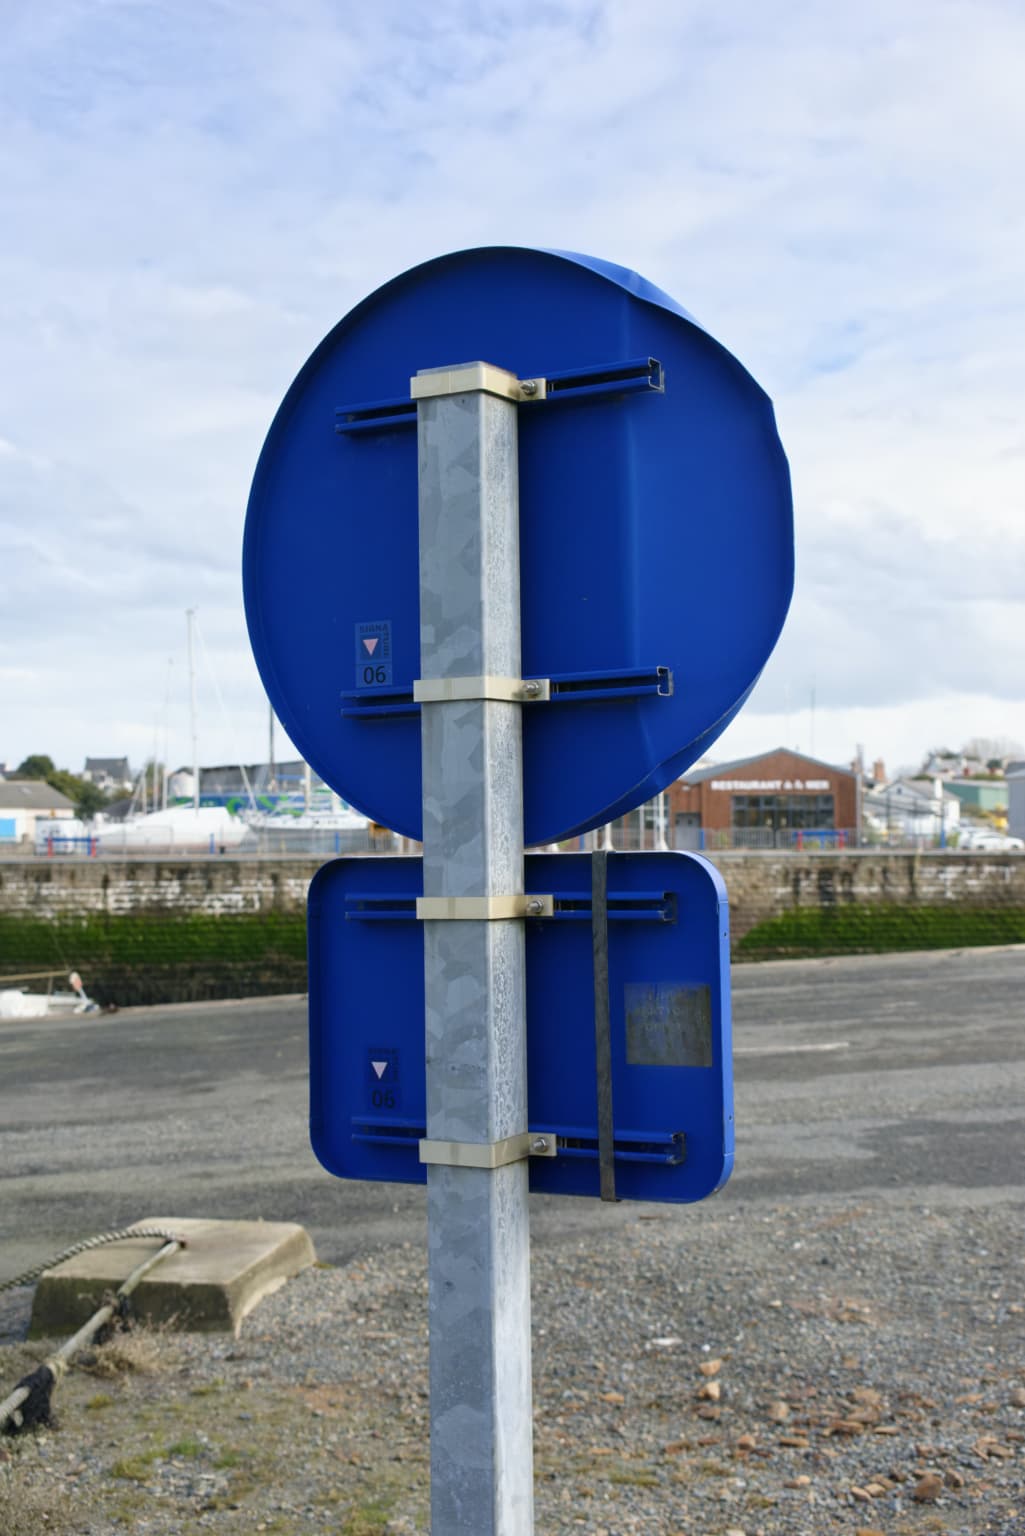
Am exploring the capabilities of the correction line method. I think its rather ‘tough’ understanding, but am am trying getting the hang of it. Your views, criticism, and advises are welcome as always.
I tried following some directives by Joanna and looked at the progressing of Mike.
What seemed being a ‘lost’ photo, now turned into something quite usable. Sure, I done some slight ‘HDR’ afterwards with other soft (earlier flow in working and reluctant getting rid of that…).
CR2 and end result in attachment. Thanks in advance.
Hi Jeroen,
I’ll give a try tomorrow. My only comments are in my experience adding micro contrast and clear view to clouds give very artificial result. I’d rather decrease micro contrast on clouds. You have also bad artifacts on the trees in the bottom left. You may have pushed too
Far the sliders ?
Regards
Indeed. They needed using with lots of discretion. On the other hand, the additional fine contrast sliders that come with FilmPack are a whole different game and very sophisticated