Have you tried the highlight contrast slders instead of the levels one?
Typically, PL creates its histogram not from the RAW file and not from its internal image in AdobeRGB, but from your monitor’s ICC profile. Yes, this is crazy. The RGB values displayed under the histogram are also from your monitor’s color space.
In Preferences, you can change it so that PL assumes you have a monitor calibrated for AdobeRGB. If you do this, your histogram and clipping might closer to what the other programs show. Your colors may be all screwed up, though, unless you have a high-end monitor and it truly needs no calibration to display AdobeRGB.
Of course, there is no standard for the clipping indicators; clipping might be indicated only where a pixel channel is at the maximum value or it might be where it is within some distance of the maximum.
I believe these are part of FilmPack. If you don’t need all the different film renderings, then you get to pay $79 just for a couple of features that should be a standard part of an “elite” raw processor.
3 Likes
I can’t find this in the DxO preferences. And I have a properly calibrated monitor, not Adobe RGB.
Whatever your opinion on value for money, I would/could not work without FilmPack; it has so much more than just a couple of sliders, even if you ignore the fil renderings.
Preferences -> Display -> ICC Profile Used for Display (normally set to Current Profile of the Display Device).
Having a calibrated monitor makes absolutely no difference. The histogram is based on your choice for this preference. Working from the same image on two different (calibrated) monitors will give you two different histograms and two different sets of clipping areas.
If you set the preference to use AdobeRGB, then the histogram will be displayed the same for everyone. The colors will be completely screwed up unless you actually have a monitor that displays AdobeRGB without needing and ICC adjustments.
…DPL (Mac) has no options for colour management (yet) except for what you get in the output dialogs.
And then there is this info too: DXO on calibrated screen EIZO
Hi geno,
Yes, I have, and it only makes the blown out whites, Grey. And I’d posit that is because the ‘raw conversion’ is already done by the time I get to use U-Point.
What I have discovered is that if I turn OFF Exposure Compensation, and turn OFF Smart Lighting, I can get an image that I get much better results using Selective Tone, Contrast and Tone Curve.
So far so good.
I am not trying to retrieve badly under or overexposed shots. I’ve already deleted them.
Currently I am shooting about 1 stop or so ‘under’ from what I’d normally use.
We have really poor weather, and much smoke from bushfires at the moment, so I can’t get out and try with a ‘normal’ exposure in bright sunlight, as, well, we don’t have any 
I think I’m going to write tech support and find out if when I turn off Exp Control and Smart Lighting, are they completely off. Or do they automatically play a part in image conversion.
The good news is that the Lens Sharpeness really does work a treat and the results are up to my expectations, so its worth perservering, until I can solve the highlights. *or just change my photo subject preferences. (joke)
1 Like
Hi mikerofoto,
I agree. The U-point or even Viveza only makes the ‘white’ areas grey, and doesn’t retrieve any lost highlight detail.
I guess the answer is the PL is excellent for many subjects, but there are some things that it has trouble dealing with.
I guess it can’t be all things to all subjects.
But I still maintain, that a single swipe on the "hightlights’ in Lightroom does retrieve much of the detail I am looking for.
Hi Joanne,
Thanks for the image and the screen dumps.
As we shoot completely different subject matter, there is not a direct comparison, and I accept that.
Your highlight ‘recovery’ on the horizon, is similar to my problem, but I’m generally frame filling a bird, such as a pied cormorant, or a Great Egret, and don’t want to just bring down the ‘overexposure’, but maintain feather detail. Hence my FRV often shows 2-3%.
I’m sure I saw Ilia Borg explain the amounts of highlight recovery possible, I must look it up again, and check the details. Bit hazy in mind and atmosphere here today.
You image does however help explain what I’ve currently been experimenting with, drop the exposure a stop or two, and then turn off both Smart Lighting and Exposure Correction and work with Selective Tone and the Tone Curve. Still lots to learn, but the results always look so promising in the remainder of the image, that I’m happy to travel along the leaning curve.
Thanks for the advice on reducing the exposure. Yes, that seems to be working for me short term. Problem I see is that it then limits my images to living in PL for ever and should I want to use another program I’ll have lots of badly underexposed images. As a refugee from Aperture, I am never again going to put all my eggs in one program basket.
All good.
Actually, that was not highlight recovery, it was just a case of “dimming” the specular highlight, which has no detail anyway.
My “system” of exposure control comes from many years experience with large format film cameras, shooting B&W negatives and trying to get 14 stops of exposure range down to 8 stops for printing in a darkroom.
The same principles of “dynamic range compression” apply to digital sensors, in order to get the best out of them. You should never need to recover highlights in a digital image - because there is simply no detail to recover.
The problem for a lot of digital photographers is that they don’t realise that a RAW image is intrinsically flat in tonality and very little headroom for highlights, but it does have a load of shadow detail available. Take my camera (Nikon D810) - it has 14 stops dynamic range at 100 ISO but… that range is split very unevenly, with 12 stops below a measured exposure and only 2 stops above.
The trick is to carefully analyse the capabilities of the sensor in your camera and shoot according to the results. When I shoot colour transparency film, with Fuji Velvia 100 film, I am strictly limited to 5 stops range (3 stops under and 2 stops over). For landscape, it’s a case of either using physical graduated filters on the bright areas or not bothering to take the shot.
When your camera takes a RAW image, it also embeds a jpeg preview in the file and it is this that you sometimes catch a glimpse of when DxO first opens an image. However, if you have set DxO to a default preset of no corrections, you can then see an image that appears to be under-exposed. This is not the truth. Because the file is a 12-14 bit image, it contains a great deal more detail than is immediately obvious without any corrections - most of which is in the shadow areas.
Take a look at a high dynamic range image in FRV and switch on the shadow detail boost, then try the highlight detail boost - this is where you discover whether or not you have detail that is recoverable. If any of the “warning lights” appear, you will not be able to recover that area. Anything that is not marked as out of range is a valid detailed image.
I know the temptation of letting the camera do all the work with things like automatic exposure but, as I found out to my cost, it cannot always be relied on and if I find myself with a high range subject, the first thing I do is to switch to manual exposure mode and spot metering.
Once you have ascertained the range of your sensor, it is a simple matter of setting the exposure compensation dial to the “above measured” range of your sensor, which is usually between +1⅓ and +2 stops and taking your exposure reading from the brightest part of the scene. In your case, that would be the white plumage on a bird. As long as you don’t change the direction you are shooting in too much, this exposure will be valid for most other shots taken at the same time. If you were to change from shooting with the light to shooting against it, then you would have to re-meter of course.
Your images may well end up looking dark when you open them in DxO but this is simply because you have not yet “compressed” the range into the limited 8 stops the monitor displays. It is not under-exposed!
No it doesn’t; see my last paragraph. Also, whichever software you use, the same principles apply. I have half a dozen apps that I show to students for them to compare and they all show the same results before making any adjustments. The difficulty is getting used to how the different software does its thing.
With a high range image, I always start with Smart Lighting, which does some very clever stuff to reduce the range and spread the histogram. Sometimes I need more than others, sometimes less, but it is a good starting point. I very rarely use exposure correction. Just as with wet printing negatives, it is more about selective contrast enhancement than it is about controlling exposure. I highly recommend the highlight and shadow contrast adjustments that you get with FilmPack.
But, first things first - get to know what your sensor’s range and start to use manual exposure mode more 

4 Likes
Good stuff you explained.
I second the filmpack contrast sliders.
That grey issue when recovering highlight is with the contrastslider highlight very good to control.
My lazy amateur set up.
1 my camera has idyn, it uses 1/3 2/3 3/3 stops ev underexposure measured from exposure reading and highlight detection. It also flatten contrast curve but only for soocjpeg.
So i practise the camera sees highlight which expand over the dynamic range of the sensor and start’s to underexpose in 3 steps. Effecting also my raw file… And only when i need it.
2 smart lighting is always on at 25% not more and i use the boxes to rase detailing in shadows and “spotlight” faces and objects and place one on the brightest spot in the image.
This sets my “dynamic range”
3 then i use centre weighted exposure compensation to give me the global exposure i want.
(smart lighting is keeping shadow and highlight inside the set bounderies when i lift or lower exposure comp.)
4 use both highlight sliders equaly in tone and contrast to adjust highlight spots, more contrast bring in detail but also risk of spotting, smearing and less contrast is smooting the bright area.
Same for midtones and shadows.
5 microcontrast, slider or clearview? Depends on the image. Sometimes i use controlpoints for selective clearview adding to add selective detailing due microcontrast.
6 tone curve, works great as blackpoint retrieval. I have a image( amfibi in water) around here were clearview doesn’t cut it and the dehaze isn’t enough. With tonecurve and clearview i get a good result.
And the clipping blinkies sun and moon are saturation warnings not only lumination warning so when a color is saturated but stil in details ok it stil goes flashing. (not something i would want and histogram is showing the srgb colorspace not the raw data which can be distracting.)
There is a strange thing in histogram when 255 is hit it shows a 0 -7 after that random.
Final, contrast and saturation and vibrance are my " punch" pop tools and i am playing with some profiles made for my camera but the generic one is less pushed so the more saturated images with more tone curve are often hit the clipping warnings.
Peter
1 Like
Hi m9k,
Ha! guess we will have to wait that little bit longer for some simple highlight recovery slider.
"I don’t get this and it’s not in my workflow to ‘’first lower exposure to recover highlights and then mess with I don’t know what to recover the rest of the image’’.
Me too.
Hello Joanna,
Thanks for the lecture, your point on no headroom is of course correct. Don’t think I was implying otherwise.
My point is that short of underexposing, I’m not going to get from PL any highlight recovery. FRV shows plenty of highlight recovery available.
No warning lights.
If I turn off Smart Light, I am certainly getting a much flatter, and therefore manageble file.
My life is not geared around spending lots of time rescueing the impossible images. If I can recover the necessary detail in the highlights, bring out the best of the dark feather detail, in Lr, then it seems to me, that is where I’ll continue to work.
My lighting setup is pretty easy. Bright sun if I can get it, Cloudy if I have to, and go home once the shutter speed drops off the handholdable. Life is too short to polish bad apples.
All good.
1 Like
Hi Peter,
Thanks for the hints on using the micro. I’m quite new to PL, and wanted to get my head around the issues I face with my images. When PL gets it right, it superb. Its the differences, I see when I encounter some washed highlights that is frustrating me.
If I run the nef through RawPower, I’m about to export a tiff with plenty of recovered detail.
I was hoping to find a simple solution in PL make a preset and live happily ever after.
But then people have been known to call me Peter Pan. 
All good.
When i am home i will search for some threads i posted about highlights exposure detailing and such.
I a kind of a techy and sink my teeth in a problem experimenting and ive hit some walls in the histograms readouts regarding the clipping warnings, how the prime does work with the automated “magic wants” . The behaviour under the hood so to speak.
But the filmpack extra’s does help alot in controling your rawfile.
( iam not use or used lightroom so don’t know if it’s better.)
Back to highlight exposure and such i have some examples who shows for you to get the max out PL.
(need to gather/collect them so need some time.)
Peter
Highlight recovery… sounds like an oxymoron. In most cases, we do not recover highlights but fix whatever the processing/presets have messed up…
I often find that the DxO Standard preset produces images that show blown highlights, while data in the raw file are perfectly okay as seen in RawDigger.
Changing colour rendition can greatly improve things. Try the setting with gamma 2.2 and see what you can get back, unless the highlights are grossly overexposed, in this case, highlights are simply dead!
Absolutely, I was really upset about the standard setting, too. Messed up skin tones, way too hard contrast and punchy colours. The first thing I did in PL was to create a “flat” preset.
Ok, here’s a chance to test Adobe (or whatever) against PhotoLab. I find many photographers are unwilling to share RAW images, so I will donate a RAW file for people to play with. It has clearly blown highlights, but it also has a lot of highlight detail near the blown out area. How well can your program recover this detail?
I have PL3 and Adobe Camera RAW (ACR) CS6, so that’s what I will contribute.
The original RAW is on my Google Drive at:
NOTE: If you arrive at this thread some weeks from now, the file may no longer be there.
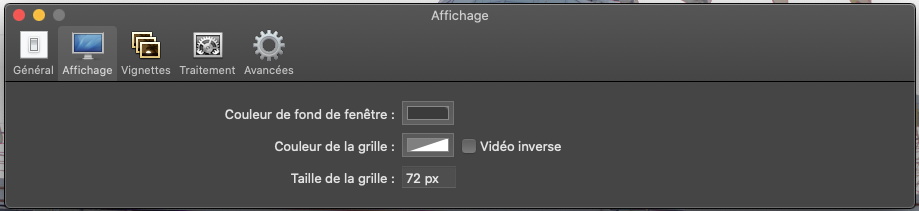
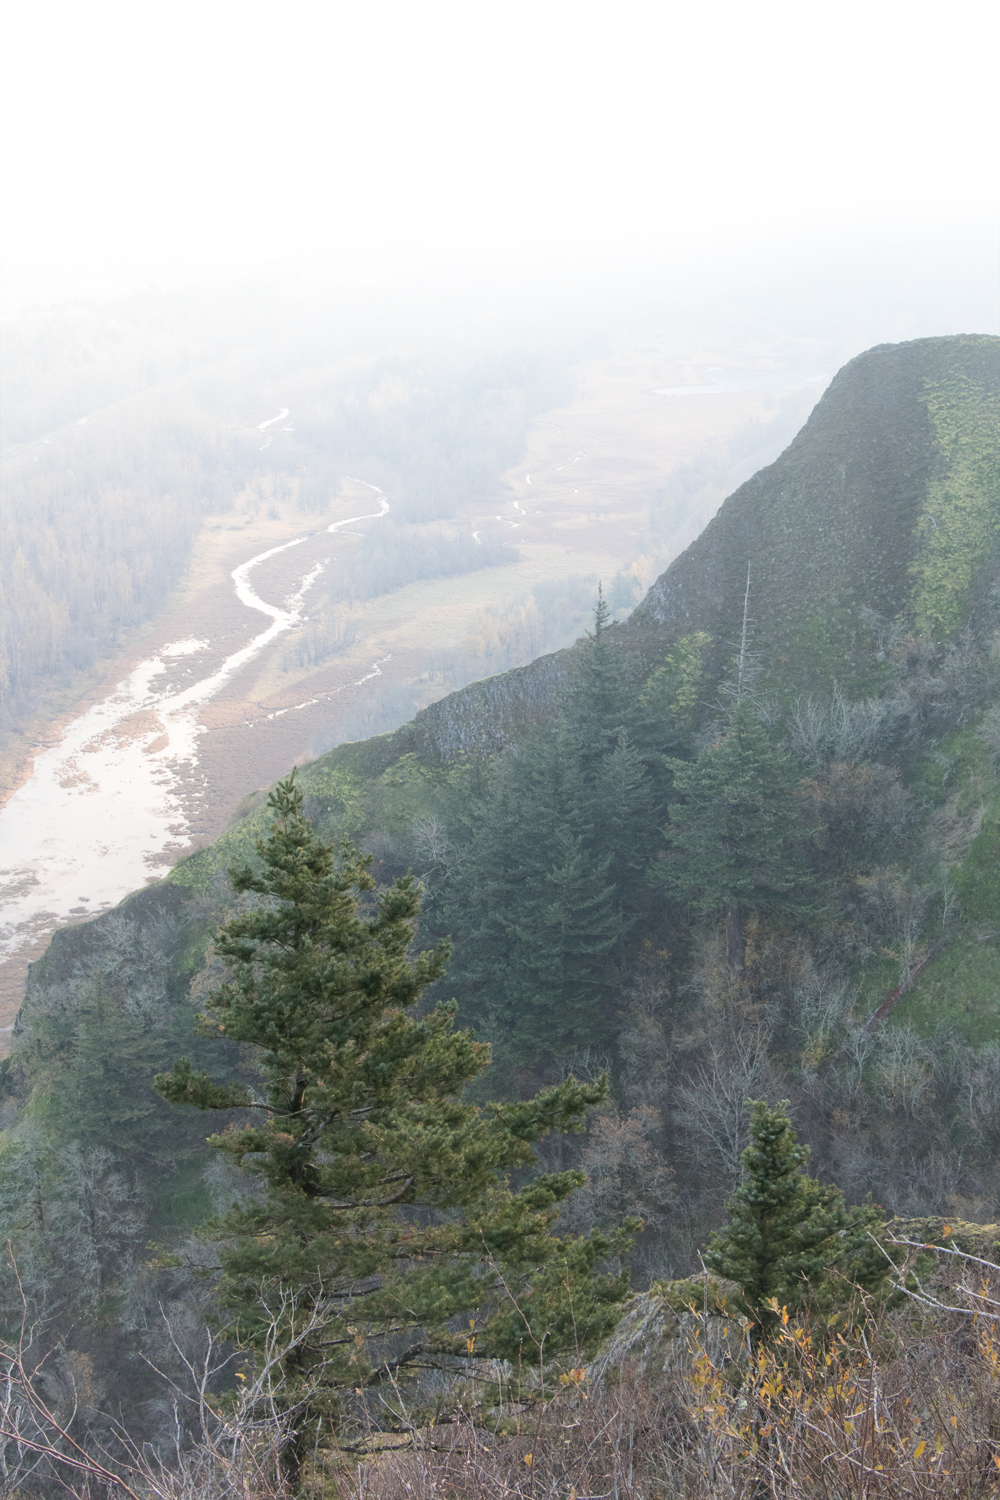
NOTE: I didn’t pick this because it’s a pretty image. I picked it because there are details in the misty horizon that are tough to bring out.
On PL3, my default view enables default lens corrections, vignetting, noise reduction and chromatic aberrations. The rendering is Generic: Neutral colors, neutral tonality v2. Everything else is disabled.
On ACR, the default sharpening and lens correction is enabled. Everything else is at its default value.
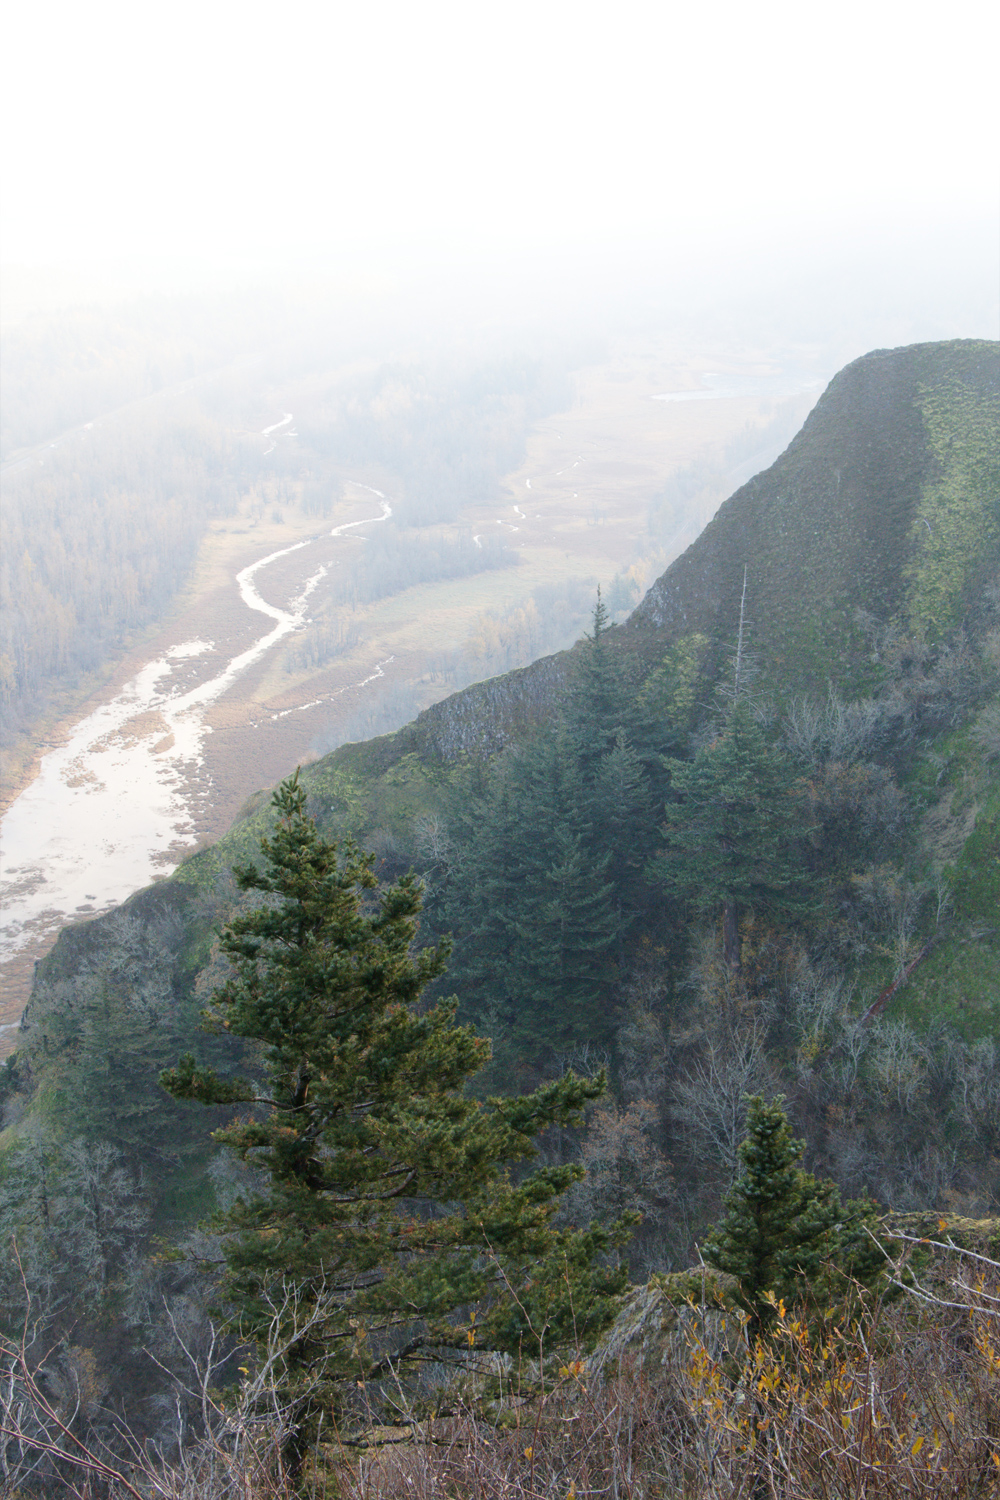
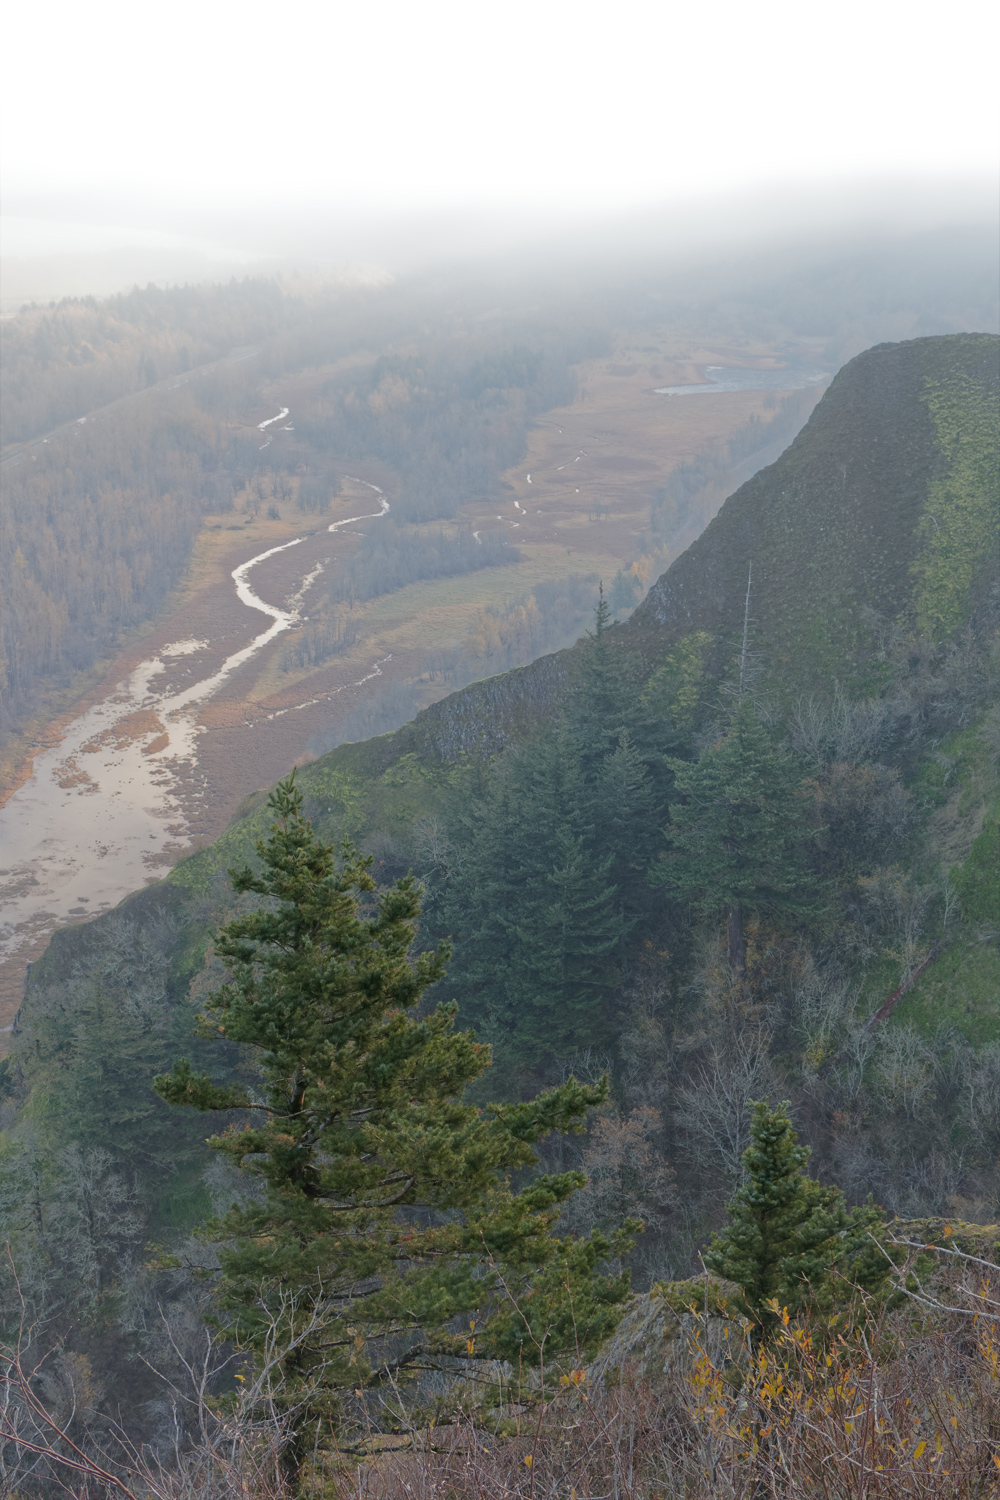
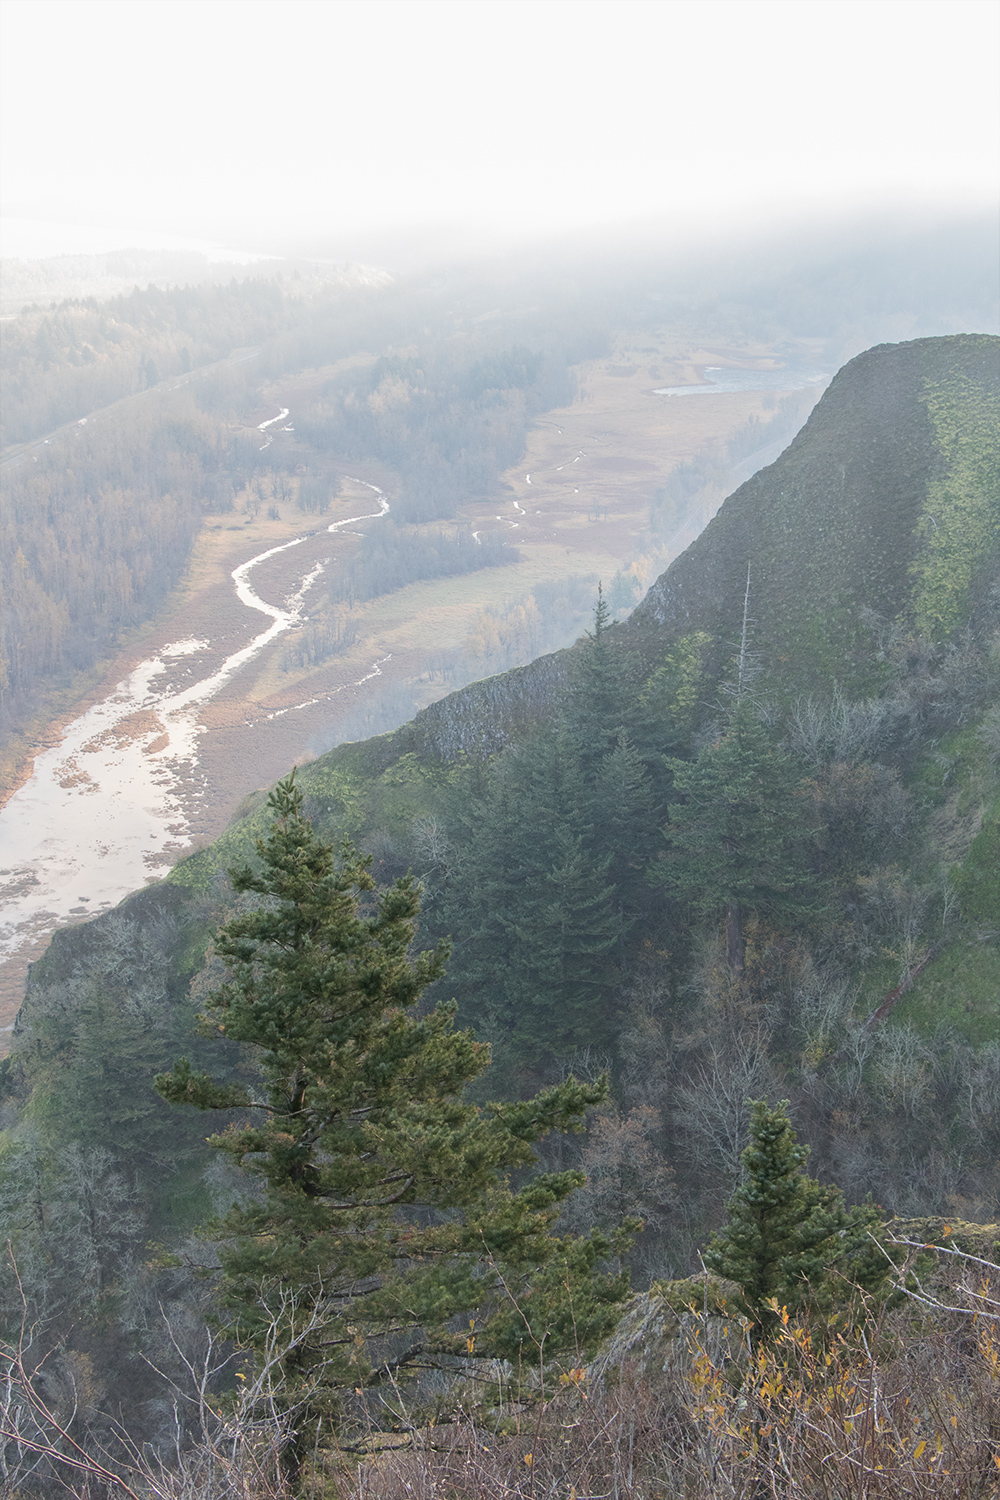
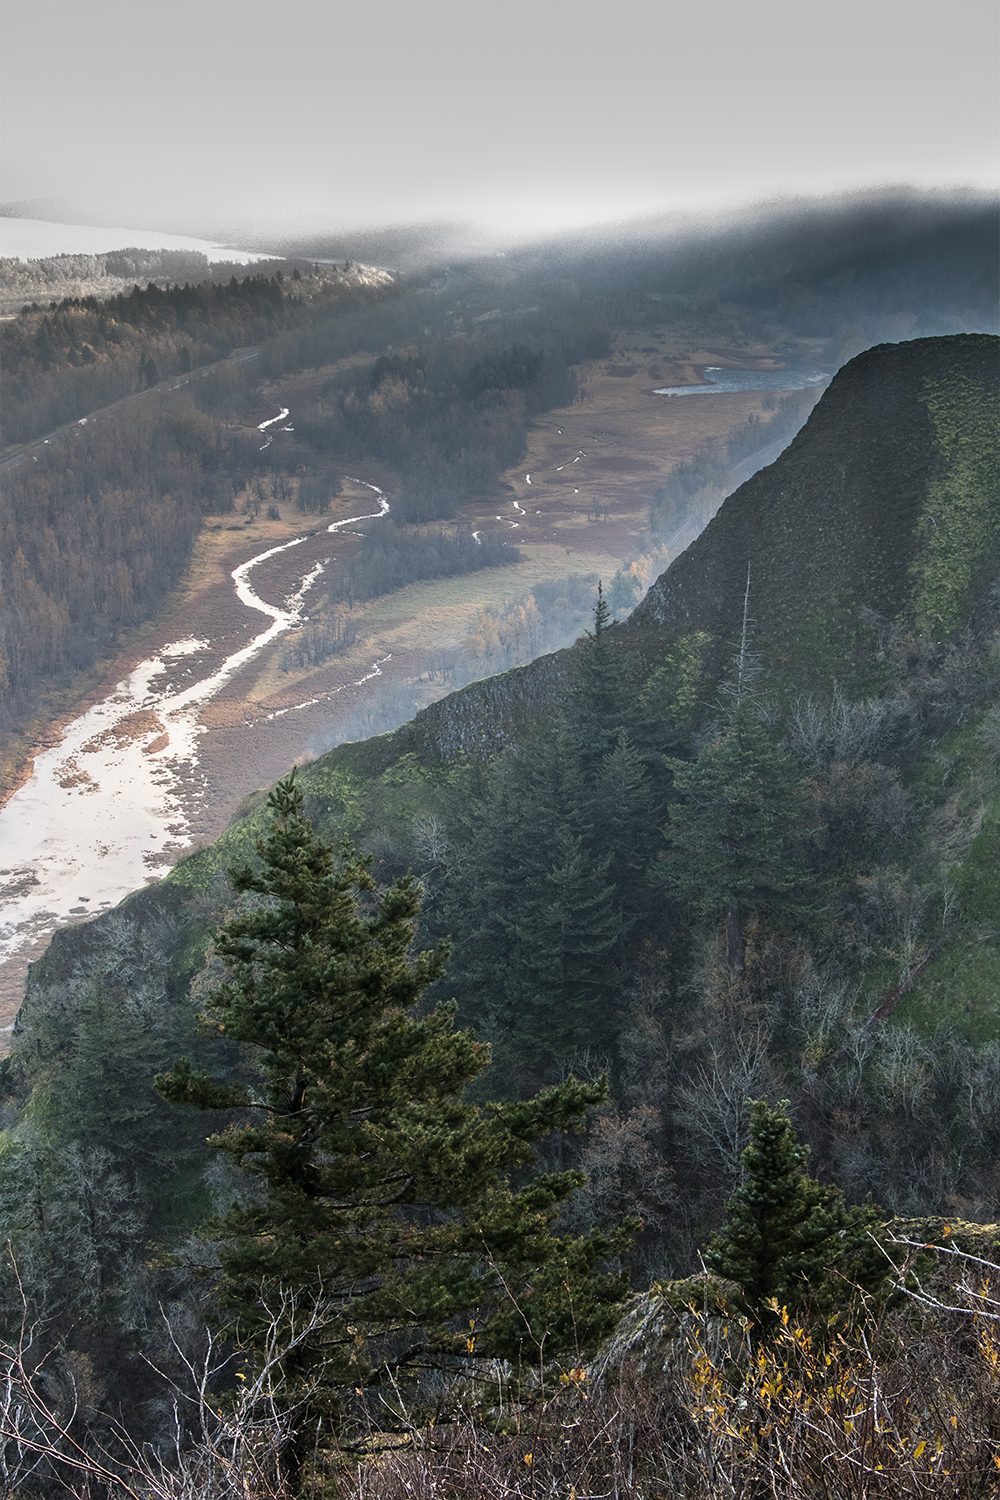
I’ll start with six reduced images. For each program, I produced one image at default value, one image where I just moved the highlights level to -100 and one where I performed multiple adjustments. My goal was only to see how much highlight detail I could recover near the horizon. I didn’t spend a ton of time with the adjustments—that would seem to miss the point. I did spent more time on ACR than I did on PL3, because it appeared less successful.
First, the three PL3 version:
Now, the three ACR versions:
Finally, I selected a small area from all the images above and created a composite:

I see a lot of people saying that LR is doing a better job. Perhaps those of you with LR will give this a try. I wouldn’t object if someone also tried Capture One (or anything else). Ideally, the foreground shouldn’t turn totally black.
I thought of creating a new post for this exercise, but since this thread is titled “Highlight Recovery” and since it is a response to people here claiming that LR can recover highlights easier and better than PL, it seems appropriate here.
3 Likes
I have got a file, too. In Lightroom it is just a highlight reduction of -22 or so. In PL…well, not that easy, it takes way more (too much) time. I know, a sunstar, again 
Lightroom 6.14:
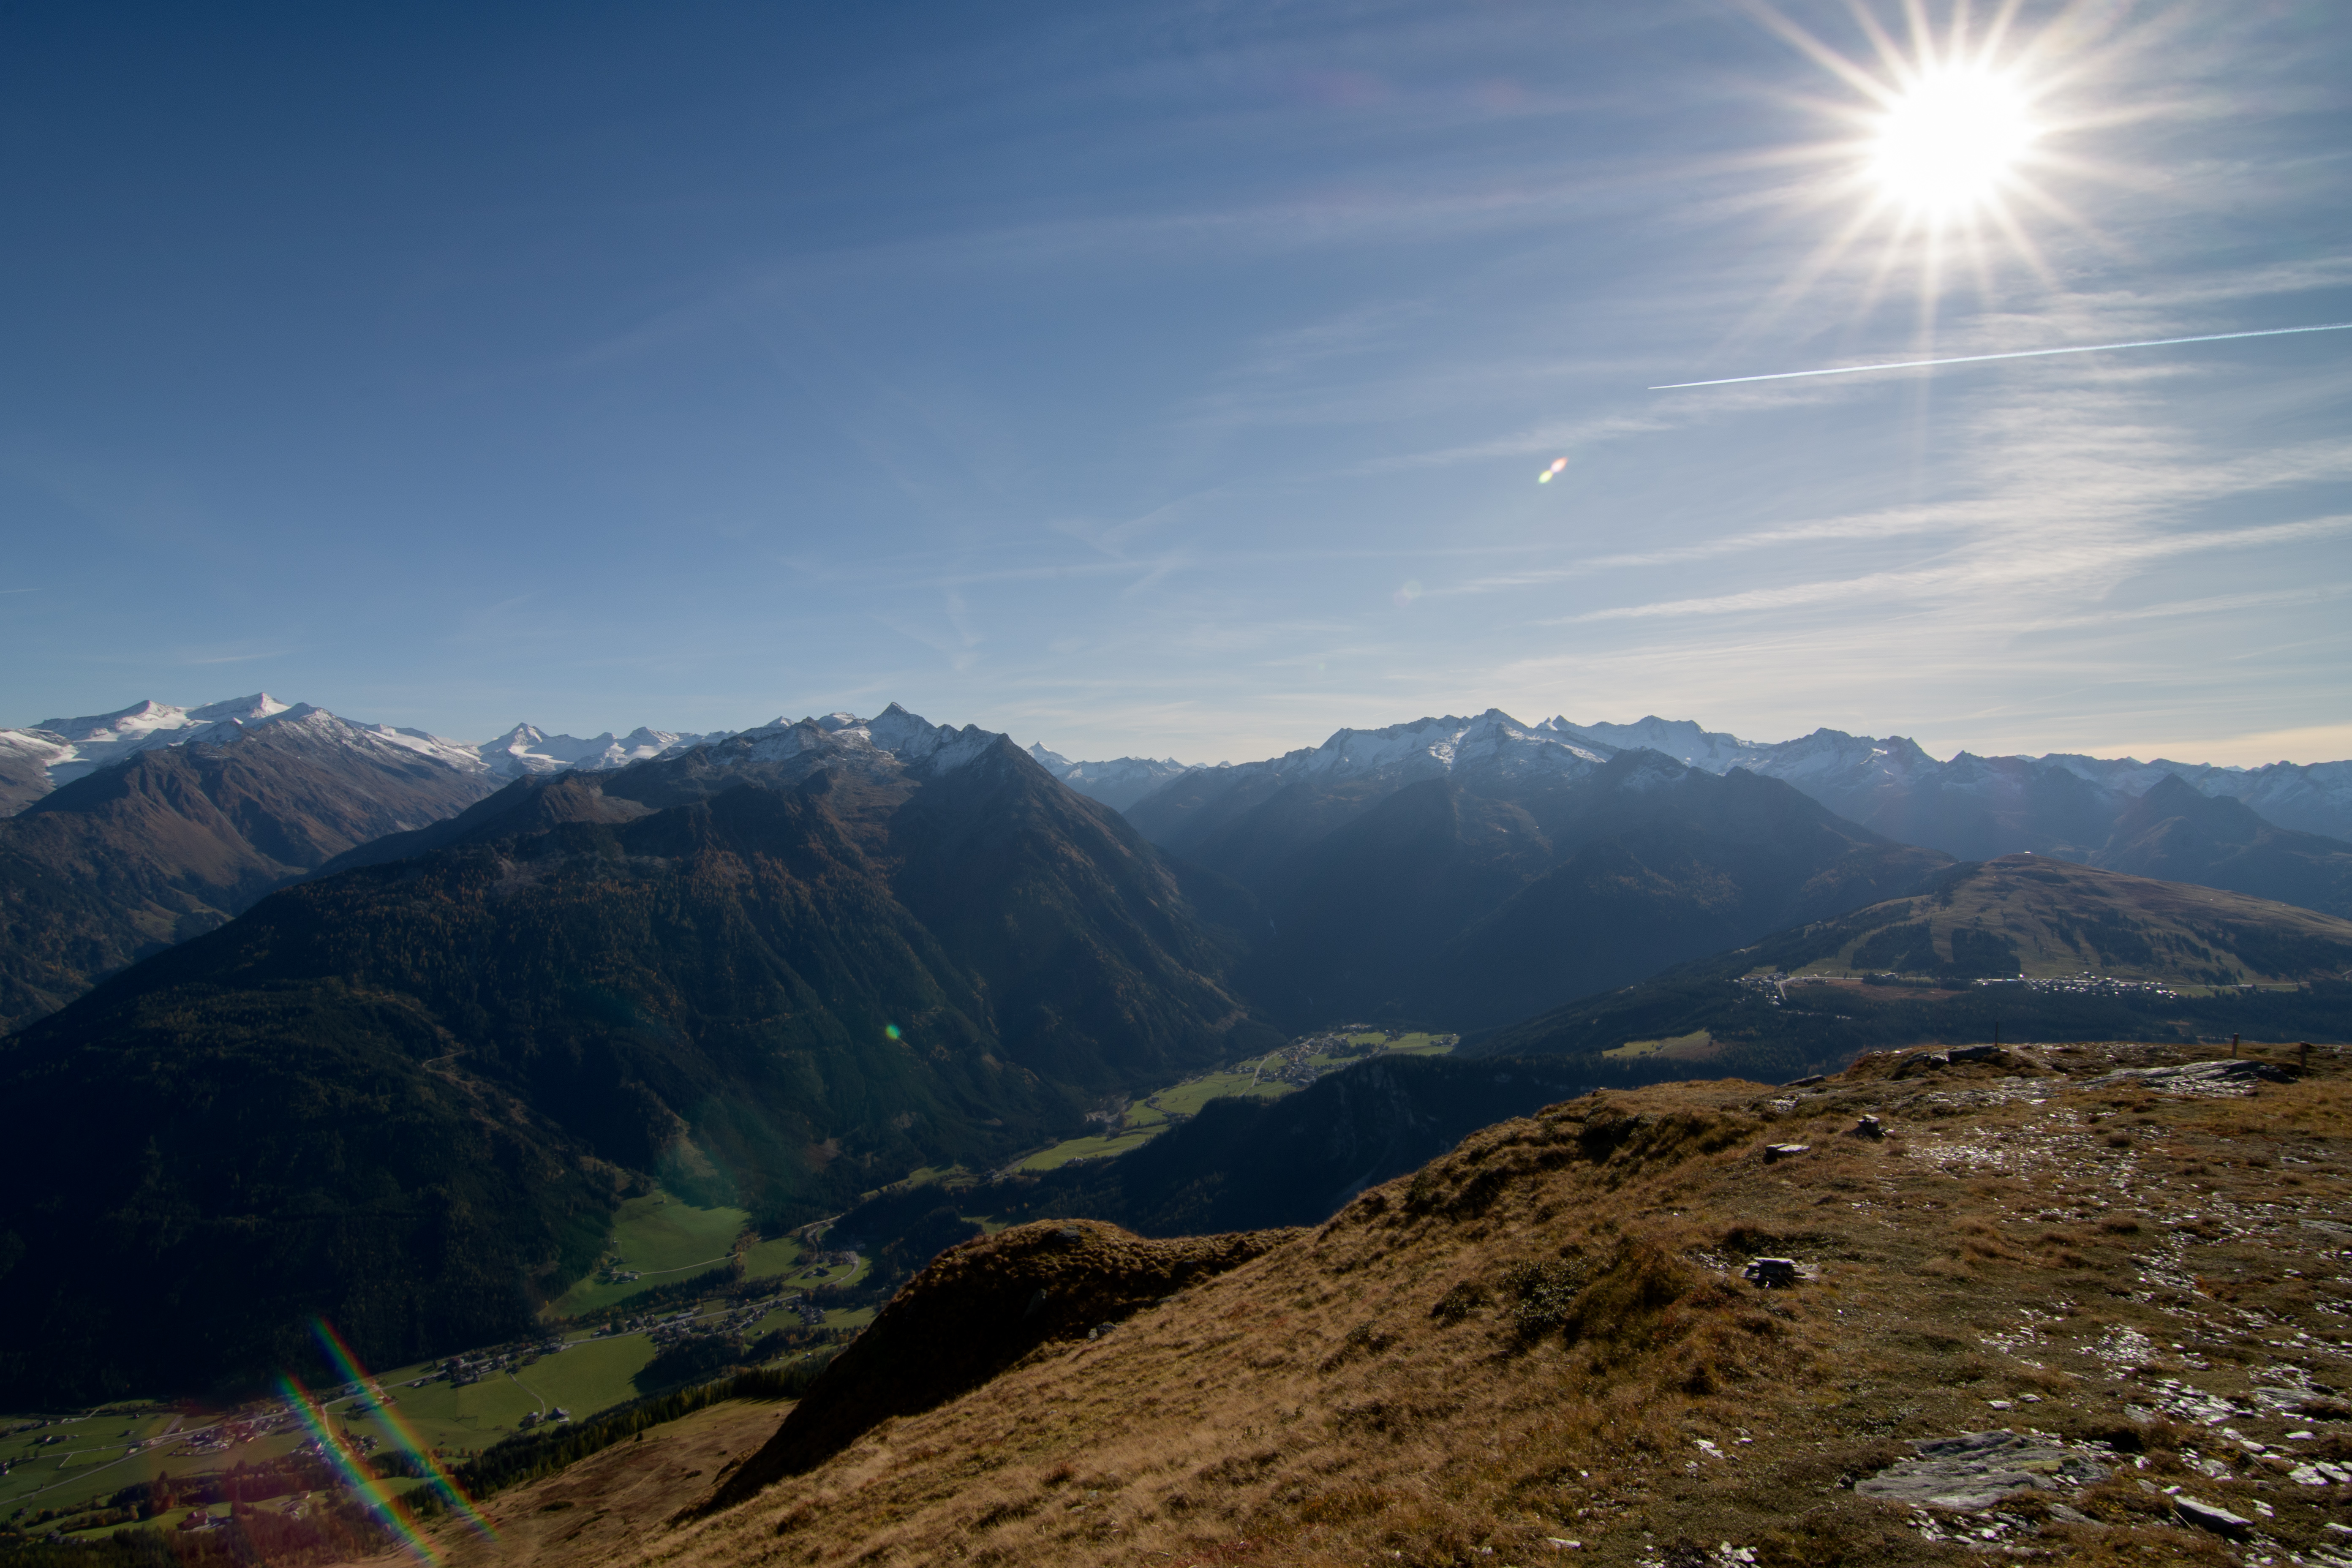
DSC_0104.NEF (22,5 MB)
1 Like