On several occasions I wish I could have changed the shape of a control point. Instead of a perfect circle, I would have liked to be able to make it an oval for example. I suggest this possibility for a future version.
1 Like
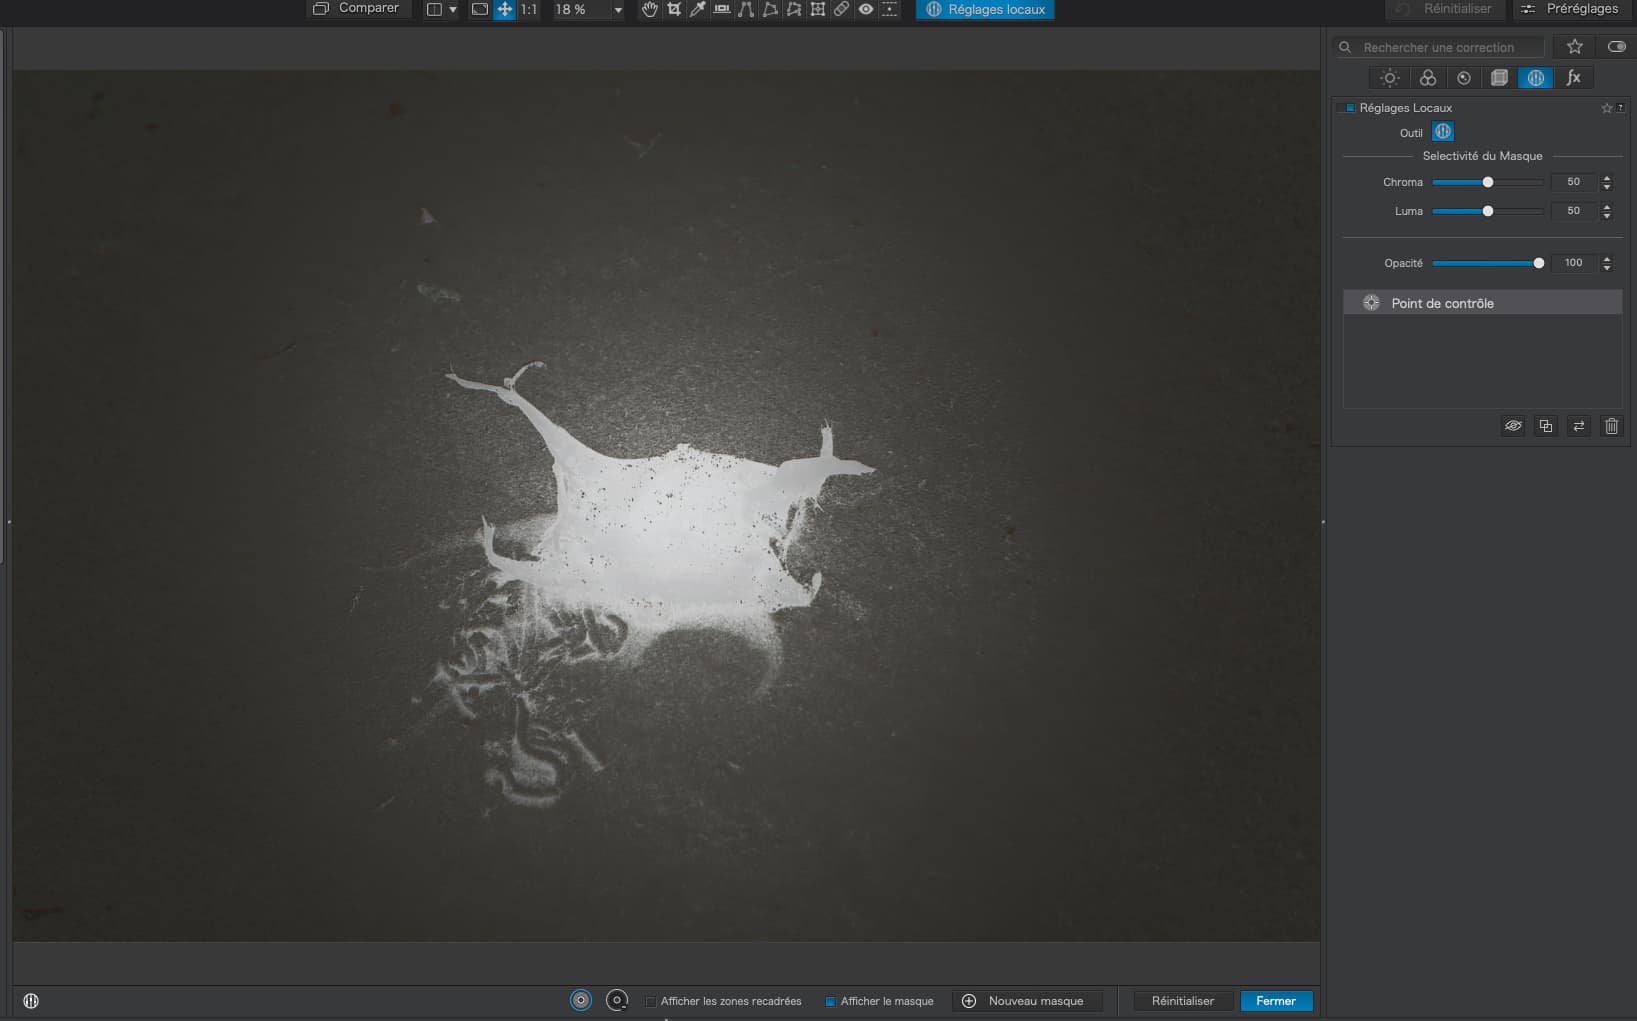
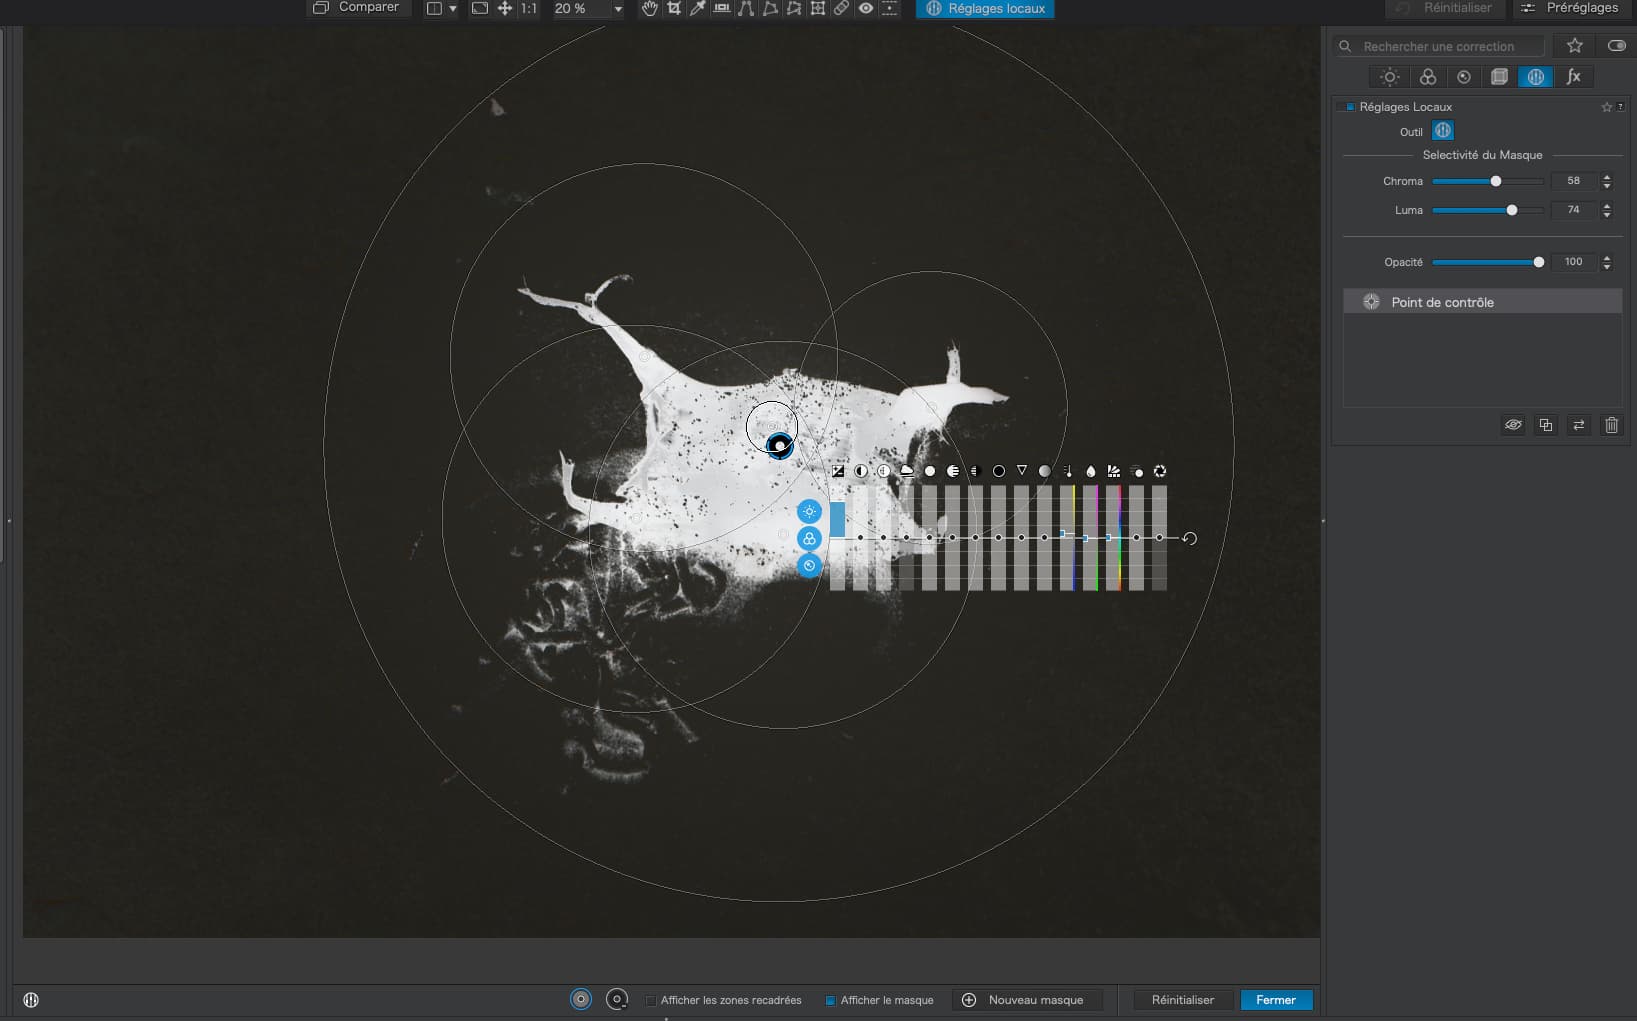
Use the selectivity sliders to restrict the coverage.
@Joanna
Interesting Joanna, but now sure how that would work to change the shape, which is what Patrick apparently, desires.
Because the shape adapts to the selection rather than just being a circle
Yes, being able to modify the shape of a control point would be an excellent improvement to Photolab.
1 Like
Put it to vote, I’ll vote for.
But you can also use the “counterpoint” by putting a point while pressing “ALT” on a PC.
Those are called negative control points.
Mark
This feature request has appeared many times over the years. Look here:
You don’t need to. Just learn how to use the Selectivity sliders…
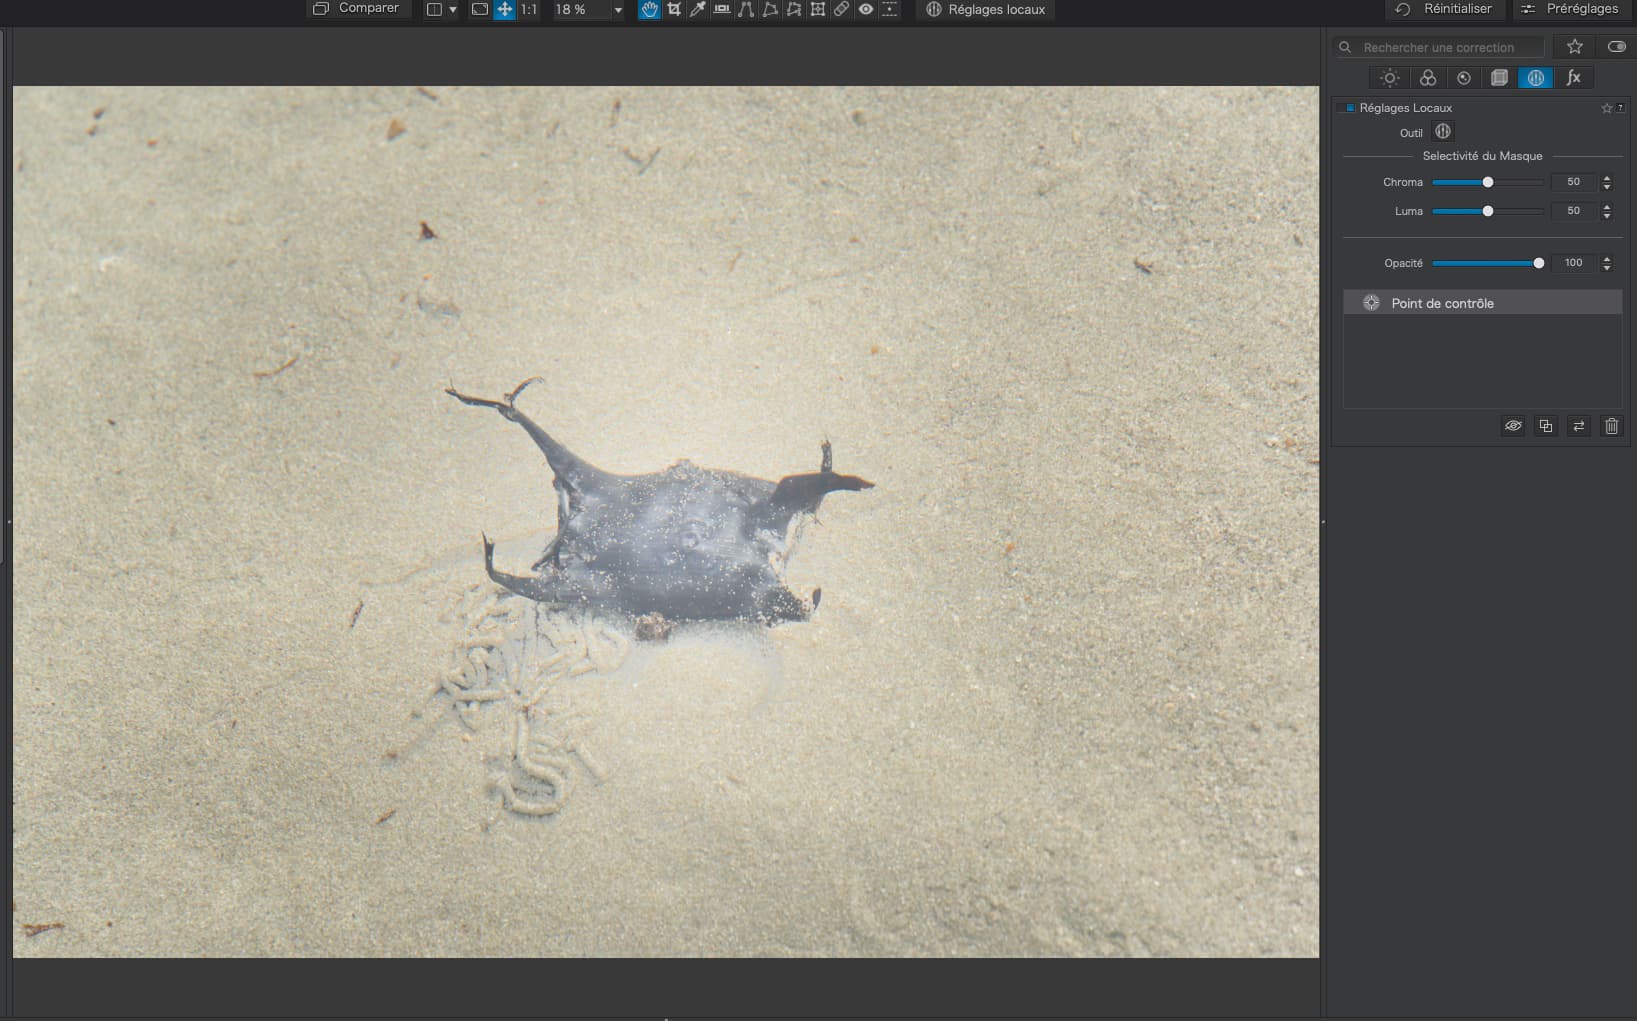
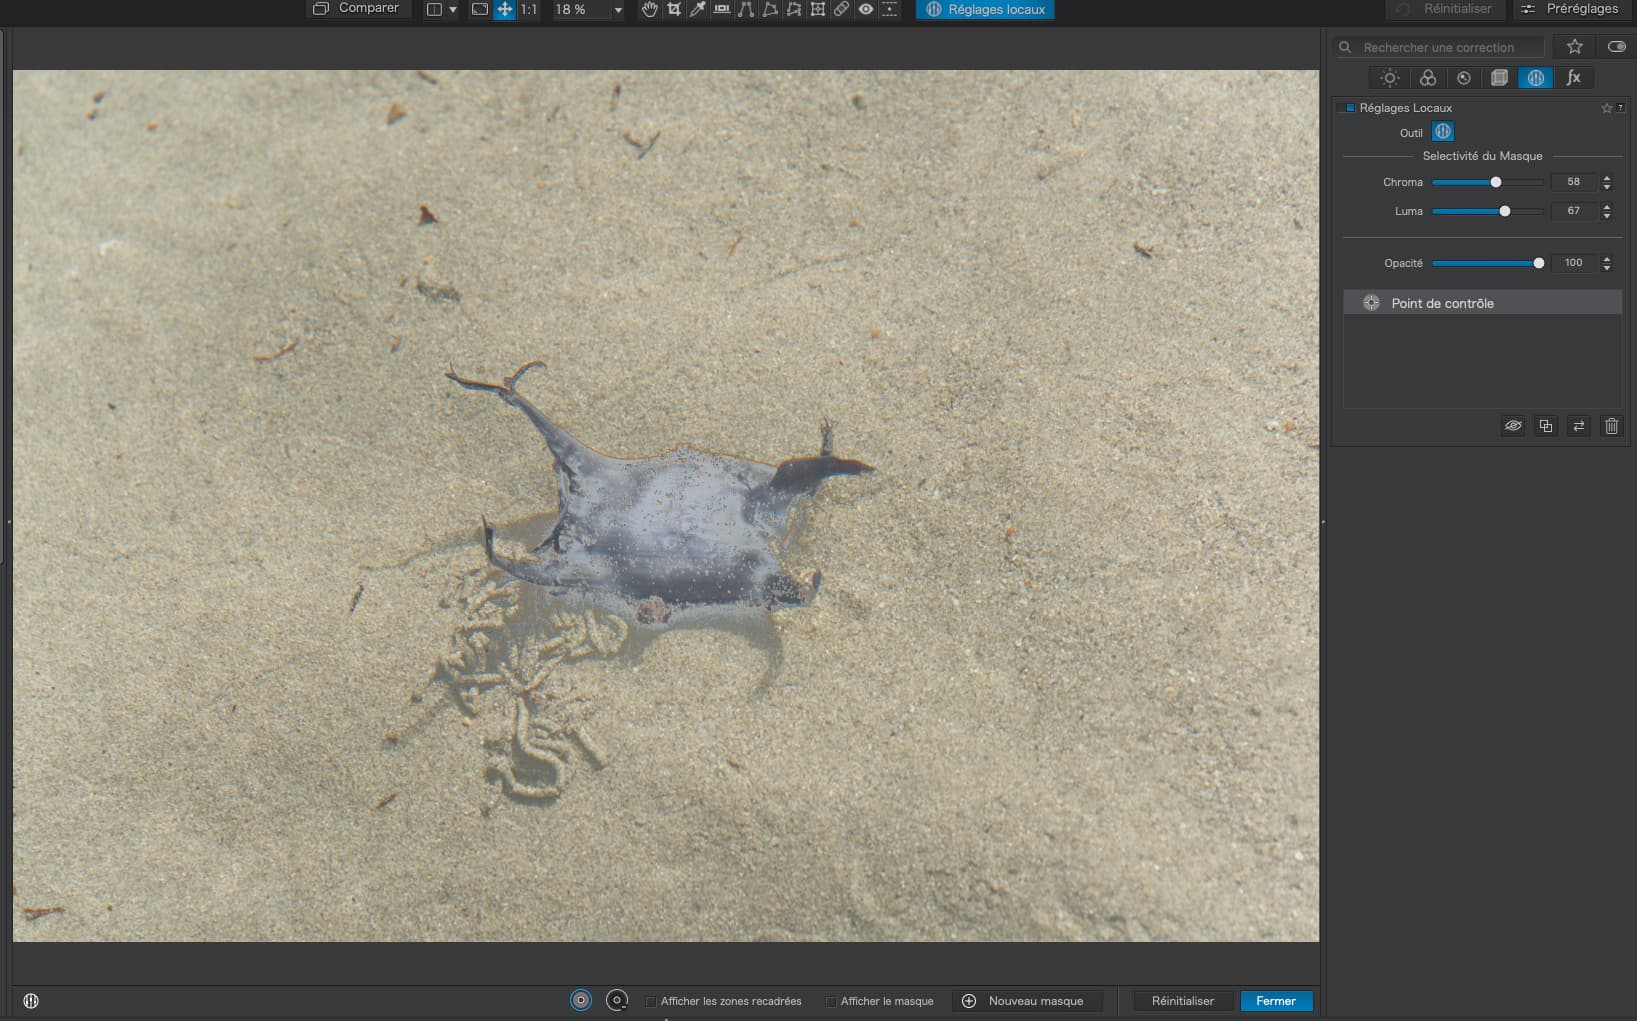
(both adjusted exposure compensation to demonstrate effect)
Default 50 / 50
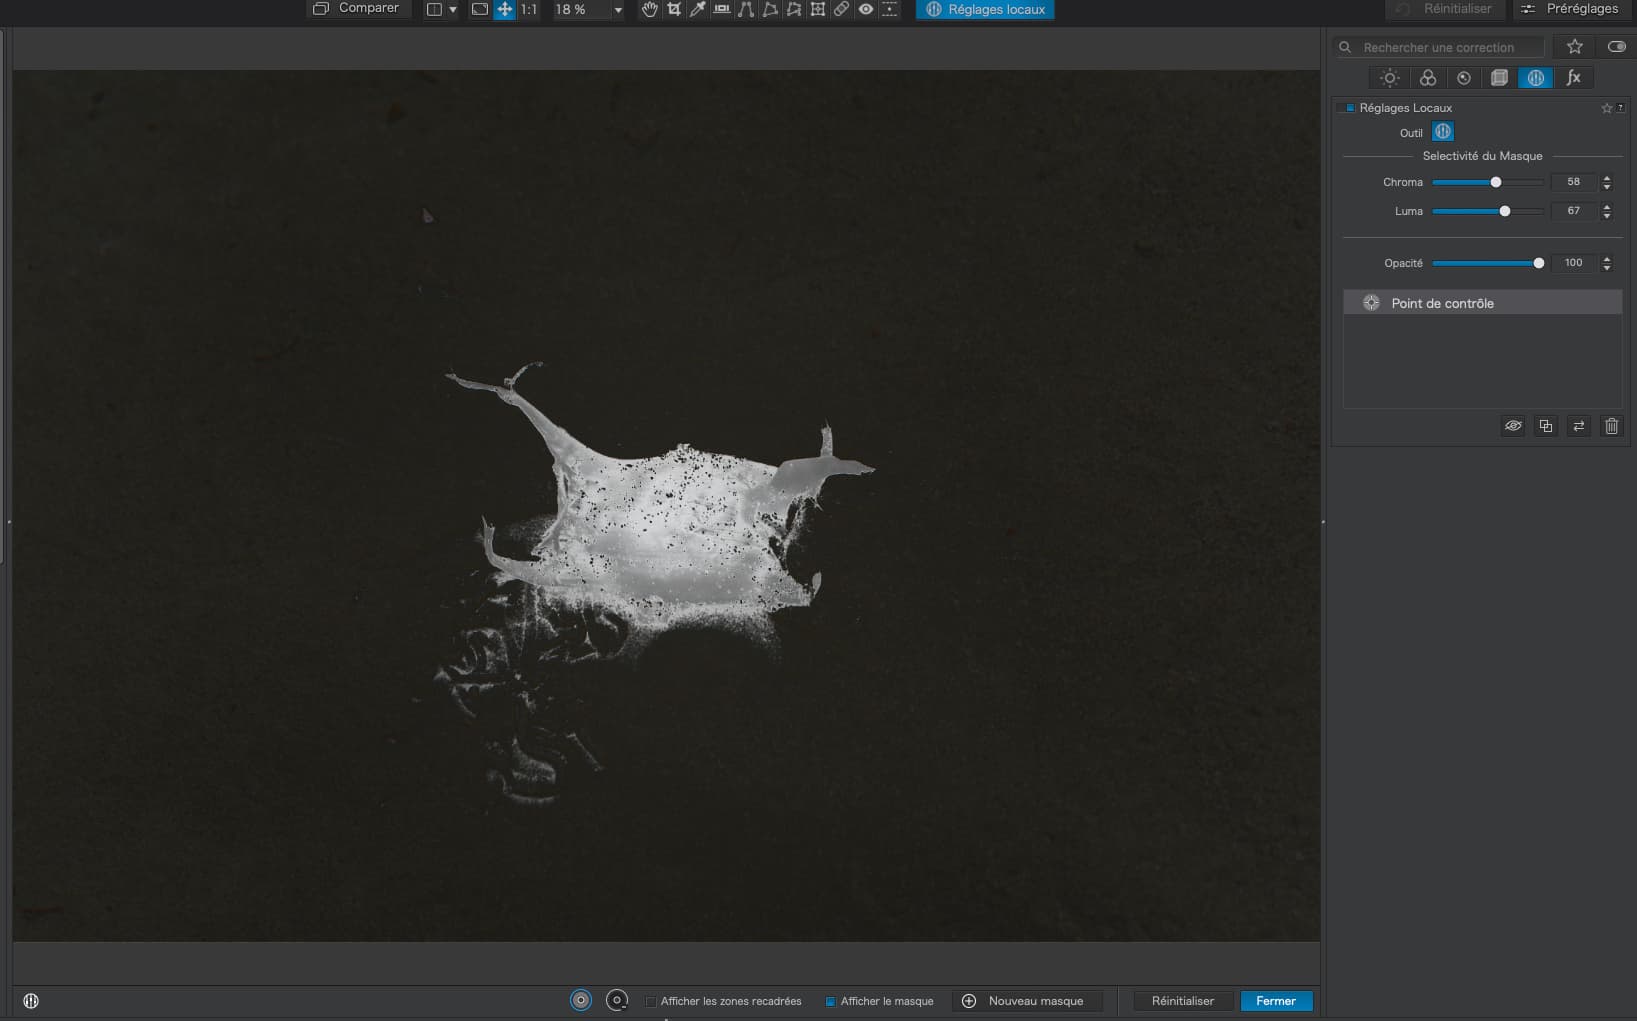
Adjusted 58 / 67
Add more Control Points to the same mask for even better definition…
1 Like
I couldn’t remember the English wording.
Thank you.
1 Like
Thank you for your answer Joanna.
I’m not sure to understand it…
It’s not the size of the control point that I want to adjust, but it’s form. It’s a detail as most of the time I’m happy with the circle. But sometimes, I would be able to change from a circle to an oval for example.
By using the Selectivity sliders, what I created was a shark’s egg shaped Control Point. Looking at the mask view, the only part of the image that gats affected is the part that is the white mask.
While the control point has the shape of a circle, it ‘samples’ the colour and luminosity below the very midpoint to then affect those values within the shown circle, but not necessarily the whole circle – as in detail shown and explained by @Joanna.
→ To visualize how the (effective) selection depends on the chrominance and luminance settings, move the sliders fully to the left and then slowly towards the right. Then repeat this with (M)ask view ON.
To get a different control point ‘shape’, use multiple control points.
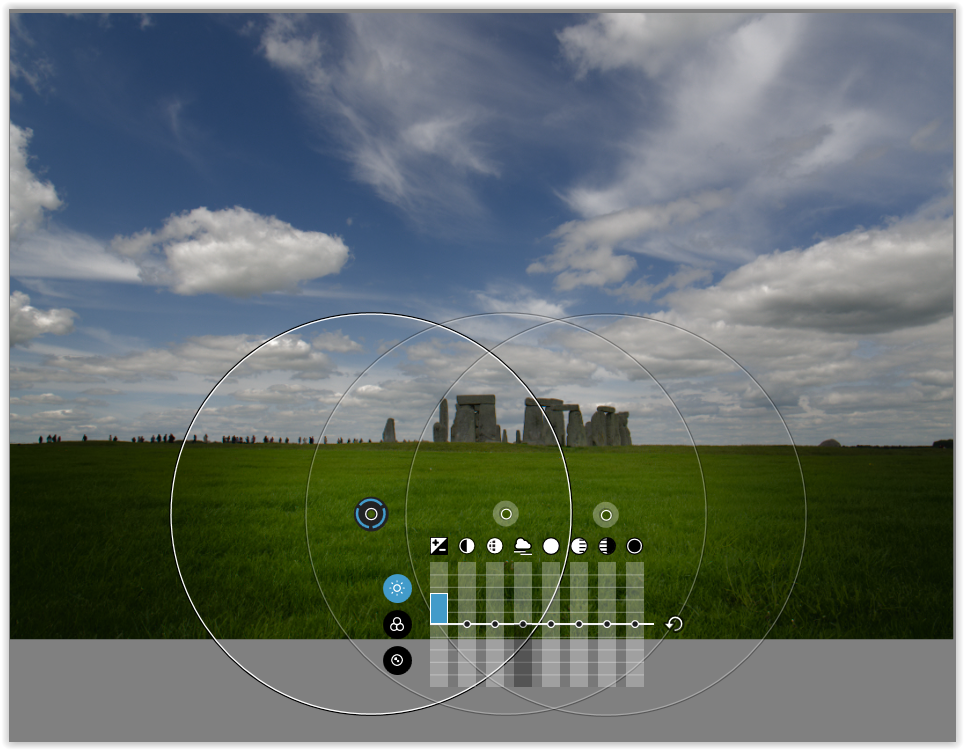
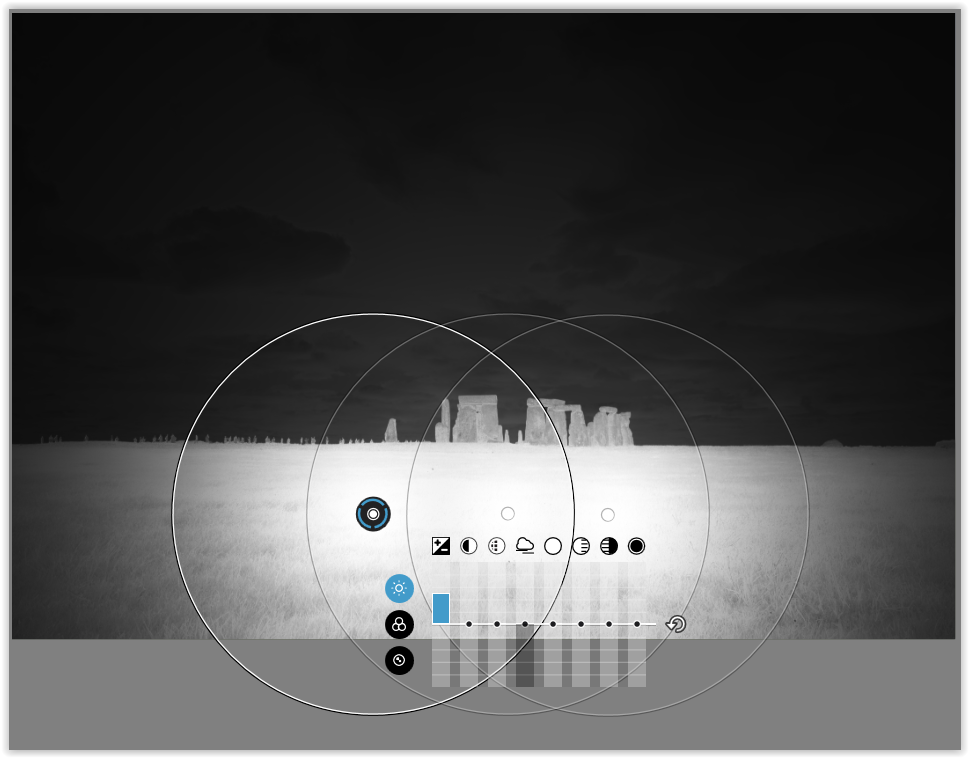
for demonstration purposes to better show the effect of multiple CPs
1 Like
Thank you for the interesting link!
Thank you Wolfgang. Yes, this is a way to modify the shape of the area of the control point. Especially with the negative control point as mentioned by @rsp and @mwsilvers
AND outside the circle!
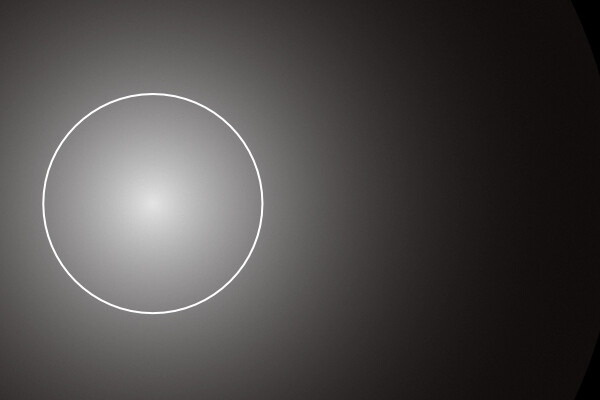
If your circle roughly fits in the left half of a 3:2 image, you will find you can affect all the way across the image. Usually it’s not noticeable, but in some recent testing I discovered this by moving the WB slider to the extremes and physically blocking my view of the left half of the image. The colour was definitely changing at the right edge of the image.
Something like this… I don’t know what the ratios or fall-off gradient is, but this gives an idea of what I’m saying. The white outline is the Control Point as overlaid on the image, and the gradient shows the effect’s strength over the area of the image. Limited, of course, by the selectivity sliders with regard to which bits actually are changed, but the “reach” is illustrated.
Btw. is there a reason the control point has no eye dropper, like with in the control line? And second a bit off topic. If the control line would have 2 points to adjust, like with the horizon slider, it would make it much easier also to be adjusted at an angle.
1 Like
There is no need for an eyedropper with control points as the center point performs that functionality.
Hi rrblint, so then, the first control point should work as a let’s say, master point, with the functionality of the eyedropper and all next points refer to this? I minimised the first therefore to a minimum. Than I put it onto a dark part. Then I made a new point with a bigger circle. Then I switch on show mask. But when I put the first point to a bright spot, there is no change, like when you do this with the eye dropper and the control line.
We need a screenshot to see what you are getting at