Editing high dynamic range images in PhotoLab 5

Hello Mike,
You both been optimizing some of my photo’s (results differ, but look better by each day, especially the cloud with that tiny bit of blue now introduced). Will practice myself based on provided info and results. Appreciated.

Here’s my interpretation of your sunset, hope you like it (Done it my ‘old’ way though, no corrections within PL5)

I’m sorry I can’t post the originals, they’re just too big, but here are two from this evening’s sunset at Locquémeau.

17h19

17h48

Hello Joanna,

Those look indeed very nice! The 2nd one is my favorite in this case.
Is this North-West of France, Lannion, right?

Yes, just about 10km to the west.

Such a beautiful scene - well worth visiting. Did you capture a shot just as the sun was in the process of dropping below the horizon?

To me, the first one looks like what you might have seen with your own eyes, as you were standing there, with several layers of clouds each doing its own thing, and the sun just starting to show that orange glow.

To me, the second one looks too “purple-ish”, but maybe that’s just the way you saw it with your eyes. As to the building, I wish you lightened up the bottom left, to show more detail there, and in the ground. When I click on it to make it larger, I start to see all that detail - lots more, including more rocks in the water. The larger I view it, the nicer it gets. It would also be fascinating if you go back there when the water and the waves are rougher.

How far away from your home is this? Lovely spot!!! And your camera angle makes everything look so “good” and “balanced”!

All in all, I took 34 shots and we were there for an hour from 16h43 to 17h43 and the sun finally disappeared for view at 17h26. At the moment, the two I have shown here are my favourites, but that might change when I have further sorted and processed the others.

Here is the very first shot…

It’s one of those times when fact can be stranger than fiction, with a strong blue sky above and the approaching red reflections, maybe it didn’t look quite so purple to the naked eye but that could be down to selective vision and the sensor not coping with pure colours. I have had similar problems with the wash from primary colour stage lights at concerts.

Ah, this is the point where the very fine dividing line between too much HDR appearance can all too easily spoil a great shot. Some folks like it one way, some another. Anyway, here is a slightly different version, which might look too light close up…

Well, I did take this shot three years ago, with a lot of graduated filtration in front of the lens and a 5 second exposure, so even though there was a bit more surf, it got beautifully smoothed out in the long exposure…

It’s about 10km so, if we know the tide times, the sunset time and can see the sky starting to develop where we live, it’s a case of jumping in the car and hoping that the clouds don’t change too much. And, of course, it’s always different, depending on the wind, sea level and cloud cover.

  1. We know the spot very well
  2. We setup the tripods well in advance, connect the remote, etc
  3. It “fits” the 28mm lens perfectly, so we know we can use a hyperfocal distance of 5 metres and get everything in focus from 2.5 metres to infinity.
  4. After, having studied it out over a number of years, we’ve learned from our mistakes :nerd_face:

Oh, and here is one that Helen took at the same time…

This is by far my favorite photo of all that I’ve seen:
a) The water is active, and agitated, and adds movement to an otherwise static photo
b) The clouds are gathered in a group in the middle, and other things in the sky radiate out from them
c) If you follow all those radial lines, they point to the building
d) I can already see detail in the building and ground, and it wouldn’t take much for me to see it better
e) I can already see the reflection of the sun in the water, and it wouldn’t take much for you to bring it out.
f) This photo has a single “focal point” for my eyes - the sun.
g) I would be so tempted to make the photo a little warmer, expanding the orange near the sun.

Maybe the photo you took right after this is even better? I dunno. But this one is a perfect starting point for your editing (as I see it).

Hindsight is always 20:20, but I’m wondering what it might have looked like with a longer shutter speed, to “blur” the water, rather than capture it so clearly? When I view this, I think I’m looking at a crop from a much larger image, and would like to see the rest of what (might have been) there.

I would crop out the (boring) left side of the image, so the sun reflection would be closer to the middle.

Which camera does Helen shoot with?

@Joanna,
Sunset is playing with colors. I’m curious what WB you used on the camera, for the first impression, and if/how you changed it. And also that one of Helen.
I thought you were Canadian, but you live in France?

George

But then the spray can become so ethereal it’s almost invisible, but that is a matter of choice and Helen wanted to show the light catching on the droplets of surf and a lot of the droplets looked like diamonds.

To illustrate, here is one that Helen took on the other side of the headland, exposure 1/13 second…

Boring to you but not to Helen :nerd_face: :grin:

Nikon D810

We both shoot at 5600°K unless it’s peculiar artificial lighting. The differences you see are due to being there between the Golden Hour and the Blue Hour.

Nope, we are English and moved to France in 2016

I had to find out the difference between the golden and the blue hour. Finding that the blue hour only last about 10 minutes :blush:
I’ve been there for a 2 week holidays. A lot of English people there, also living.
Anyway a WB of 5600 means nearly no correction of the color temperature.

George

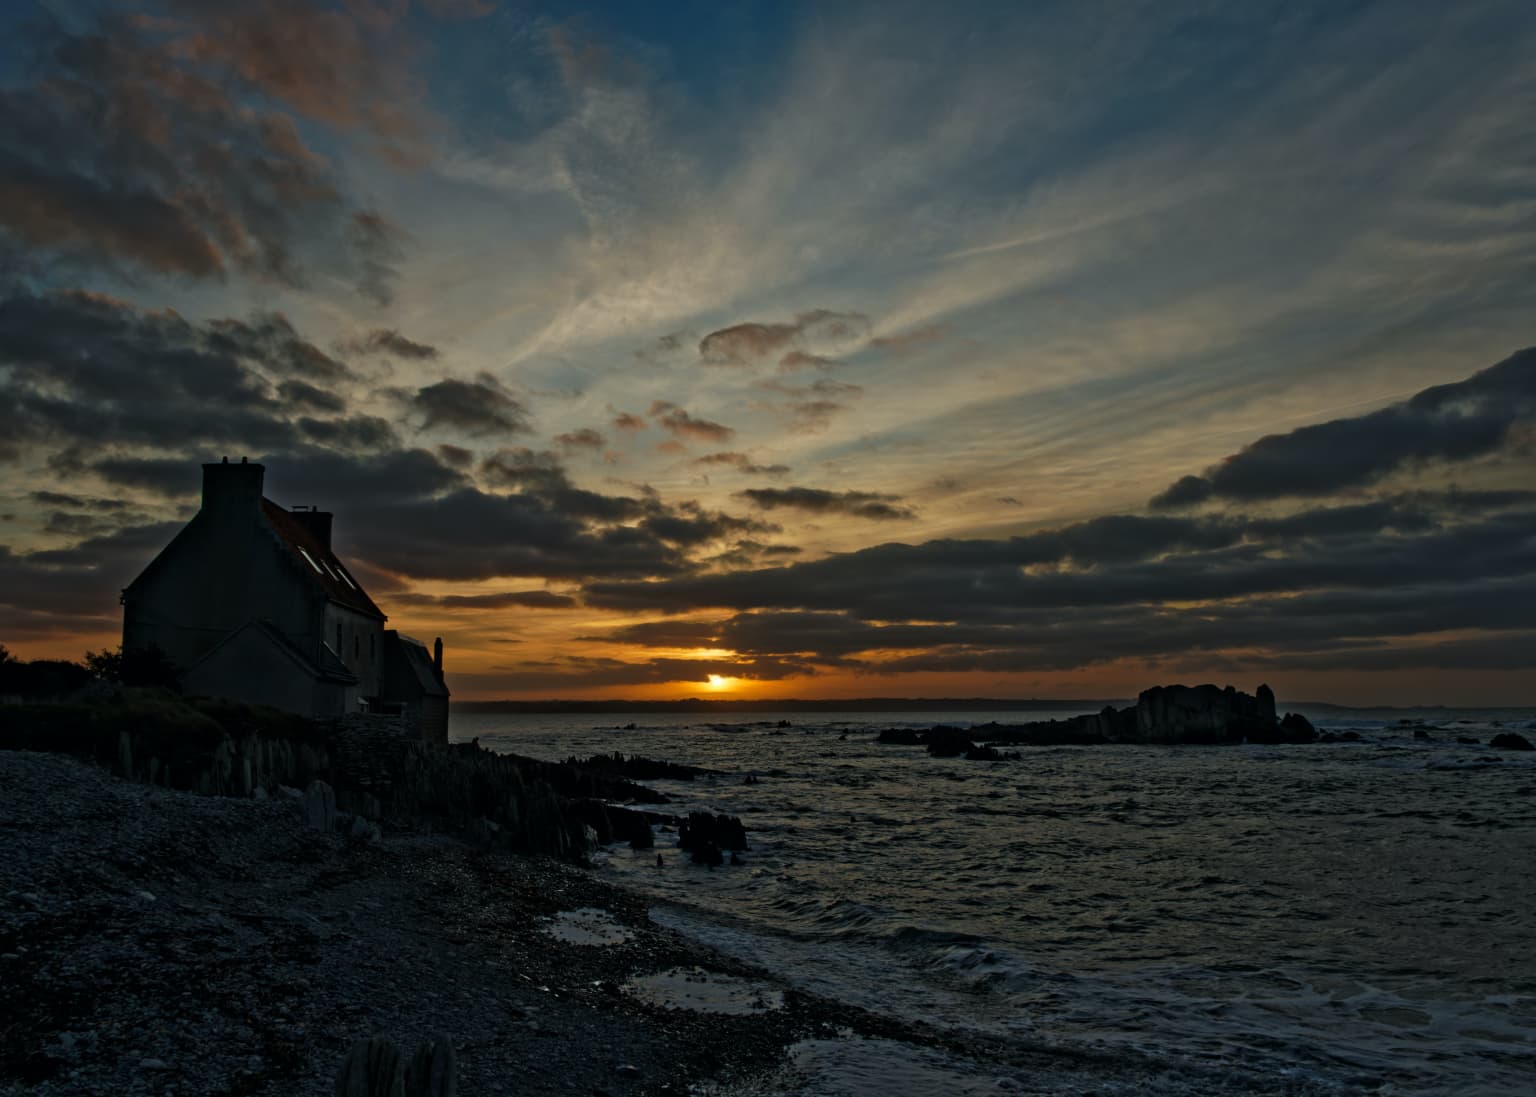
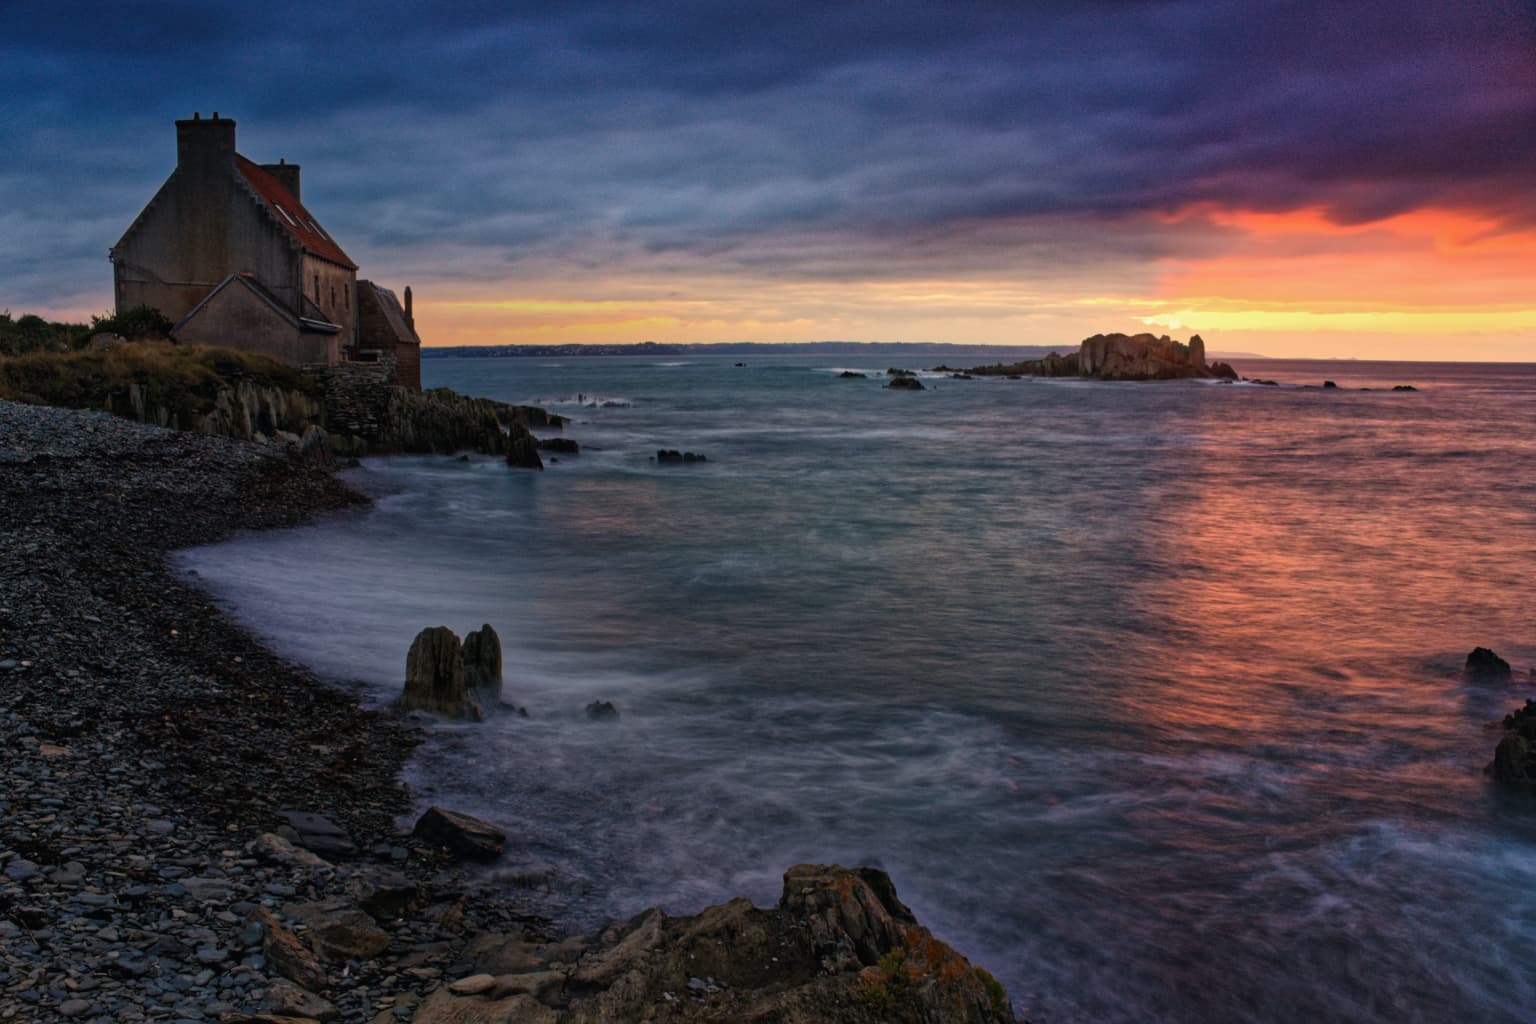
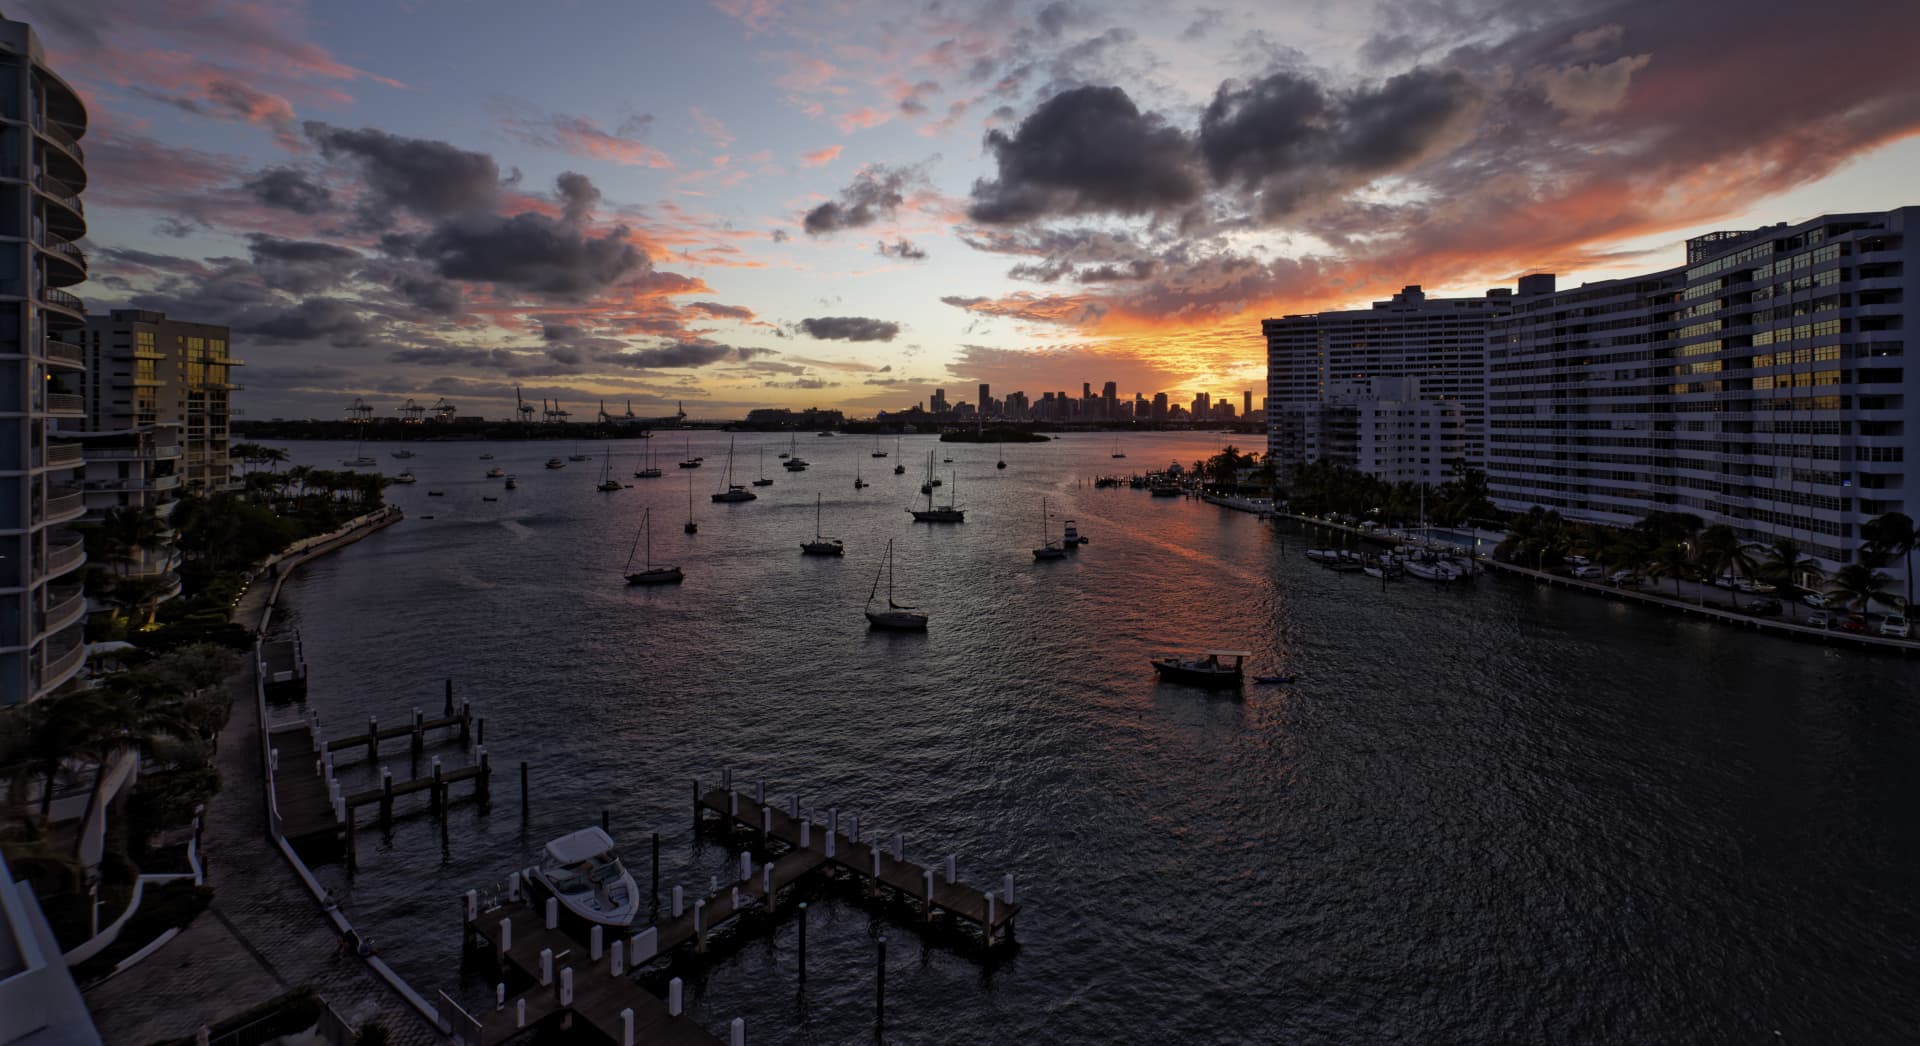
Maybe “boring” is not the best word… I was taught long ago to look at my photos with my eyes “squinted” so all the details are gone, and to just look at “shapes”, and see if a photo was… well, “balanced”. When I look at this photo, I see all the fascinating action towards the right, and a large dark area at the left.

To my eyes, knowing nothing about the intent of the photo, this is what I “see”:

Screen Shot 2021-11-18 at 07.09.08

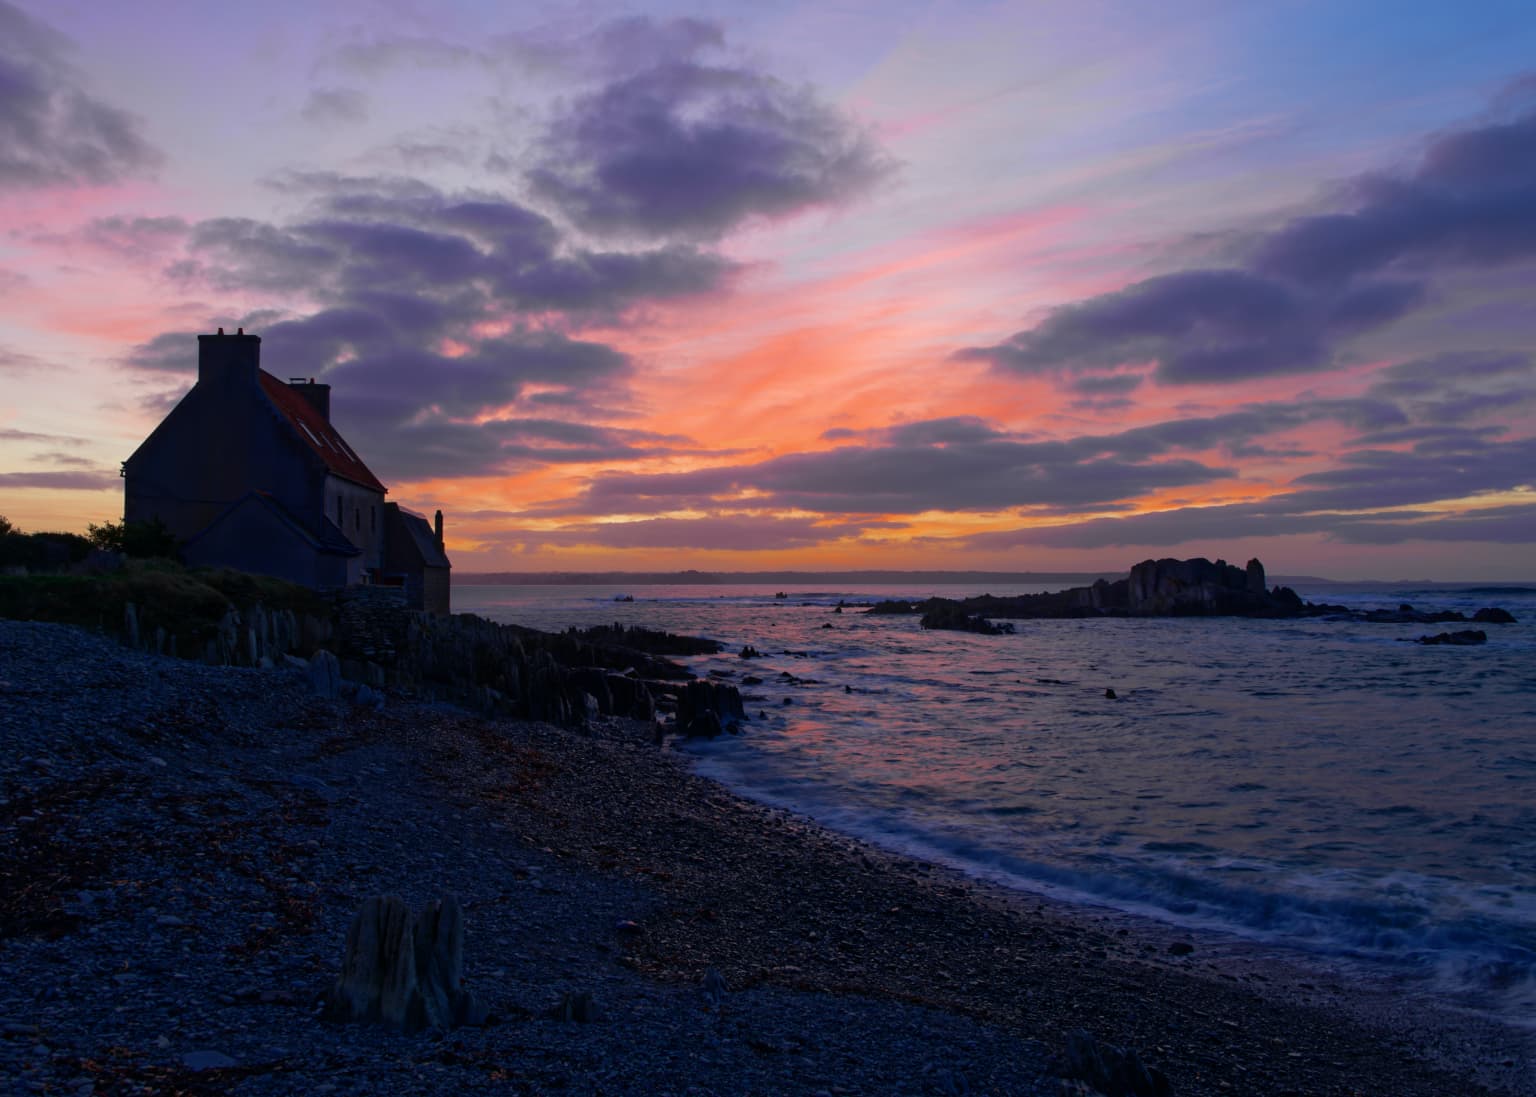
I guess I have my own way of looking at things nowadays, and I prefer “simple” compositions, which is why I preferred your sunset photo with the clouds all clustered together. Sadly, when I look through my viewfinder or screen, I have no control over what’s going on, only the ability to decide what goes in the photo, and what gets cropped out.

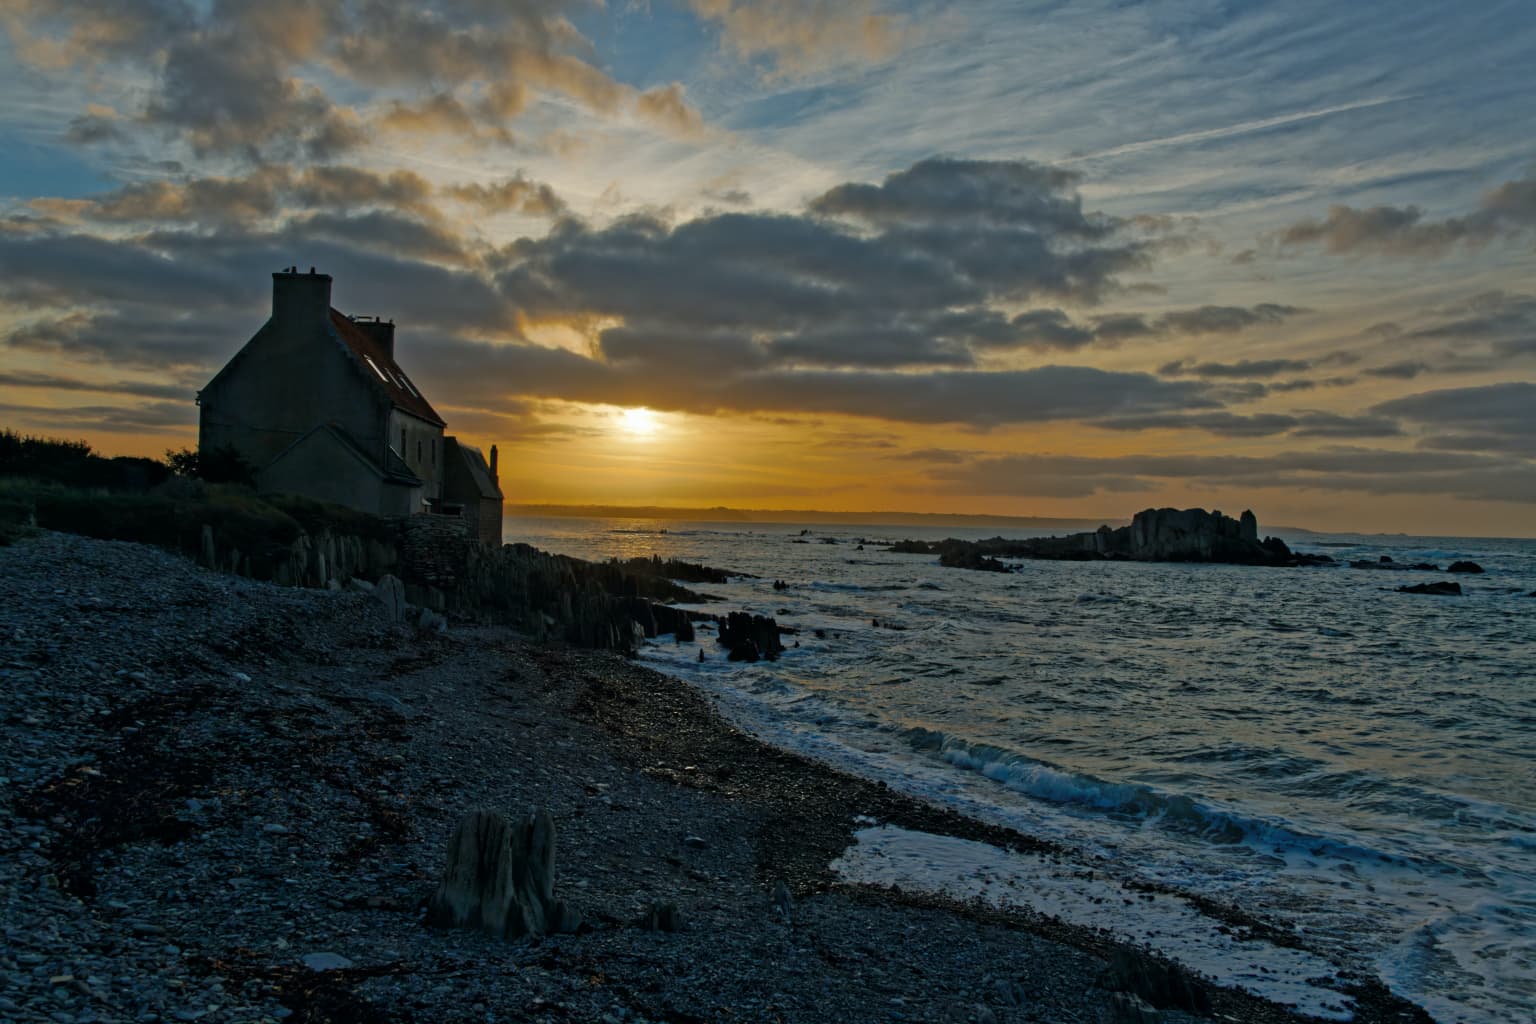
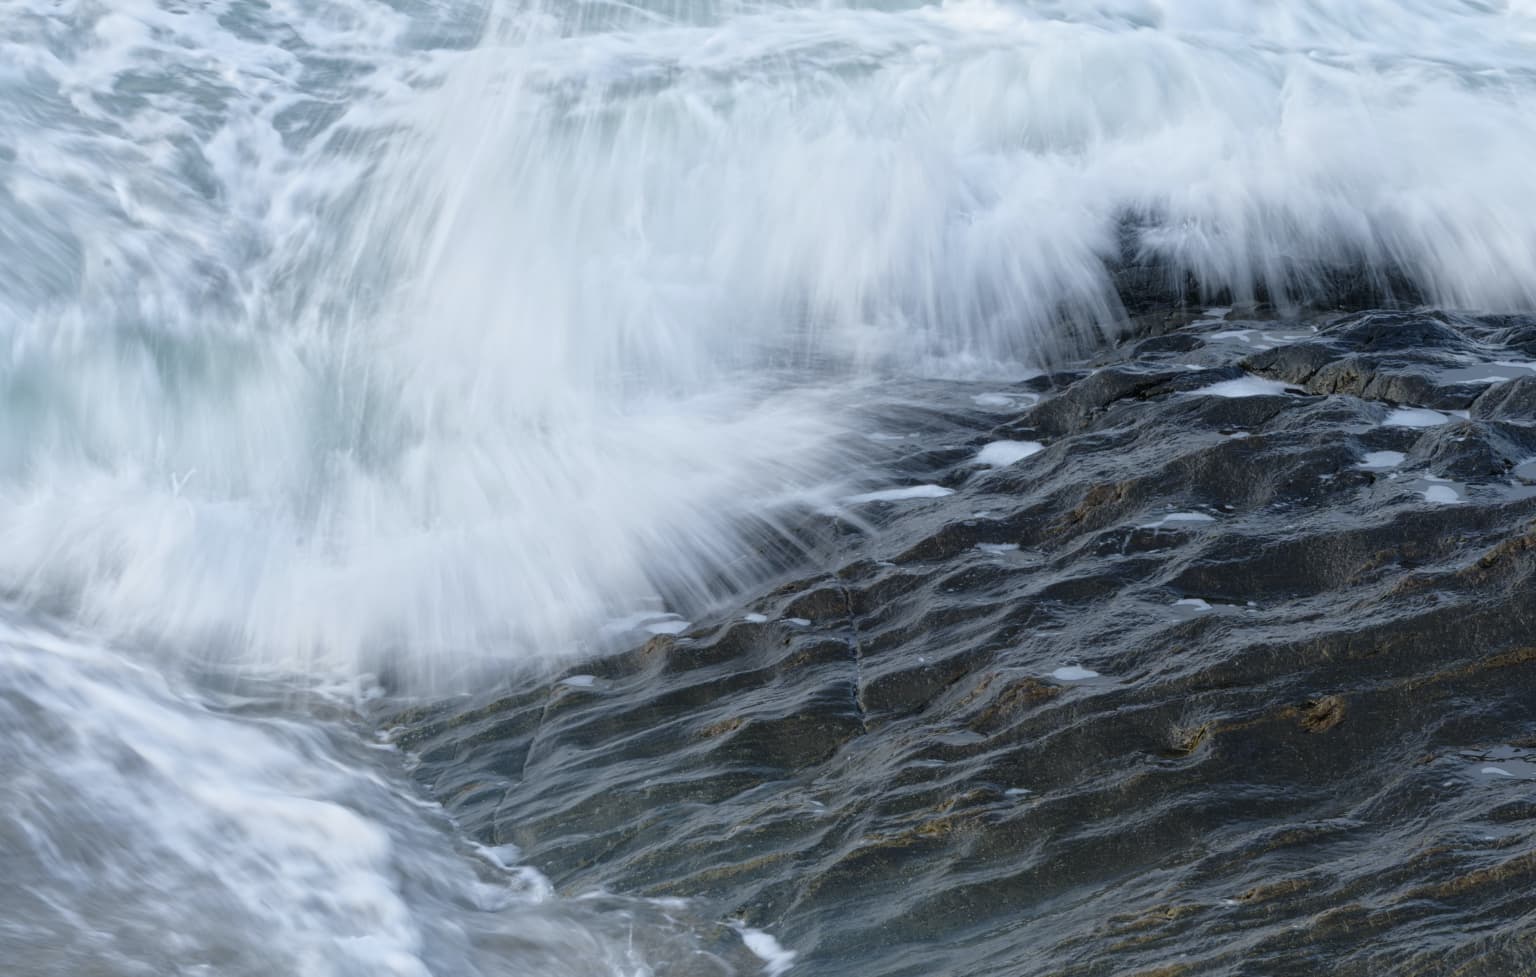
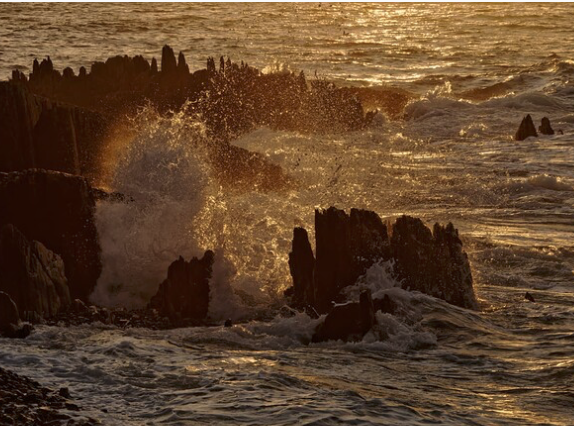
Shutter speed - it is strange and beautiful to see each drop of water so clearly, frozen in time. The “action” is captured perfectly, but the “movement” is lost. I know I “see” this with my eyes, but my brain “sees” things with a longer “shutter speed”, meaning water that is a little blurred.

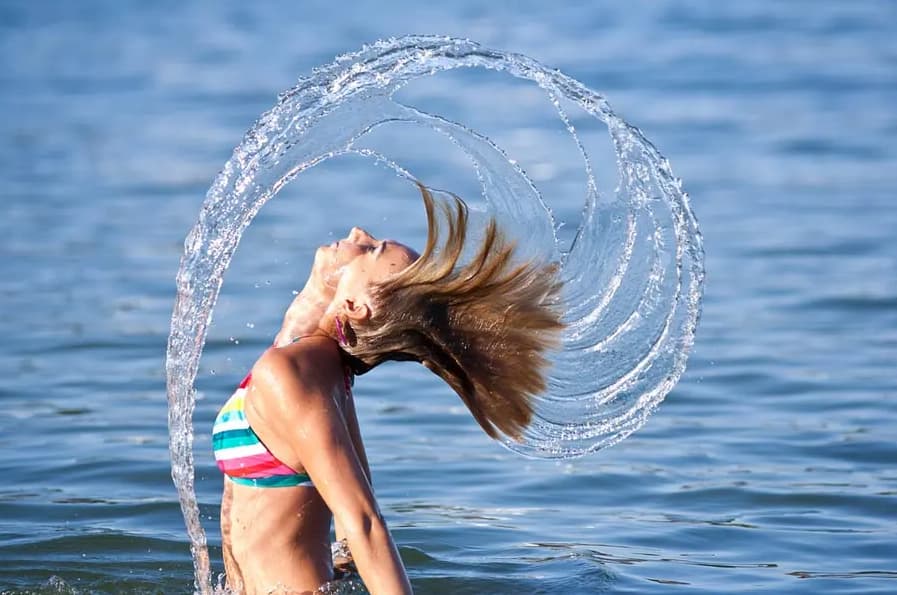
Another way to look at this shows the beauty of doing exactly what Helen did, showing every bit of water frozen in time. Sort of like this:

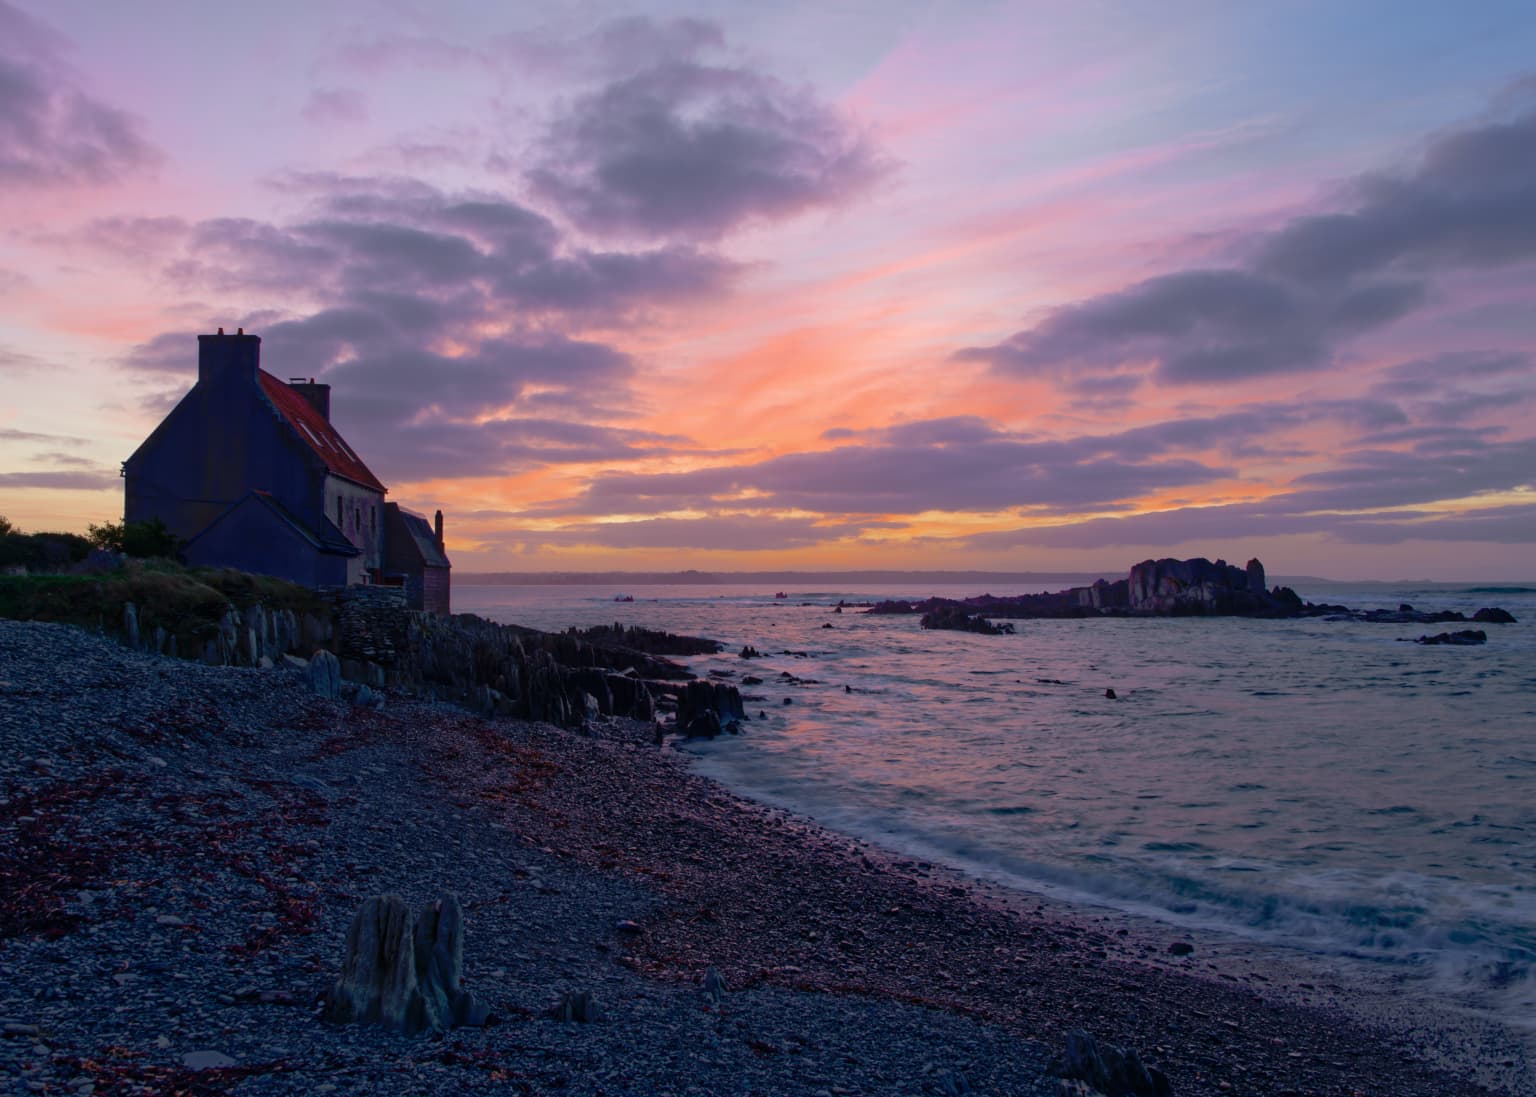
From that point of view, the water is captured perfectly in Helen’s photo, even though I never aware of what I see IRL (In Real Life). Here’s an article on how I can learn to do this, now that I’m thinking of it:
https://www.adorama.com/alc/how-to-photograph-water-splashes/
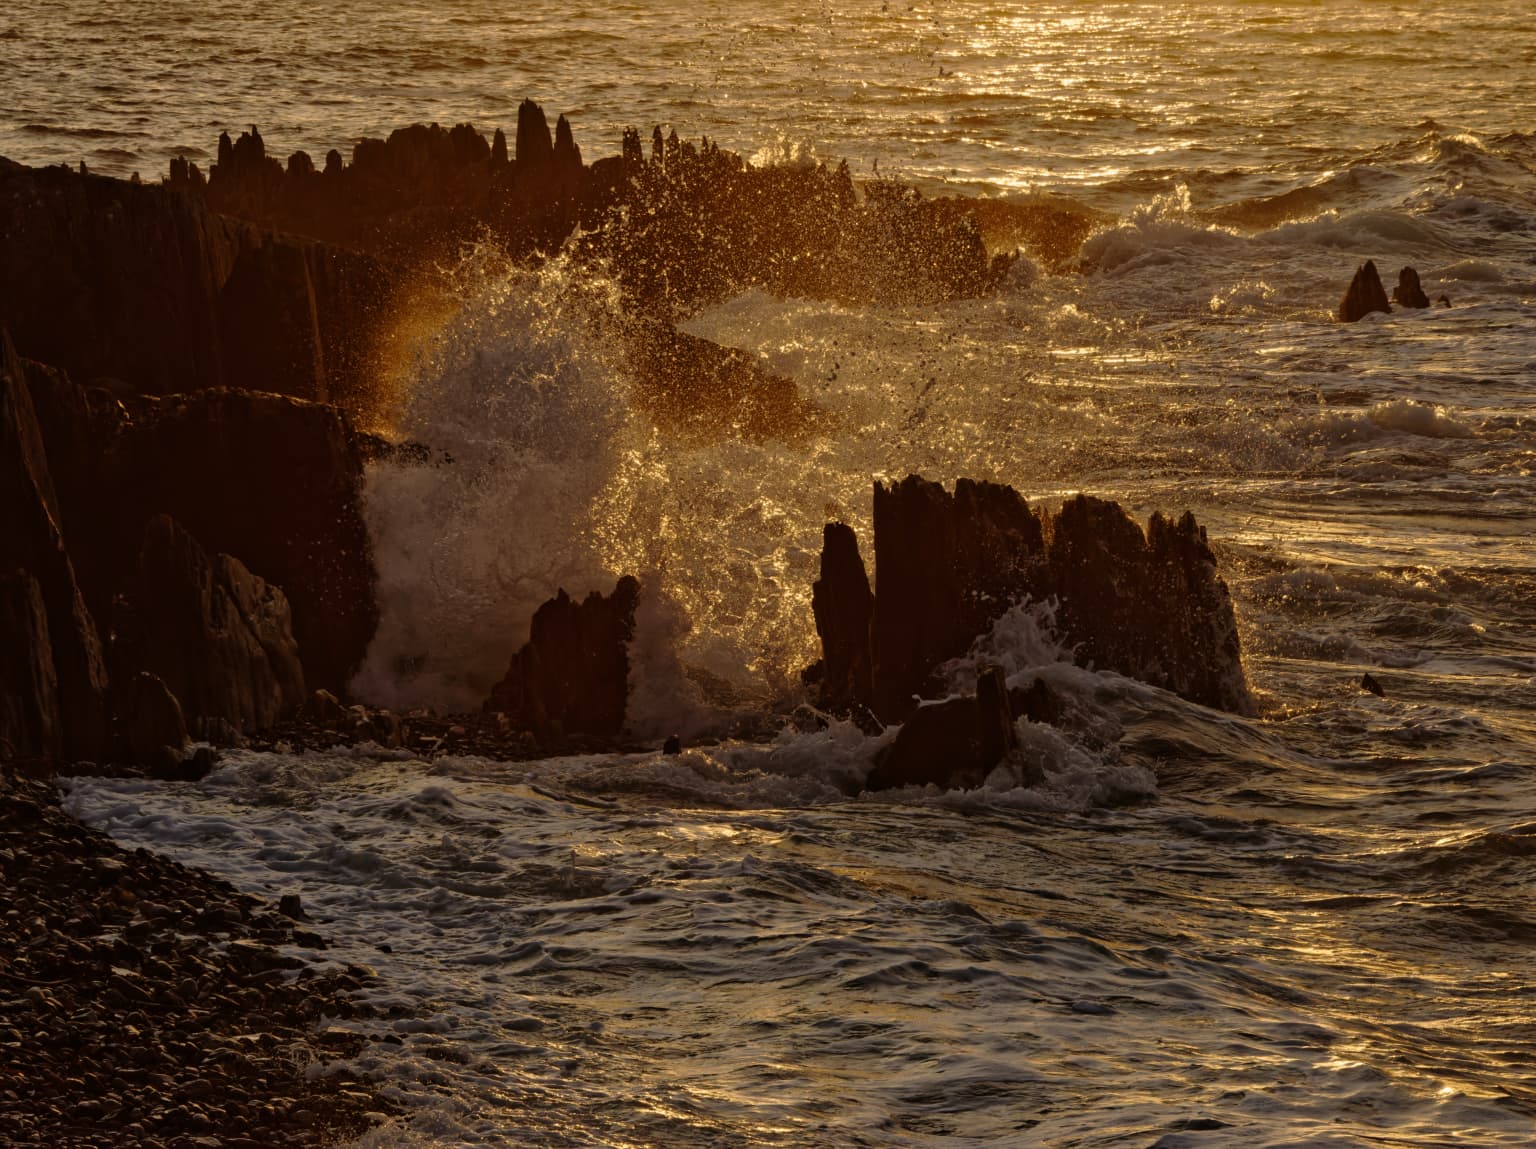
And specifically in Helen’s photo, she captured the water with “back lighting” making it even more interesting. …and after re-thinking this, I now prefer exactly what Helen did capture, more so than what I was wondering about with a slower shutter speed.

…and this setting only matters to built-in previews, thumbnails and OOC jpegs,
but not to raw image data…

I’ve known about the “golden hour” since long before I heard those words, but I don’t remember ever reading about a “blue hour”. What is it, and what makes it special?

Because of Joanna’s suggestion, I have set all my cameras to 5600K, and RAW, and I used to think that when shooting in the golden hour, I should play with the white balance to make this more obvious, but I think what it’s really doing is making the camera “see” what I felt I saw with my own eyes. I’m not very good at this, and for much of my life, I never paid much attention to it. I started using it for real in India, and it’s probably from all the dust in the air that the world started to look overly “golden”. My favorite outdoor temple photos were from when the sky was just starting to get really dark, a deep blue color, but before the sky turned black. The low-level golden lighting just added so much more to the photos. I realized I had between five and ten minutes to take the photos - anything earlier or later lost the effect I wanted. This means being all set up ahead of time, waiting for just the right timing, and shoot. I’m no expert, but with trial and error, I soon found out what worked best for me.

Nowadays I find my favorite photos are from early morning or early evening, when the sun is low on the horizon.

Anyway, can you please post a photo taken in “blue hour” so I can understand what you mean?

Just set WB and never change it. WB settings don’t change what your sensor sees. They just change how the shot will look while chimping or before being processed in DPL. WB will also define the looks of out-of-camera JPEGs - if you care to keep them…

I suspect this is where “Golden Hour” came from, as back then, we were all shooting film, and the lighting changed, it was obvious when we viewed our prints. Of course back then, there was “daylight film” and “tungsten film” because of the change in the lighting.

Nobody’s aware of this nowadays, as most people set their camera to AWB, Automatic White Balance, and never realize what’s going on.

It’s one more bit of advice I got from Joanna, even though at the time I wondered how it would work for me. As you wrote, the camera will record whatever the sensor “saw”. Makes me wonder what I’m seeing on my LCD screen, since I have AWB turned off, and the camera is now “seeing” at 5600K. If I’m shooting RAW, would it matter if I set the WB to some strange, goofy number? One of these days I’ll have to verify that - but it shouldn’t.

On the other hand, since the LCD screen and the histogram will vary based on the color of the light, why would I not want to leave my camera set to AWB, if for no other reason than to possibly make the histogram more “accurate” based on the lighting? Maybe this is why I’m likely to get a different exposure metering when I use a viewfinder, compared to when I use “Live View”.

Unless/until I know differently, I’m going to just leave my white balance set at 5600, with the camera permanently set to RAW only.

The histogram varies with what you set as WB. Unless you set it to UniWB, the histogram will reflect the preview rather than what the sensor recorded. I’d not think of the histogram as a precise measuring tool, but as an opinion of someone more or less well informed…

Don’t forget:WB is a correction factor to correct a non-white light source. Mostly we want to correct that non-white light but not with sun down/rise. We want to keep that feeling.

George

1 Like

@GIBF4 & all-- about Control lines

Hi Jeroen,
as you have been working on this pic your ‘old’ way, you might be interested how to in PL5 …

_MJM9746 2021-11-16.nef.dop (57,2 KB)

M = masterfile (from post #303 / with optical corrections)
VC1 = Mike Myers
VC2 = Wolfgang (2nd Control line to extend sampling range)
VC3 = Wolfgang (2 Control lines to extend sampling range)

Choose the COMPARE MODE

  • to compare different versions instantly
    (w/o recalculating; also not side by side …)
  • and keep the pic ‘in position’ with Local Adjustments activated
    (w/o jumping around because of crop)

While I wanted the big block on the right to ‘get out’ of the pic, I decided to crop the sky down
to about 1/3 and let the water mirror its beautiful colour, enhancing the strong perspective.

After correcting perspective (temporarily lighten to …) I set the Spot Weighted box here right onto the sun and the second one somewhere at the bottom right, cropped to taste, moved the second Spot Weighted box around to get the ‘right’ amount of visibility in the water and played with global Contrast / Shadows.

Control the range of the Local Adjustments with MASK VIEW [M]

To bring more attention to the buildings and the water I used a Control line / ClearViewPlus (excluding the sky w/ CPs). A big Control point on the main reflection with a little light and a tiny bit of warmth helped to guide the viewers eye. Then I brought up the reddish reflection on the right and with a 2nd Control line the one on the left.

  • in VC2 both CLs use the same settings, but different pipettes to extend the sampled range
  • in VC3 I simply duplicated the CL and only moved the new pipette as in VC2

Lastly I enhanced the vibrancy in the reflecting windows on both sides.

To finalize (balance out) the pic, I revisited several steps ( and experimented with VC3 ). :slight_smile:

have fun