Several people in this forum, especially Joanna and Wolfgang, have been teaching me how to work more effectively with High Dynamic Range photos.
The first suggestion was to put away my Leica M10, and switch to my Nikon D750 which is more suited to this kind of photography. (A Nikon D850 would be even more suited, but that’s for much later, if at all.)
What they suggested I do was:
put D750 in (M)anual mode
Select RAW mode
Set ISO very low (I used 100 ISO today)
Select “Spot Metering”
Use the exposure compensation control set to +1.7 (overexposing)
Measure exposure with the “spot” on the brightest part of the image, and center the D750’s metering so it is “centered”.
Adjust the composition, focus, and shoot.
Exposure was 1/320th, f/13, ISO 100
From then on, it was using my PhotoLab tools, but I used my new PhotoLab 5 for the first time. (In retrospect, I forgot to turn on DeepPrime…)
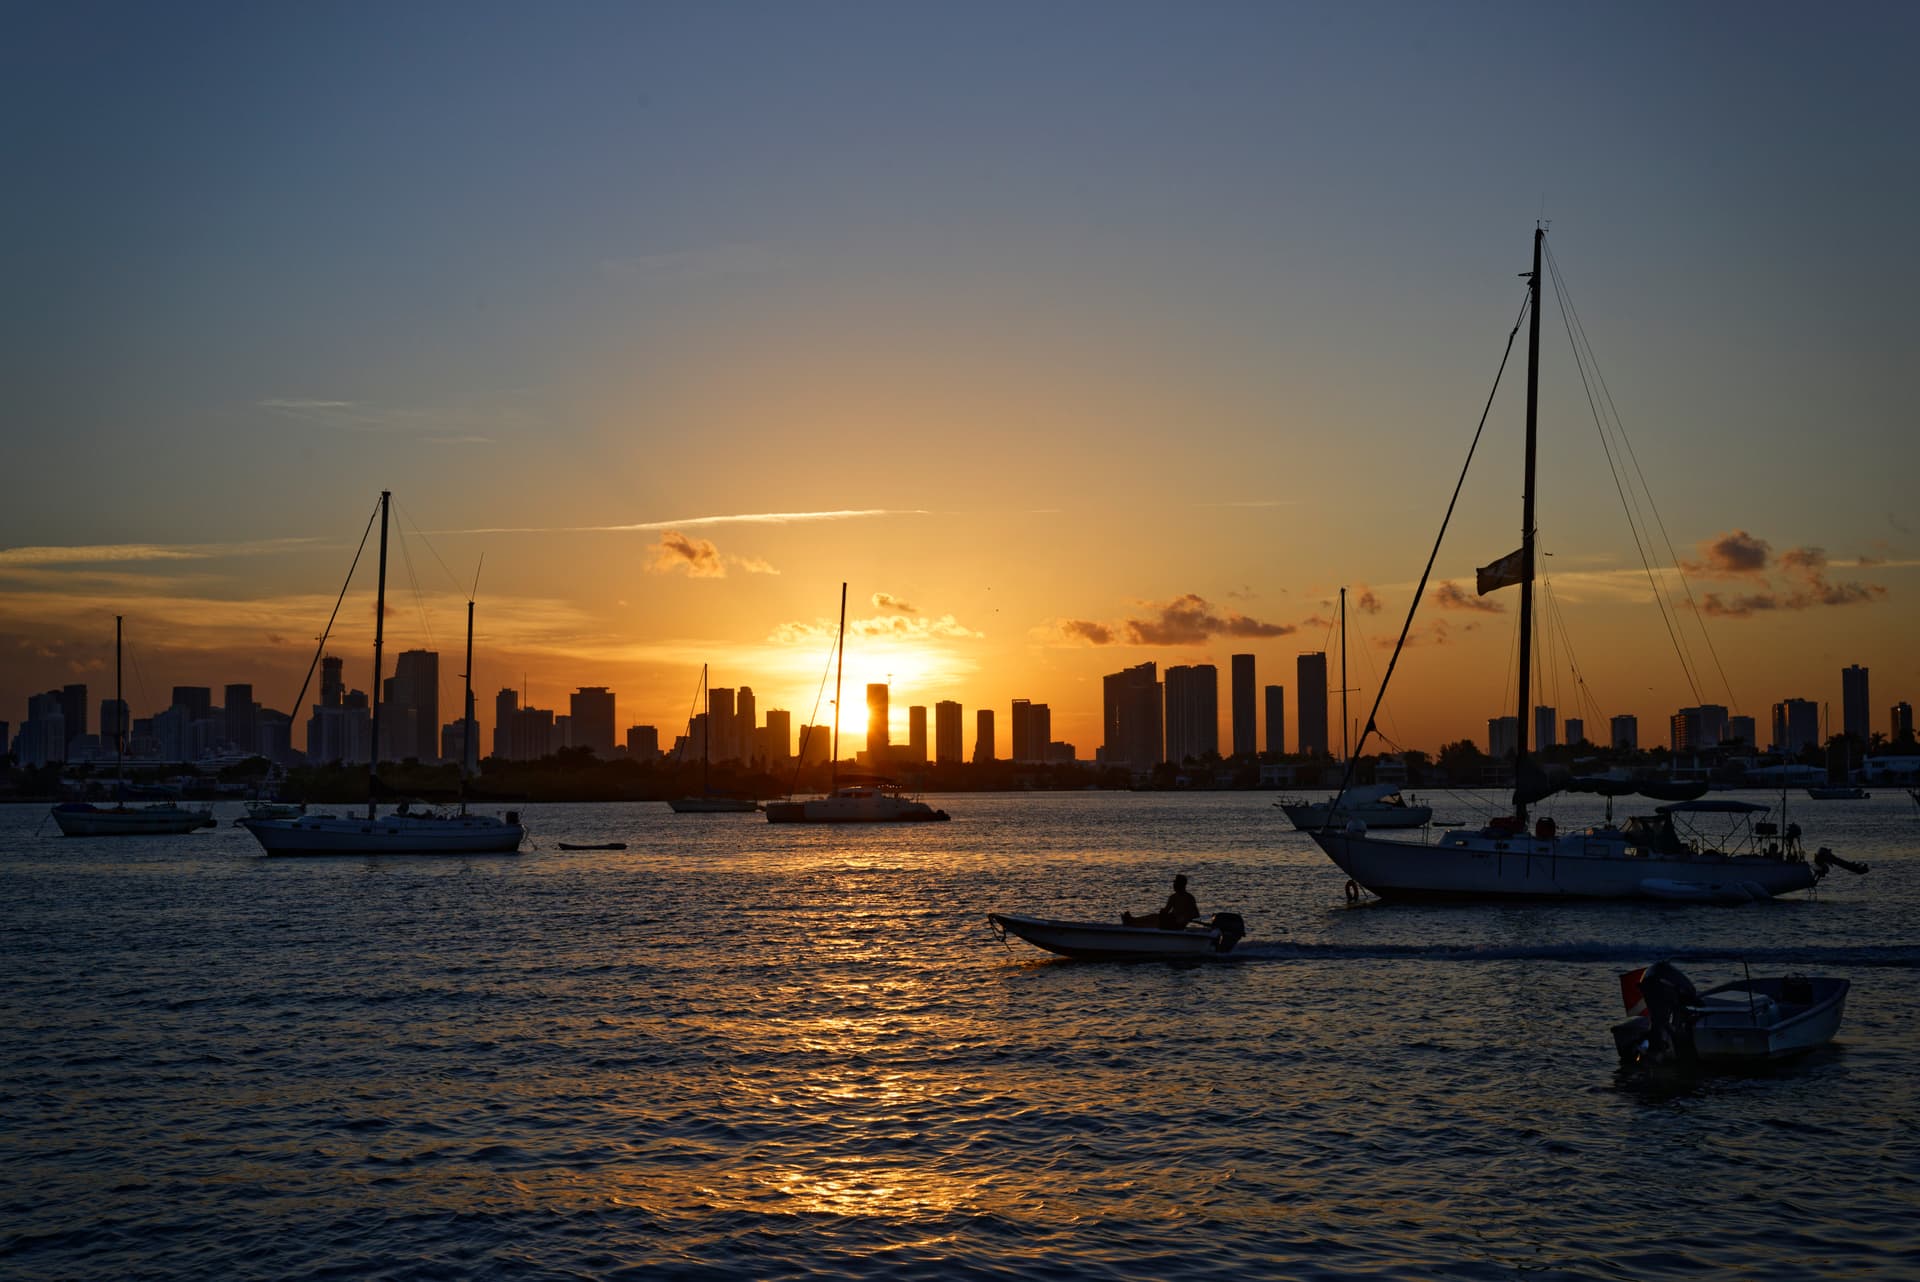
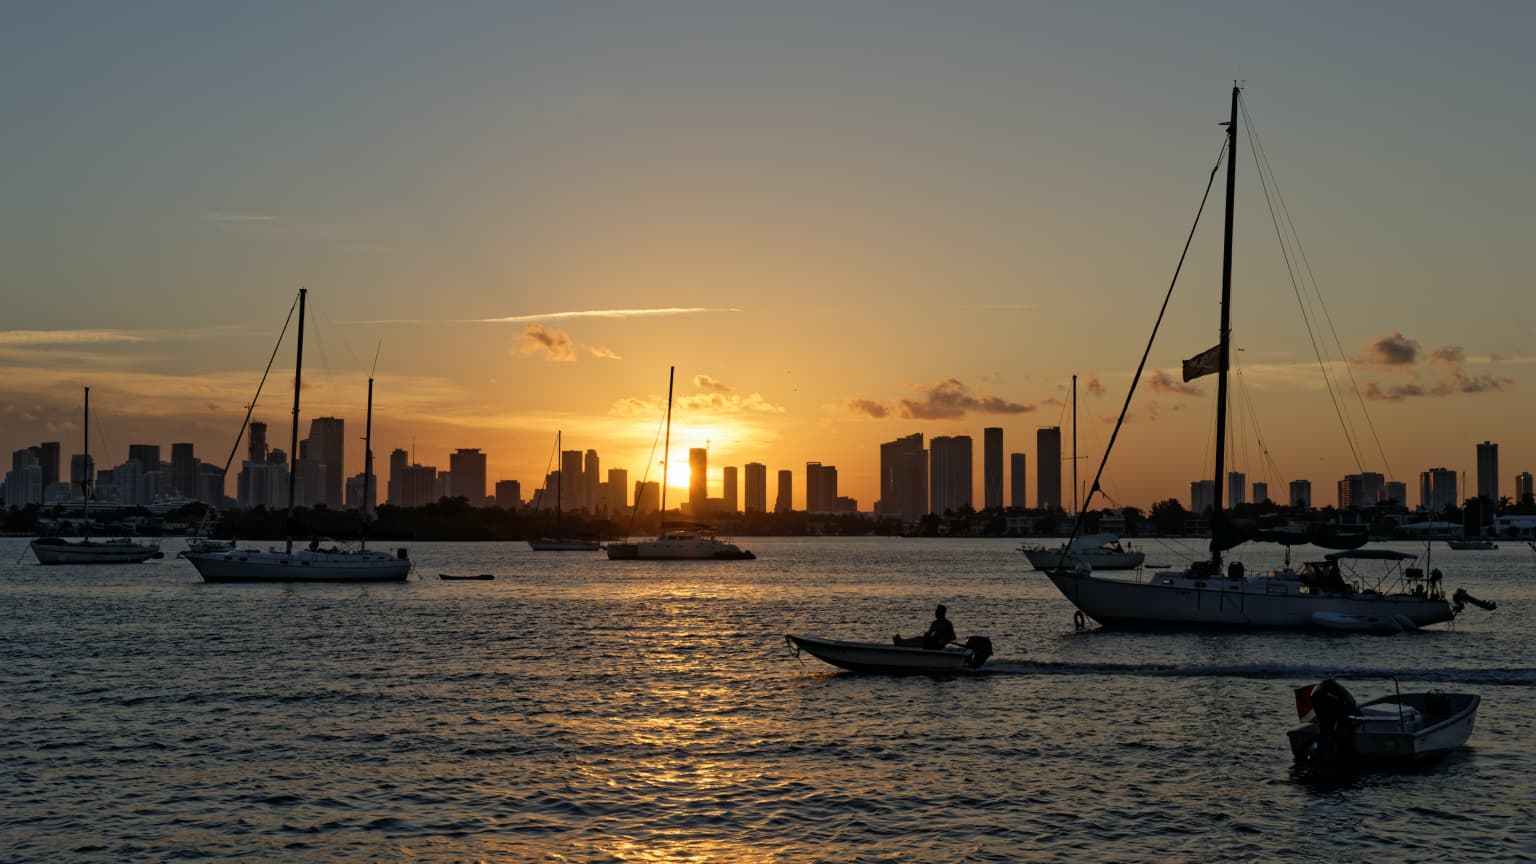
I’m posting that image here - anyone who feels like it is free to edit the image any way you wish. As for me, I did very little editing, and as sunsets go, today’s sunset was very boring. Fortunately the speedboat came by, to put some life into the photo. I saw it coming, and waited until it was just before the reflection in the water.
Viewing this on a calibrated display, I think it looks the way it’s supposed to look, but on my uncalibrated iMac it is way, way too bright. I usually feel this way after posting, and the following day I get lots of ideas of how I could have or should have done better.
(Oh, I suggest anyone posting in this thread should use PhotoLab 5, not an earlier version, even though I think the would show the same thing…)
Hi Mike, see my proposal, I raised the depth, added some contrast and artificial vignetting (integr. Filmpack), increased the orange and blue channel (HSL) to giive it more pop. Finally a matter of taste. No deep prime necessary, your D750 just delivers. _7509172 _ 2021-10-21.nef.dop (10,3 KB)
This is even more amazing. I just tried something else:
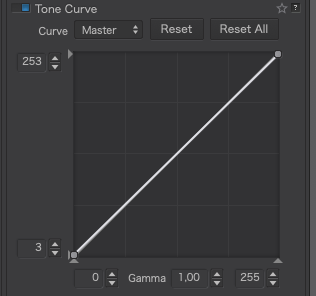
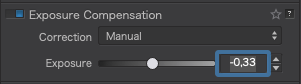
I put the top of the tone curve back to 255 and reduced the exposure by only ⅓ stop and the over-exposure indicator went out. If I hover the mouse over the sun itself after having done this, the levels show as R:254 G:254 B:254.
This means that, if you had use +1⅓ instead of +1⅔ compensation your image would have been absolutely perfectly exposed for the highlights.
I’m placing your image next to mine, on my ASUS monitor, and not thinking about what you did, only how the image looks. What strikes me the most is you have the sky near the top as being more “blue”, while my sky is more gray. Also, your image is much more “vignetted” (is that a word) starting with the sun, and radiating outwards. That’s not what I saw, but it certainly grabs my attention. The added contrast certainly gives it more “pop”, but the minimal detail I tried to bring back in the buildings and boats is mostly gone again.
I’m not sure what to think. As a record of what I “saw”, I prefer my version now that I’ve learned how to bring out all that detail (with Smart Lighting), but if both images were hanging side by side at a gallery, I think a bigger crowd would be enjoying your version.
As to Deep Prime, I no longer debate whether it’s needed or not, and I rarely can see the difference, but I wish I had a setting to turn it on always, unless for some reason I physically turn it off - the only reason it’s not there, is because I “forgot”. My “fix” for this is to move “DxO Denoising Technologies” up to near the top of my “Right Dock” - the order from top to bottom has all the things I do most up near the top, so I’m less likely to forget in the future. I haven’t yet noticed that I really need Deep Prime from my D750, but if there are any parts of the image where it would help, that will now always be done.
The way I used to feel about images, I certainly prefer your version more than mine, as it just jumps out of the screen and into my eye - “pop” on steroids! What I question though, is I’ve been learning in this forum how to bring out so much more of the detail in my images, that I never really paid attention to before. By using Smart Lighting, I was able to bring out a little more detail in the boats and buildings. Now that I can do that, to my mind it’s close to “essential”… but I need to figure out how to bring out more “blue” in the upper part of my sky. I’m not sure right now how to do so…
I guess I did that, but all I was doing was following the instructions you taught me, and Wolfgang got so buried into my brain that I’ll never forget them. The sun was already a little bit “hazy”, and I was spot-metering right on the sun, zeroing the exposure setting at the bottom of my D750 window. The rest was trivial - recompose, focus, shoot. It felt very “mechanical”, and I remember wondering last night if it would really work - but apparently it did.
I didn’t realize that the SIZE of the Smart Lighting tools made a difference. I see what a difference it made in the tone curve. I used to use the tone curve first, but unless you give me a reason not to, I’ve moved Smart Lighting to the very top of the Right Dock, and from now on, will use this before adjusting the Tone Curve, not after. Thanks. Now that I think about it, it sound more natural - and I can clearly see the difference between your Tone Curve and mine. Like I wrote to ‘Fotoguido’, I have changed the order of the tools in my Right Dock, and Smart Lighting is at the very top now.
Yep, not having it turned on was my mistake, and it is moved near the top of my Right Dock, so that won’t happen again. I just saved my Workspace with Deep Prime turned on. Maybe on my next use of PL5 it will be on automatically, unless I wish to turn it off?
I like both, but I didn’t like the small boat right up front at the right, so I cropped it out, and then. cropped the left to balance the photo, and then realized that the speedboat was sort of the focus of the image once my eye left the sun, and was looking around.
My favorite, if I can figure out how to do it, is your version, but with Fotoguido’s more blue sky. Not sure how I can modify my sky adding more “blue” without changing the tones of the rest of the photo.
Perhaps sometime soon, I will get a much more spectacular sunset to work with. I never know in advance when that’s likely to happen…
I opened your version, and move the top of the tone curve up to 255, and the over-exposure warnings lit up. How did you “reduce the exposure by 1/3 stop”? I can’t find any way to do that? I can’t find any display for “exposure setting”.
Also, looking at your version at 100%, I can see all the detail in the buildings and boats. That’s important to me, and while I brought back detail in the boats, in your version I can clearly see all the detail in the buildings, the window, the reflections, and the “tree line”. I think I’m “speechless” right now - all that detail is visible, and the sunset lost none of its (limited) beauty!
That “mechanical” is very important because it frees up your thought processes more to compose and generally think through how you want it to look once it’s processed rather than having to rack your brain trying to remember which menu something was on.
Yes, Smart Lighting is, well, smart, but it does need a bit more information to calculate the brightest/darkest areas in the context of what is around it.
Nope. Workspaces only remember the position of tools in palettes. To remember a setting, you need to edit your default preset.
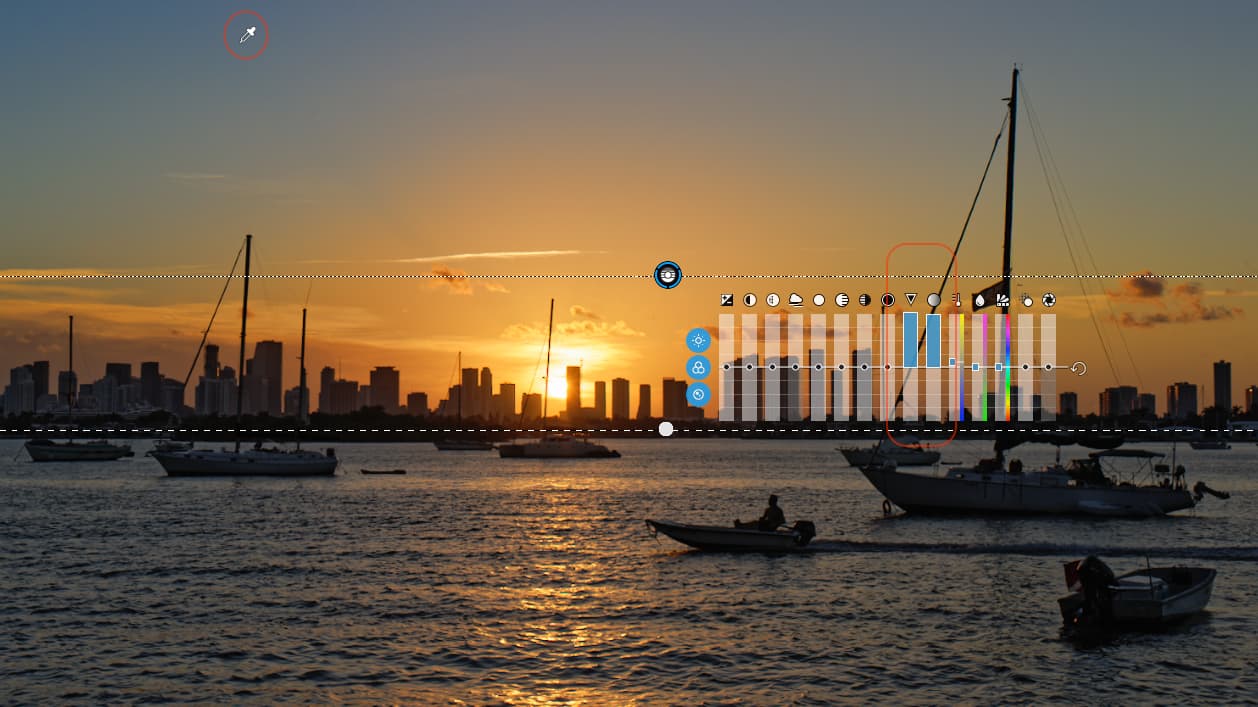
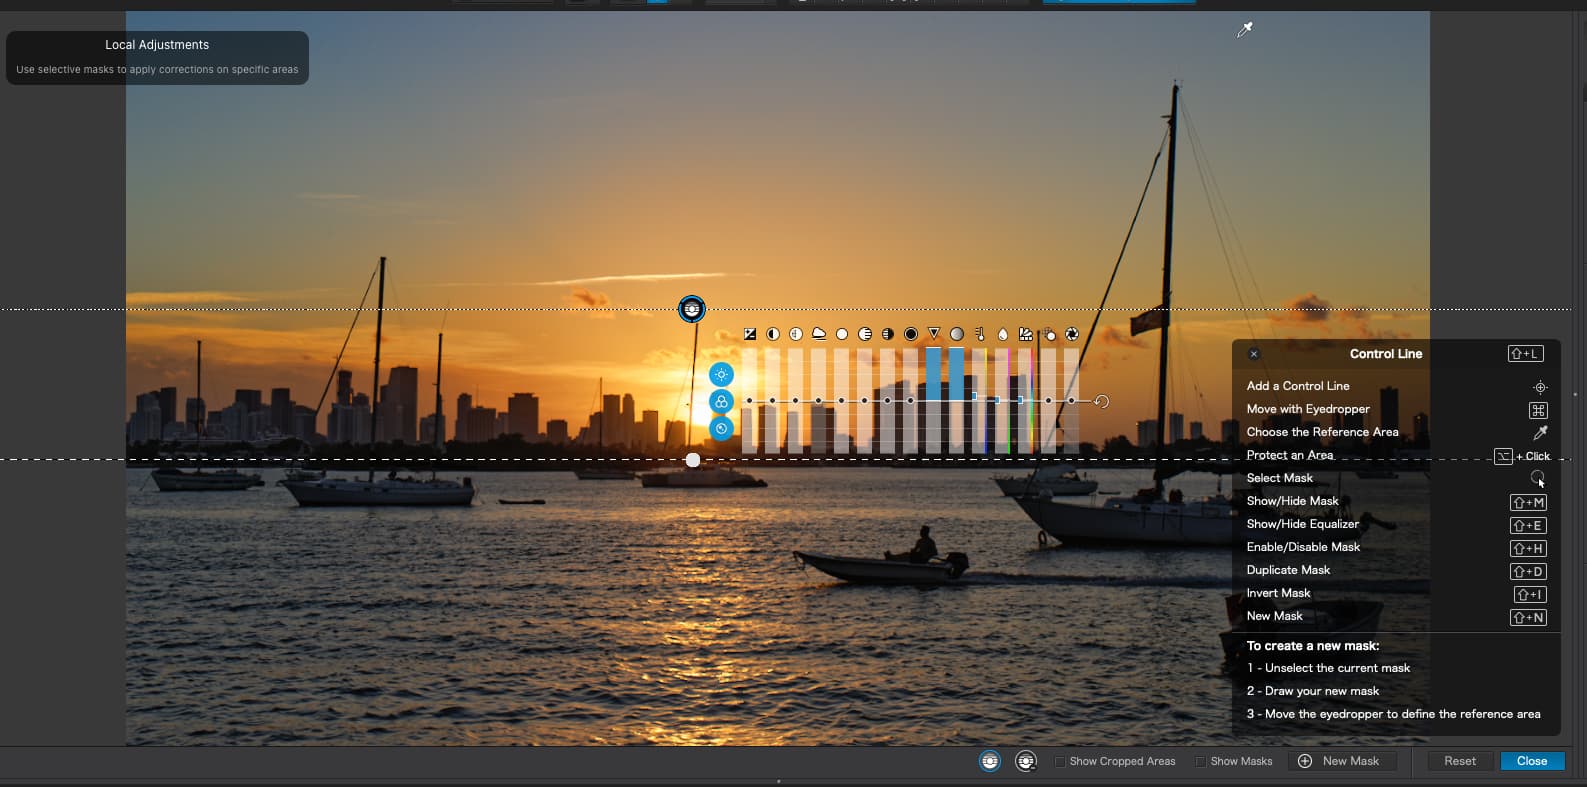
For that, possibly the best tool is the all-new Control Line in Local Adjustments.
It’s a bit like the gradient tool but with a lot more smarts. In this case, I started setting it to start roughly where the blue starts to turn to orange at the sides and drew it down to the shoreline. Then I moved the pipette from next to the control point to a part of the sky where I judge it to be the “bluest”. This tells the tool to select that as the the primary colour/tone to work with.
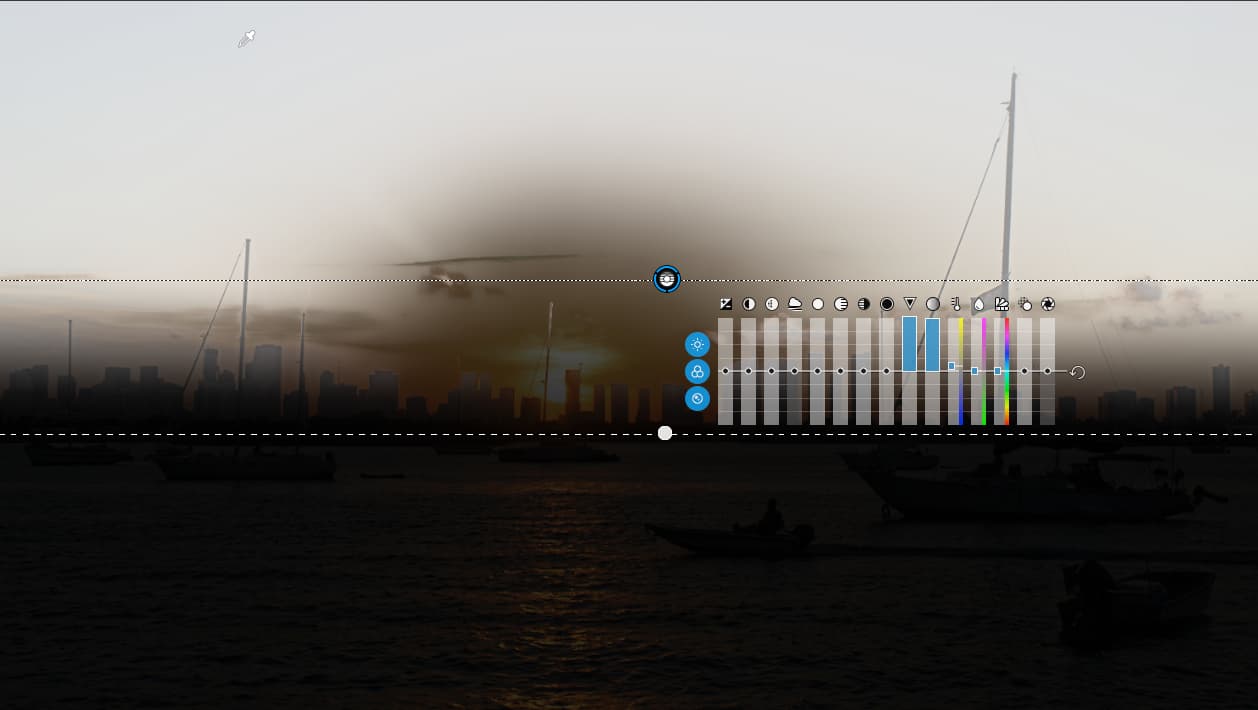
To see more clearly which parts of the picture are going to be affected, click on the Show Masks checkbox at the bottom of the picture and whatever appears whitest indicates the most strongly affected areas.
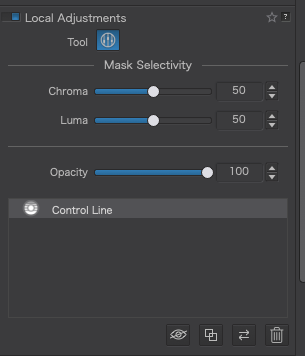
You can also use the Chroma and Luma sliders in the Local Adjustments palette to decide how selective you want the selection to be.
In this case, I left both selectivity sliders at 50 and simply jacked up both the Vibrance and Saturation sliders on the equaliser.
In the Exposure Compensation tool?
Don’t forget with a RAW file, within limits, the exposure can be regarded as a suggestion. But, after I wrote what I did, I altered it to -0.1, but you can play with it now you know where to find it.
This is why I altered the Exposure Compensation very carefully, because it is quite a fine line between having shadow detail and the blacks starting to look mucky grey. In this, EC worked better than bending the bottom of the tone curve - it really depends on what surrounds the black areas.
Fascinating!! I haven’t read about what’s new in PL5, and didn’t realize this was added. Thanks for the detailed explanation - I will try to follow exactly what you did, by which time I’ll be able to add it to my “toolbox”.
As always, thank you for the detailed explanation and “how to” instructions. …one new tool to explore!
Added a few minutes later:
I tried what you suggested, and got the desired result, but I’m quite confusabobbled about all this new information to select from!
I didn’t think about it that way, but you’re right - follow the routine steps without thinking, and I’m left to fully concentrate on composition, which as I see it is the single most important part of a photo, arranging it in a way that communicates to others what I saw and felt. Your suggestions, and from others, give the best chance of having all that “data” available when I edit the photo.
I don’t consciously think about what it will look like when processed, but my imagination is showing me the end result that is possible, with no indication of what I’ll have to do next. I “crop” and do other things in my mind without realizing it. Lots of little stuff, like moving a bit to one side or another, to get things to line up the way I like - it just happens, as part of “composing”, like wanting the speedboat in just the perfect place in the photo. I guess I shouldn’t say the “perfect” place, as it’s really where I “feel” it will fit best.
Now I’ve got this new tool to think about, and learn how to use, but that’s for processing, not capturing. What I want, and work for, is the best possible image “OOC”, knowing I’ll work on it later.
Now I’m off to read about “Control Line” and how to use it effectively.
Hi Mike, glad you liked my version. Not much time and Joanna described a lot of good things. There are many ways to Rhome Even I fiddled around a bit. To make the sun even more orange I chose the Local Adjustment tool on it and reduced Highlights significantly and brought the color temp to 12.000K. For the blue, checkout the HSL tool and set saturation to 60 and luminance to 10 on the blue channel, but again, all a matter of taste.
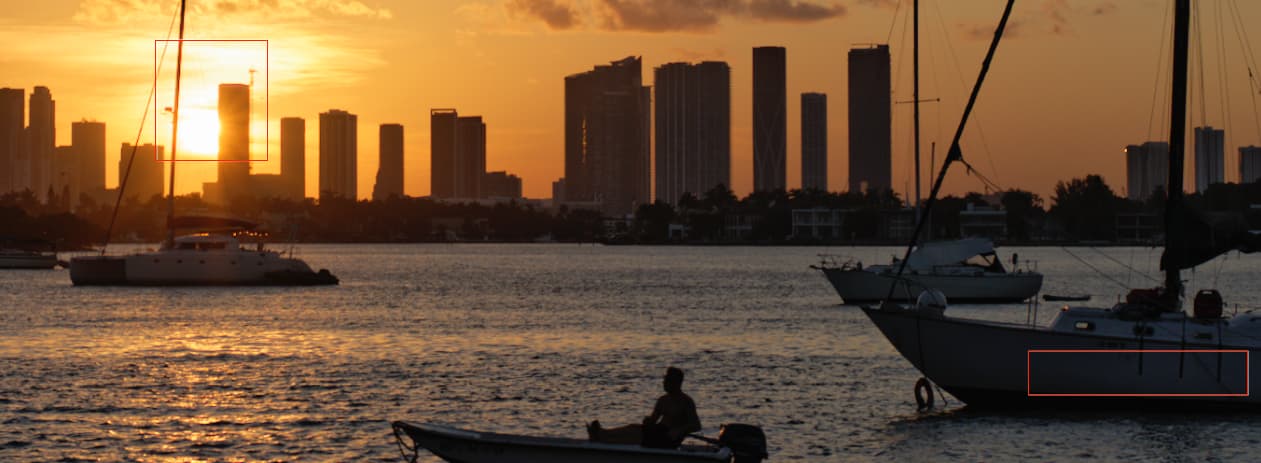
Noticed that there are at least 8 dust specks in the sky? Thats normal but only visible when operating with small appertures like f13.
I haven’t cleaned my D750 sensor in ages - but haven’t been using it much. I think some of those specs are birds, but others looked like dirt. So, I used the built in sensor cleaning tool. I set the camera to take a photo of a white wall, aiming for 18% gray - 50mm, f/1.8, ISO 100, 1/100th second. No more dust. I then shot a photo of the sky, over-exposing, so I was using f/16. Still no dust. Even more curious, I opened up an image from two days ago, taken mostly of sky and water, overly bright. At 100% I couldn’t find any dust.
So, I’m now back at the image from last night, viewing it at 100%. These are the most suspicious “things” in the photo:
I think they are birds? Regardless, my sensor now seems to be fine.
(I forgot my D750 even had the sensor cleaning function!!)
Those are birds for sure. The best test for finding spots is to shoot at f/22 or smaller. I usually avoid any openings smaller than f/10 or so (and usually at f/8 or wider to avoid issues with diffraction), but sometimes (e.g., for sunstars) it’s useful or necessary. The Nikon sensor cleaning is useful but can’t eliminate all sensor dirt…
Nice sunset photos! And useful processing suggestions from Joanna and Fotoguido.
Thank you - lots of wonderful teachers in this forum. Joanna is the ultimate expert in my opinion, but when I don’t understand Wolfgang comes along and says things in a way that fit into my mind better. Fotoguido is also quite talented - I don’t think I have met him before.
I do know about diffraction, and usually try to avoid f/22, unless it’s necessary. I’m surprised my D750 works as well as it does, with such tiny pixels, and Joanna’s D850 has even smaller pixels.
Back to what you wrote - I think by “sunstars”, you mean points on the screen with “lines” going out from them in many directions, sort of like a star? Maybe when you have time, you can please post something on how to do that? I see them in other people’s photos, but have no clue as to how to do it. I suspect you put some kind of filter on the lens, but that’s just a guess.
I love posting photos here, editing as best I can, and then many, many people come along with ideas on what I could have done better, and then they post their version. Images I uploaded a year ago I now consider quite ugly - too many mistakes, and too much use of “ClearView”. I thought I knew what would make an image look better, but now I realize I was deleting much of the data that the lens and camera captured. My sunset photo up above - had I posted it last year, it would be black buildings against the sky. In my wildest imagination I never dreamed I could bring out all that detail, while shooting into the sun. Now I look at images at 100%, and see data that I didn’t expect. It’s an opening into a whole new world. I’m guessing other software can do it, but PhotoLab makes it so intuitive ONCE I LEARN THE CONTROLS.
Sunstars: Yes, you understand what sunstars are. Not something you want to use all the time, but in moderation something a bit different. You don’t need special filters (although those are available also). And I haven’t used it much. You can give it a try by stopping your lens down to f/22 or so and just including the sun in your image. There are a number of subtleties, but that’s the general idea. (Be prepared to clean up some sensor specks due to the small aperture.)
Back to the main topic, I had an interesting experience this morning. I put my D750 with my heavy 80-200 lens mounted on my Bogen tripod, raised the camera up to eye level, and was going to use spot metering to measure the brightest part of the image. At 80mm focal length, anything I did to the camera caused the image in the viewfinder to “wobble” - anything. (My new tripod should be arriving any day now…)
So, I went looking in the D750 Menu for the self-timer setting, but found something in the PHOTO SHOOTING MENU for “Remote Control Mode (ML-L3)”. Selecting that gave me several options for remote shooting, including the option to lock up the mirror first, then either take an instant photo by using the remote, or taking a photo with a delay. Back to the computer, what is an ML-L3??
As for my photo from an hour or so ago, I got one photo I liked, but that was from before I switched from center-weighted back to spot-metering. A boat was sailing by the statue, and if I delayed any longer, the composition would be gone. I took more images at better settings, but clouds started blocking the sun. I may or may not have an image worth editing and posting here - there were lots of cruise ships, all lined up in a row, and I thought that made for an interesting photo, especially for people who don’t see these ships all the time.
Excuses, excuses. You know you should set the camera to what you intend to shoot next, before you switch it off, even if you don’t know what you are going to shoot next - it’s called predictive adjustment and it’s available in the upcoming Nikon D2025 Super AI IQ+
I think the best thing I can do is to set the exposure comp back to zero, and switch from (M)anual to (A)perture priority mode, with maybe 400 ISO. I think that was your suggestion for walking around with the camera, not knowing what the future might bring me…
Does that D2025 include the auto-shutter option, so it only fires at the optimum moment when the camera is stable and the composition satisfactory?
More seriously, DPReview had a discussion as to why the ML-L3 doesn’t work with the Nikon D850. https://www.dpreview.com/forums/thread/4340612
What are you now using for that purpose? Does the D850 accept a standard old-fashioned cable release like cameras were intended to use, or is it like my D750 that doesn’t seem to accept any cable release???


 Even I fiddled around a bit. To make the sun even more orange I chose the Local Adjustment tool on it and reduced Highlights significantly and brought the color temp to 12.000K. For the blue, checkout the HSL tool and set saturation to 60 and luminance to 10 on the blue channel, but again, all a matter of taste.