DxO, Please; layers!

Thank you! I have never used the CO “DAM” and never will. Since I always have used the old fashion “Sessions”-paradigm that software once was built around when tethering repro photographed images to computers, I have no use for their variant of an “Image Library”. In their “Sessions” there is a session centric database and that,s good enough for me. Sessions is in fact the CO way to let people having a workflow not using a monolithic database today. An option like that is not really present today in Photolab.

I will still use Photolab as my main work flow for more simple general work but if I see there is a need for more advanced precision tools I will do that work in CO’s far better layer tools.

It’s not ideal but I feel it’s an absolutely necessary step to take in order to meet my own demands. I guess I will use DNG a lot more too…if it’s possible.

1 Like

I bought CO version 10 back in the days as I wished to migrate from Apples Aperture.
After massive problems with bugs and crashed databases on import or during work. All support did was telling me I had too many photos and told me to keep fewer than 10k per db.
The bug fix was to upgrade to next version they said.
I was soo frustrated and saddened.
I’ve not touched CO since then and the license is not used.

I bought PhotoSupreme Server version which I run on Postgres as DAM and PhotoLab Elite as developer with FP and VP - and my life have never been so smooth and hassle free ever since.
No to mention the picture quality in regards to invested time, the PL delivers way above its cost.

Version 10 is 5.4 versions old. Anybody here still talking about Photolab 1? I thought so. CO support is mediocre, okay, but lately I’ve also seen people here asking for some comments from DxO personnel. And it just didn’t happen.

Like you, I also had to find another home for my pictures, coming from Aperture which in terms of DAM and integration with all sorts of apps sets a standard too high to reach for any other one-, two- or more apps solution. At the time Apple closed shop for Aperture, there was nothing comparative around. And still is, no matter how high the workarounders here praise their, well, workarounds.

Each external DAM apps cannot show my edits unless they are exported which I find to be a waste of diskspace. I tried a couple of these workaround double, triple and quadruple apps. Lame, cumbersome and fussy.

My time of sadness was when Apple abandoned Aperture. Ever since it’s not sadness when something is not working the way I was hoping, like DxO with their stubborn sticking to own lens profiles which btw. can be much worse than manufacturer profiles - if DxO has one to offer, which too often was not the case. Currently, with CO I’m not as often upset as I used to be with PL. With each app something can be learnt, my edits in CO now are different from the ones I did when I started to find out how good PL really is, to my personal taste, of course.

In terms of database size: My two main DBs contain 17+33k images, from 16 to 60 MP. I can open them side by side without problems. It would be perfect, if a user could search for album and project names and few other things old Aperture was able to perform 7 years ago. But since most other DAMs have to run on Windows and Mac OS, the weakest system sets the standards of what’s possible.

@JoJu while I agree with you I miss Aperture a lot as well, the point of saving disk space is actually not valid. When you look inside the aperture library in Finder (you can just open it like a folder), you will notice that Aperture saves a jpg of every imported (and edited) image. The file size and quality of that image can be defined in the Aperture settings. As the thumbnail of the original raw image is also not deleted, you are not saving any disk space in comparison to exporting jpgs of your final edits in Photolab or elsewhere.

However, I agree that the automatic creation of those jpgs and the automatic attachment to the original files is much more user friendly and I’d be happy if Photolab optionally offered such an option. It would also speed up the loading times of the images, as it would basically just load jpgs until you start editing.

As no (to my knowledge) manufacturers share their own profiles - they need to be measured and created by the application developer.
DXO is doing one heck of a job creating top notch profiles. But it’s time consuming and they do not get their hands on them beforehand, so they need to wait until they are released and available.

If you want the manufacturers profiles asap - the best option is to stick with their own software ie for Nikon that’s NX Studio (created by Ichikawa/SilkyPix).

Same with colour or picture profiles.
If we want the real intended colours only way is to stick with the manufacturers development tools. Everything else is done after someone else’s ”taste” or lack of. :slight_smile:

That’s what I would have said also a couple of weeks ago. I had to find out, it’s not true. See here

Manufacturers can (and should, because their new way of saving money on lens design is going the “lens profile”-way) share their lens profile by (my guess) putting it into the lens firmware.

Tamron, Tokina, Sigma, Voigtländer and Zeiss (and much more) have no special RAW developer apps.

All my Sigma lenses - quite a few - are already supported by using “manufacturer profile” in Capture One. Even a rather exotic Irix 11/4 is supported by a “generic” profile. I’ve really no profound knowledge about how these profiles find their way into Capture One, but apparently “it’s no rocket science” (and rockets are rather old items…) and DxO’s way is not the best to get. I was quite surprised to see these results and originally expected DxO to become the winner of the comparison.

Hi,

Lensfun by GitHub

not more time sorry

Like DXO, with C1 you can only upgrade by two versions, so when V23 comes out you are on full price for the upgrade.

But why is the control line graduated? Why not 100 % in the complete selected area.

You have complete control over that. Just pull the two lines together and you eliminate the graduated effect.

Mark

As Mark says, it gives you control over the area that is affected by the correction.

The Control Line allows you to change just the sky in this image without changing the trees that intrude into what would have been a graduated filter…

In this first screenshot, I didn’t want the sky to be darkened all the way to the bottom of the trees, so I applied the feathering from about halfway down the heads of the trees, fading out as it reaches the “horizon”

In this screenshot, I wanted the whole sky to be affected without affecting the trees, so I placed a short graduation that both started and ended below the “horizon”.

This screenshot shows that I can cover the entire image with the full density of the adjustment but starting the gradient outside of the image area and, as long as I adjust the Luma and Chroma Selectivities, only the sky, which is where I placed the pipette, will be affected, just like the previous example where I started the graduation under the sky.

1 Like

Thank you Joanna and mwsilver!

I did not realize all I could do with the second line, as placing it above the first line.

So again, thanks!

You can place a Control Line at any angle and in any direction. You can also combine more than one line or add in Control Points as well.

The important thing is to remember to turn on the masks, set the chroma and/or luma selectivity sliders and turn off the masks before you attempt to make any adjustments.

And don’t forget to place the pipette(s) on the area(s) you want to affect. Don’t rely on the circular tool.

What I would like to suggest about layers from my later experiences

@Required

Stability

You are absolutely right that there have been major issues with the C1 stability in earlier years. Personally, I did not experience the problems you had since I worked with the “sessions”-storage method instead of using the single point of failure monolithic image database (a la Lightroom) and I still use the sessions-solution that suits me better the way I work. Optics Pro / Photolab has always been very stable and I think still is.

from Lightroom to C1 to Photolab and back to C1 again

… but it´s also true that C1 has improved a lot since version 8 or so when I started to use it. I once switched completely to Photolab from C1 when DXO had added some local adjustment tools it previously lacked. At that time, I also felt Photolab was far more efficient for me than C1, as I worked.

C1 has been the layer and masking king for many years now

C1 though, has by far had the best layer-based editing among the converters I have used (Lightroom, C1 and Photolab). It has also offered the by far best control of the local editing process and I think it is better than both Lightroom and Photolab when it comes to the rendering of image details BUT even as late as the last version I had used until now (version 20), it was very easy to get lost there among all the layers. It has been relatively cumbersome to handle and pretty inefficient.

Version 21 and 22 has changed a lot

Already version 20 had far better mask refinement tools than Photolab and with version 21 I think everything changed. The developers at Capture One had taken the feedback from the users seriously and they came up with a few brilliant process oriented solutions that has changed a lot and made C1 far more efficient than it previously was.

The introduction of “Style Brushes”

Once when I still used Lightroom 4.x I bought a preset package to Lightroom that also had a bunch of style brushes to improve face retouch (SLR Lounge). We got specialized tools for skin-, hair- and iris-retouch to mention the most important that really helped a lot and now Captured One has done the same for us with C1. More than 20 highly effective style brushes are now included that makes a great difference and there is also an interface that easy let you make your own.

Now we just pick a style brush and then the system automatically creates a new layer named automatically after the used style in a background process and it´s just to start applying the changes the selected brush will make possible. It works wonders and the user don’t even need to think about layers using the Style Brushes.

Magic Brush - Magic Erase and Mask Refinement

With Magic Brush it´s now very efficient to apply smart masking just by clicking once or a couple of times on the areas you want to mask. Finally masking got efficient and even edge refinements are built in too together with adjustable size, hardness, opacity, flow and eve just a right click away with the mouse.

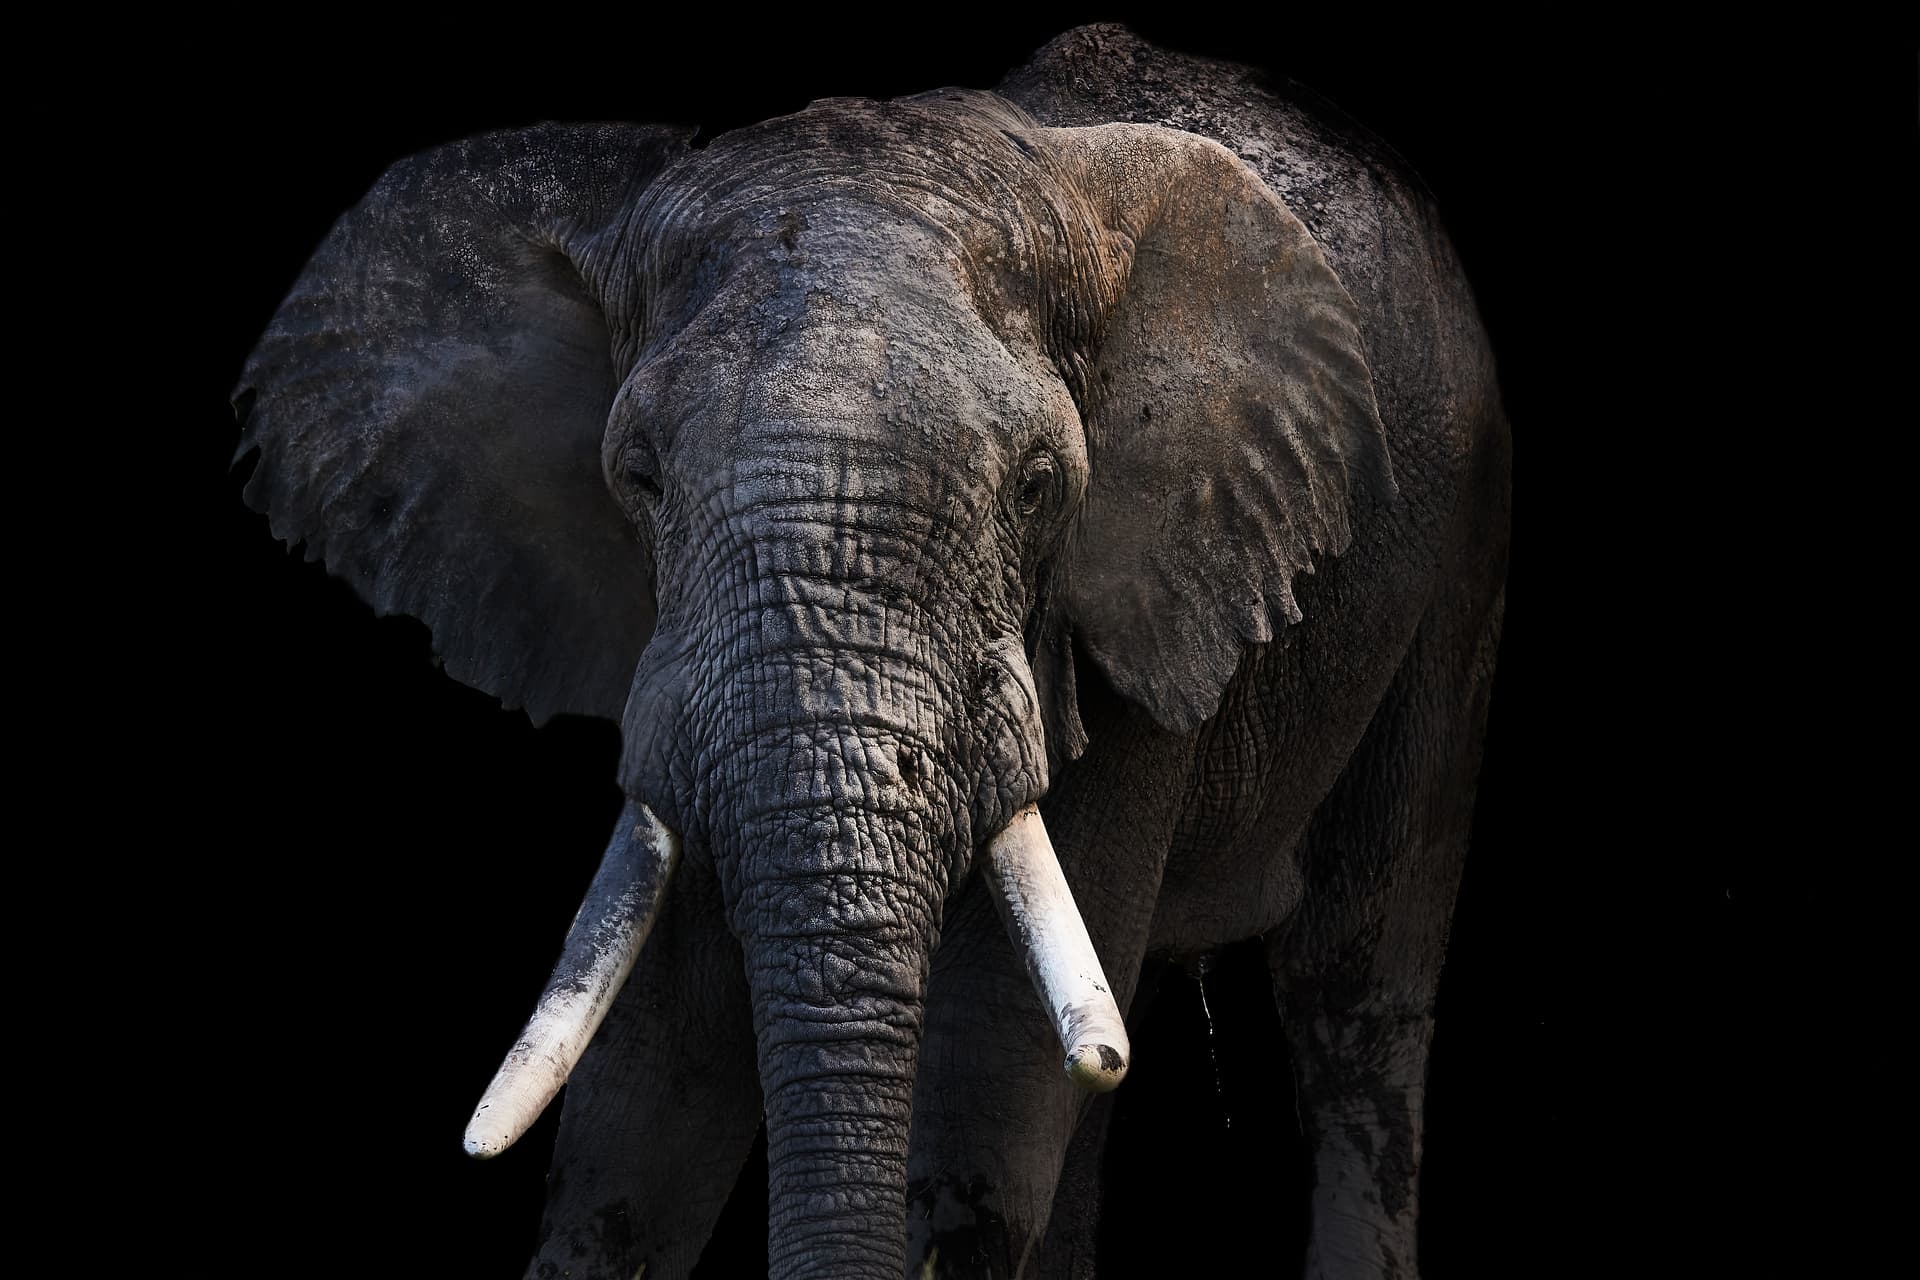
I suggest DXO takes a look at the competition and tries to harmonize the now pretty disparate present tools of the application that have to be better integrated in the layer system of a future Photolab layers and masking system. Today I don´t feel that I can make a job like the one in the “animal portrait” below in an efficient and precise way in Photolab like I can in C1.

The sharpening problems with scanned color slide images

Another disturbing thing I have noticed in Photolab is that when editing repro photographed color slide images, neither sharpening like the old “unsharp mask” or the new one in “lens correction” works at all on these images, BUT in C1 the sharpening works even with these repro photographed color slide images! Photolab’s both sharpening methods are completely indifferent to these images! Why can Capture One fix this and not DXO? For me this really a show stopper using Photolab now when it works so much better in C1. I would love DXO to fix these things because I still have a dream where all these things will work efficiently in Photolab so I can have it all to one single converter.

The DNG-problem

The third major field that has to be improved is the DNG-file format support. C1 can read DNG from Photolab but Photolab cannot read DNG that has been initially exported from C1. If I make a round trip and export initially from Photolab though and then open, edit and reexport from C1 THAN Photolab can read that C1 file because it seems that Photolab prefers the DNG flavour it creates by itself!

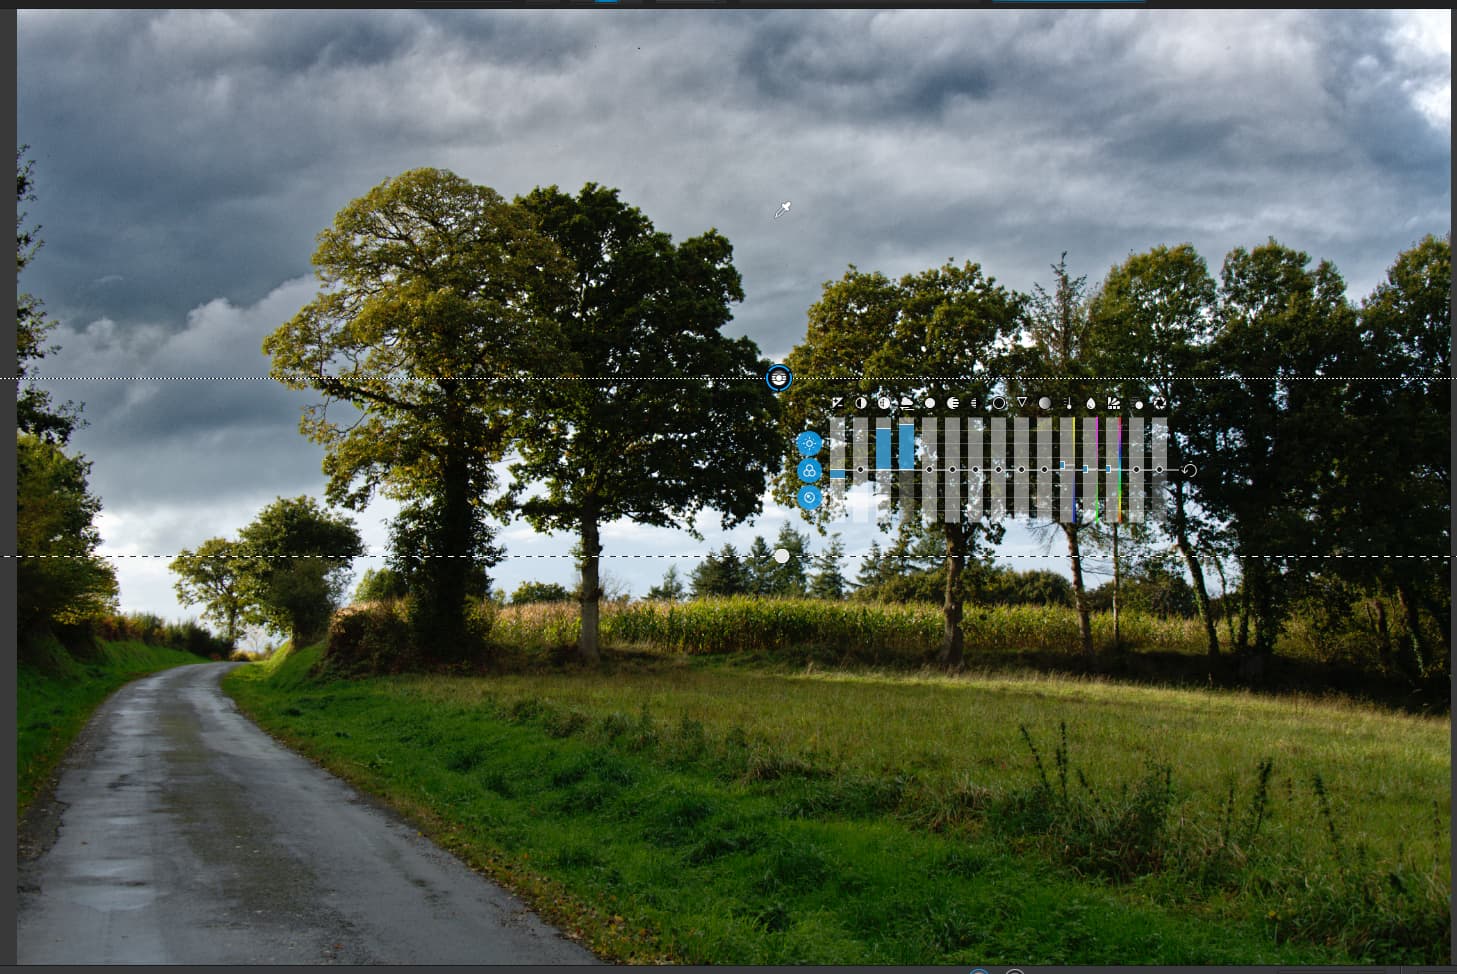
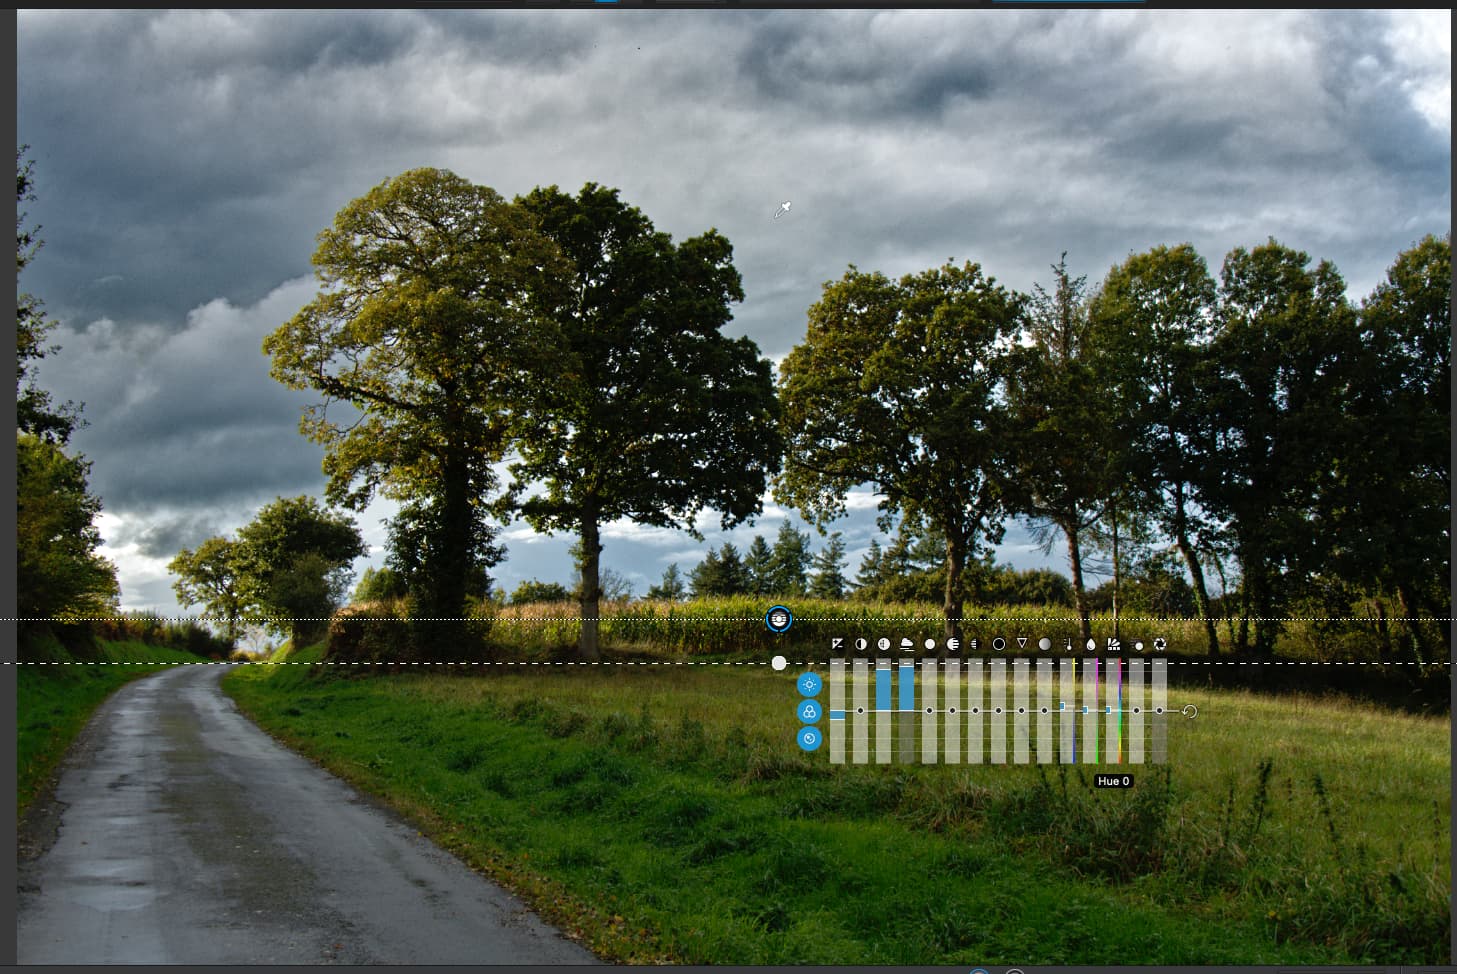
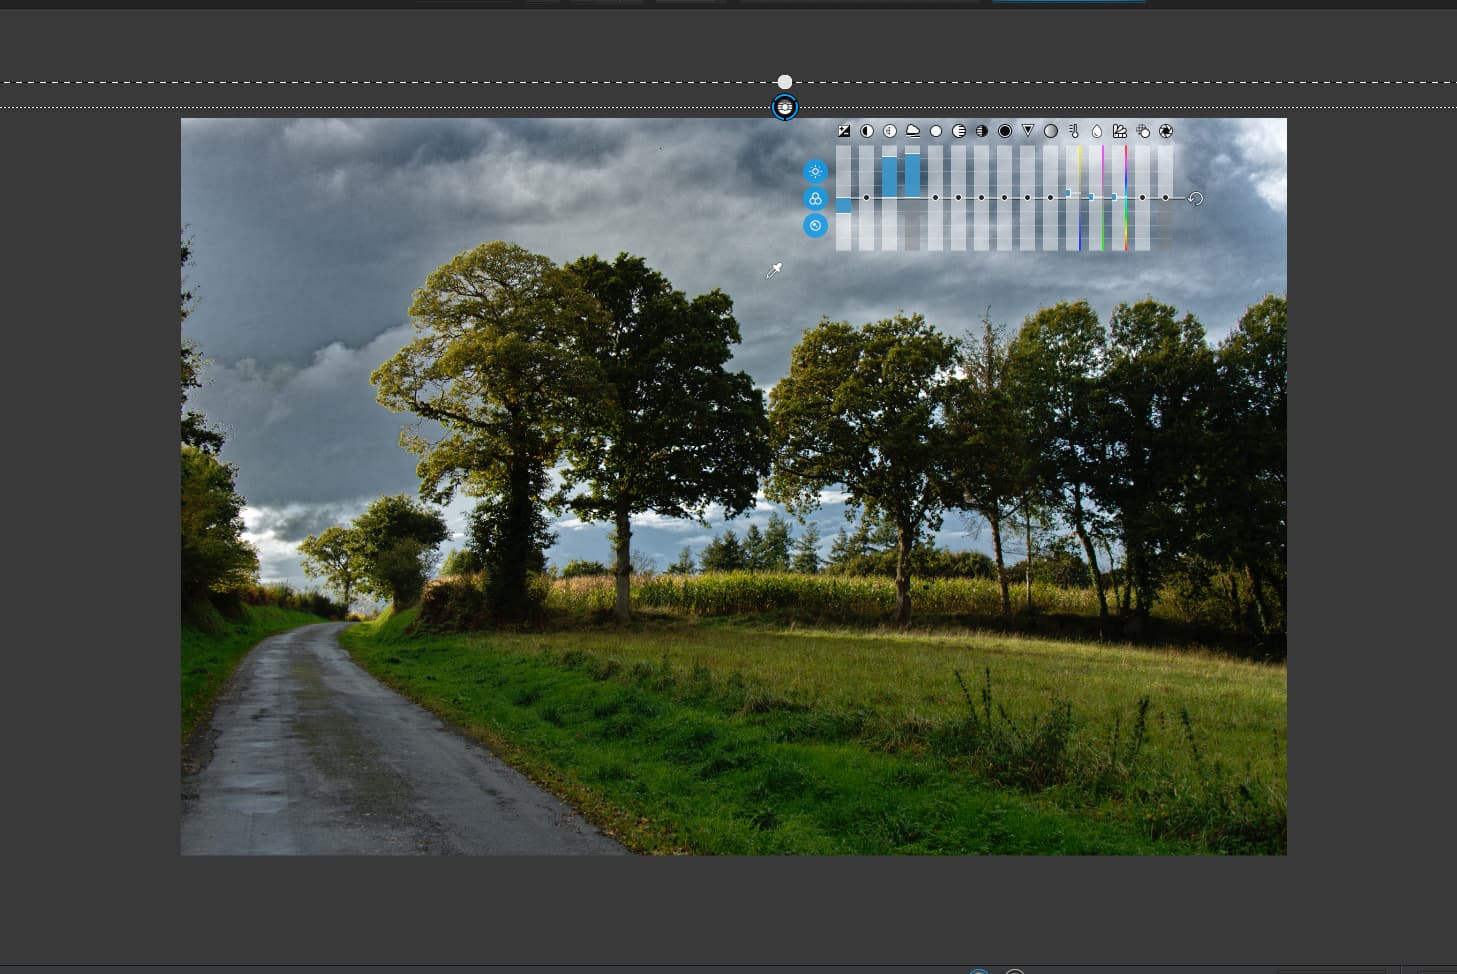
Below is an example of a file that I have tried to develop both in Photolab and C1. Today it´s by far much easier to do it in C1 than in Photolab because the new tools in C1 is just so much more efficient and precise and I have a feeling that even the detail rendering is better in C1 than in Photolab especially in highlights and shadows.

This image took about one hour to develop and print in A2 format on my Epson P900 with C1. I’m at last fully satisfied with the result. I have once done almost the job in Photolab and it was much more difficult and inefficient because PL lacks some of the tools C1 has. I was OK at that time with the result too but today I’m not since I can compare it to the new result.

That also rises a question many of us put ourselves from time to time when new and better tools will make us redo some of the work we once made with poorer tools. Last time that happened was when Lightroom 3 replaced the much inferior Lightroom 2.

5 Likes

Very nice constructive post @Stenis , I agree in every single point.

That is really a clear missunderstanding. Photolab has like Joanna already has written layers for some of the local adjustments though far more archaic than Capture One and it is definitely a direct competitor to C1 that is layers from top to bottom.

What we need is a complete remake with a robust layer think throughout Photolab and far more sofisticated precision tools for retouch that Photolab to such a degree lacks today.

1 Like

Thanks again Joanna, your comments are usefull as always.
Another thing I did not realise before was that the mask was absolute above the first line ( control line?)
Anyway, thanks a lot!

The initial suggestion was to make PL like PhotoShop, so I responded to that. And PL and PS are 2 completely different tools as PL is a real RAW processor and PS is much more than just a RAW processor.

I haven’t worked with C1 so I can’t speak for that.

@RvL

I think Keith maybe set the words on this more clearly and this is one of the very few times here in DXO Forums I find myself not agreeing to what Keith writes :slight_smile:

In fact I don’t really understand what that word “pixel editor” means since both C1 and even the Local Adjustment in Photolab definitely can and certainly do “edit pixels” with many of it’s tools.

What differs Photoshop from the RAW-konverters is that it’s a tool that has a lot of tools mainly made to design overlays on top of the basic image. It may be texts or other elements more commonly used in the business world to sell all sorts of stuff. Photoshop is about design and layout and not primarely about converting RAW which it’s not even capable of opening. Of mainly historical reasons people has come to use it even for pretty simple postprocessing that I today find pretty inefficient, because it really decreases efficiency and add today unnessassary complexity to our work flow and forces us to use really storage and processing inefficient ancient file formats like uncompressed 16 bit TIFF. Photoshop has it’s place but that is to a very shrinking extent when it comes to postprocessing and refining RAW-data.

I have had access to Photoshop since the early ninities but I have stopped using it since many years now and today with C1 21 and 22 I have no reason to look that way anymore because all I need now is there already in C1 and it seems like both Camera Raw and even Lightroom is getting there too now. I think even Adobe has done a very good job the last year så I guess even their users will have far fewer reasons to look to Photoshop for some extra polishing in the years to come. Adobes users are just to congratulate to a better postprocessing work flow too. They have waited a long time for that.

Yes, but no blend modes and you cannot move the layers around (top to bottom, etc).