Those DxO presets are OK but I couldn’t get the same results.
‘’ Hmm, different raw developers produce different results. ‘’
So, how much work I need to put in DxO to get the same result? I can not get the same result only by moving 3 sliders like I did in my other RAW converter in a few seconds.
So I guess there is a catch somewhere and I need to adjust something more to avoid this dull look.
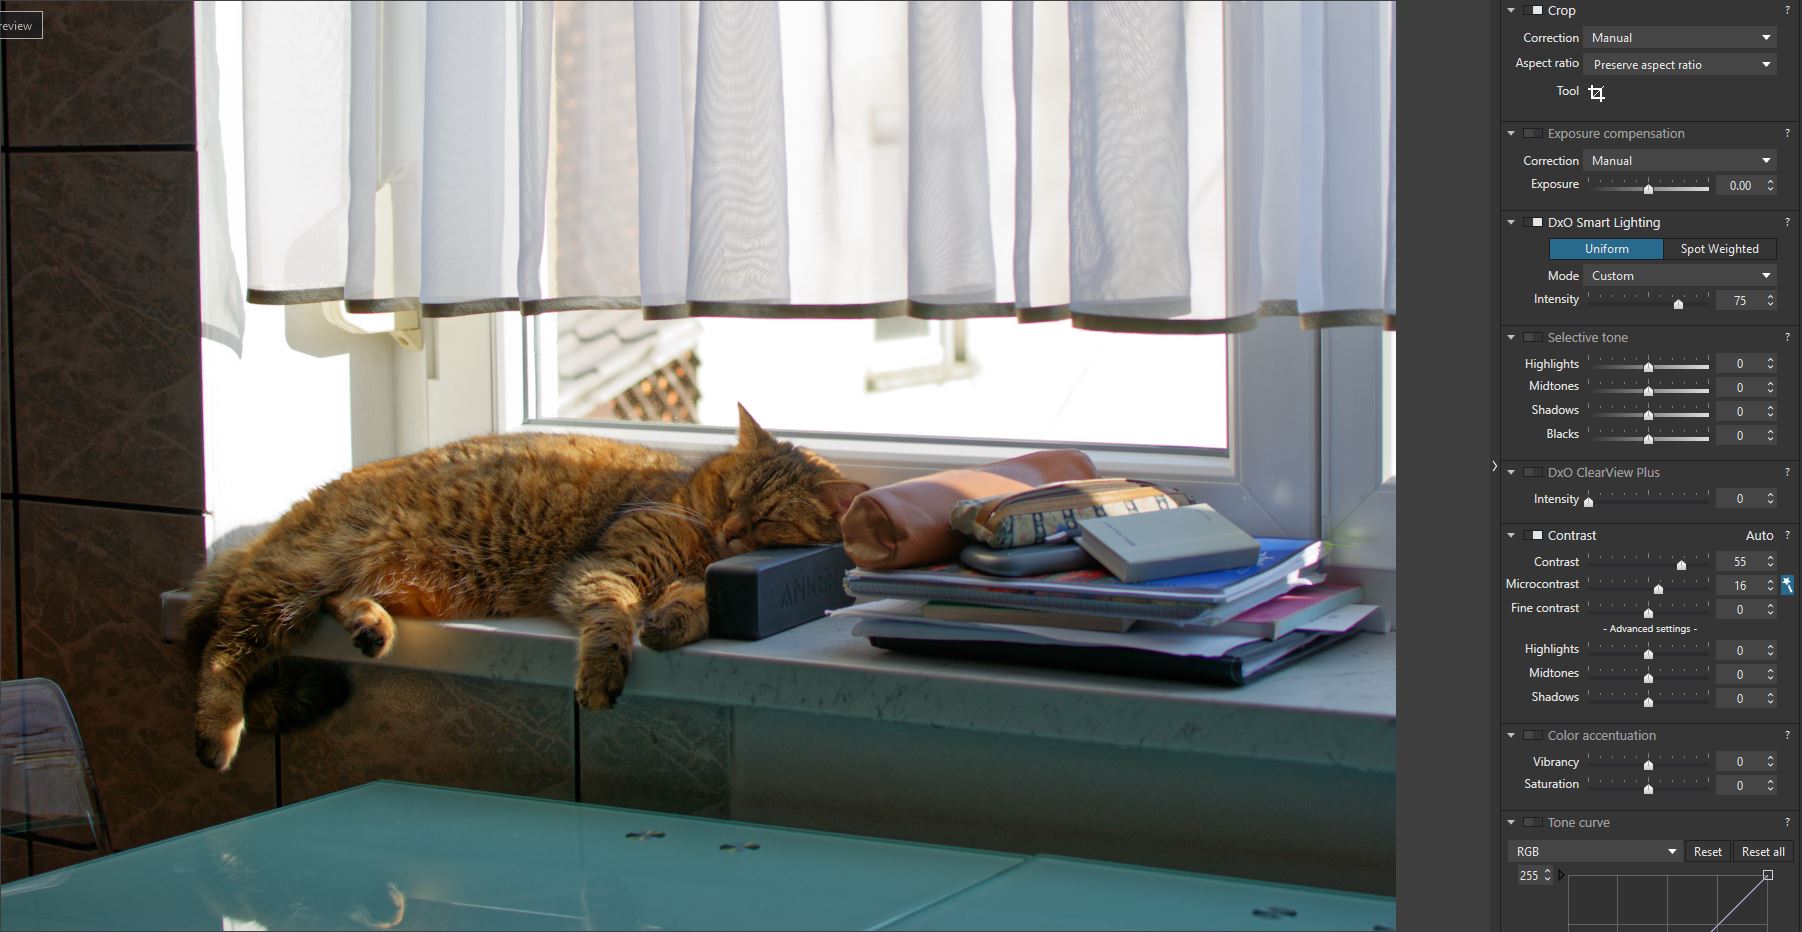
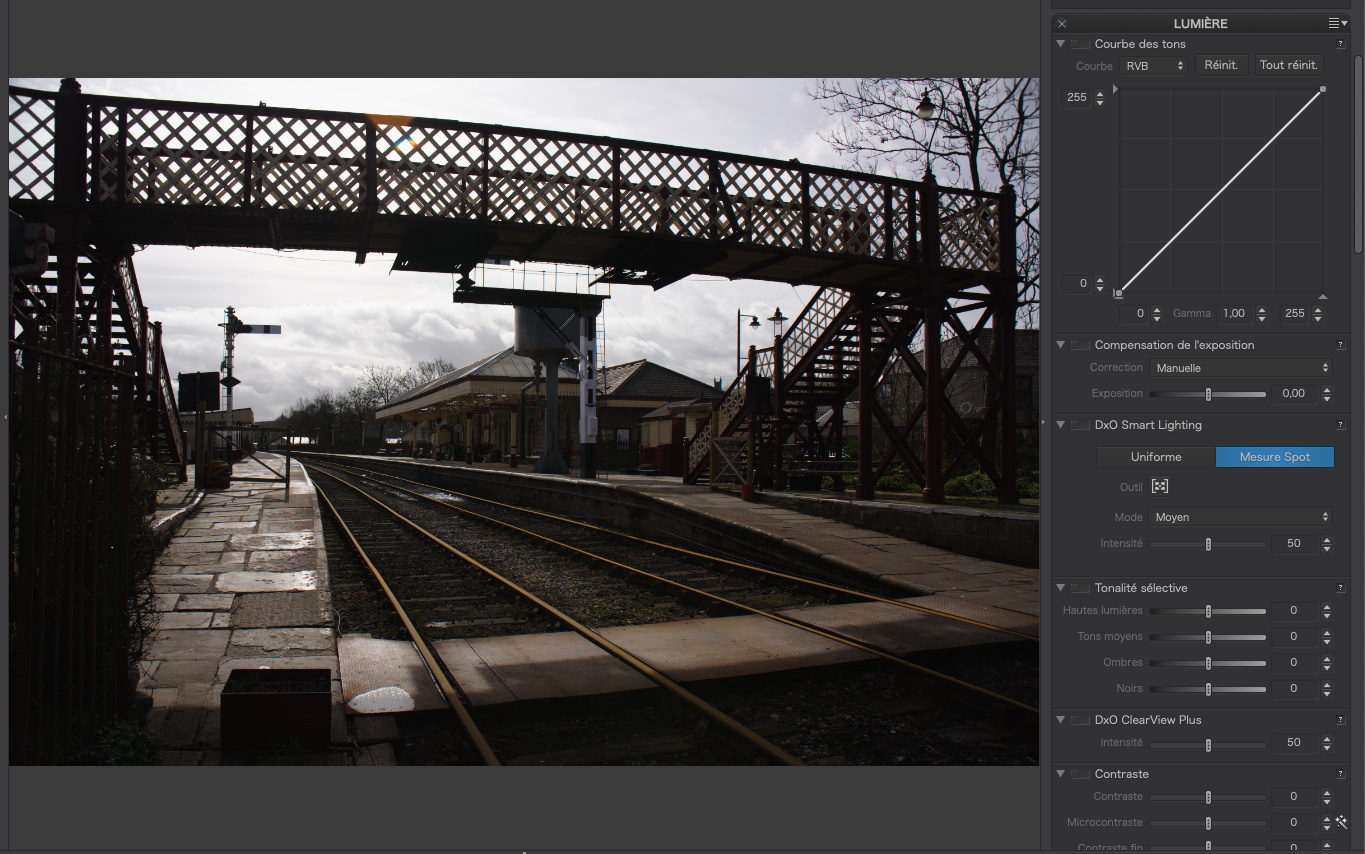
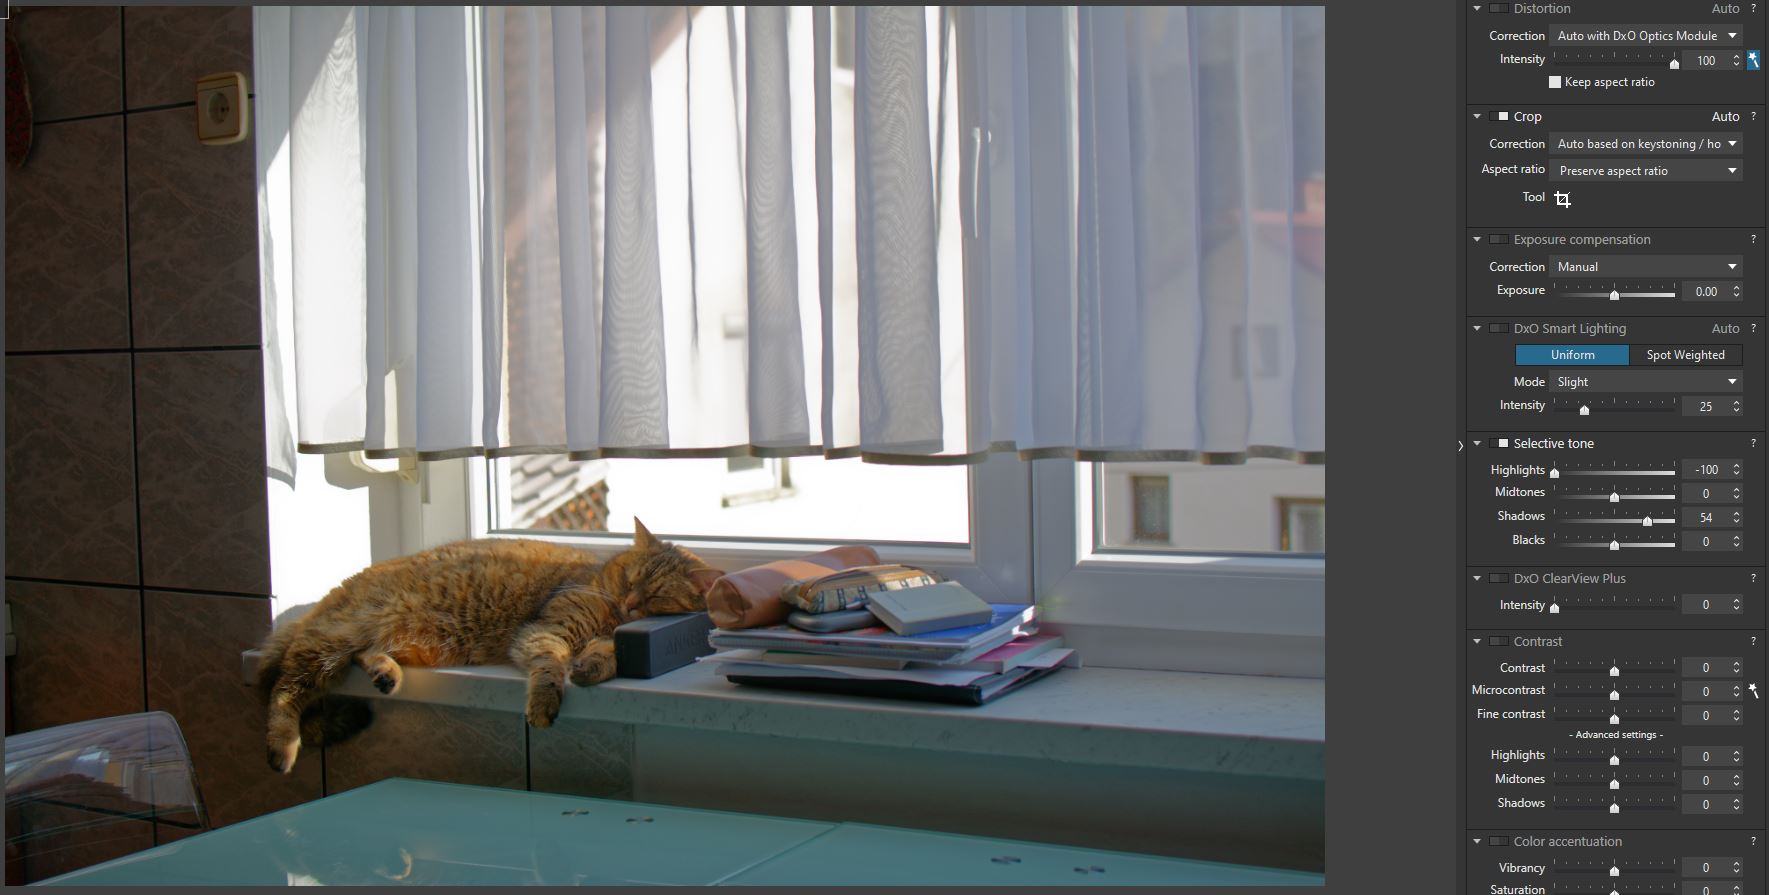
Here is an attempt with Smart Lighting and Contrast. I Think Smart Lighting is not the answer as well.
Regards
Does the image look better if you turn on Lens Sharpness? I always leave this on for RAW images.
The contrast adjustment you’re comparing DxO’s against adds a lot of microcontrast for a strong HDR look. If that’s what you want, try increasing microcontrast or fine contrast in PhotoLab. Or use Clearview instead and raise midtones if the overall brightness drops too low.
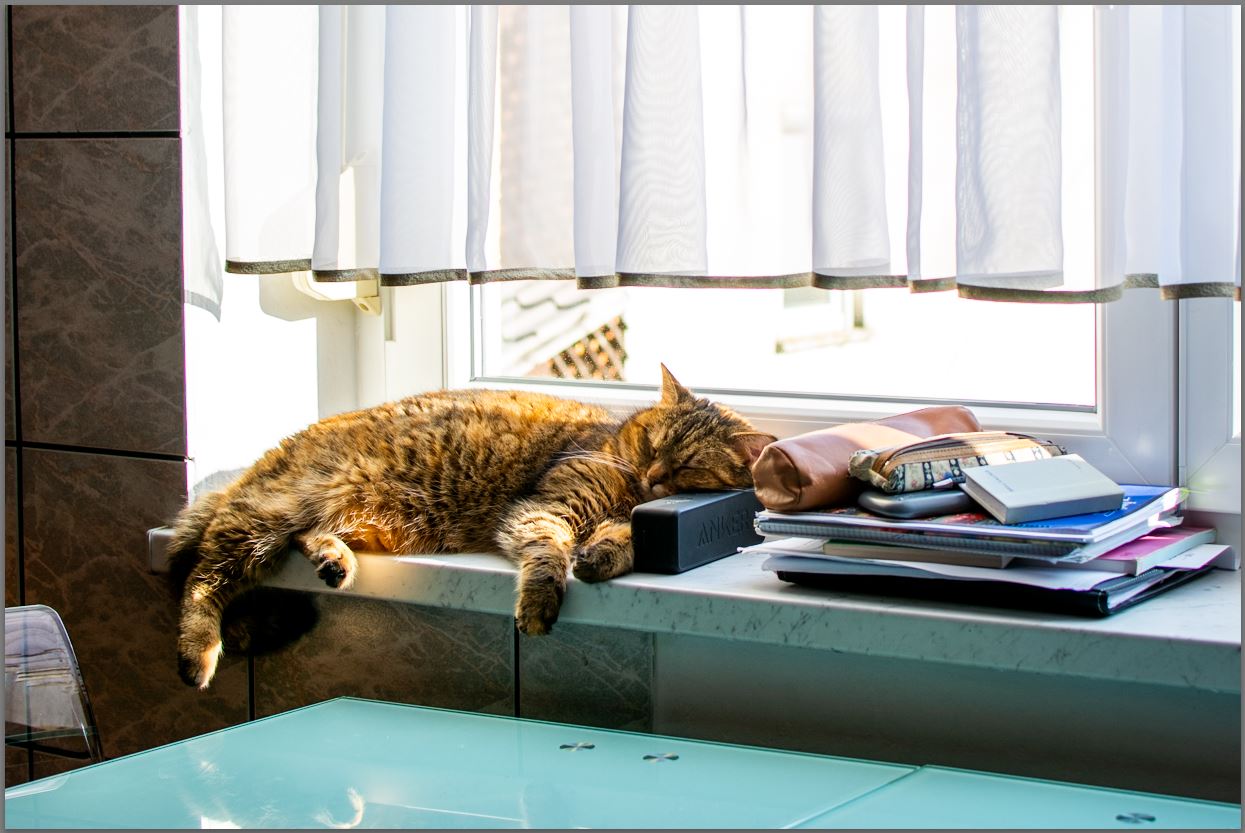
What if instead of adjusting highlights and shadows in PhotoLab you simply apply Smart lighting instead (Uniform mode) and increase or decrease it to taste - or select the Spot Weighted mode and draw a large selection box around the cat?
There are many ways to achieve the results you want in PhotoLab, because we all have different objectives. The workflow will be different than you’re used to, but hopefully not much more involved once you’ve experimented with the controls a bit more.
Yes; my other RAW converter is adding something to my photos ‘’behind the curtain’’ (contrast, micro contrast, dynamic, …?) and I like the results.
On the other hand DxO is not and I can’t figure it out. I don’t know how to do it so I can ge the same results.
If you are seeing a particular “look” once opened in PL i.e. if PL is applying something upon opening the file is that in some way affecting the outcome as to what tools in PL that you are using or not as the case maybe, AFAIK the choice of setting in the screengrab I have posted will affect what you see, does it not???
HTH
PS as in all things, I am still learning something new everyday…so if I have got it wrong I look forward to those more ‘in the know’ to helping me learn more
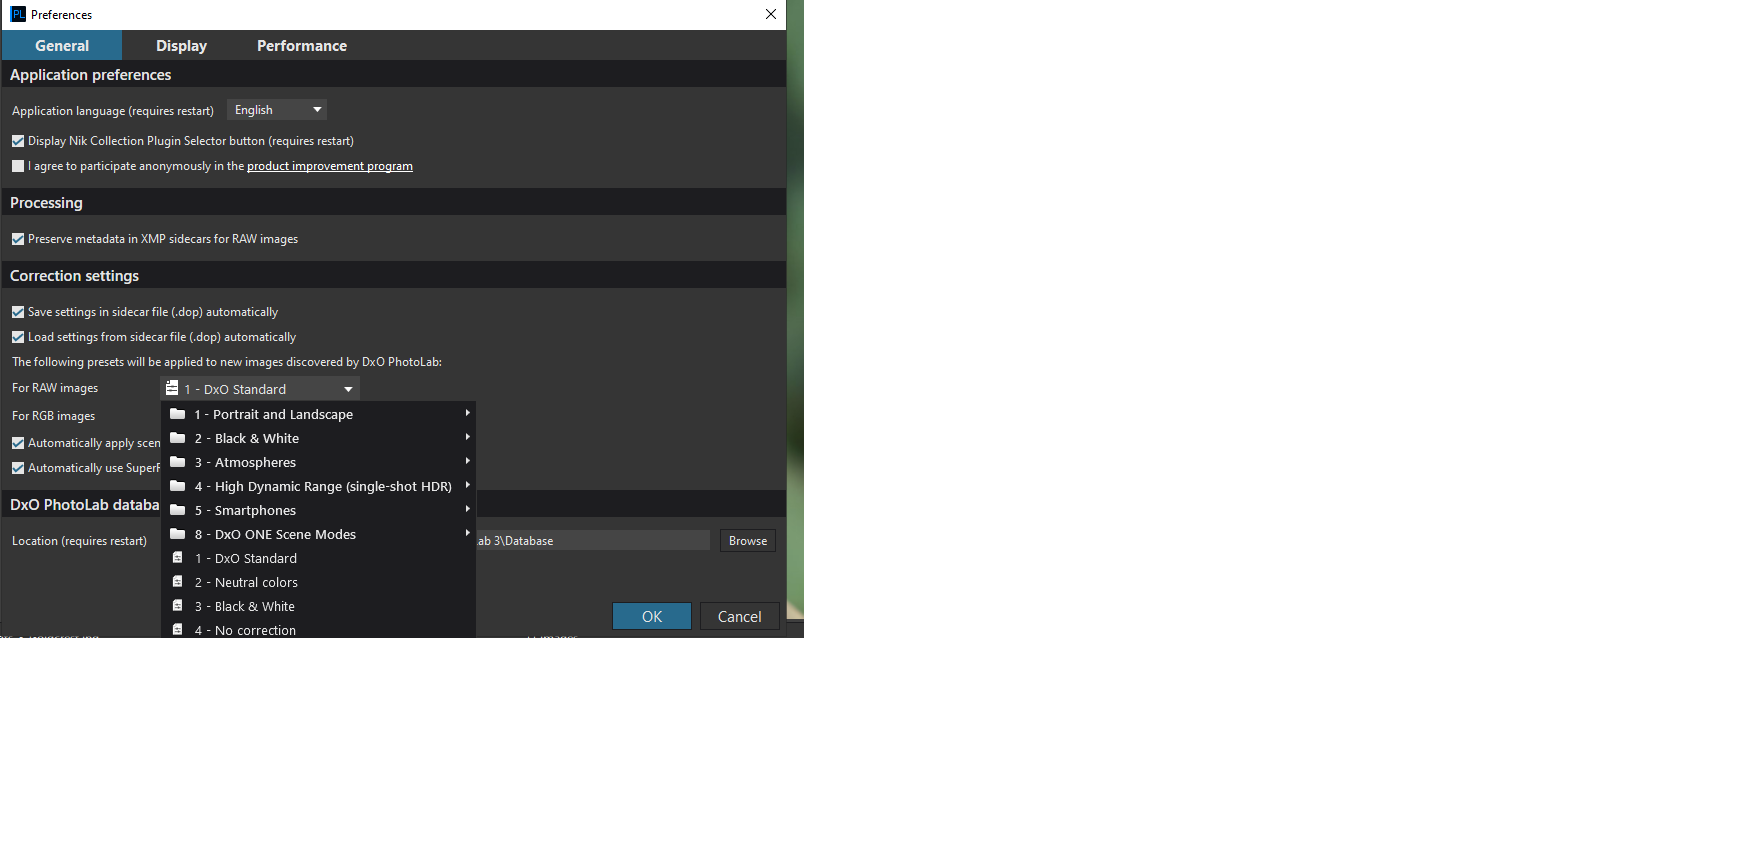
One can also go to the right upper button “apply preset”. I just wonder how I can see which preset is being used now. I mean not using the preferences.
Your not the only one as a LR user. It seems that LR has a very sophisicated auto modes which a lot of people like as look. (there is a old thread from a forum member who had the same issue.
Just scroll though this it’s a search and journey for things which seems to be done in LR as a breeze to see if it’s also possible in DxOpl v1. At the time.
Do you have filmpack?
Then you have advanged sliderset.
When you turndown highlights agressive in selective tone the white got “greyisch” so use both.
Contrast and tone highlight slider say -19 and -19 instead of -40 on tone.
Second, use smart lighting only in box selective mode. (the tool to set a box of interest around something in the image.) place one box on a dark place and one on a bright place.
When pushing exposure up the smartlighting is working to keep the image brightnes\lightness inside the DR of the selected parts in the boxes.
Vibrance does help to make the image more pop. I have my personal preset a +18 al the time.
Clearview helps to add microcontrast and thus pop into the image.
Like LR is just give you a auto modes (lot of things are done without your controll or knowing which can be a pain if you don’t want it.)
in DxO you can make your own automodes. Called a personal preset.
If you can provide the rawfile people can give it a go and even post the dopfile so you can see how it’s done.
Remember smartlighting is killing contrast because it extend the existing dynamic range. And thus stretching the tonecurve of the image tonal property’s.
About the tonecurve see this example:
also a methode to create contrast.
what i am trying to say is look further then the “basic sliders” .
DxO is powerfull because you can use different paths in full control to a endresult.
and if you have a solution for something which you can use more often: create a (partial) preset and name it " sunny days" or dull images or " for more pop"
And when you have a preset which others can use you can post it here:
I got off smart lighting a while ago and almost never use it. Instead, I mostly tweak tone curve and contrast settings, I have better control of what goes where.
If you like, you can post the raw image - using one of the transfer services like wetransfer - so that we can try to emulate the Lightroom looks with PhotoLab…
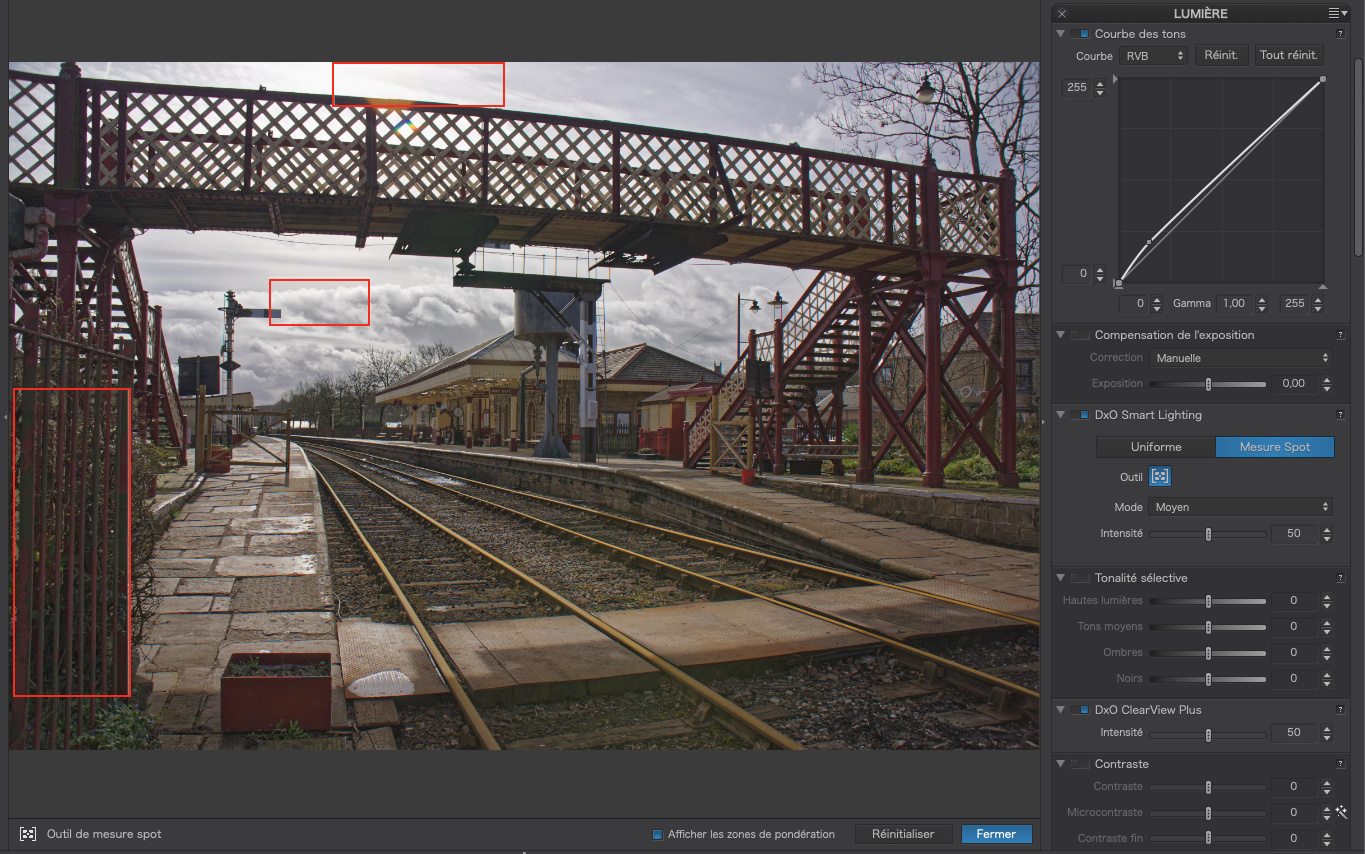
Use DxO Smart Lighting - and select Spot Weighted mode
Click on the Tool button (in your cat example it will say “No faces detected”)
Now go to the image and draw a box that includes the cat AND the curtain.
Next, with your cursor, move the box in small incremental steps to different parts of the scene - and evaluate the results: Hopefully, you may like what you find.
That is, try using some of PL’s unique features - rather than just replicating the process that you use in LR.
I’d also be happy to send you a copy of my default settings, with which I have replaced the DxO-Standard default settings (which provide a great starting point for the majority of my photos - to my liking, at least) … Just ask.
I will also try to answer all your questions and suggestions.
I have lens Sharpness always ON. The thing is you just can’t see it because I posted printscreen and DxO shows sharpness only at 75% or more magnification.
I find this odd. I would like to see sharp image when the image is ‘’Fit to screen’’ in DxO window.
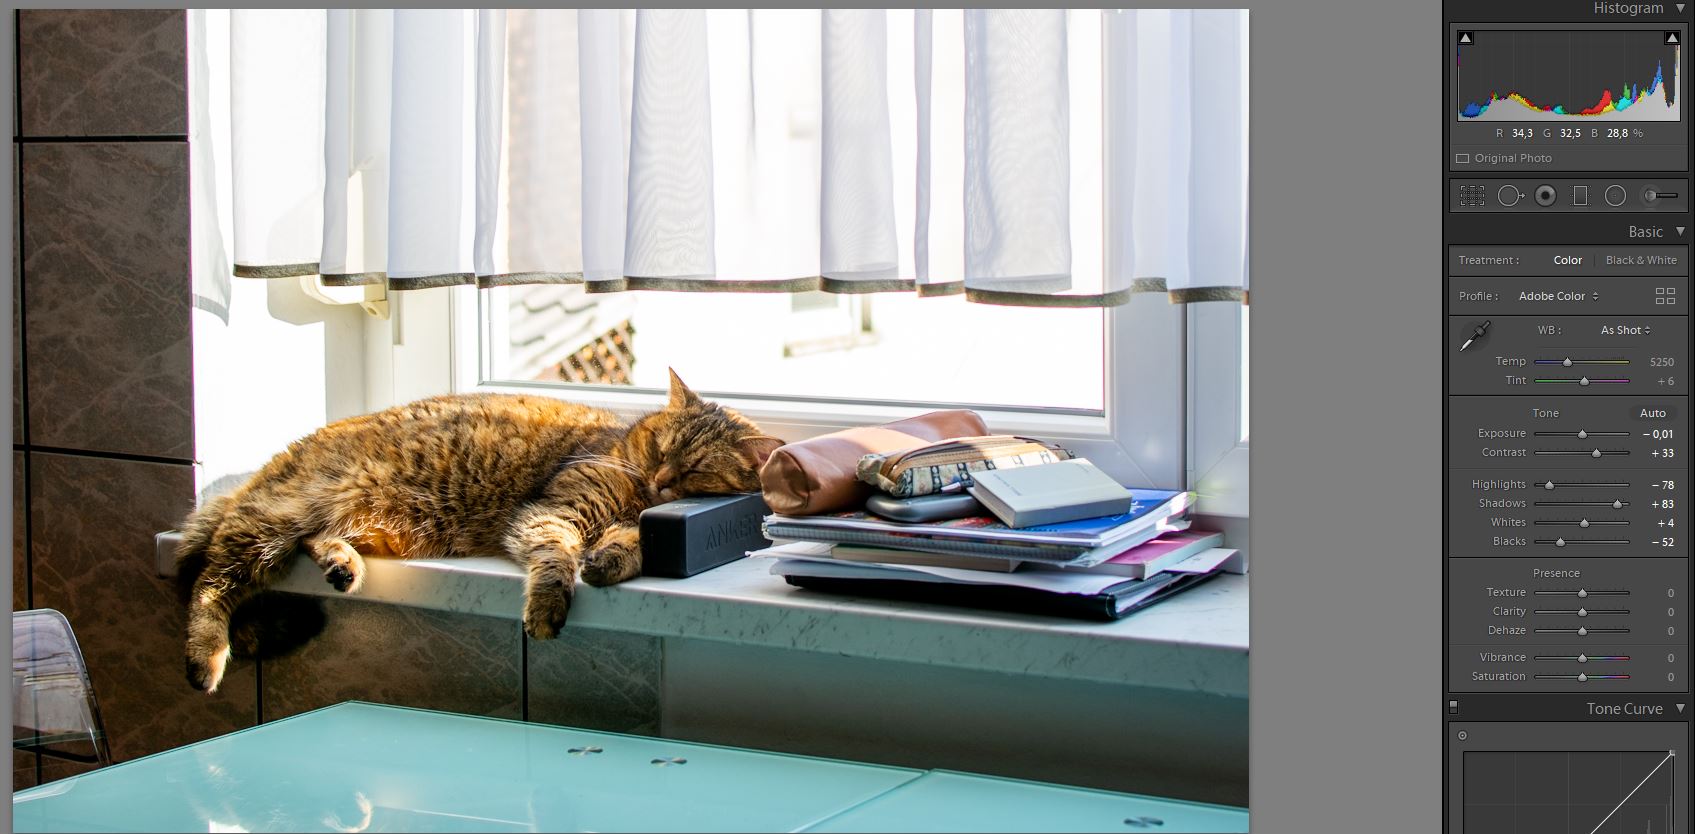
My last attempt was to adjust Smart Lighting and Contrast but results were similar – check the last two images I posted.
I have my own preset in preference tab – No correction with Lens Sharpness activated. When I open new RAW file my preset only adds Lens Sharpness. Then I look at the RAW file as it is and then I decide what to do.
And yes; if I apply those DxO presets I can see the changes on my photos but those presets are not what I’m looking for.
Yes; I agree. Lightroom is adding something to my RAW files. I just haven’t figured it out what it adds and how to get the same in DxO.
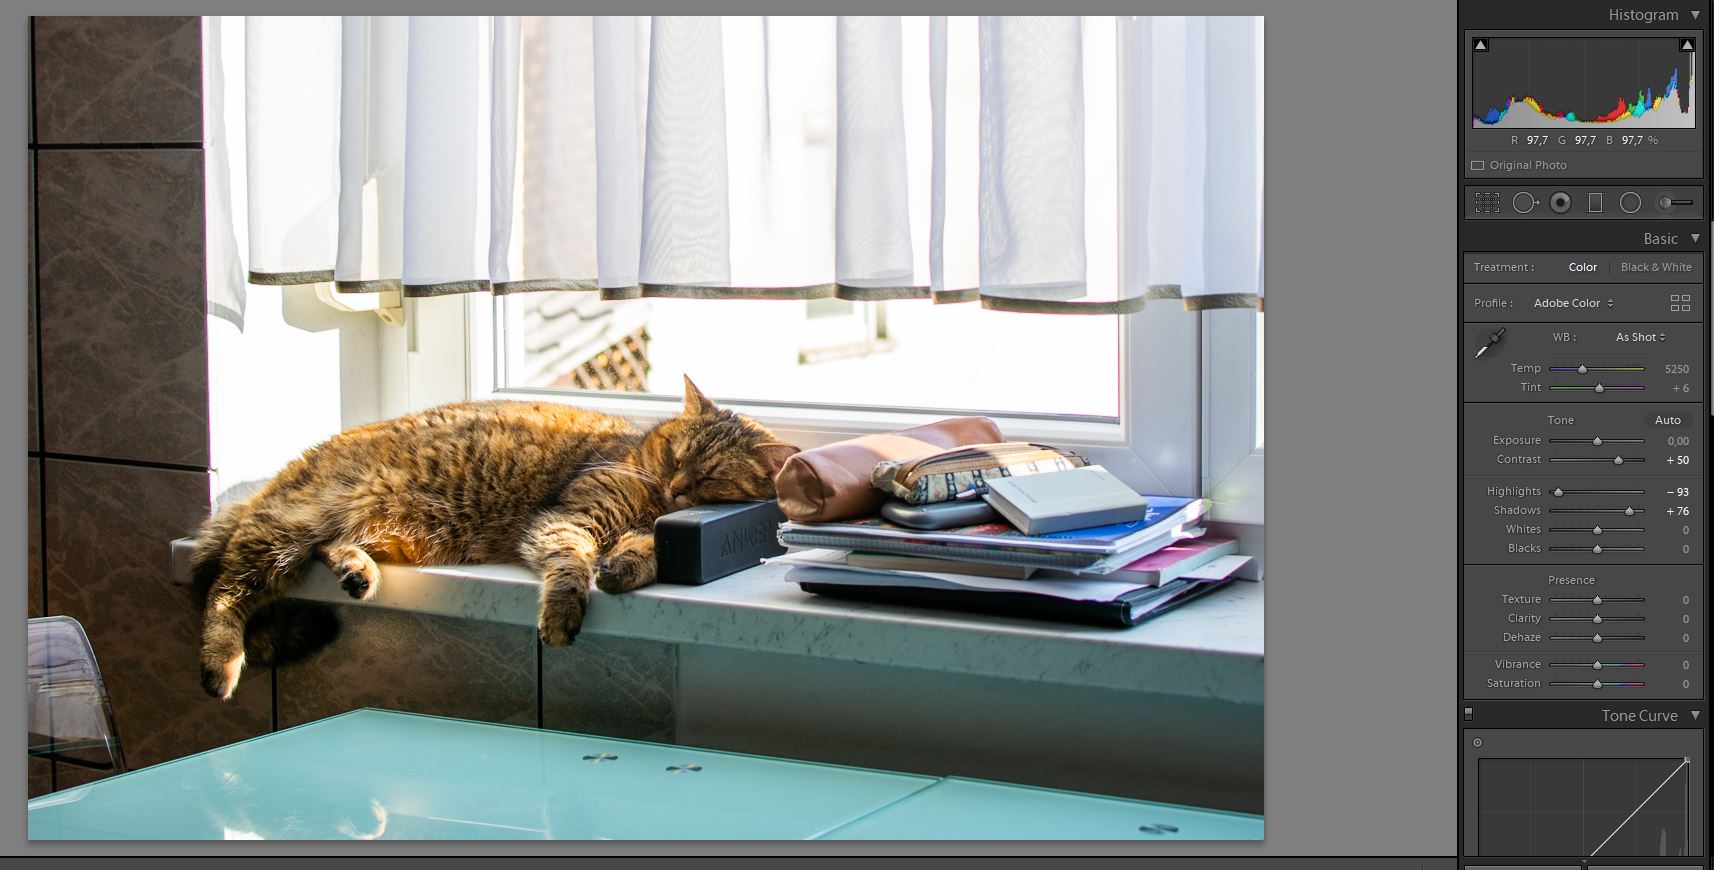
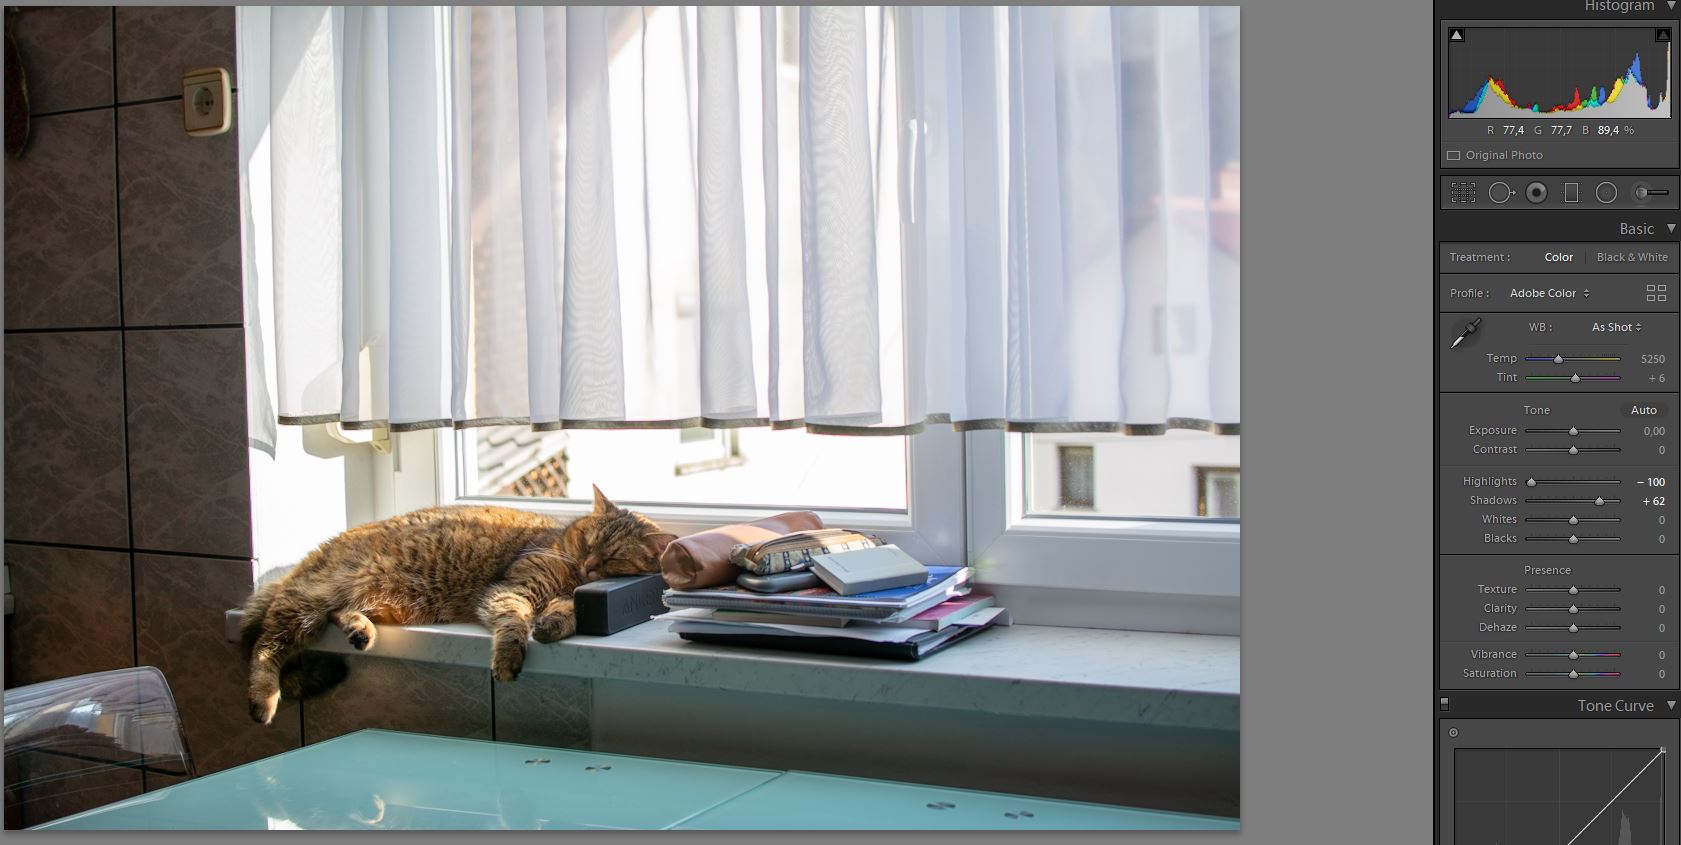
For example; check the first two images I posted. I only moved Shadows slider to the right. In Lightroom shadows opens but my cat does not loose contrast and you can clearly see those black stripes on the cats body.
If I move Shadows slider in DxO the image goes flat and my cat is without contrast. If I want to compensate this with Blacks slider then all image goes back to dark because Shadows and Blacks sliders have almost the same effect.
If I try to compensate with Clear View plus it homehow helps.
And here is odd thing; if I use Texture in Lightroom it somehow calculates by itself on what things to make effect – high effect on contrasty things and low effect on things without contrast like white smooth surfaces and similar. If I use Microcontrast and Fine contrast in DxO ALL image is affected no matter what.
John-M; Thanks for the answer and suggestions.
I think it’s natural to compare tools designed for the same job. I have three plunge routers for my woodworking and I compared the results so I use one router for dirty jobs (it has some play in the pillars) and the other router for more delicate jobs where I need to do more precise work and my third router is under the table because it has the best hight adjustment. They are designed for the same work – to do some routing of wood but I can not get the same end results with all three routers.
I hope you all understand what I’m trying to say.
Whenever I write to this forum I get the answer ‘’don’t compare DxO with lightroom’’. Why not? They are designed for the same work. I use Lightroom for years so it makes sense to compare and my goal is to get the same results in DxO in about the same time.
If I want to get rid of Lightroom one day I must be sure I can get the results I like with DxO. As I see Lightroom is doing lots of work ‘behind the curtain’ so I don’t have to do.
OK; so below are three results.
The first image – I draw a box on the cat and on some shadows below the cat and moved the box around
Second image – added Smart Lighting box also on the window
Third image – Lightroom – I did ’Auto settings’ and then moved Contrast slider to the right, Hdadows slider to the right and Blacks slider to the left – 5 seconds job.
Can you see how the image shines and DxO image is dull?
I don’t know what else to move in DxO to get the same result.
apply Smart Lighting (I’ve highlighted the rectangles)
apply ClearView Plus
lift the tone curve at the shadow end
It took me all of 15 secs
Don’t try to compare results achieved with another tool’s “magic” settings with what DxO can achieve with its own.
The difference is that, with DxO, I know what has been done to my image and can modify any of the settings if the “magic” isn’t quite what I was after.
there is a thread about how to interpretate selective tone tool there is also a gray ladder.
If you have two screens load this “testfile” in LR and DxO and see when what who is done in both.
No use to use a raw file, it’s differently processed from the start when turning it in a screen preview in both rawdevelopers so even when the shadow sliders are working the same it 's outcome would be different. That’s i think why it’s no use to try compare LR and DxOPL in way of use.
Compare endresult yes.
when i am at home i will give it a go. ( please ad a LR endresult jpg as example how you would process the image to your liking.
thanks.
Thanks for the effort. Nice work.
Not exactly the same as my Lightroom attempt but much better as I did in DxO…
The thing is; I can get similar results to some extent in DxO but with more work. I can not do it only with Selective tone sliders. I also can not do it only with Smart lighting. I need to use Selective tone sliders, Smart lighting, ClearView, all those sliders below name ‘Contrast’, Curves and some Local adjustments.
There is no way I can get the same result in 5 second.
All the best images tend to take time - unless you strike it lucky and the “magic button” creates something you like.
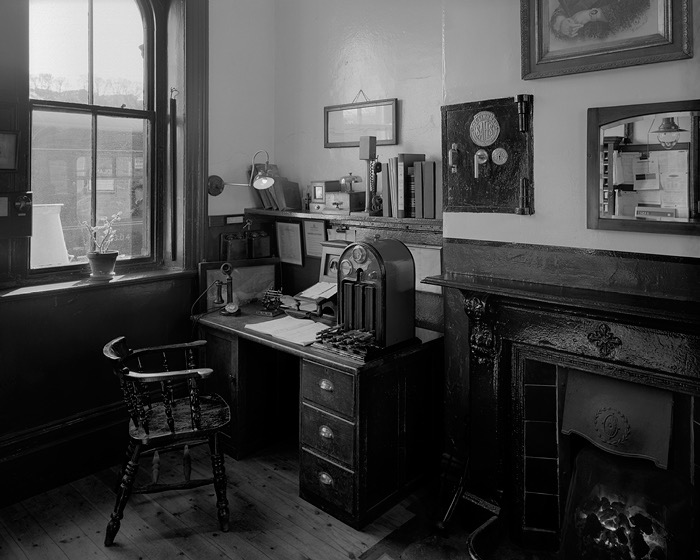
I come from a large format (5" x 4") film photography background, where good pictures have to be thought out before you press the shutter. With such an image as this, in colour, I would only have around 5 stops of dynamic range to pay with and would more than likely not take this shot due to the excessive contrast involved; due to the bright area only taking up a corner of the image, graduated filters would not work without darkening the wall to the left of the window.
I could more than likely take this picture in B&W, which normally has a range of around 8 stops, thanks to being able to use the Zone System to calculate by how much I would have to over-expose and under-develop the sheet of film to compensate for the high dynamic range.
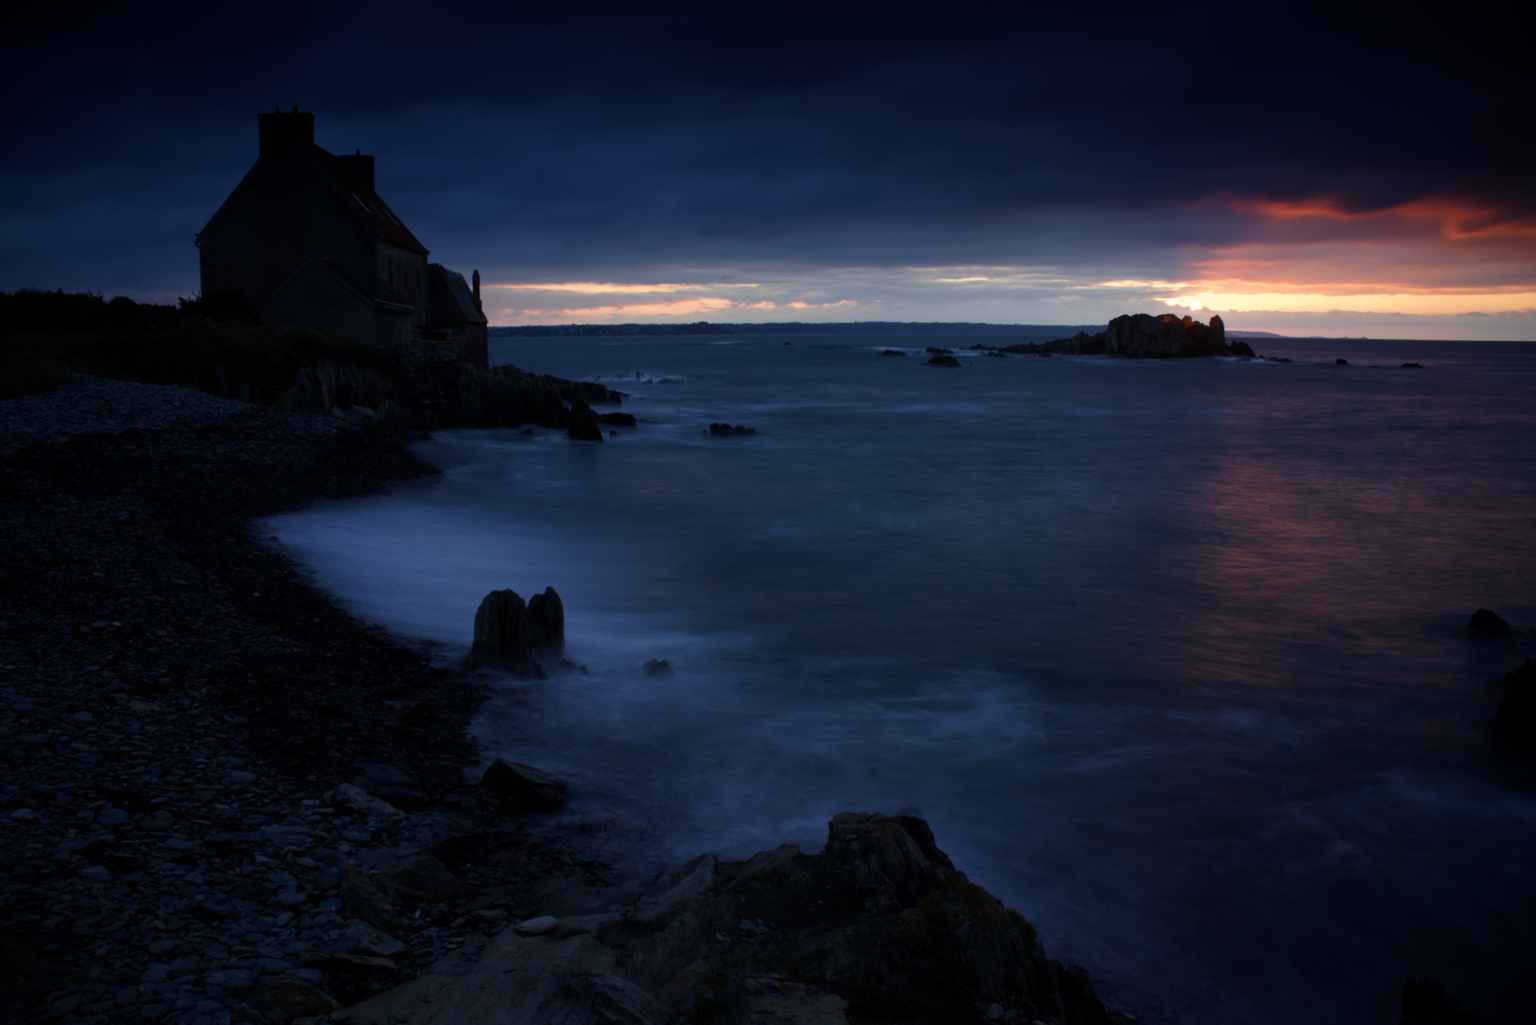
Here’s such an image taken on film with a dynamic range of 14 stops between the sky through the window and the lit gas mantle on the desk, through to the detail on the hearth around the fireplace.
Some modern digital cameras can now cope with such high dynamic range but you have to carefully expose to avoid blowing the highlights - shadows can be recovered whereas highlights of more than 2 stops over the measured exposure cannot.
In that case, I reckon you’re missing the point of PL - - It will do a lot of the basic image processing steps for you, if you will let it do so.
My suggestion was to use just ONE box - covering both the cat AND the curtain (within the one box) - then move that around - - in small incremental steps. This is easier to manage (and more effective, I’ve found) than moving around two boxes.
I guess what I’m (effectively) saying is that if you want PL to work exactly like LR - - then why not continue using LR (?) - it would be easier for you to do so. Alternatively, you could try adapting your process to the PL paradigm instead.
Here is some explanation/advice from the online manual that may explain this a bit better:
DxO Smart Lighting is probably the most complex of our corrections. It has a global and a local effect on the image – affecting the whole picture and local details – and has a strong influence on contrast and brightness. Such a complex correction can only be mastered with practice. However, you will quickly see for yourself how effective DxO Smart Lighting is even for difficult images.
First, generally speaking, DxO Smart Lighting changes bright images only slightly, but has a stronger effect on darker images. It has little effect on highlights, unlike Exposure Compensation. Second, you should stick with the three automatic correction modes as much as possible, as they can cope with most situations, and then fine-tune with the Intensity slider afterwards. If you need to do further corrections, use the Selective tone palette or the Tone Curve.
Because DxO is not Lightroom. the developers of each product have decided to do things differently and provide different methodologies of handling a RAW image.
As John says, if you don’t want to do anything more than press a magic button, then carry on with Lightroom. If you want all the goodies that DxO provides, you will need to get to grips with how it works - differently.
Personally, I place one Smart Lighting rectangle over a highlight area and another over a deep shadow area, then possibly another over a more mid-range area if necessary. Look at the .dop file I sent you to see where I placed them on your image.
Don’t forget that RAW images are intrinsically flat and will need contrast enhancement. Maybe Lightroom’s magic gives you what you want but, looking at your screenshots, it would not be what I would expect. I want to be in charge of how much contrast and in which part of the range it is applied.
Yes, it took a little more effort in the case of my version of your image but we are still only talking a matter of a few minutes. Learn to play with DxO, discovering what each palette does. In my version of your image, I used ClearView Plus to enhance the contrast but there are a number of different tools that can give you similar results.
Then, don’t forget local adjustments, which will selectively change only part of the image. Or are you expecting to do everything globally, simply because it is quicker?
Oh, and definitely make sure your images are correctly exposed, especially avoiding blown highlights. It’s easy to do - simply turn on the blinkies on your camera and review the image. If there are blinkies showing, simply adjust the exposure compensation. Don’t forget to choose either spot, centre-weighted or matrix exposure mode, depending on the subject - don’t just leave it in one mode and expect to get good pictures every time.
I notice that you used Aperture Priority mode, which is always good to ensure control over depth of field. But you also used Matrix metering, which forced you to apply +1⅓ stops of exposure compensation. And yet you still managed to blow the highlights.
Might I suggest, for this kind of shot, that you go into manual mode and use spot metering to determine a non-compensated reading for the brightest part of the image. Because you know that the metering will try to adjust the exposure for the highlight to 18% gray, you should set the exposure compensation to either +1⅔ or +2 stops of compensation. This will ensure that the highlights will be as bright as they can be without being blown (at least, that’s what I’ve found on the majority of Nikon cameras). The shadows will fall where they will but, as I have said before, DxO can recover shadows but, once you have blown a highlight, it is completely irrecoverable.
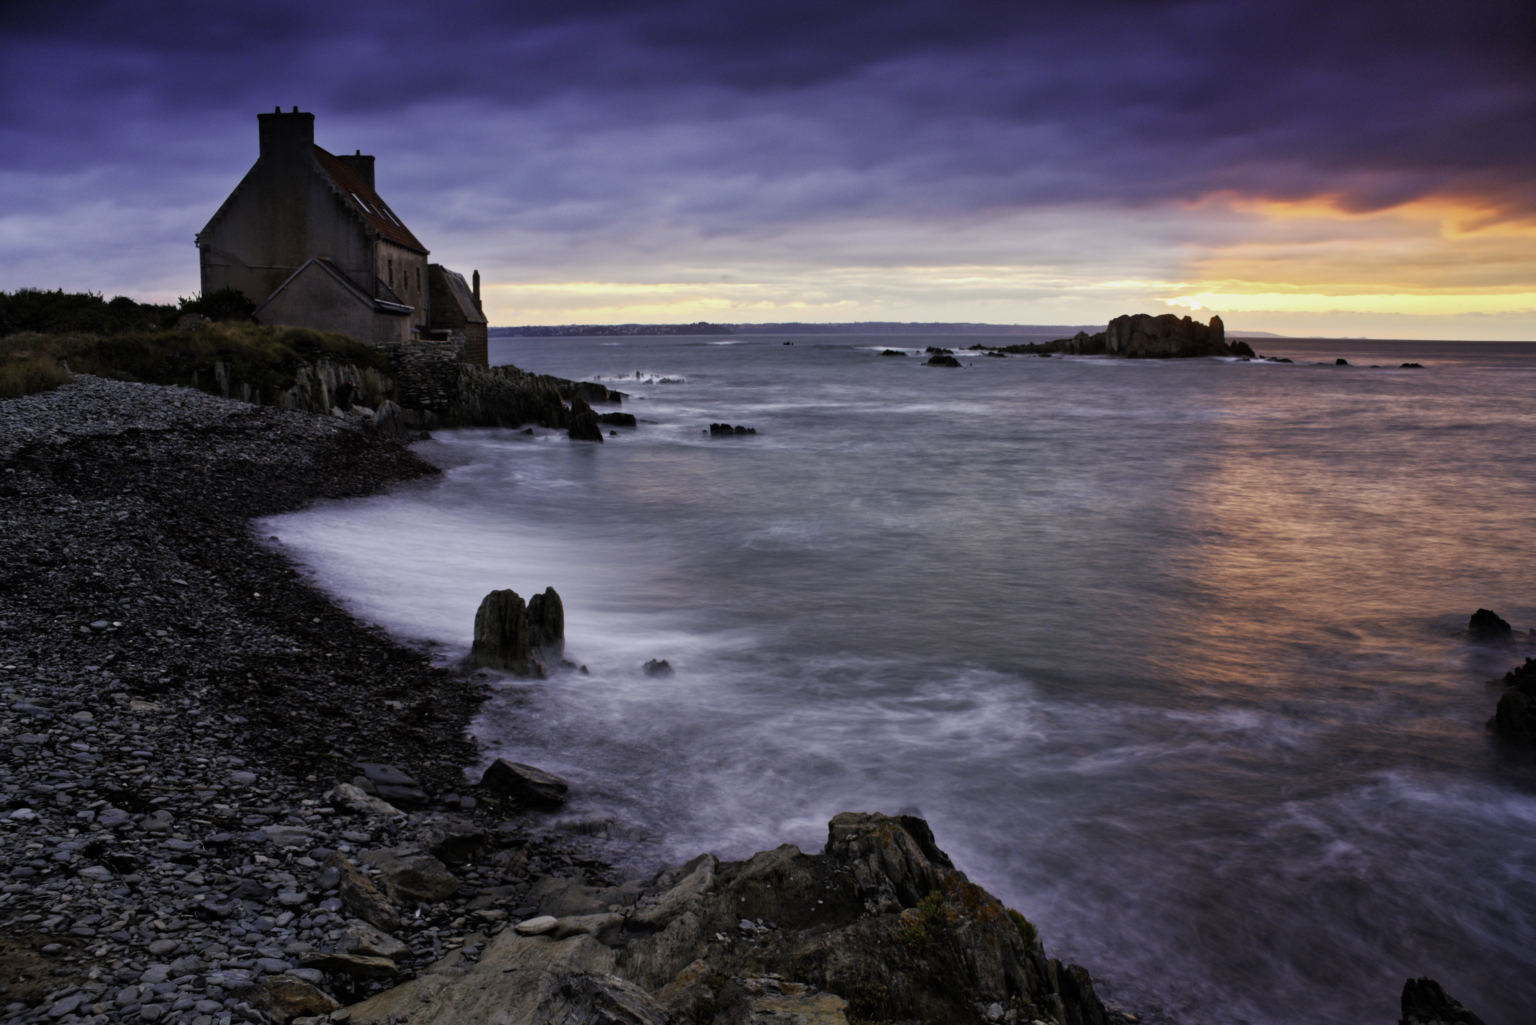
Here’s a shot I often use as an example of correct exposure of high dynamic range without blowing the highlights. Spot metered on the brightest area of the sky and over-exposed by +2 stops.
I have learned a lot how to use Lightroom by watching videos from Julia Trotti, Jessica Kobeissi, Jared Polin, PiXimperfect,… to name only a few.
I didn’t have to watch Capture One tutorials because when you know how to work with Lightroom you can figure out Capture one in an hour or so because they are similar. At least I had no problems to understand Capture One.
So;
would you be so kind to point me to some Youtube videos where I can see how masters work with DxO. I would like to see step-by-step, what they do and how those masters are using DxO.
Can you point me to some world known photographer who is using DxO so I can learn from him to understand DxO workflow?