Hello,
I think that’s pretty much what I wanted to achieve. And I don’t really care how it is solved. At the moment, I can make the settings relatively roughly with the touchpad, for example. With the button/mouse combo, I would then simply have a kind of scaling factor, with a larger surface the identical distance of movement would simply be less value added.
I can’t describe this properly, and I think we’ve had this issue with other tools/sliders where you have difficulty realising values around the +/- 1 change.
But I’ve no access to the EA5 posts where we discussed it.
Another solution would be to implement a radio button to set a scaling factor of lets say 0.1 or 0.5 For the reduction in value for the same route.
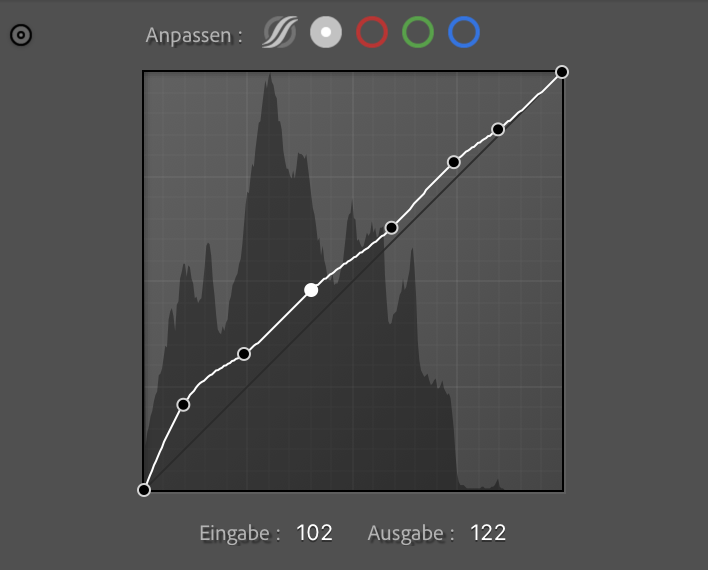
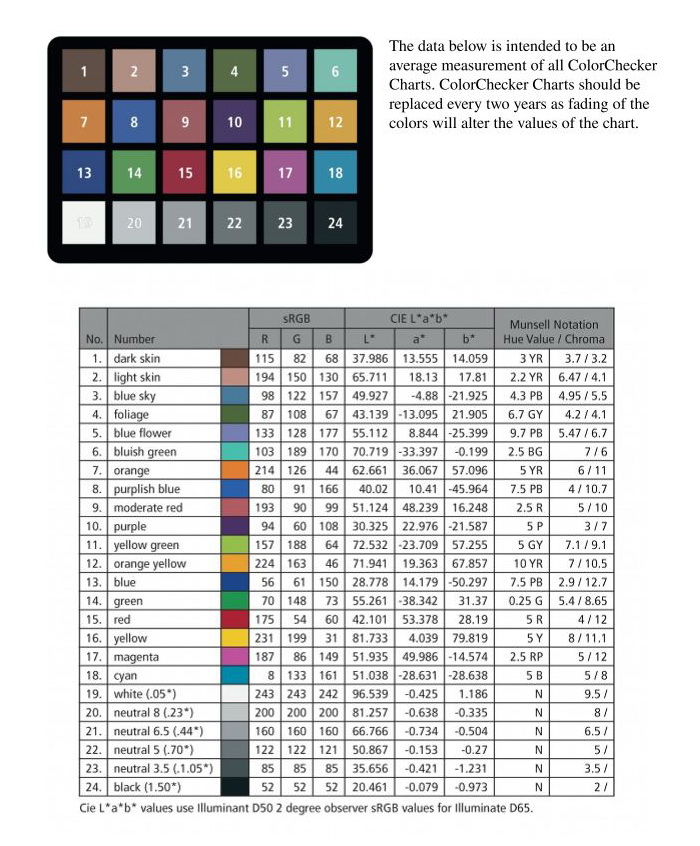
The is edited to match the 6 greyscale patches of a Color Checker.
add 6 points between the black- and white-points
enter the target output values , e.g. 52/83/122/160/200/220
select a point and the respective patch
increase or decrease the input value (using the keyboard) until the patch has the correct value
repeat steps 3 and 4 for all other patches
done
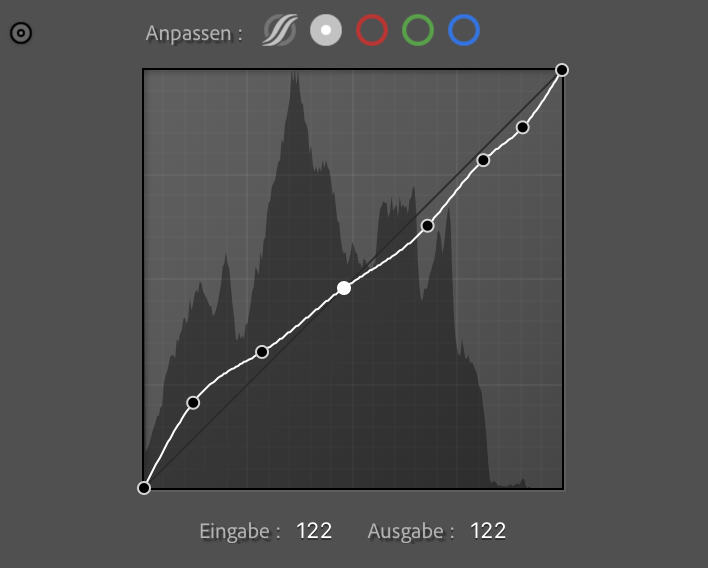
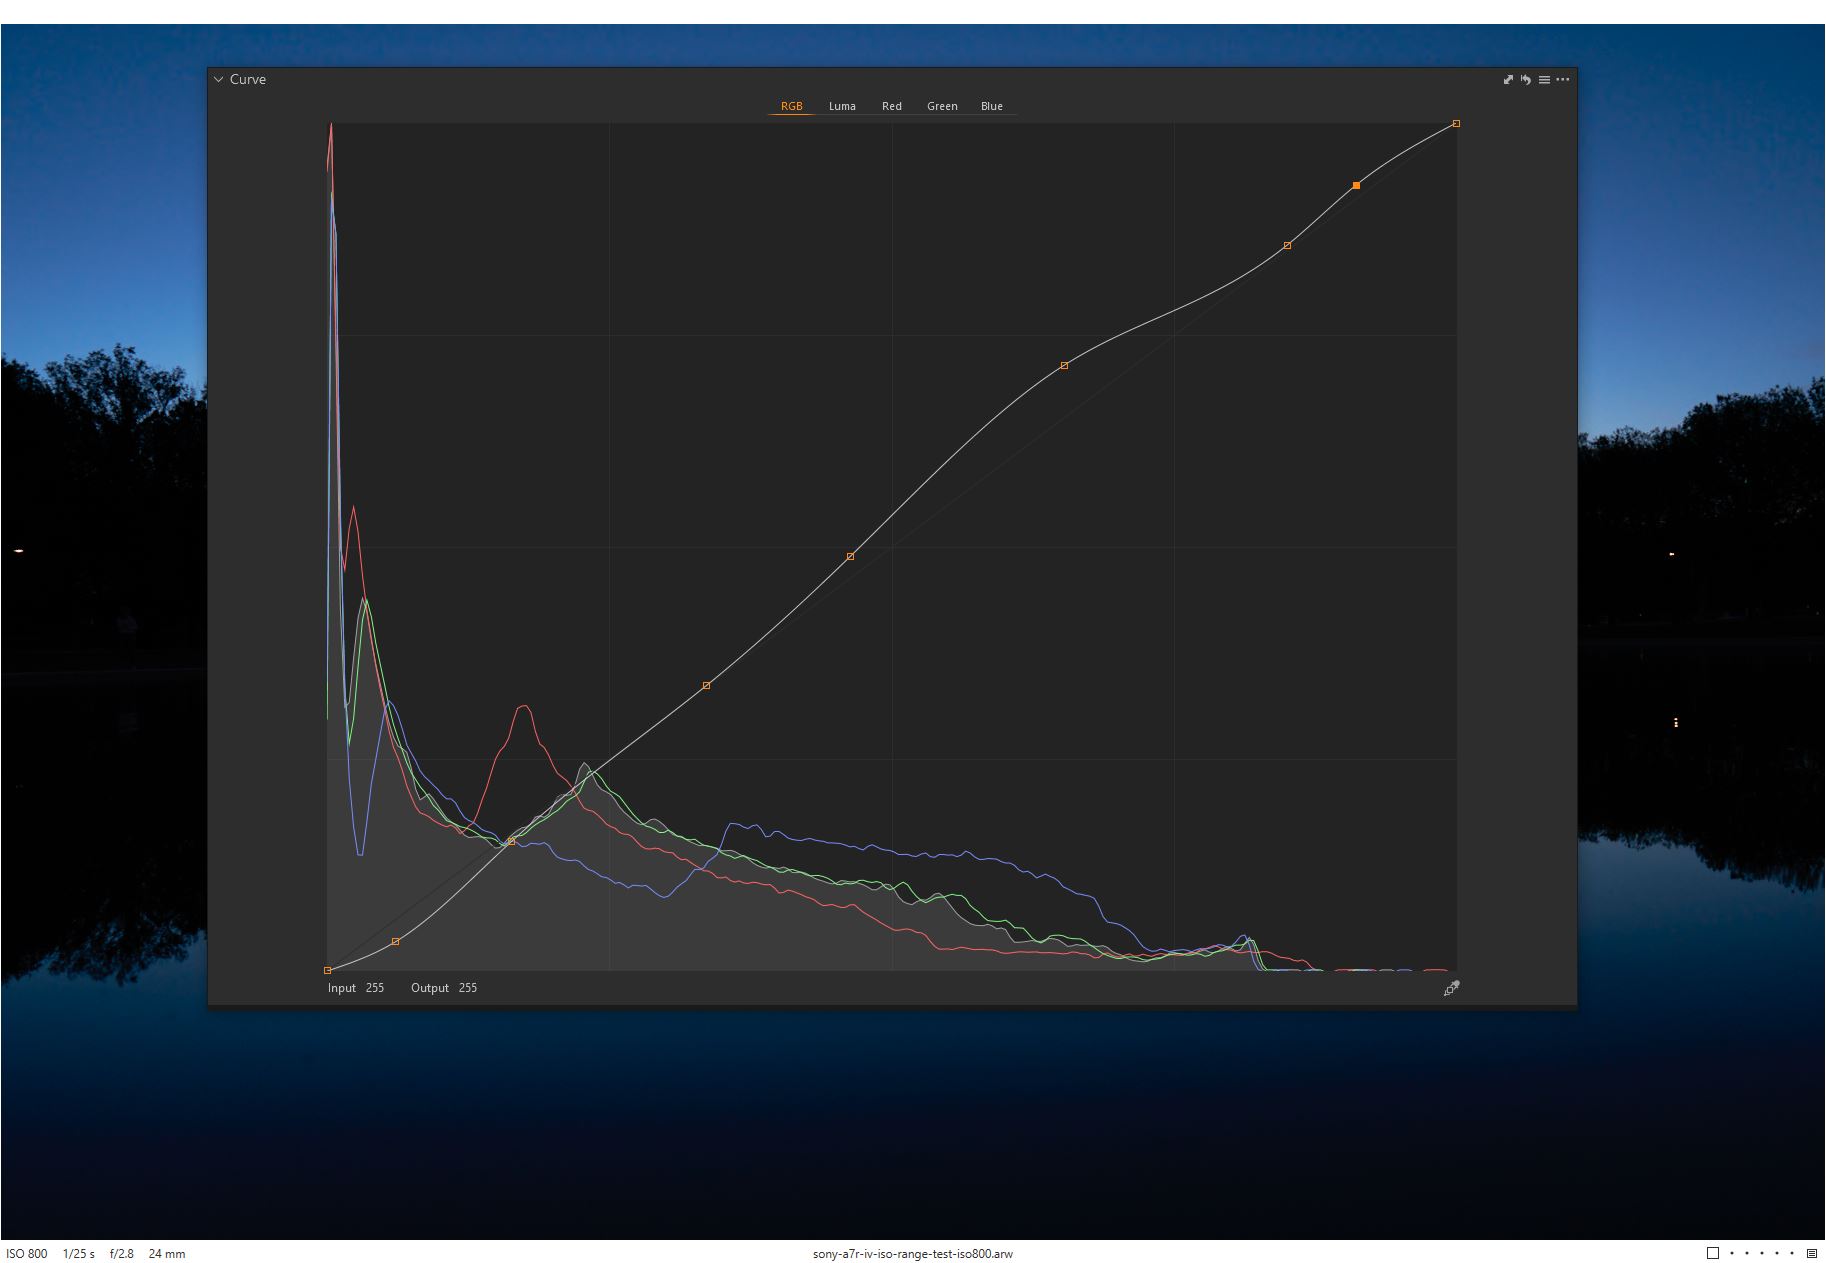
As we can see, the shot was underexposed. I could have raised exposure, which would have given different in/out pairs in the tonecurve.
Moving the points with a mouse or touchpad does not work well, because the movement often changes both input and output values. That’s why I propose to use the keyboard. If the movement could be limited to one direction, mouse/tablet could be used too.
Note: TC of Lightroom Classic, which has the annoying feature to display tones in % in the histogram and as 0…255 in the tone curve. In soft proof mode, they come up with 0…255 though.
Yes! Agree; also with Joanna, that we need a (tear-off or pop-out) panel that is larger than the current implementation.
Most of all, I want a LAB COLORSPACE for the adjustments: i.e. the ability to change the contrast in luminosity only. Adjusting contrast in RGB, as DPL does changes the hue when it should not.
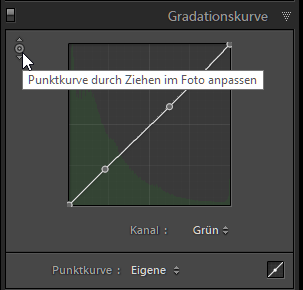
I just remembered one function in my old LR 6.14 with the tone curve
With choosing the “Punktkurve” you can click on the color to be selected.
This will be set a point at the curve and either you can move the mouse in the picture to change the curve level or click on the set point in the tone curve to change here.
And it works also with the mouse wheel after pointing the color.
Colours will still be off the given numbers, but they look pretty close to an original Color Checker Passport reference. Again, “correct” is what we want for repro work, everything else can follow our own ideas and intentions…
m-photo
( Marc (macOS Sonoma on MBP16" Intel))
15
Yes. This histogram is so small especially on a 4K or >4K display.
It needs to be able to switch from the little one we have to a big popup window with all those options
Voted.
It is a really basic UI requirement to have enough “resolution” to be able to make sensitive adjustments to a curve. The current UI is adequate to implement a basic S curve for example but for multipoint adjustments it is inadequate.
Other software simply allows you to resize the UI window to obtain whatever you need, even virtually full screen. I would like DXO to implement their on screen display functionality, as you get with menus for local adjustments to allow the curve line to be displayed full screen to give something similar, but better, than C1which simply uses an enlarged window.
Agreed - very handy tool and great time saver. The PL tone curve offering really needs a good overall updating as well - many good ideas in this section. Gets my vote.
In my standard default Preset (the one auto-applied to “newly encountered” images) I have a simple Tone-Curve set-up - but, with the Tone Curve tool deactivated.
When I want to use this curve as a starting point, I simple activate the Tone Curve - and, voila !
Two of the most fundamental tools in most editors are the Levels and Curve tools. Photolab’s Curve tool does the job of Levels - black, white and gamma can be easily adjusted. Beyond that, I find it useless. There’s no input - you can’t define an editable point either with on-canvas selection or clicking on the curve. There’s no feedback - no histogram and no coordinates for points on the curve.
Much improvement needed.