Am working on getting to know the PL5 masking techniques and certainly they look immensely powerful. They have been likened to the TK8 panel for Ps and certainly they seem to share some (maybe a lot) of that power. Are there any detailed tutorials around? I have read so many interesting snippets in these forums but it is hard to pull it all together, with each snippet being in a different place. Until quite recently I had believed that PL had inferior masking to Lr but that may not be the case.
@Joanna adroitly recommended this quick tutorial from PhotoJoseph on Control Lines. Everything Joseph says about Control Lines applies to normal U-point masks so it’s a twofer.
Skip the second half about FilmPack 6 as it doesn’t include anything interesting or new.
I’m surprised that DxO does not have better documentation and demos for these powerful masking features which have been included since PhotoLab 2 I believe. Even on PhotoLab 4 without the latest luma/chroma controllers and control lines, masking can be done quite accurately and subtly with U-points, using negative masking to clean up.
photoJoseph tels it quick but accurate.
To understand how controlpoint works you have to know which part is the color selector.
Sometime’s a 200% zoom in does get the right color. Sometimes a zoom out gets the right colors
The small circle in the center is the same as the circle of the controlline’s eyedropper.
The more pixels you select the more diversity of selected color you can get.
By the old controlpoints there was a faded random selection around the “pupil” a bit which you could name the “Iris”. The three parts of a circle.
So moving the dropped circle around could give several options to choose from.
Then the last outer circle, the “eyeball” that’s the circle of influence.
As you can see it doens’t stop at the line, the mask influence isn’t “round” Ctrl M or show mask to see influence. Move “pupil” around and see the change.
The outer line is stretching the feathering ratio. The bigger the circle the bigger the area of influence is but with softer edges. Stay in show mask and enlarge circle and make it smaller to notice what i mean.
Very powerfull but it has it’s bounderies. To get a sky and brances under control you needed a lot of points and negative points (this creates a protection of the selected color.mask blacks out means no influences.)
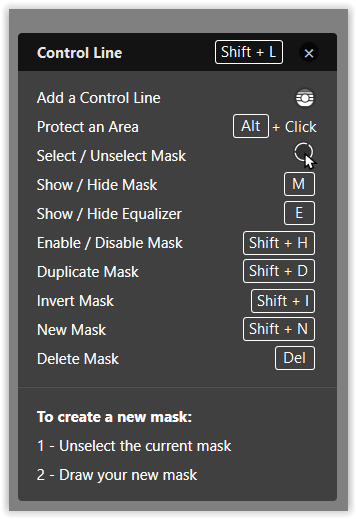
Now control line, pupil is the eyedropper, simple place it where you like.
Line, the 100% effected area, different then the variable percentage of the circle shape.
In order to have some control over feathering of the effect the dotted line comes to play. So much better in excluding area’s then controlpoint which has as a circulair stretching kind of feathering, the bigger the circle the softer the edges.
Try it. (leave chroma and luminance at 50%) which is the color selectivity of the “old” controlpoint. The v4 version.
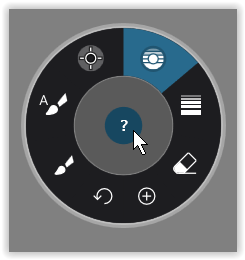
Ok now the real power of the new control line and point.
1 mask mutliple controlpoints is posible in v4. (and negatives)
Now you can combine controlpoints with controllines in one mask, and use also both types as negative.
And now the sliders.
It’s selectivity of lumination, (brightnes) and chroma (color)
Lumination at 0%? Black to white level is effected.
Chroma at 0%? All colors inside the masked area are effected.
(this is a gradient.) line and circulair non selective area. Much like brushing a mask. But with much more feathering control. (yes you could use mutli stroke in brushing)
Raising lumination selectivity? What you do is exclude more and more levels of brightnes AROUND selected luminance level. ; say you selected 18%gray at 0 it’s 0%-100% and at 50 it’s 10% - 60% and al the up to max selectivity it’s maybe 17% til 20%gray luminance level which is effected.
Yes a luminosity mask. (chroma at 0 selectivity)
Even more selectivity?
Add some color selectivenes in. (remember 50 is the v4 selectiveness.)
Select one part of the hue? Say redisch orange to yellow
Aim eyedropper or pupil on a redisch orange color.
Drop luminosity selectivenes to 0.
Drag chroma up to a point you see mask effectivenes covers the wanted colorrange.
The higher the slider of chroma the more “hue” you exclude.
Like a local HSLmask! (only you can’t change colors as in the colorwheel of HSL.)
To see selected area effectlevel i use max desaturation everything gets grey or max ev +3 everything gets white (overexposed) or -3ev yes you guessed black.(underexposed.)
When you satisfied with the selection, turn menu sliders to 0 (NOT luminosity and chroma!) and start you adjusting.
Use opacity slider to blend mask’s together in strenghts or copy invert…
Add smart brush and such to it endless posibilities.
Thank you, Peter. Lots of interesting detail there. Not so far removed from the way Lr masks but with a few interesting twists. Again, many thanks. Time to play
Deneice
(French photographer | PL5, Film Pack and NIK suite user)
7
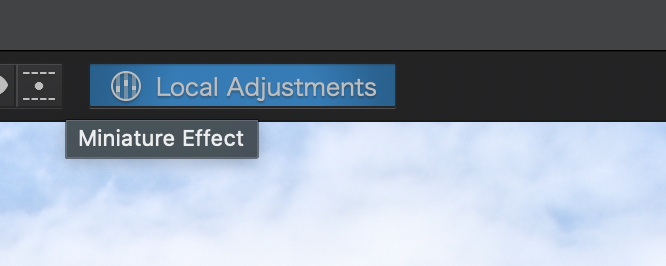
Where is this toolbar on windows PL5 ? I can see it on the mac demos but I can’t find it on my windows 10 PL5… ??? and how to display the shortcurt floating window ?
That toolbar doesn’t exist in the Windows version.
Deneice
(French photographer | PL5, Film Pack and NIK suite user)
12
Ok I could search a very long time…
It’s always strange and give a bad taste to think there is two different versions according to the OS., same number version, same price…
And what about the tutorial and demos we can find on the web ?
Thank you Rrblint !