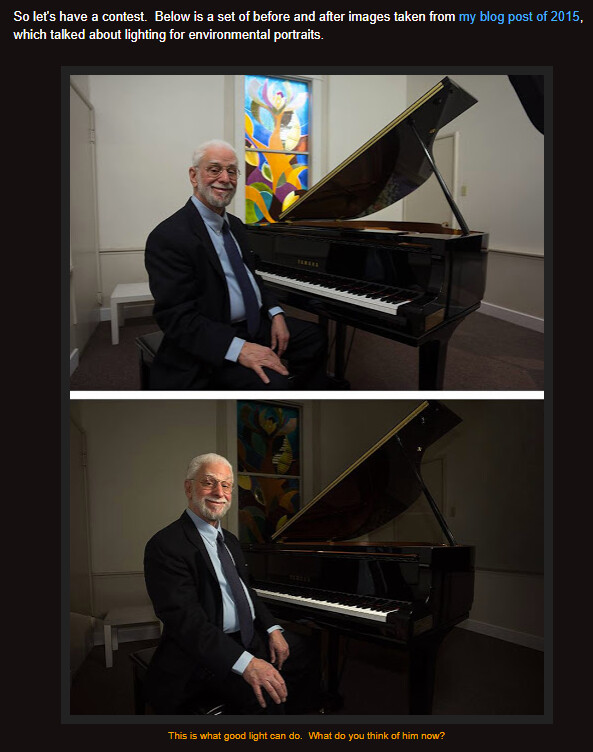
Gary Friedman (photographer and photography writer) poses an interesting challenge: to take an image captured without flash and make it look, as close as possible, like the same shot taken with flash.
Mmm ! The challenges I encountered were as follows;
The RAW file provided for us to work with (taken without flash) doesn’t seem to be as sharp as the one taken with flash (as depicted in the .psd file) - Take note of his hands, especially … AND the one offered as the target image (in the .psd file) looks like it may have had some “work” done on it (see particularly the back of his white hair).
I don’t reckon it’s practical to make the image look exactly the same, because the lighting is coming from a different place in the image without flash (and over-riden by flash in the other) … eg artificially darkening the LHS of his face would be hard to do (I reckon) and I doubt would look natural, even if one did.
– I reckon a reflector has been used (in the shot without flash) to direct light from the window to his face … that’s probably the edge of it that you can see in the top RH corner (which I removed).
I found it difficult to darken-down the colours & luminance from the stained-glass window … and, since that’s where the light is coming from (in the image taken without flash), it looked “wrong” when I tried.
I couldn’t resist straightening the verticals (just because it’s so quick & easy to do with PL).
Here’s the result of my attempt: … It’s OK, but not great !
Note:
-PL finds the lens identification to be ambiguous, I chose the Zeiss ~ SSM II version.
-For reasons I can’t readily explain just now, I’m unable to upload my sidecar/.dop file.
Light from a flash depends heavily on the distance of every element in the picture from the flash, which in turn relies on the position of the flash, and then there’s the colour of light it emits and the intensity at source, and the physical shape of every element in the scene along with its reflectivity.
I just don’t get why anyone would want or need to do that. It sounds more like a challenge for a 3D modeller. What ever happened to “get it right in camera?”
Gary F was, essentially, posing the question: “Can the computational features of smartphones (and post-processing software) produce results as good as photographic techniques - such as speed-lights?” … with a “fun” challenge for his readers to try.
Note: He’s a serious photography writer (Cameracraft magazine) and author (of manuals for Sony cameras); also an inventor … He’s quite an interesting bloke.
Hi @John-M
to my mind, Friedman’s contest is not worth the effort ( still tried ).
As already said, the photo to be edited is horrendously unsharp (1/6 sec, f2,8). But then, taken with room light from ‘behind’ results in a person’s dark front instead of a more even lighting.
And using a super wide angle lens quickly results in unpleasant disproportions (compare both hands
of Danny Brodsley as well as his right hand with his face).
While the pic of Leon Levitch ( The Friedman Archives Blog: Classical Environmental Portraits ) seems to be taken with the same lens, him holding both hands close to his body, the distortions are less obvious and distracting.
To note, both finished photos are ‘photoshoped’, but compare the nice soft lighting in the pic of Leon Levitch with that much harsher one of Danny Brodsley. – Friedman must just have been pulling out some old stuff, while in lockdown.
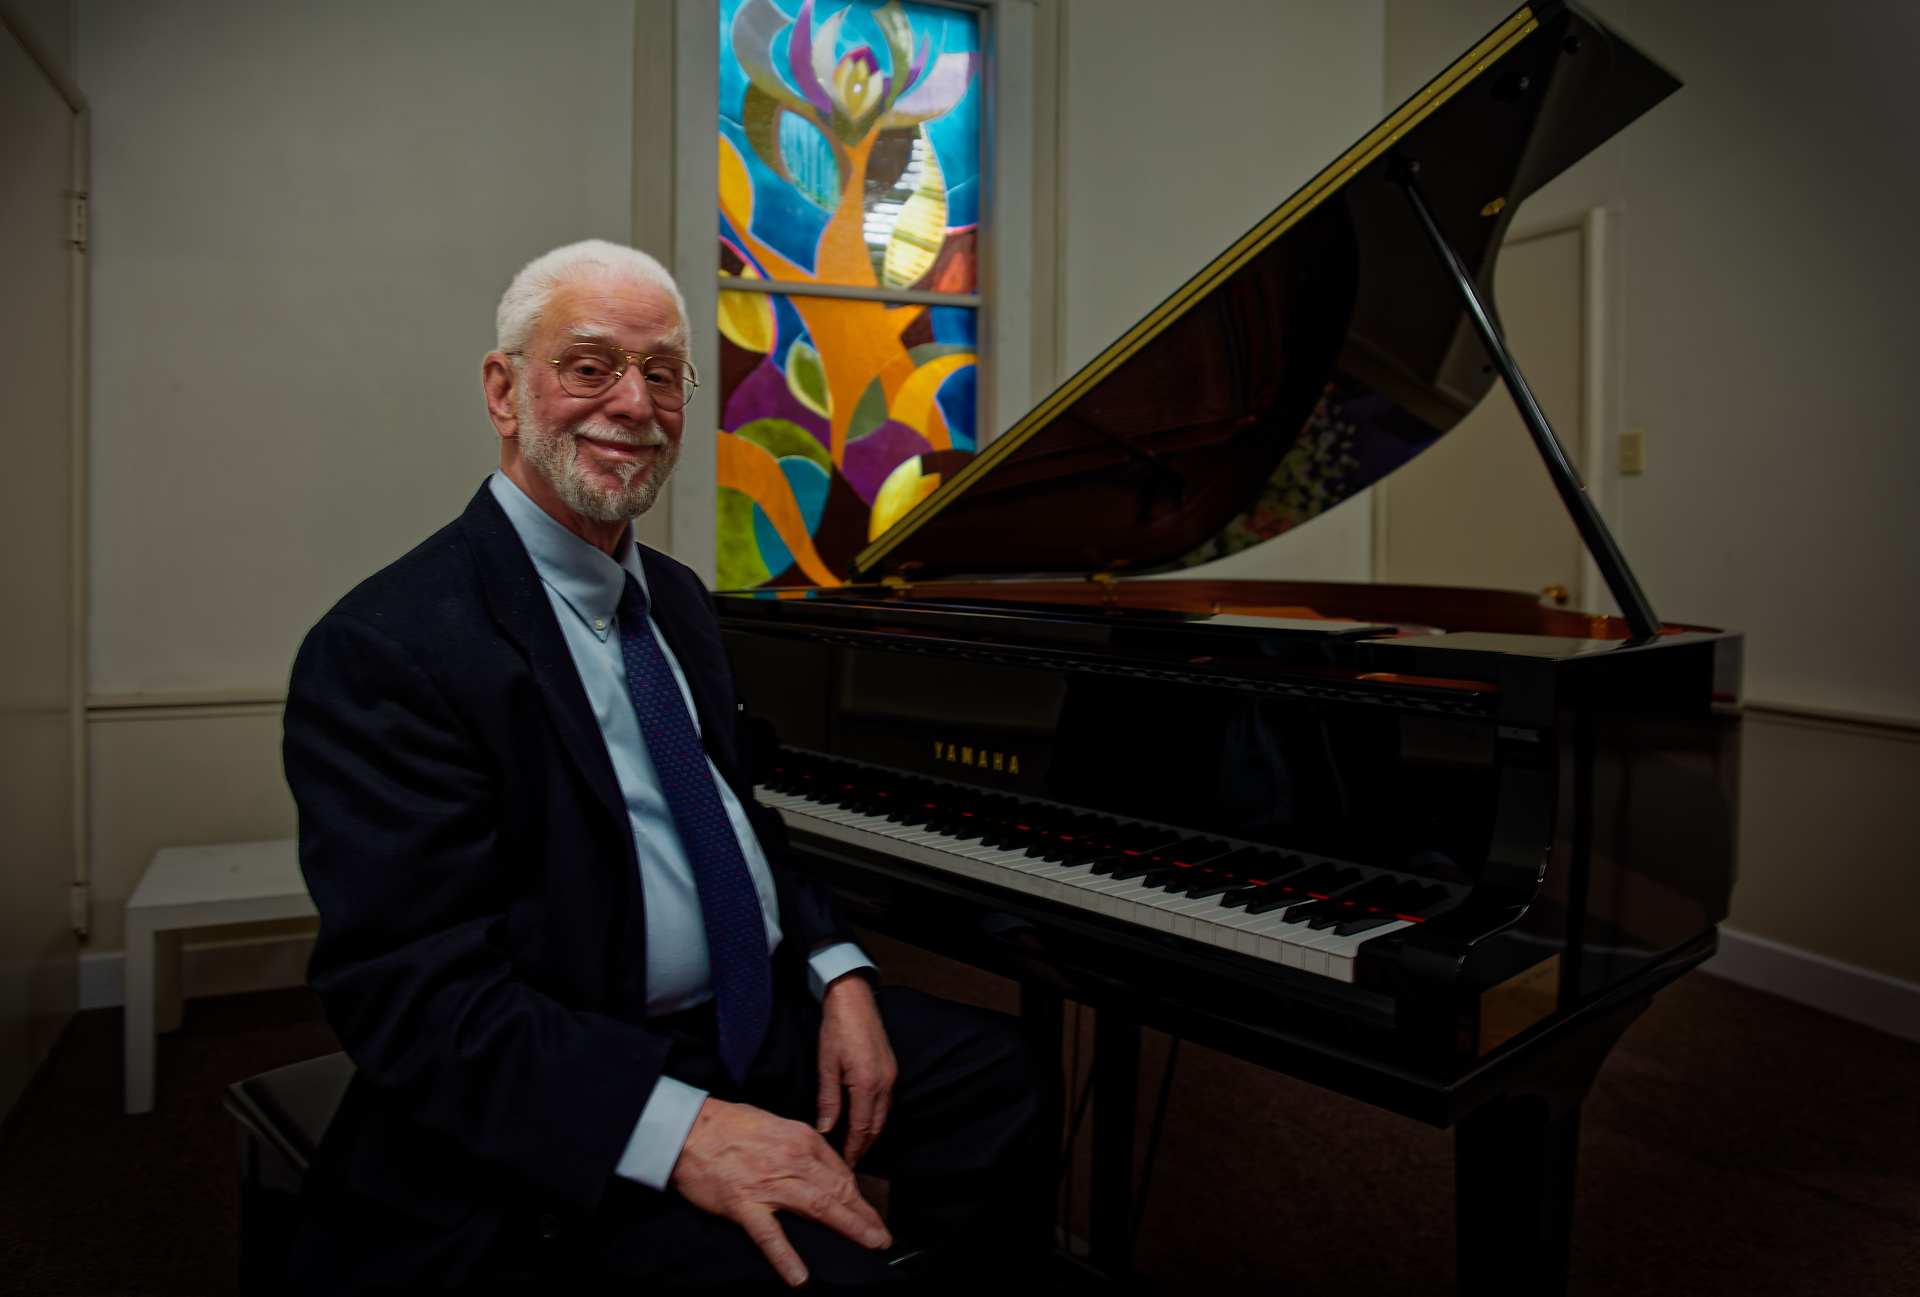
@rrblint & @Wolfgang : Thanks for giving it a go, fellas.
(Yes, I agree there are quite a few issues with this base-image … but, I guess it is what it is !)
You both did a much better job with the light on his face than my effort.
Q: What did you use to remove the “red” colour-cast on his face ?
That’s very close John good work! I don’t remember doing anything special to get rid of red in his face, I just darkened his right side with a control point, but yes I may have removed a little bit of vibrancy too. I really don’t remember, getting old is so much fun.
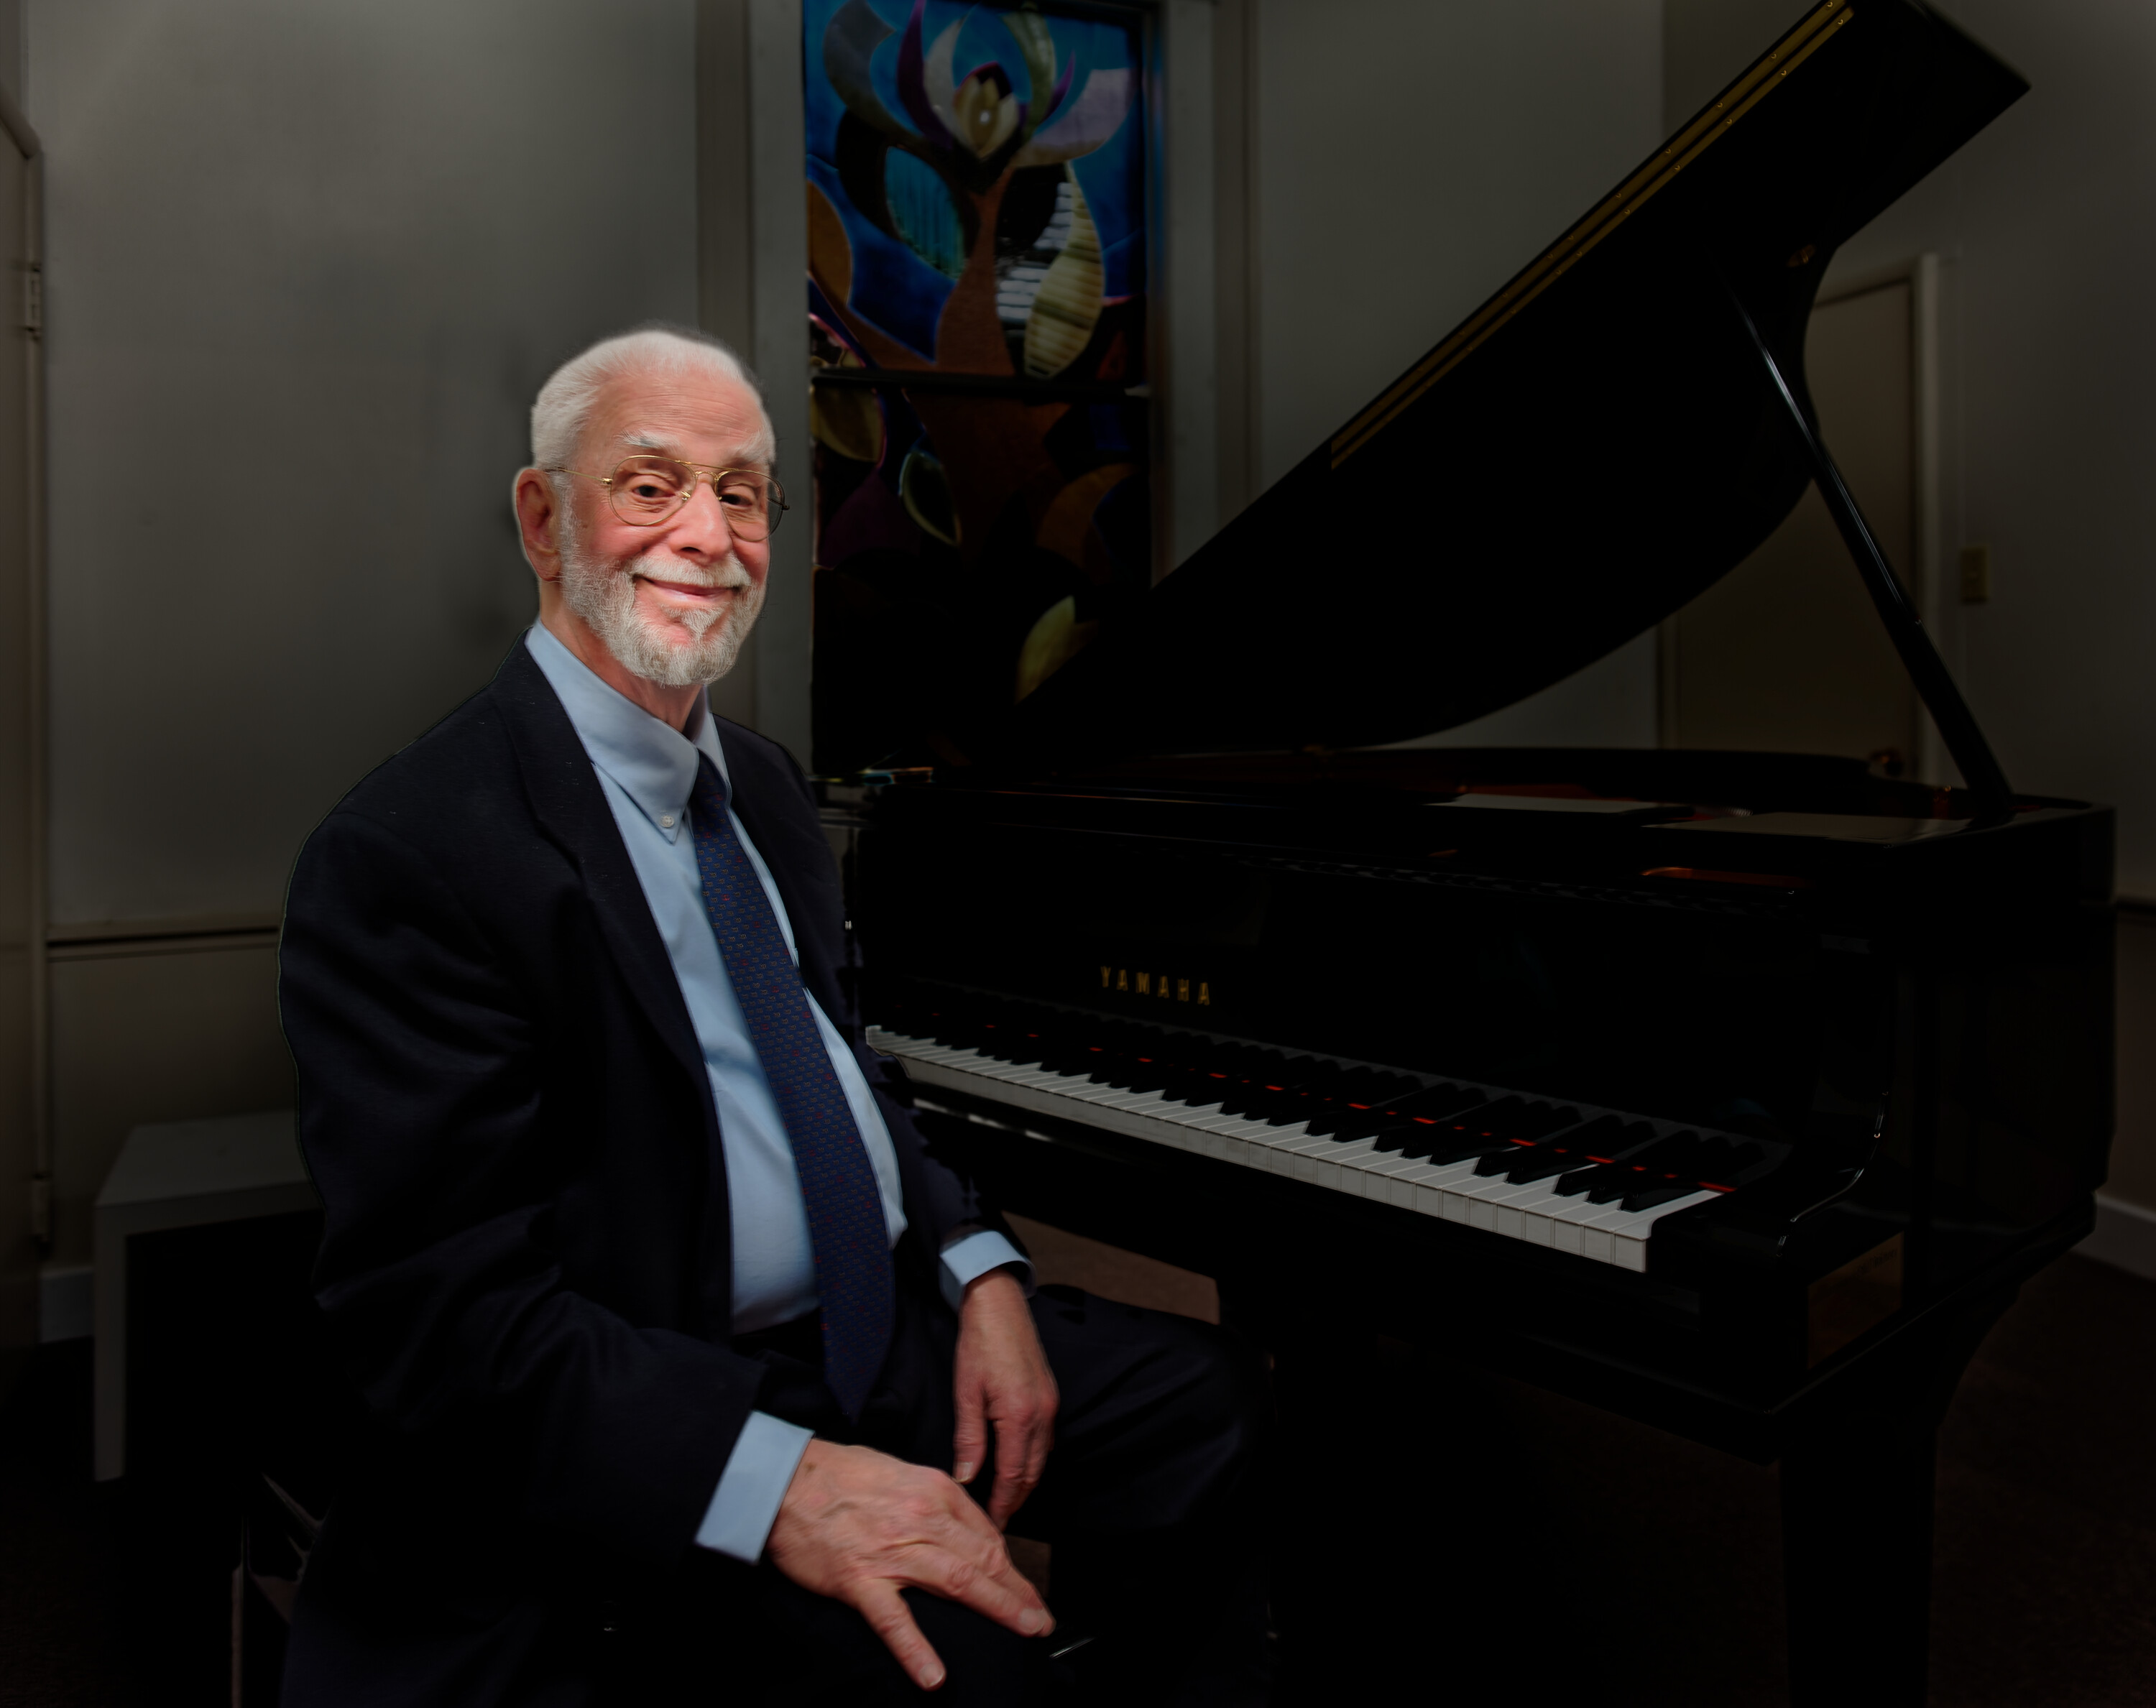
@john-m
Yes, much better now – you put more work in this one.
Like @rrblint, I also didn’t change any colour. Suppose, the reddish tone appears stronger with a darker face.
Straightening the pic and working with so many Local Adjustments became really tough. It took long to load the pic and ages with LA active.
When correcting masks manually, it happened several times that I moved the ‘start button’ by mistake and so the mask – quite annoying. And next time I’ll use less CPs.
What I don’t get, how to remove the top right black corner. I tried with copy and repair, but never get a clean replacement. Does it have to do with touching the edge of the pic? No problem to repair something as long it doesn’t touch the side.
Today I thought to export the image with its corrections as Tiff-file and try again with a few LAs. – That’s speeding up the process and no more waiting for the screen to finish rendering!
So, for me it was a training about what can be done in PL. Normally I do dodge & burn in PS and therefore use a Wacom tablet – difficult in PL.
Haha - Yes, true. But, it took the example of you & Mark to prove to me that “tilting” the shadows on his face was do-able … and, so, that set me a challenge I had to try.
When the part to be replaced/repaired is close to an edge, I’ve found it best to mimic the edge positioning with the source (rather than taking the source from an “open” area) - all the same, I still had to crop a bit from top and RHS to get rid of some “shadows”.
Ah - Yes … That’s a good suggestion.
Once again, thanks to you and @rrblint/Mark for “having a go” at this. I reckon it was a good learning experience.
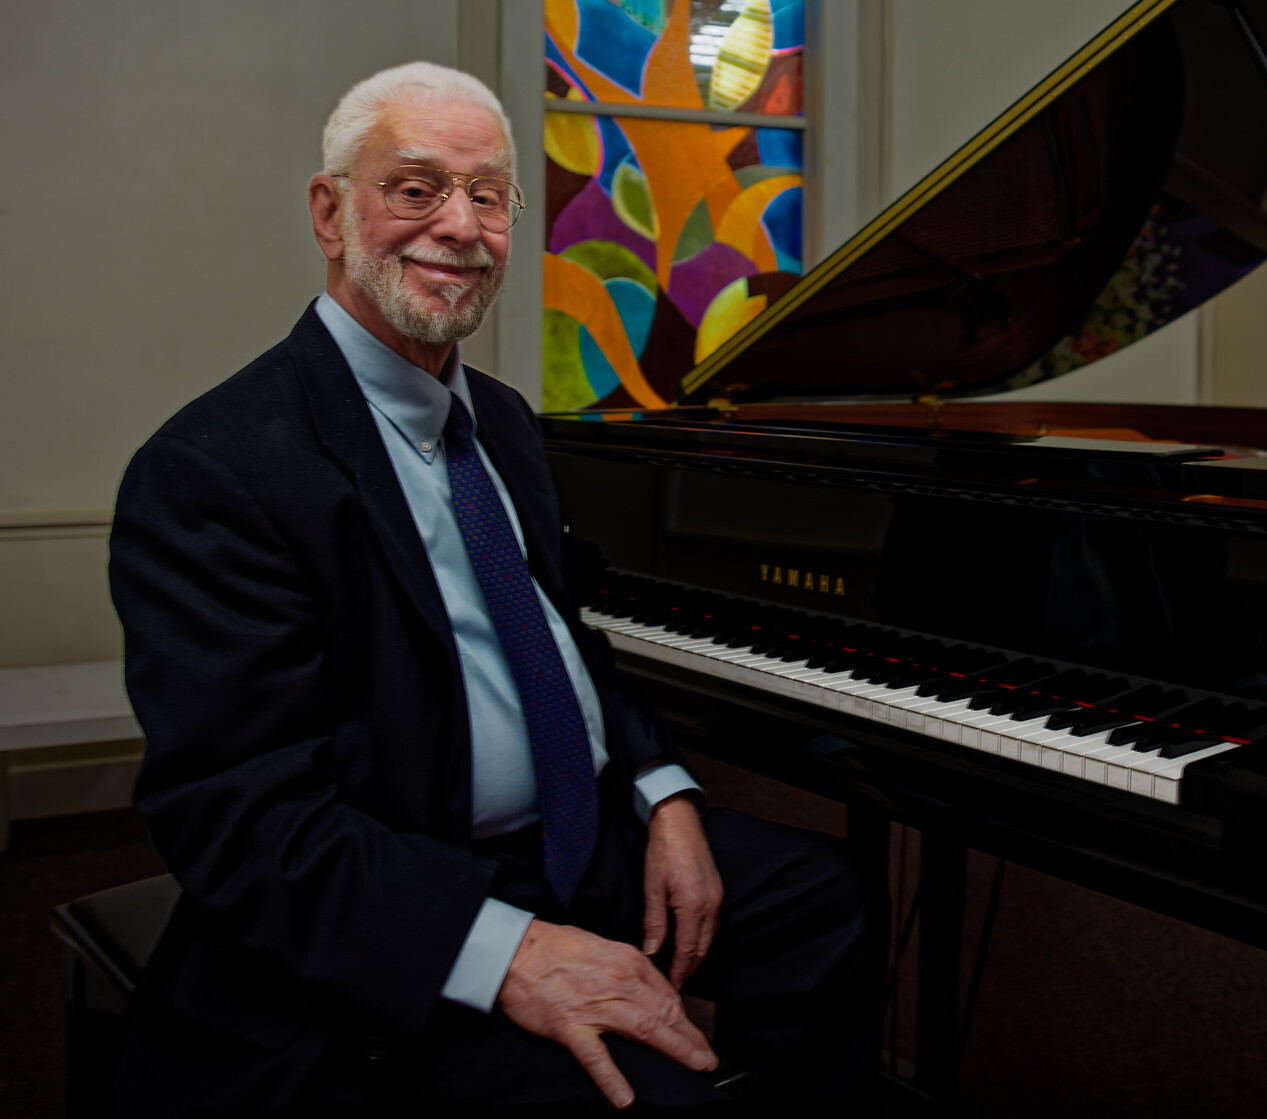
I’ve sent mine off to Gary, with explanation that I’m using PL - hopefully, that may pique his interest.
John
Edit: I’m pretty “chuffed” - I just received the following response from Gary Friedman: “Hey, John! This is a wonderful job - looks very real. Well done!”
nah, PL is not developed enough, not even trying! For instance if you want to lower the exposure of the image and using a local adjustment to turn back exposure to normal, you will not get the original color/exposure, no matter what you do. There is no other shape than round so you painstakingly have to paint the oval shape you need for proper perspective adjustments (like light spots). Otherwise I’d image you’d need to do a couple of gradients opposing each other, just to put different temperatures (a flash is normally coldish).
This is also a frustration I regularly encounter. It seems to sort of bring in blur from outside the image. It helps if you reduce feathering on the mask but you can never quite clone out a thing on the edge.
This is something I’ve come up against too. I regularly shoot more or less into the sun on the beach so I expose for the sky to avoid bleached-out highlights. My strategy in post is to up the exposure to get the foreground right and then put a gradient on the sky to bring it back down but it is always a struggle to get it back to where it was. The values aren’t the same. If I up exposure compensation by 1 stop and pull the sky back down 1 stop with a gradient it doesn’t go back to where it was before exposure compensation - always much darker. It’s not even close. So although the gradient slider gives numbers that purport to be in stops they don’t actually match in value.
Why do you expect to ‘see’ flash light?
– Indoors, the illumination (atmosphere) rarely is ‘cool’ and the piano keys are white.
But, I reduced the shady skin tones’ saturation for a more realistic look (HSL tool to simplify).
Any time, I prefer the nice soft lighting in the pic of Leon Levitch
(The Friedman Archives Blog: Classical Environmental Portraits)
to the harsh (amateurish) lighting of Danny Brodsley
[no studio photograph here, but it’s just not the best example to follow].
my feeling is that in the local adjustment, instead of the exposure to be increased, when using that slider (exposure), is just turning up the shadows.
I tried to trick the software by using the artificial vignetting with local adjustment that increases exposure but same issue, maybe even worse. A fake vignetting will apply over all your adjustments.
[update] with regards to the sun: normally you shoot to have the sun right and not the shadows. Why? because a raw picture can recover easily 2 or more steps from the shadows and rarely more than 1 stop from the highlights. I had excellent sunsets (in the highlights) with 0 shadows that I recovers perfectly after turning it up. It’s all about the light available in the landscape - if your eye tells you there is easily enough light to see all, there is, so it’s just a technical matter with your camera. I must say, mine is 10y old, almost, and it’s a good one (5dM3) but the new ones, OMG, how wide their dynamic range is, so it should be even easier. On the other hand it’s awesome to have great contrast and colors by exposing more. If you do landscape, HDR is the answer.