Change auto mask - local adjustments

Particularly when trying to punch up dull skies into something with more blue tones, I’ll paint a mask with a large brush, and change down to something smaller around edges. I’ll finish the mask, start shifting things around… big gap in the sky! The mask says I painted that but… nada. In desperation, and annoyance, I start another mask, and… not all of the hole is repaired, and the whole thing becomes a round of whack-a-mole as I try to beat down the nasty little irregularities that auto-mask thinks it sees. My monitor says the sky is pretty much, to my eye, a field of “'blah”.

Question: Is there a way to expand the range of acceptance. That is, some part of the scene may be darker or lighter by only a small amount. Is there a way to expand the range to include the lighter or darker area, which would otherwise not be included in the mask?

It can depend on various factors, such as combinations of Size, Feathering & Flow.

A good tip is to change one of the sliders (Exposure is a good one - decrease it to extreme) so you can actually see what’s being applied - then you can go over any areas that need it, whilst keeping it all as one mask (which is advantageous too).

Suggestion: To enhance skies, try a Control Line instead of a “dumb” painted mask.

HtH - John M

1 Like

Selecting sky:
1 open a control line. Set featherline just under the horizon and the line just over the top of high structures.
2 point the eyedropper to a point you think you want the most effect on.
3 hit “M” screen turns in black en white to show mask.
4 slide chroma and luminosity around until the sky is white and structures are mostly black. (the less white and black the more feathering or crosover there is.)
Repeat step 2 3 4 until you satisfied.
50% is selectiveness of the former controlpoint.
5 rampup vibrance and some clearviewplus(very gentle)
This should make you happy

3 Likes

Yes - - and reducing Highlights a little can often help too.

John

Agreed. Using Control Lines is far more effective and a lot easier once you get the hang of them.

Key is what Peter (@OXiDant) says about using the selectivity sliders.

@RBEmerson would you like to post an image here and I can add a control line and send you back the DOP file so you can see what settings I used?

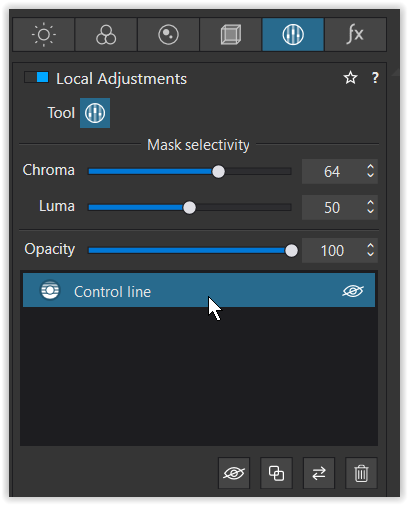
@John-M: I haven’t spent any time with control lines - I’ll investigate that.

The brush fuzz, flow, etc. is fixed, only size is adjustable. checking mask shows I covered everything I was after. I often run the exposure slider to black to confirm whichever mask is being used is operating correctly.

@OXiDant: Thanks for the work flow recommendation.


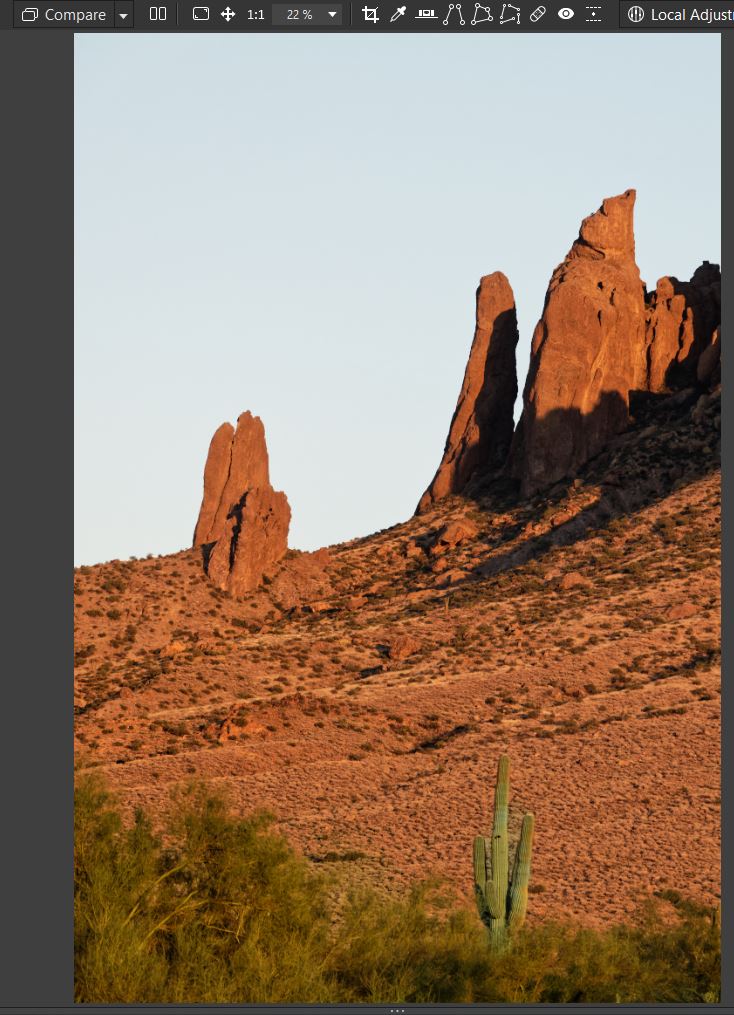
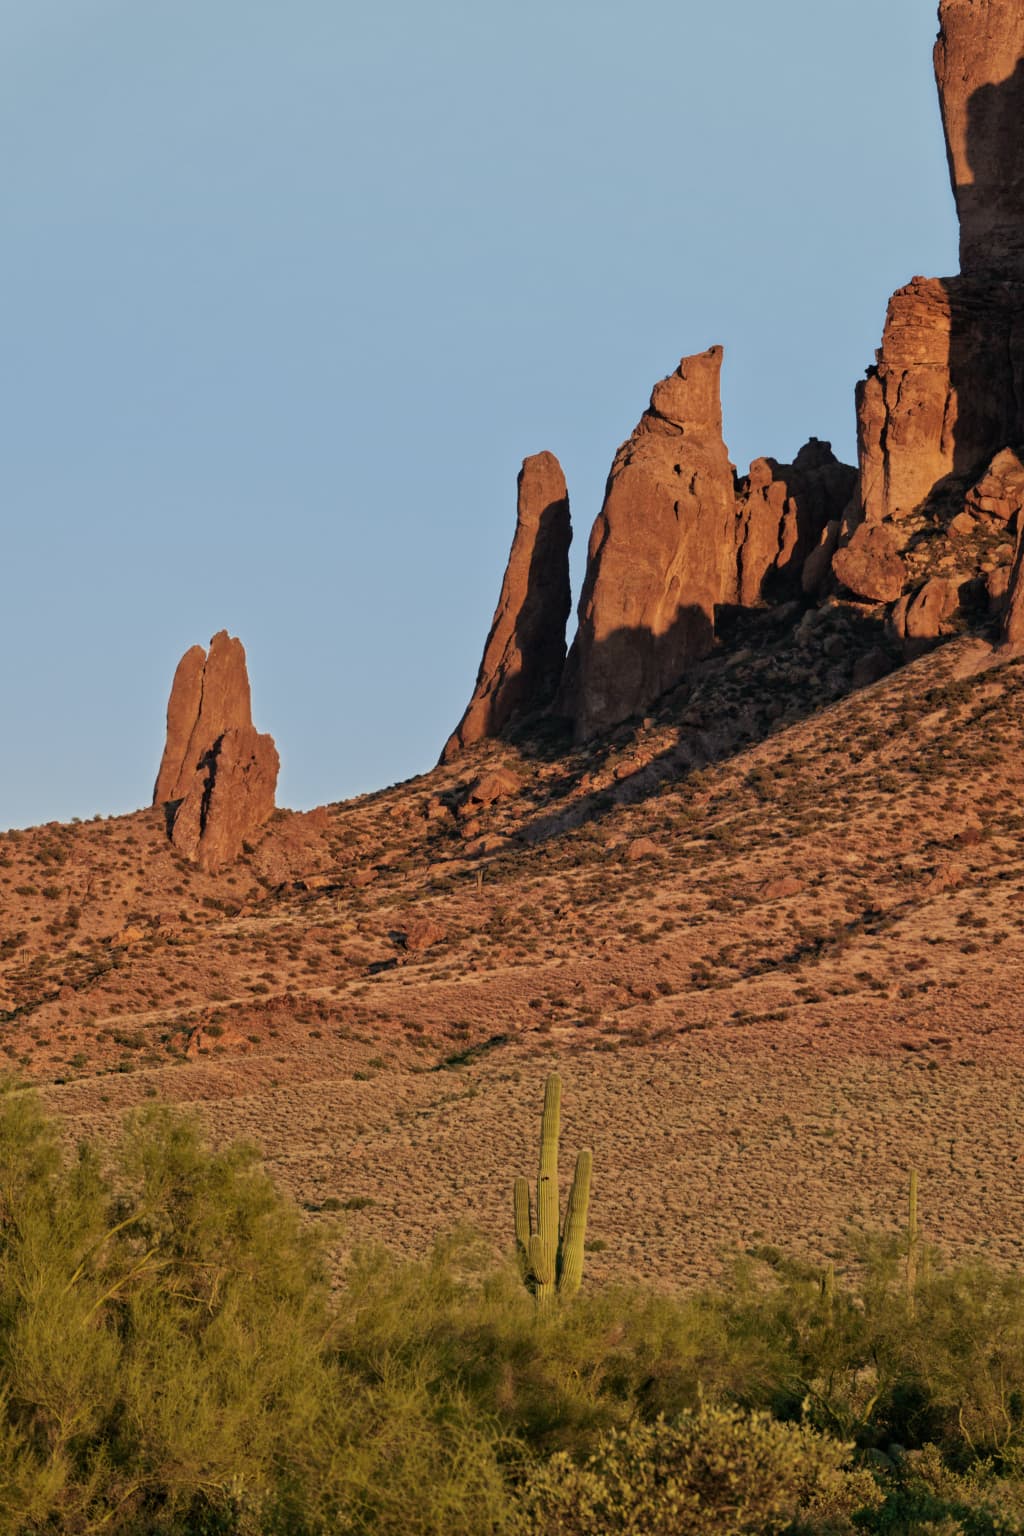
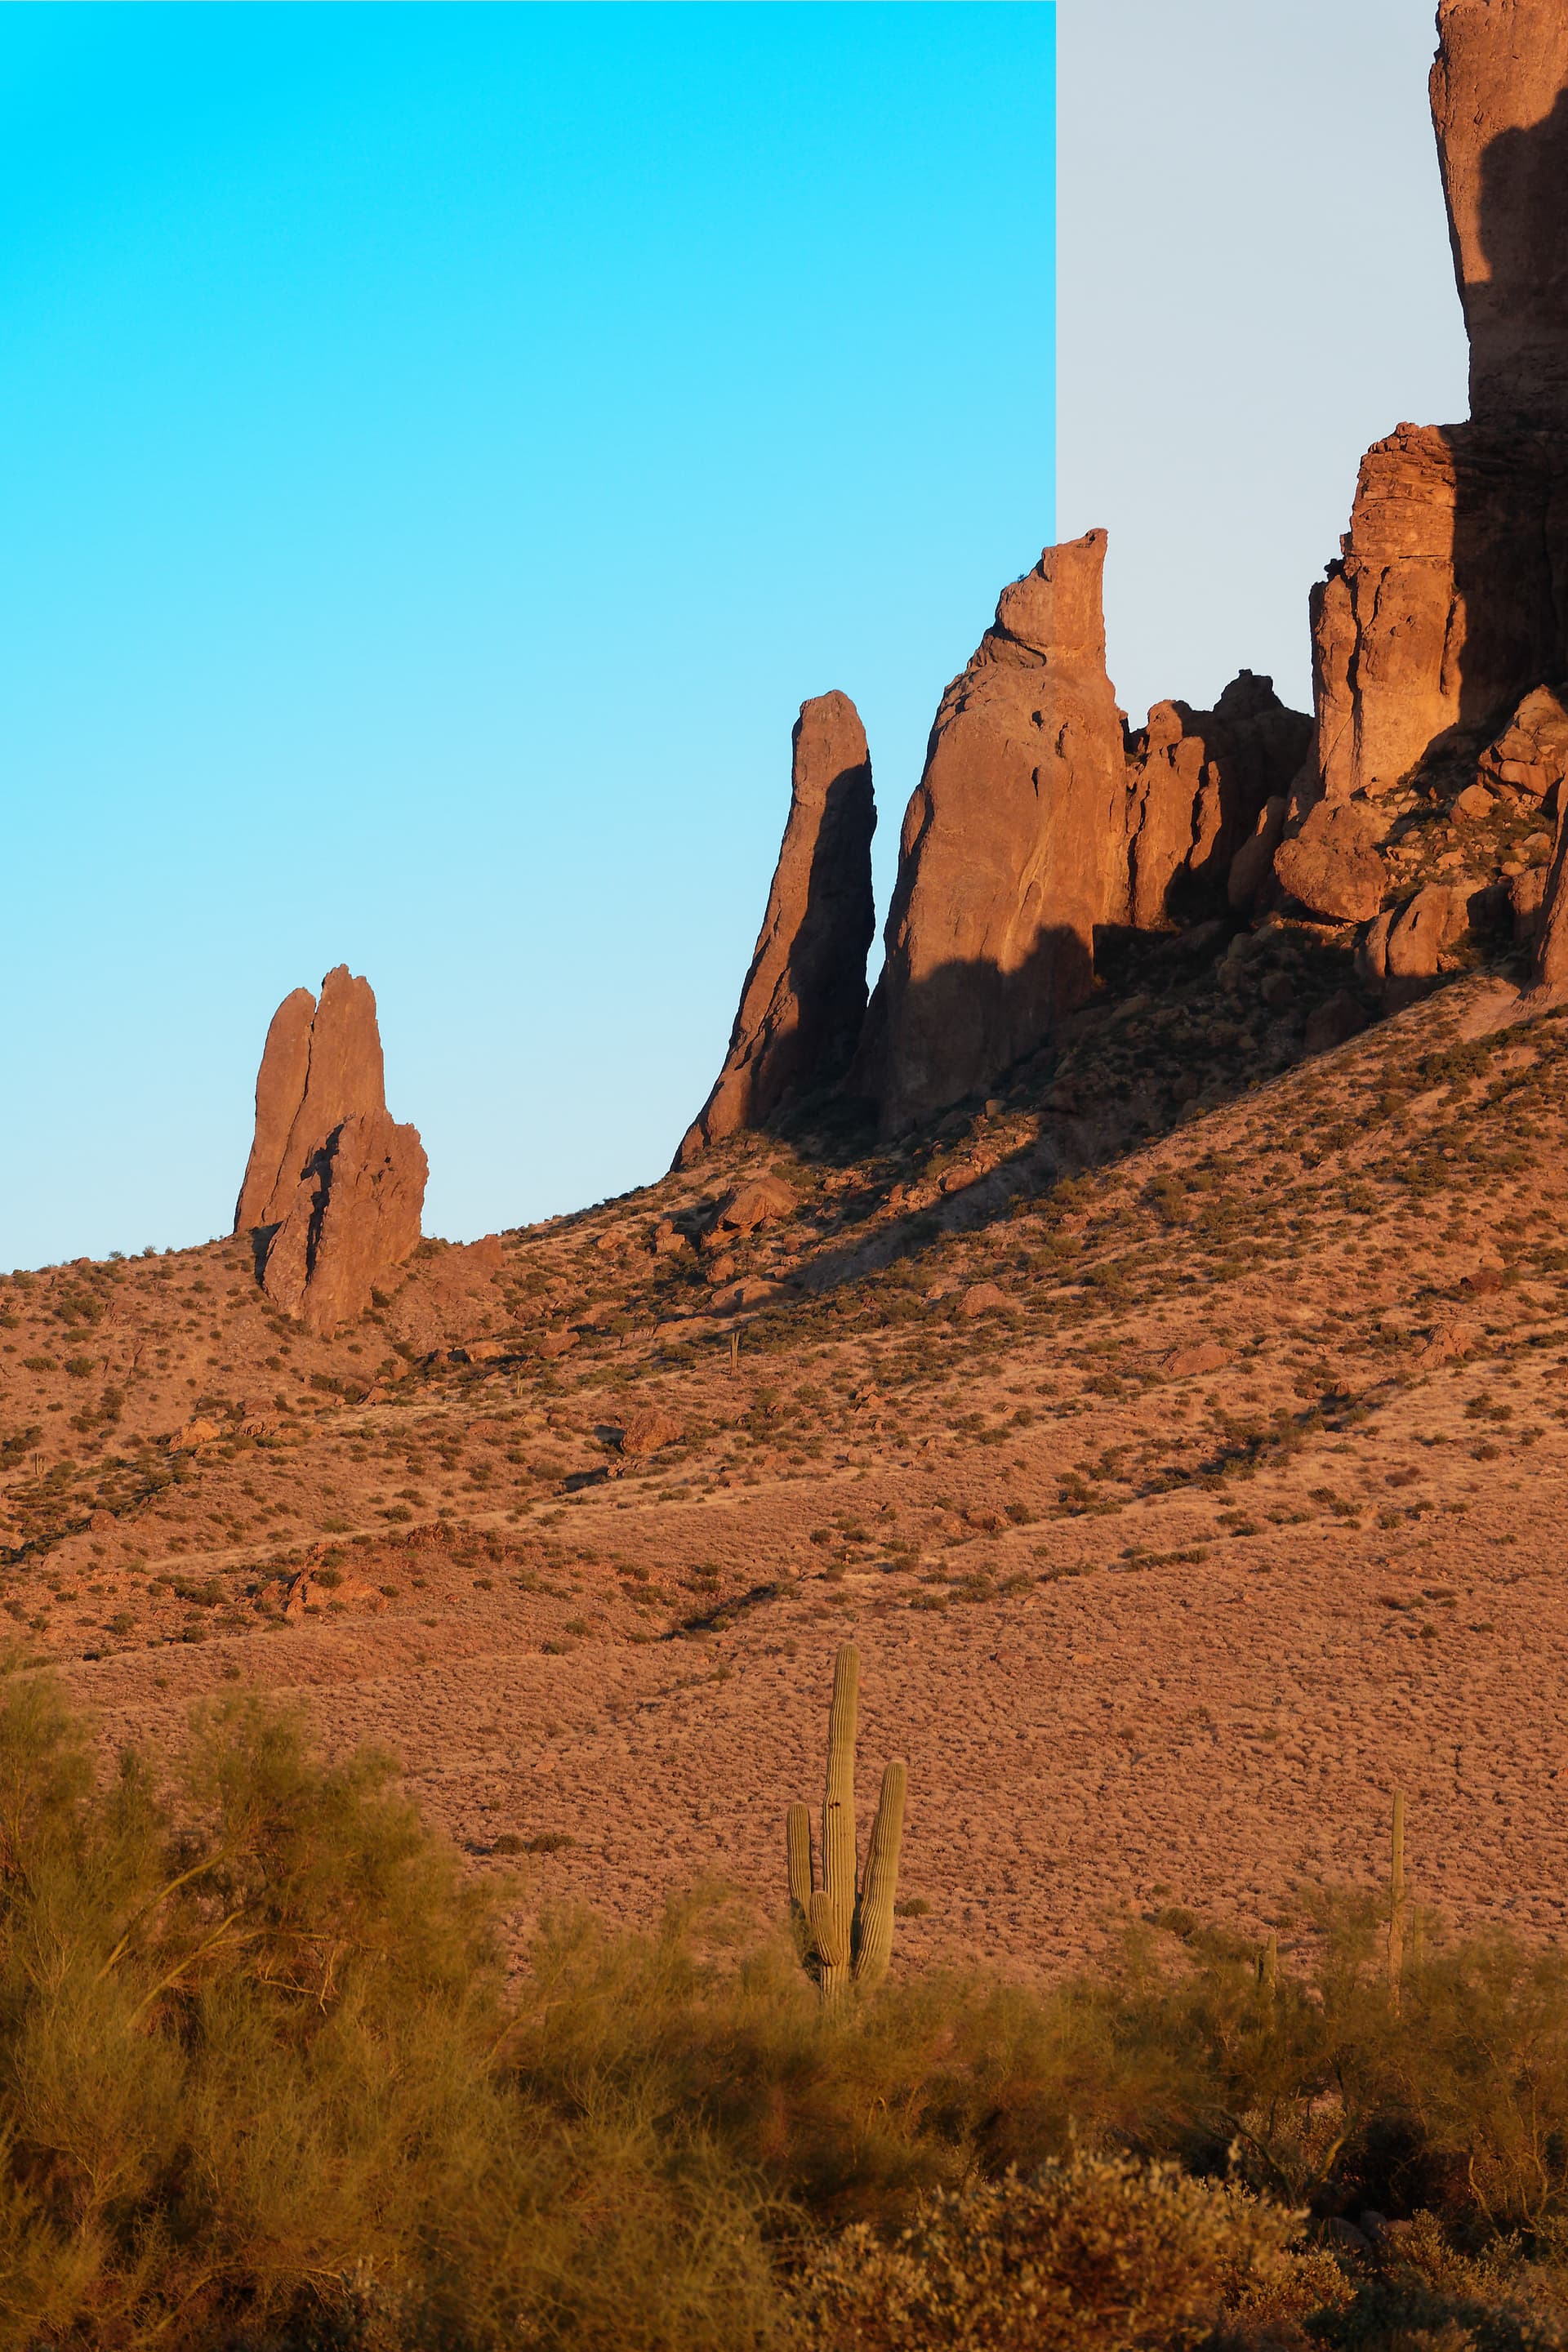
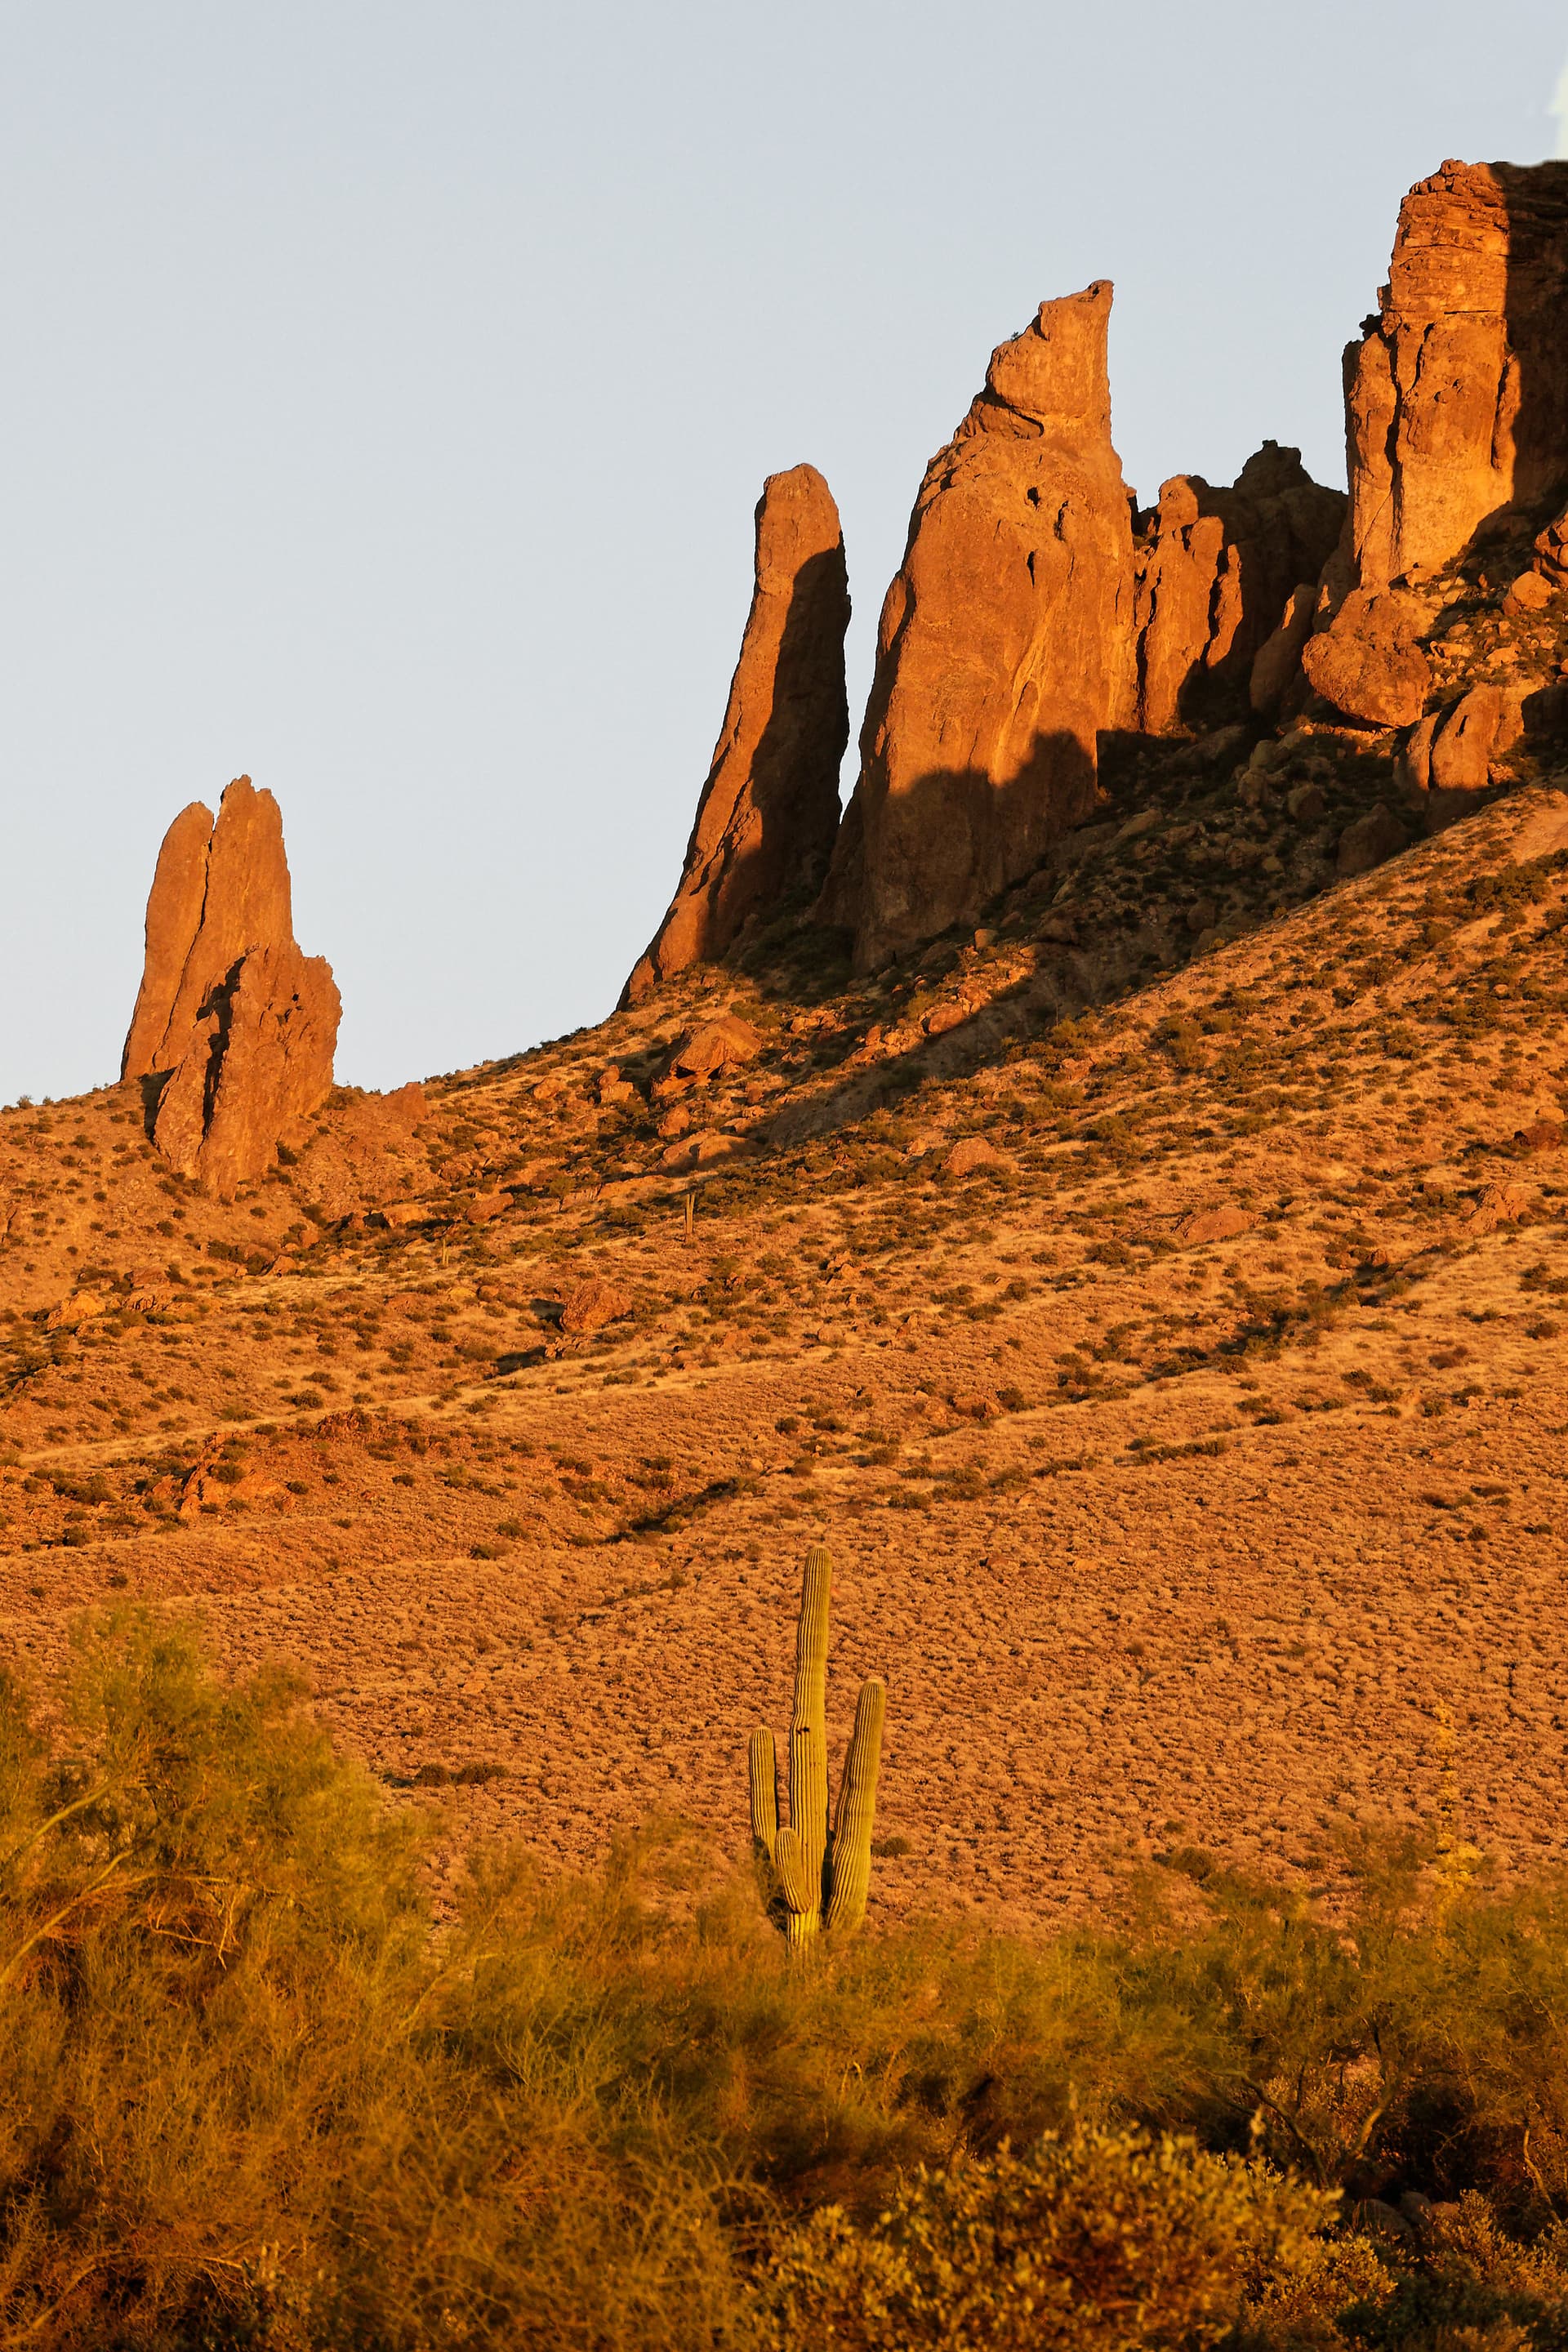
I’ve attached the (frankly, mediocre) snapshot. I played with it a bit, concluded it was never going to survive cropping let alone anything else. I played with auto mmasking to get a better handle on doing that. The location is “Praying Hands” formation in the Superstition Mtns, east of Phoenix, AZ. I was on a “golden hour” expedition.

This almost the basic RAW - ignoring I messed with the cactus and brush - much too saturated, but so what. It shows the colors before masking. The sky is just blah - why not fix it?

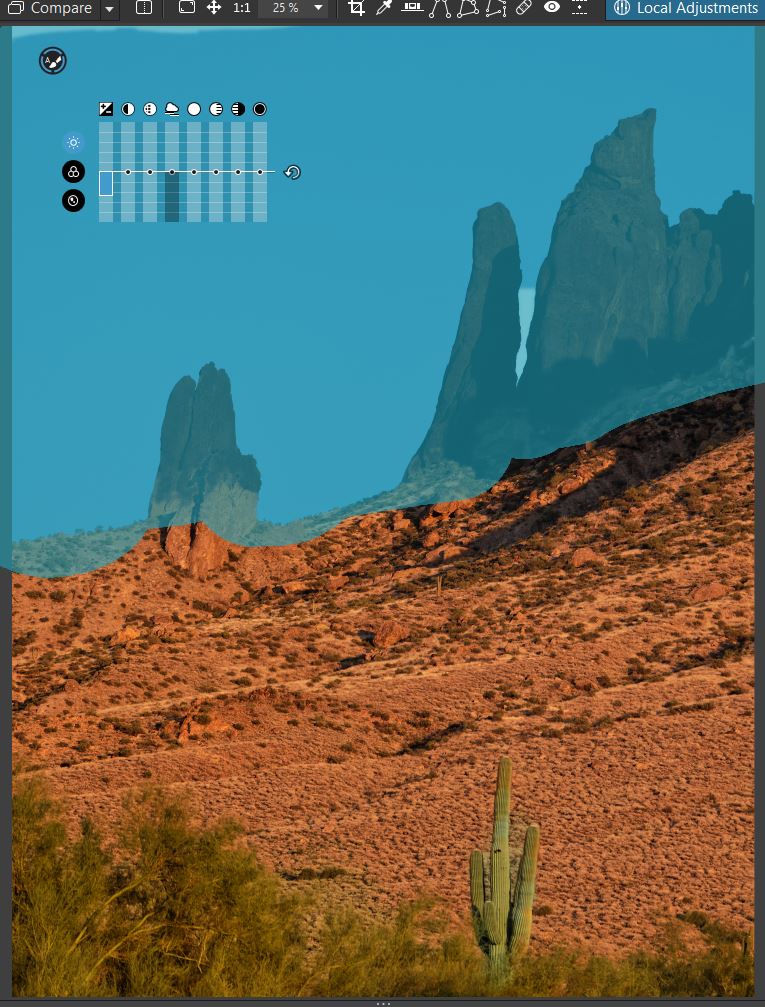
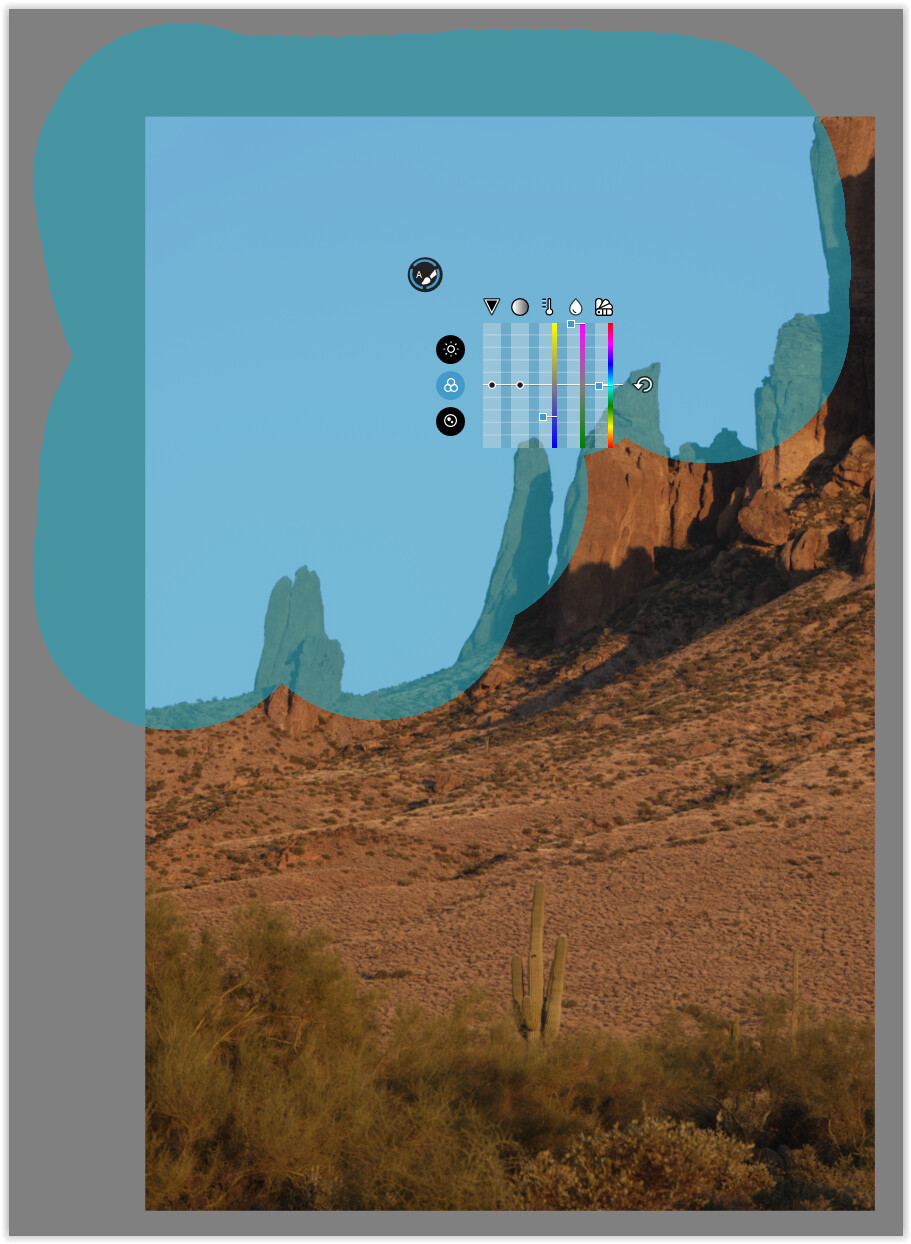
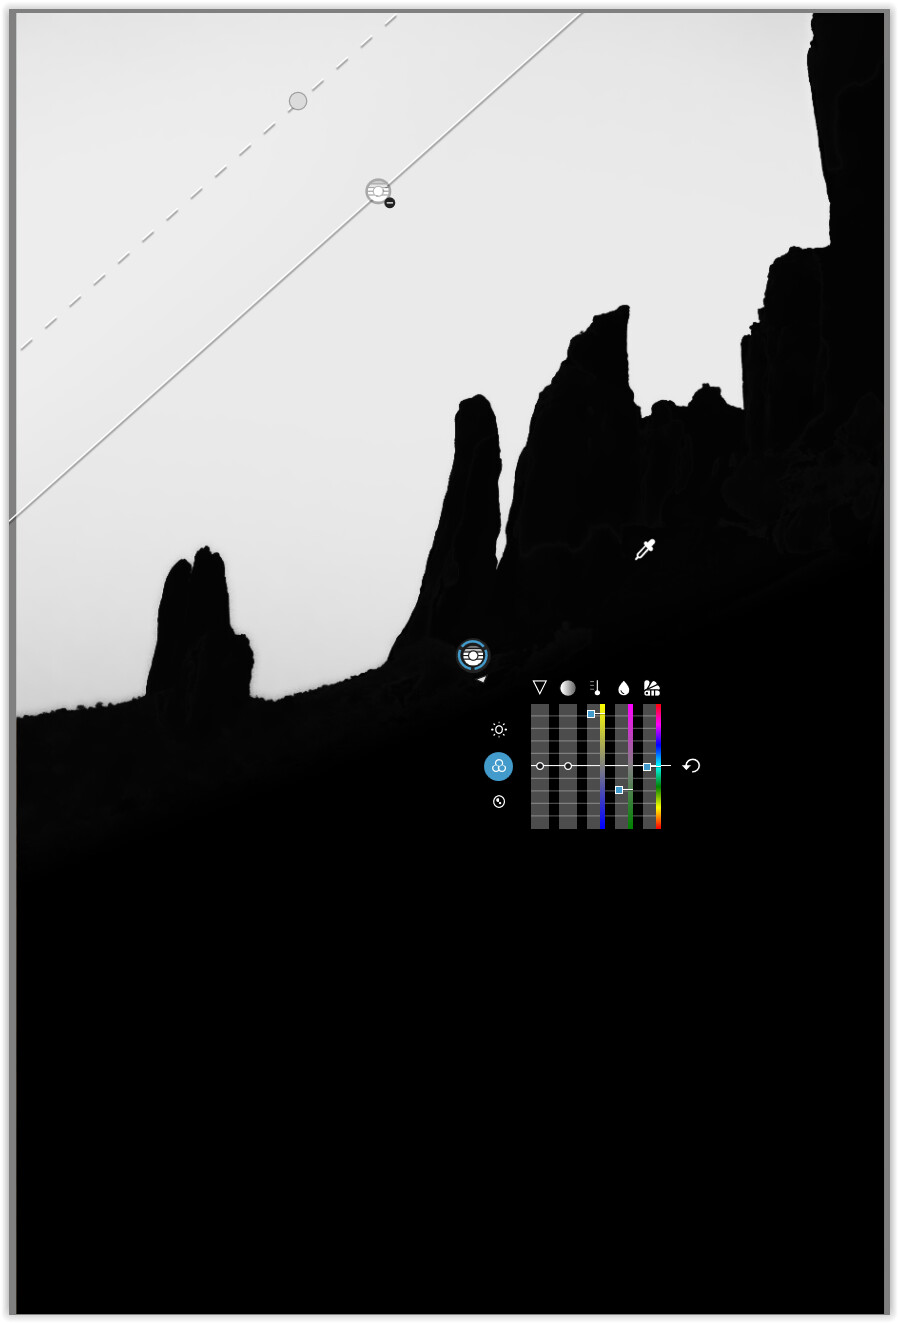
The mask was applied, and life got interesting. The (control point, or whatever it’s called) was dropped in a place that didn’t create the large swath, across the middle of the sky, That prompted the question. However, note the gap at the top of the frame, and between the “hands” in the formation. First time around, it took more than one new mask to fill in those gaps. Look at the original file, and there not much indicating the first mask won’t act on anything like the sky. Note the mask covers over a lot of rock. Different color, different shading, the auto-masking should work very nice. Fail!

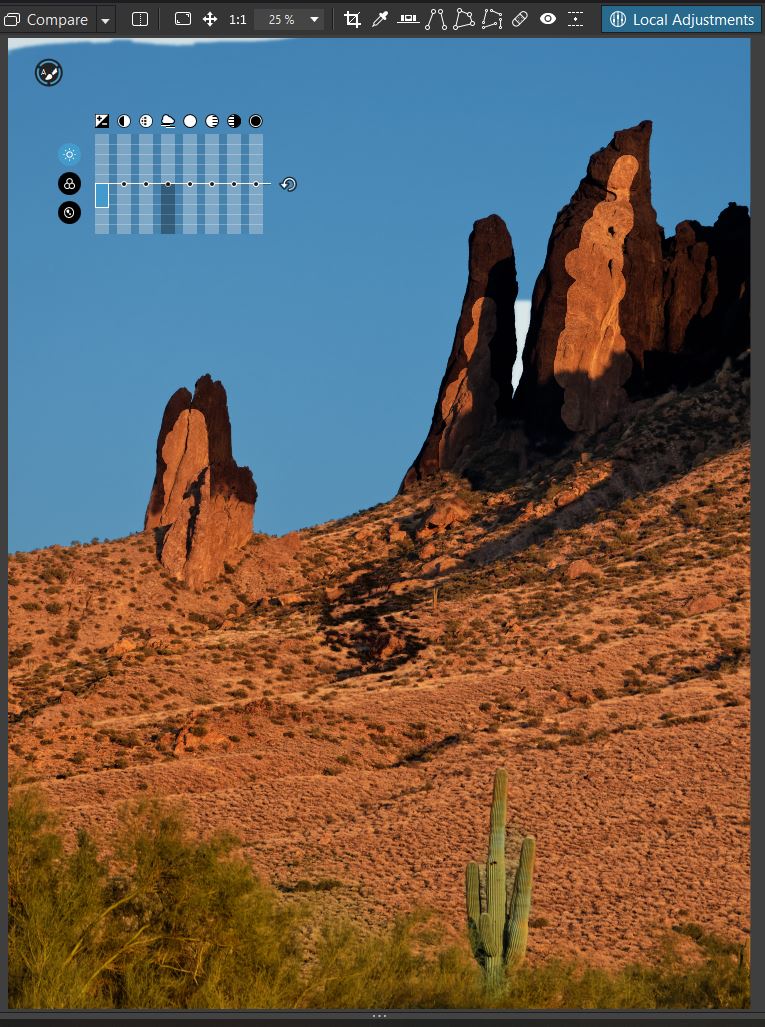
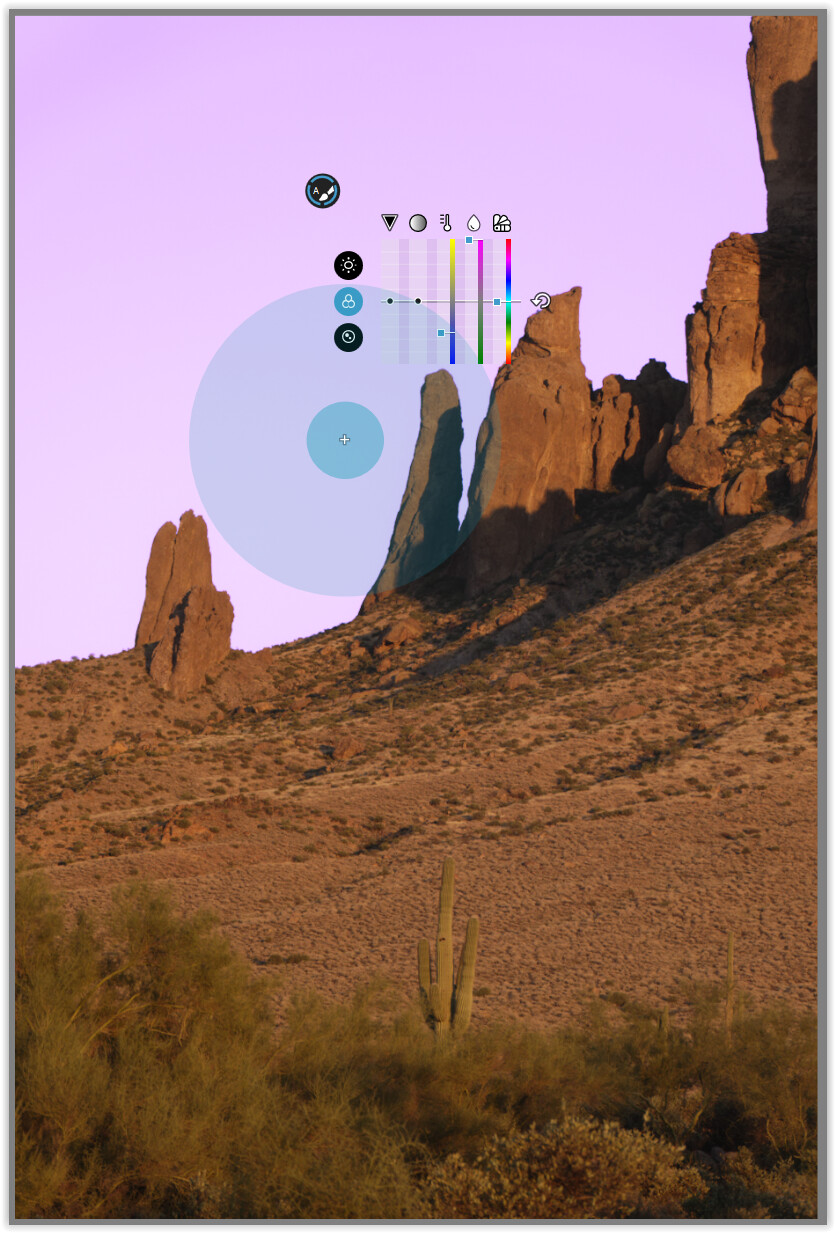
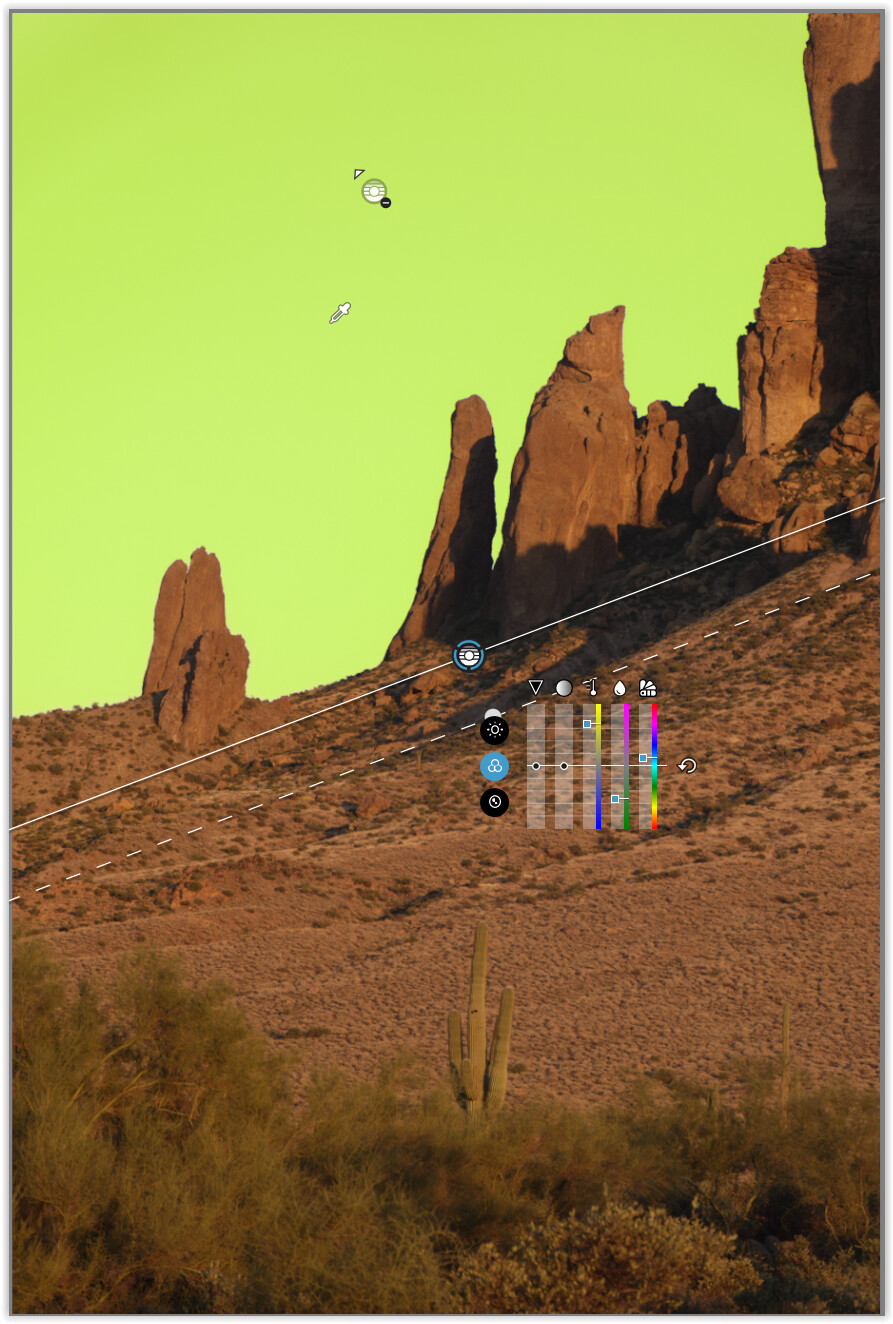
In this file, I erased some of the mask over the rocks.to show how what should have been golden rocks, darker than the sky, were also operated on. Or a faint variation in the sky is rejected, while rocks, very different than the sky, are adjusted. (The color comes from shifting the color temp blue-ward. It’s much too exaggerated for actual use, but makes the point about what’s happening, or not, with the masking)

Again, please ignore the content. Think of it as a test card.

@Joanna This is the starting point. If the cactus and brush is green, I have an untouched exposure taken with in a minute or two of the JPEG’s I just uploaded.
DSC01436.ARW (20.0 MB)

As I said earlier, this is just a “noodling around” excursive. I’ll be happy to try something other than auto-masking.

Well, here is an export of a quick rework of your RAW file…

Using several Control lines to help with both the sky and the Cactus/brush.

Here is the DOP file that PL5 created, so that you can see what edits I made…

DSC01436.ARW.dop (9,7 Ko)

I am not a frequent brush user because controlpoint technology serves me well.
But auto mask is indeed only size and feathering, the first drop on a image takes a sample of the lumination, and color i think. That is the autopart for masking inner ring/circle does the masking and outer ring does the outlining of the edges of your masking object.
The plane mask does have multistroke painting and the erasor too.

Your specific image does point towards the use of controlline.
None of the sky color nor lumination level is anything near the rocks and forground colors and brightnes.
Automasking works great if you have a object which you want to edit wile the surounding doens’t. With eraser, holding ALT down eraser is popping up, is the outer ring mask outside the object to wipe.
Then you can copy mask and invert to mask the other parts.
This way you can counterpart the other’s adjustments.
I can show a example if you find that use full.

Control points and control lines can be connected and used in one mask together.
And by using ctrl? alt? You can open a negative line or point to blacken a certain place.
Once you understand the way they work and how you control the control-technique ,pun intended, then you wil understand our enthousiast feeling about the control technology.

Great thanks for the effort, and DOP.

I made a quick try with control lines and the pinnacles still get colored. I put the before and after into GIMP, stripped away part of the after. The change in rock color isn’t quite as bad a before, but it’s there. My inclination, if I was willing to devote the time, would be to carefully mask the rocks to keep them unchanged. Which is pretty much what I’d have to do with auto-masking. The one saving grace is not worrying about the places, in the sky, where auto-masking failed.

I’m baffled as to why auto-masking affected the rocks at all. Grrr…

Somewhat related, is the control line seems to be acting, at least here, pretty much as the gradient tool does. What’s the main difference?

If you slide the selecitivity to zero then it acts indeed as a gradient.
If you slide it to max selectivity then it acts as a plane automask of the color and brightnes of the picked color with the eyedropper.

Auto mask is not very smart. As i said the core does the masking as in plain adding it to the mask. The feathering circle is the “smart” selector it detects the edge of the object by hitting a different hue, contrast detection.
So if you hit the rocks with the core you “select” this color and auto selection does what you ask.

1 Like

A-hah! All is revealed!

I went back to the start with a copy of the RAW, and worked with auto-mask. Based on Peter’s comments, I made the brush ridiculously large to fill the sky in a few strokes. The key move was to keep the core off the rocks. There was another gap in the sky. This time I was careful to put the core inside the gap, and the gap was filled in, as hoped for.

After action summary: All of my problems centered on not managing the core correctly. Keep the core out (in my case) of the “do not paint here” area, and the mask works as auto-magically as I expected.

Great thanks, everyone, for getting me back on track!

3 Likes

@RBEmerson – easy with this ‘classic’ example → DSC01436.ARW.dop (53,0 KB)

Automask version → VC 1 = pink sky


the center of the automask-brush did not not touch the red rock


Control Line version → VC 2 = greenish sky


left – maskview of the (main) control line with picker in the sky
right – mask selectivity adjusted for the sky


left – maskview of the (additional) negative control line with picker on that greyish part
right – the nice greenish sky (with main control line + picker)

2 Likes

I started from scratch, with a frame taken within a minute of the earlier demo.

The sky was painted with a huge brush (quick area coverage), with the core obsessively out of contact with the rocks. One “hole” appeared, but a swipe (same mask, just a repainting) with the core in the middle of the hole removed that gap. The process was the same with the saguaro, although I used a different mask for the trunk, and each arm - seemed the thing to do after a piece of background, between the arms and trunk, picked up the changes. No worries there.

The high brush is a clump of palo verde (“green branch”) trees. In normal sunlight, the branches are an almost emerald green - very pretty, but have thorns (don’t ask how they reminded me about that). The goal here was to raise up some green, in contrast to reddish rocks (lots of iron in the rocks means red rocks). The low bush is a creosote bush (literally smells like tar when wet). Small white-ish, almost furry blossoms with dark green leaves - I added a small amount of green for that. The dots and clumps in the mid field and back are mostly sage, varying between silver and grey. I left them alone, to help support the overall “golden hour” feel.

I removed a pair of saguaros low on the right side - they just didn’t belong here. I cloned sky into part of the rock above the rightmost rock face, removing the wall above the shelf. Finally, I tweaked the cropping. Great art it ain’t, tolerable it is. [wink & smile]

(Just showing off, but… The legend of the saguaro cactus is there is a dead Indian brave buried at the base, watched over by the prickly trunk and arms of the cactus. The arms tell of how many wives the brave had - one arm for each wife. The arm’s length tells of how long they lived together. The arms can point up or down or twist - the wife was a pleasure, a burden, or was a little of each. And that’s the legend of the saguaro.
BTW, never, ever park near a saguaro. They can be amazingly tall, don’t have a huge root system, and they can weigh several tons.)