Can I apply PL4 lens corrections when I use a "known" lens on a film camera

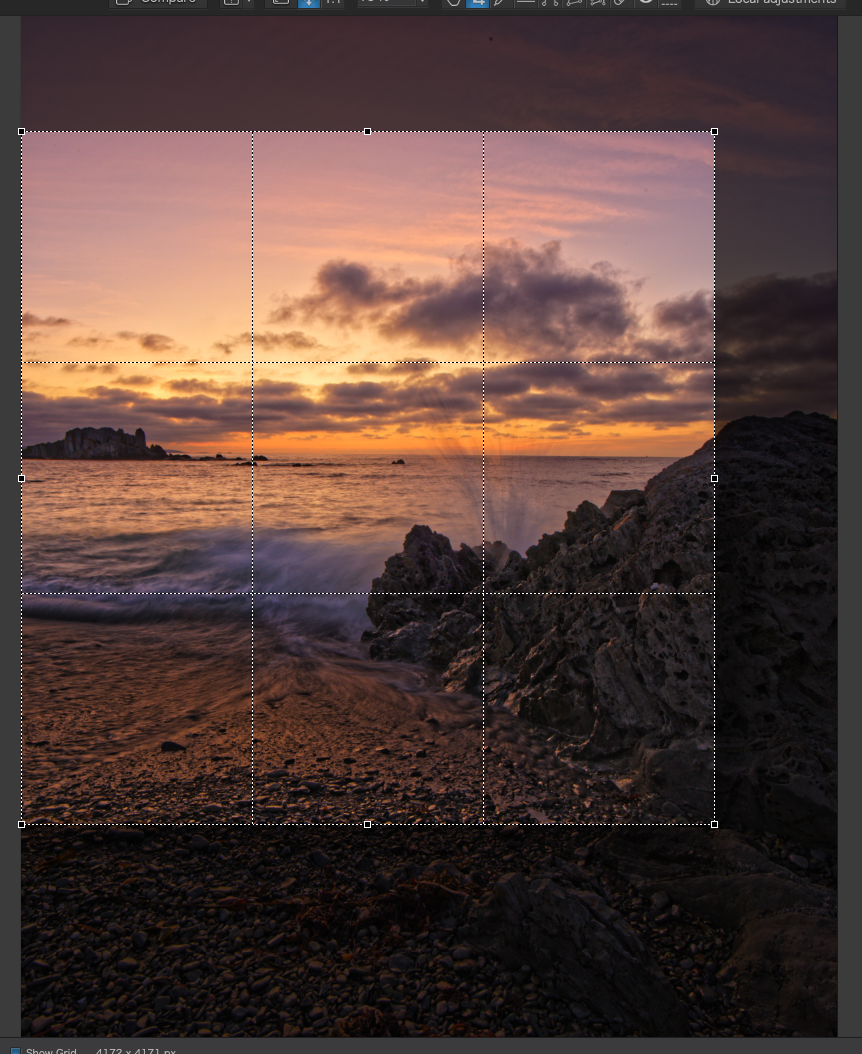
I could ask lots of questions, but the detail speaks for itself regarding stitching. This also looks much sharper than the 100% shot of the QE2.

There are lots of programs that claim to do a re-size. Genuine Fractals did a superb job. Is ON1 Resize 2021 the same as Genuine Fractals long ago? I don’t see how they could have improved it much, compared to the original - just as the “free” version of Nik Collection is just as good as the version DxO is now selling for lots of $$. Maybe I’m wrong.

(I don’t need to resize photos now, but when I get back to India they want to do it to my photos quite often. If they haven’t lost track of it, I think they still use the original Genuine Fractals I suggested they buy.)

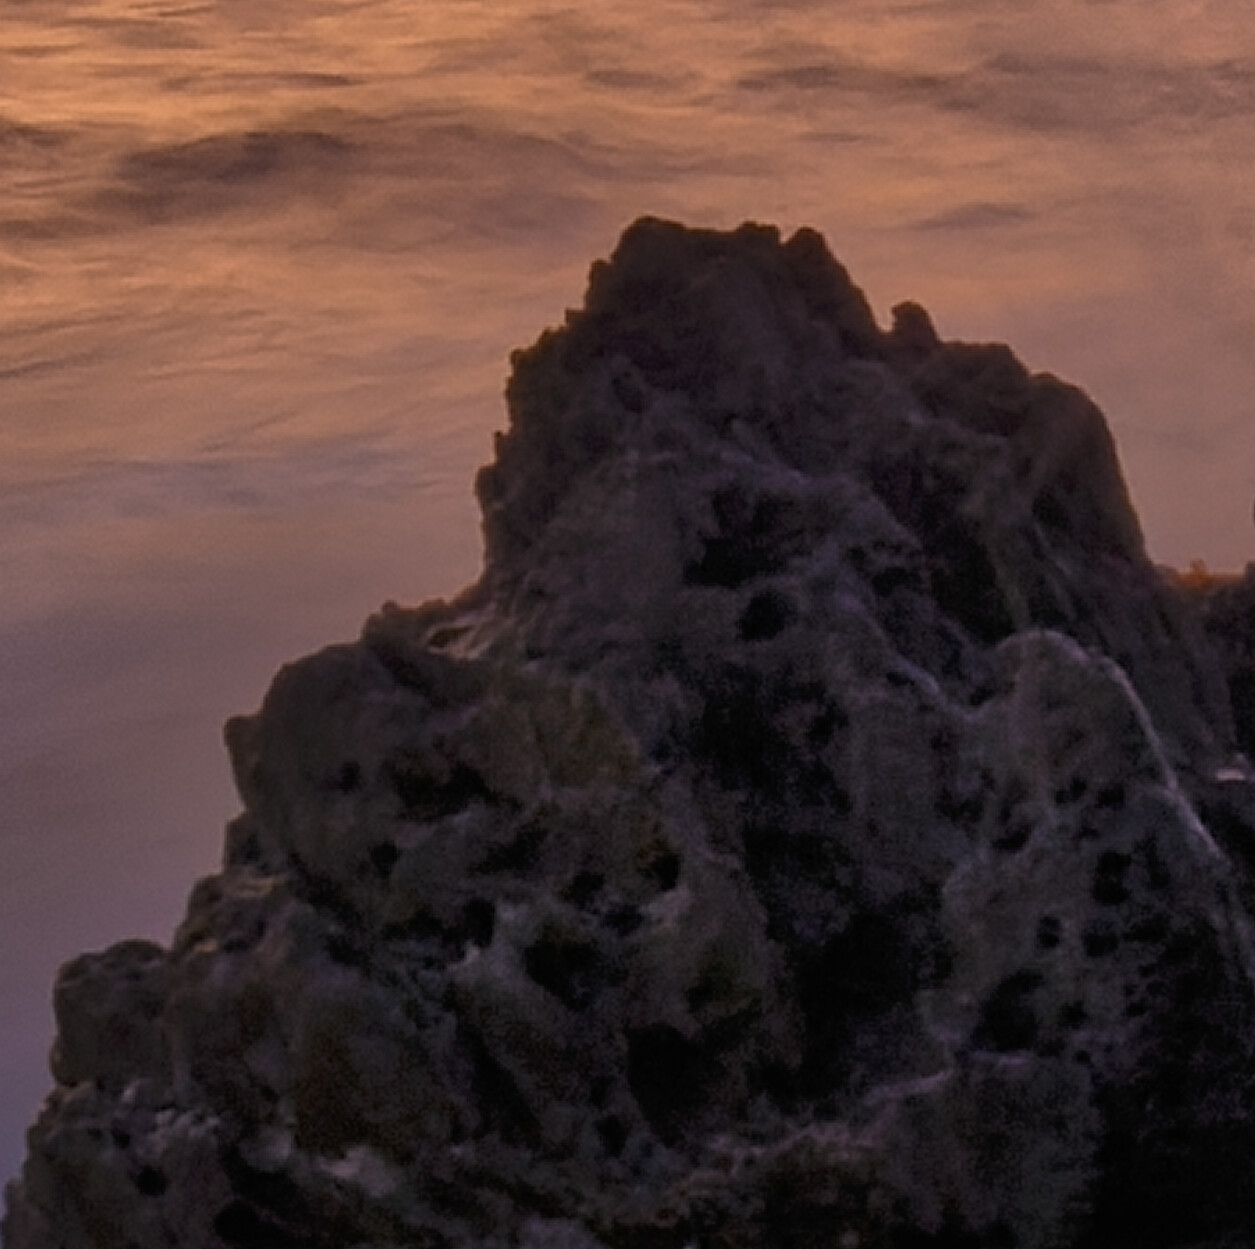
I’m no longer sure of anything regarding image quality, but both my Leica M10 and my Nikon D750 have 24 megapixel sensors. I suspect that for a 24x36mm sensor, diffraction might limit me more than the number of pixels. I love your images, but for me, my limit is a full-size image posted on Smugmug. I assume this also requires a rock-steady tripod, a cable release, and a very good (=expensive) lens. I think my Leica lenses are the sharpest lenses I own - every time I’ve done a comparison, my 1960’s Leica lens image was better than the same image from one of my much newer Nikon Lenses. The detail in your 100% shot looks better than anything I have yet been able to do.

(I don’t recall a D200 as being that good in today’s world. Which lens were you using? I think the wonderful quality is much more due to YOU, than to the D200. I haven’t done a “100% crop” in a long time. Maybe I should do it again. What I do know is that when I view my images at 100% on my computer, my old Leica lenses are better than my current crop of regualar Nikon lenses, everything else being equal, but my Nikon Lenses sell for hundreds of dollars now, while Leica lenses are thousands of dollars. I’ll have to try this comparison again.)

That’s because the canal boat image hasn’t been resized. The QE2 image was taken on a 6Mpx camera with a ⅓ overlap so it was roughly a 22Mpx image that has been resized to a 243Mpx image. But, don’t forget that is for viewing at a distance greater than sitting in front of a computer screen.

Well, I have it as part of On1 PhotoRaw 2018, because that used to be the only way to get it then. It certainly does just a good a job as it used to when it was Genuine Fractals.

Diffraction is easily controlled but using the simple rule of always shooting at f/10 if possible, which is the optimum for that sensor or film size.

In which case, you have everything you need in the cameras you have.

For the QE2 shot, it was handheld. I no longer have the EXIF as I have lost the original RAW files in a disk failure.

For the Fettler’s Wharf shot, the tripod, yes - I have a Gitzo 3 series CF. The cable release is just the standard Nikon electronic one. But the lens was only Nikon’s 28-200mm f/3,5-5,6 zoom, which is mediocre at best, but at 50mm, it’s not too bad, especially when you realise that I was losing most of the edge stuff in overlaps. I brought all of the D200 RAW files into PL and used the lens module adjustments to get the best geometry and sharpness, which greatly helped compensate for the fairly naff lens, then I passed the DNG exports to Affinity Photo for stitching and saved the result to a TIFF.

Don’t forget, this image is made from 22 RAW files and is meant to be viewed at a distance, so sharpness isn’t anyway near as critical but ensuring you shoot at f/10 and use PL’s lens modules really helps.

I certainly wouldn’t stand chance of that kind of sharpness if I were scanning 35mm film - 6cm x 7cm is that smallest I would scan. But then, Mamiya lenses are so sharp, they cut your eyeballs :flushed:

It all depends on the choice of lens for Nikon. We have some of their prime lenses: 20mm, 35mm, 50mm, 85mm and 105mm macro. They are all pretty good for the money and I absolutely love the results from the 85mm, especially for portraiture.

Leica might be good (and expensive) but they needed to be, to get the best out 35mm film. With modern high resolution, full frame, digital cameras, the playing field is a bit more level.

Of course the trend is now moving towards larger 6cm x 4.5cm sensors - something that changes the game completely. If I had the money, I would buy a full Fuji GFX 100 kit and lenses. Oh, and a more powerful computer to cope with processing the images.

For detailled quality information, check out sites like this one:
https://www.dxomark.com/Lenses/Nikkor/Nikon-AF-S-NIKKOR-24-85mm-F35-45G-ED-VR-mounted-on-Nikon-D750---Measurements__975

Fuji and Hasselblad “medium format” camera sensors are 33x44 mm. The “standard” focal lenght for such a sensor is around 55 mm as opposed to the 42 mm of a 24x36 mm sensor.

Ah! I should have checked.

In that case, how dare they call them medium format. They should be called “slightly larger than 35mm and a different shape” format :stuck_out_tongue_winking_eye:

How big do you want your (published) pics to be printed?

checking smugmug’s minimum requirements
https://help.smugmug.com/resolution-requirements-for-printing-H1GleDkNS
for a pic of 43x96 → 2365 x 5280 px

This is truly awful!

They are claiming that they can produce a 43" x 96" print with only 55ppi? Most monitors now run at around 110ppi and most “real world” print shops ask for anything between 240ppi and 300ppi.

I suppose it’ll be OK if you don’t mind walking back about 15 ft to view it.

You’ll not get me sending anything to them for printing.

Well, they promise to do some magic, but that size you don’t look at from 1 1/2 ft anyway. :slight_smile:

That’s easy to answer - in the US, I don’t expect them to be printed at all.
In India, they have taken two of my images and printed them on a special material for mounting on glass, and each was about fifteen feet or so, I would guess - at least ten. Someplace I’ve got a snapshot I made of the finished result completely covering two huge windows.

But to answer your question, I use PL4 to export to disk at full size, no compression.

(And I don’t know how many people are as serious as I am, wanting to see the full size image, like I love doing with images posted here.)

If I were editing an image to be printed, as I did years ago, I would save it in the largest size possible, and let the photo lab work on it as needed for printing.

(I ought to add that I enjoy doing this, even though it’s usually not needed. To me, the most important thing about any photo isn’t about the technical issues - it’s the “image” as it’s seen by someone’s eye. It’s about things that all of you do without consciously thinking about it, which most people with cameras are oblivious to. IMHO.)

Actually, there is nothing to stop you preparing the image for printing yourself.

In PhotoLab, get the image as clean and as sharp as you can, but be careful of over sharpening.

Then export as a TIFF full size, with a resolution of 240ppi, and open the TIFF in On1 Resize and specify the finished size in pixels by multiplying the size in inches by 240. That’s assuming the print shop will honour that resolution. You will need to adjust the sharpening in On1 to get it acceptable for the size of the final output.

This will give a “large” TIFF test you should be able to FTP to the print shop.

Sometimes I am very slow to realize “the obvious”. I was thinking that since DxO “knows” my lenses, and knows the needed corrections for the lens, it could apply that to the scan from my negative, but then it hit me - that’s all irrelevant, as DxO needs to work on the RAW file, and a Tiff file ain’t the same thing. If I had realized that way back when, I never would have asked.

Thanks for putting up with my unreasonable questions sometimes… At times I feel like I’m living on a different planet. Day after day, week after week, month after month, and year after year, I always understand “more” as time goes by, but I think for the rest of my life I’ll be playing “catch-up”. :slight_smile:

Should this happen, I will do both. I will prepare a file as per your suggestion, and take it to the printers, and also give them my original file, saved as a Tiff image. If what I created is good, they’re all set, but if there are any issues, for any reason, they can do what’s needed. I don’t see this happening for a long, long time, as I haven’t seriously printed an image in years.

Out of interest, here’s a small export of an image taken on the D810 and cropped in PL like this…

… to give this…

And here’s a screenshot of part of that image after I used On1 Resize to enlarge it to 1 metre square, viewed at 100% on screen…

What you can’t see is, enlarging to that level brought out some chromatic aberration that I hadn’t seen and PL hadn’t corrected automatically.

The more someone pushes anything the more “errors” appear.

This is the letter " o ".
It is nice and round.
If I enlarge this screen enough, it will stop being a circle, as the edges get rougher.

I think what you are saying is that the chromatic aberrations were there all the time, but only became visible as you enlarged the image enough to see them. Or, was it the On1 Resize that brought out the chromatic aberration?

Lovely image, by the way!