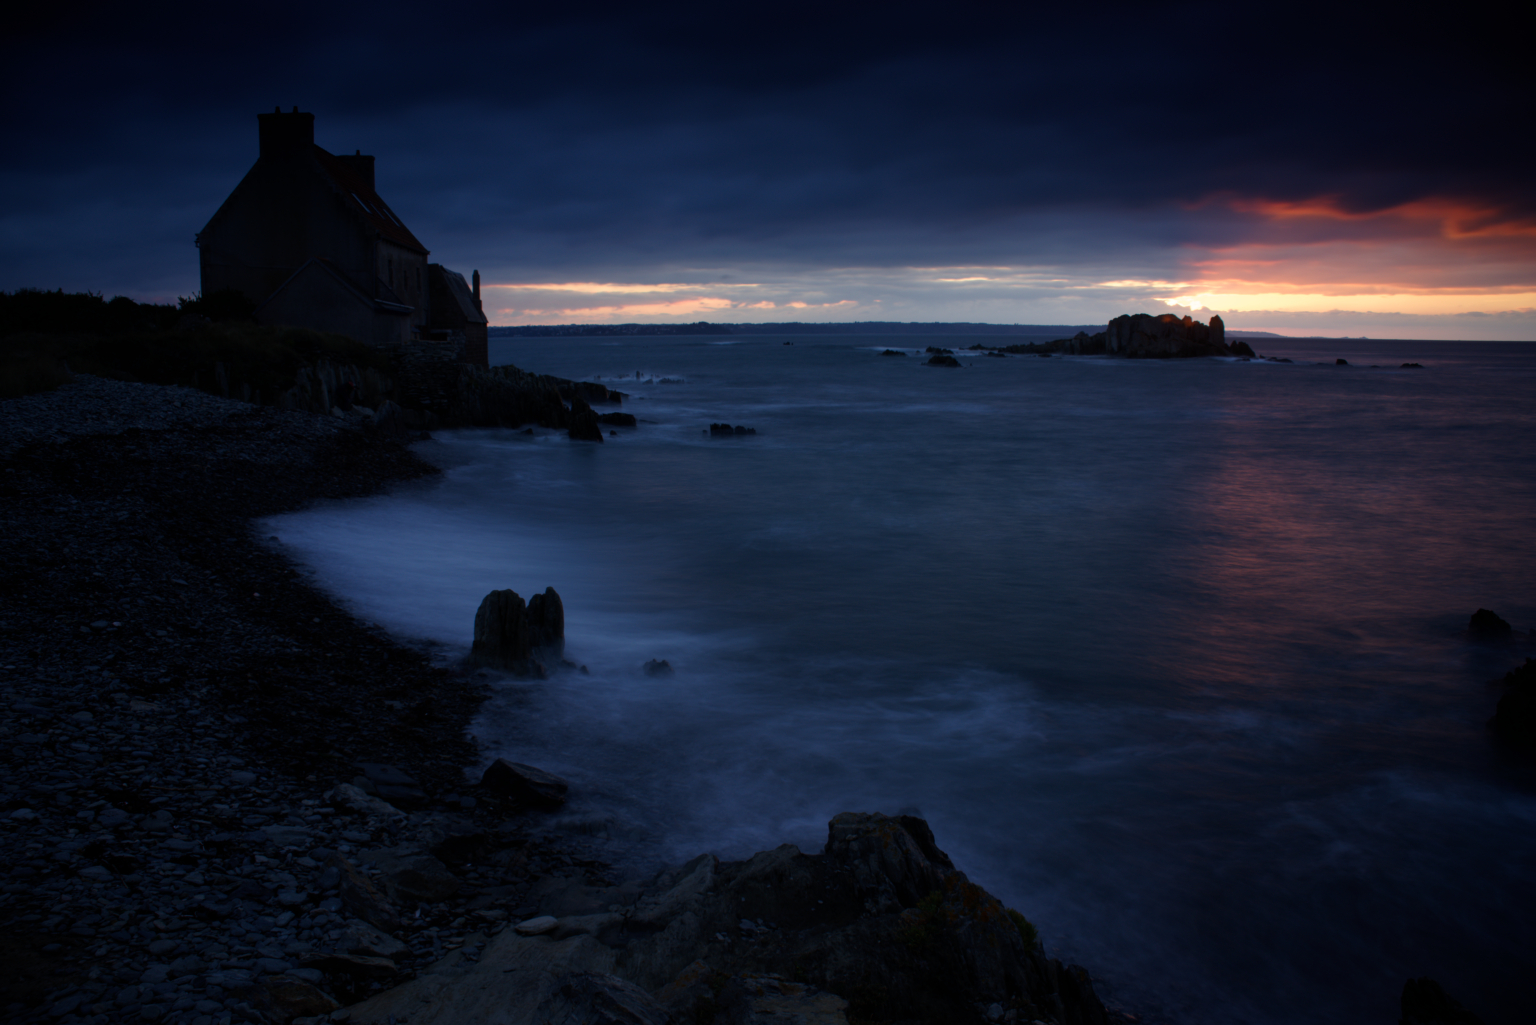
When I open an image, the brightness of image is almost same as camera LCD preview and other image viewer in Windows 10. A cycling circle which means some process is under process is shown on the lower-right corner of preview area. When the process (what I understand it maybe PL4 preset (I choose standard)) finishes, the brightness becomes darker.
This screen capture shows the case (with standard preset):
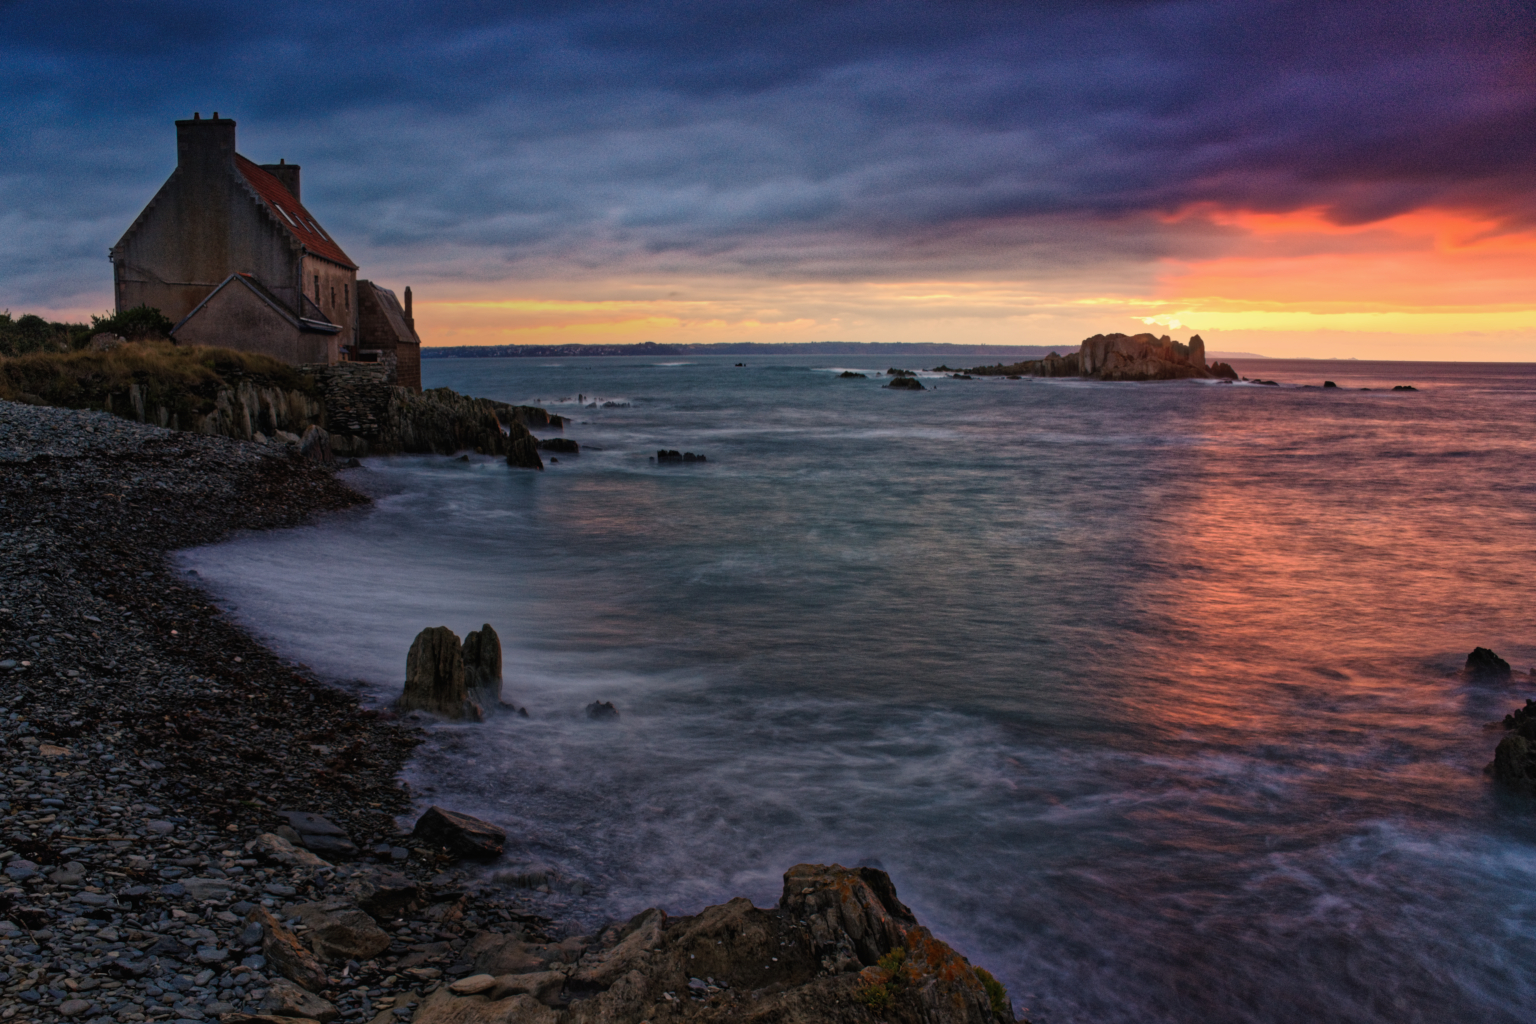
However, even I set “no correction” in preset, the same occurs. I guess the darkness image is not because of preset but do not know what is the cause.
This screen capture shows the case is same (with no correction):
Anyone can advise me the cause of it? And if I want to keep the brighter version (which I think is unprocessed version), how can I do?
I found the same behavior in both PL 4.0.1 and 4.0.2.
When viewing a RAW file most image viewers simply reflect the JPG that’s embedded within it, and the camera’s preview mode is doing the same.
Yes, that’s PhotoLab applying its RAW processing logic.
The result you’re then seeing is the rendered image after PL has applied its RAW processing logic to the RAW file.
The fact that this result is different to the embedded JPG rendition may be due to a “Picture Profile” or “Creative Effect” that you perhaps have assigned in your camera set-up - (Those being Sony terms for what I’m assuming are also available for your Nikon camera) - as these will affect the JPG but not the RAW/NEF file.
Did you activate Nikon D-Lighting? As far as I understand it it’s similar to Canon’s Hightlight Tone Priority and may lead to an underexposure of up to 1 stop. In the (embedded) JPEG this will be compensated for, but in the RAW you will notice the difference.
But PL never shows the embedded JPG, so that can’t be the reason. I find the result of your two experiments to be quite different. In the first case I’d suspect SmartLighting to kick in. In the second case you can see how the lens vignette appears after a while. As if PL had a rendered preview in cache with corrections applied and then removed the corrections.
Secondly, for me, both screen capture behave very similar thought the 1st is under “DxO Standard” preset and the 2nd is under “No correction”. In both video, whole image becomes darker after RAW process, not only on corners.
Lastly, I understand Nikon D-Lighting (or similar tech from other brands) does not affect RAW data. However, is it possible for PL to simulate it? Because it will be annoying if PL cannot reproduce similar image as what I see in camera LCD. Of course, people may say that I should not use D-Lighting then I will get consistent image. But is it the only way to do?
If I turn off all in-camera settings and just shoot, it’s a little bit difficult for me to determine whether I take a good shoot. For example, if your straight out image is on my camera LCD, I’ll wonder if it is under exposure and retake a brighter version. haha…
Thanks again and I think I need to rethink about photography and camera operation.
Ah, well, that’s something we got used to because we weren’t able to do that before digital cameras. We would have to take anything up to 36 images on a roll of film without being able to check any of them before we sent the whole film to the lab.
We also do large format film work (5" x 4" sheet film) and there, we need to know exactly how the image will turn out before we make the exposure - mainly because it can cost around €10 per sheet of film with developing costs and we don’t want to waste that much money.
However, there is a way to absolutely know that an image will turn out (at least for the exposure).
To start with, you need to find out what the dynamic range of your sensor is.
Then you need to experiment to find out by how much you can over-expose highlights with blowing them.
On my Nikon D810, first I went to the DxOMark site to determine that I had at least 14 stops of dynamic range at 100 ISO.
Then I took a series of incrementally over-exposed shots to determine at what point above a “measured” spot meter reading the highlights started to blow - in my case, that was 2 stops. Oh, and you need to check for blown highlights in something like PhotoLab, not by using the blinks on the camera screen.
So, now I know that I can successfully take a shot with 2 stops of over-exposure and 12 stops of under-exposure and recover everything in PhotoLab. In fact, that is exactly what I did with the image of the sunset above.
I put the camera in manual mode, set the ISO to 100, set the aperture to f/10 and took a spot meter reading of the brightest bit of sky (above and to the right of the rock). Then I used the exposure compensation dial to set it to over-expose by 2 stops.
Now I can assure myself that I will not have any over-exposure and I have down to 12 stops below measured exposure of shadow detail that I can recover from the RAW file.
Of course, the image on the back of the camera was just like the unprocessed image and I could easily have ditched it. Don’t forget that, at best, you might just get 11 stops out of a jpeg file (which is what you’re looking at on the camera back), at a push, but you will never get the tonal gradations and detail that you will out of a RAW file.
For your shot, what you should have done was to do a spot exposure reading on one of the street lights and then compensated by between 1⅓ to 2 stops of over-exposure, letting the shadows fall where they will.
Then you have to trust in the work you have done familiarising yourself with your camera’s capabilities and ignore what you see on the back of the camera
Christian: I think you missed James’ initial explanation - He’s not assuming to use PL to view the embedded JPG. He said: “the brightness of image is almost same as camera LCD preview and other image viewer in Windows 10”
I reckon Christian has nailed the cause - “underexposure of up to 1 stop” is quite significant.
Ok…I understand exactly what you are talking about now. Yes…I’ve noticed the same thing. When the image opens in PhotoLab it may be brighter and then after a few seconds of processing it may darken. (As you put it: “A cycling circle which means some process is under process is shown on the lower-right corner of preview area.”) Depending upon your computer it may happen so fast that it is not even noticeable. This occurs even when “No correction” is set as the default.
Here is my understanding of what is happening: Some cameras “bake in” corrections to the RAW files, and PhotoLab strips out those corrections when the file is opened.
For example, some cameras, especially the newer ones, AUTOMATICALLY reduce noise, brighten dark areas, add contrast and correct optical lens distortion and make these adjustments permanent even in the RAW file. This is especially true of smaller point and shoot cameras. I know this is how my Powershot G1x iii works. When I open a file from this camera in PhotoLab (with “no correction” checked) an image briefly flashes on the screen and then is replace by a slightly different one. It is very obvious because I can see that PhotoLab is stripping out all the corrections that the camera made to the RAW file. It is especially noticeable because the shape of the objects in the image change when the lens distortion correction is removed.
On my 5DS I notice far fewer changes. For one thing, with interchangeable lenses, the lens correction is not baked into the RAW file.
The way to check this is to process a RAW file in PotoLab/no correction, and then process the same file in Photoshop Camera Raw making sure that all the adjustments are set to zero (which is not the default). The resulting Tiff or Jpg files will be slightly different–sometimes lighter, sometimes darker, and other differences in noise, contrast, distortion, etc., may be visible.
It seems that Photoshop doesn’t strip away the changes to the RAW file that the camera may have made. PhotoLab does. I think what you get in PhotoLab is the “real” RAW file.
Anyway, this is the conclusion I have come too. And…exactly what PhotoLab and Photoshop do may vary by camera.
I don’t find this to be a problem. I just make all the adjustments in PhotoLab that are necessary. I also see that the lens distortion correction in PhotoLab is much better that what my G1X iii does in-camera.
Most cameras do not “bake in” corrections to the RAW file, instead, they construct a preview jpeg file with those corrections and embed that inside the RAW file.
What you are briefly seeing in PL is the preview jpeg (which needs no processing to be viewed) whilst PL is rendering the RAW file to a state where it can be viewed, optionally including any corrections you have made if the image has already been previously edited in PL.
No, that’s incorrect, Rich. Here’s what’s actually occurring;
RAW files rarely contain “baked-in” settings applied by the camera (Some manufacturers do assign some specific settings, but that’s not the general case … That’s why it’s called a “raw” digital file).
When PL first displays an image (or, when a not-yet-corrected image appears in the Image Browser), PL uses the out-of-camera JPG image that’s embedded within every RAW file.
As you “touch” each new RAW file, PL processes it to into an image that you can see (even if you use the “No Corrections” preset) - and, at this point, the JPG image is replaced by this newly rendered image … and henceforth, PL uses this version of the image whenever it presents it to you.
Hmm…it does make sense that what we initially see flash on the screen is the jpg image before the RAW opens.
I have also found that on the G1X iii, that the lens correction is definitely baked in to the RAW file when you open it in Photoshop (with Photoshop lens correction and all other changes disabled). When you open it in PhotoLab that in-camera lens correction is removed so that PhotoLab can use it’s own lens correction.
Some reviewers have also suggested that the RAW files on the R5 are slightly “cooked”–meaning that some noise reduction has been “baked” into them. So the definition of RAW may be changing a bit:
The bottom line is, regardless of what initially appears on the screen, PhotoLab is in fact working the with the RAW file and nothing in terms of quality has been lost.