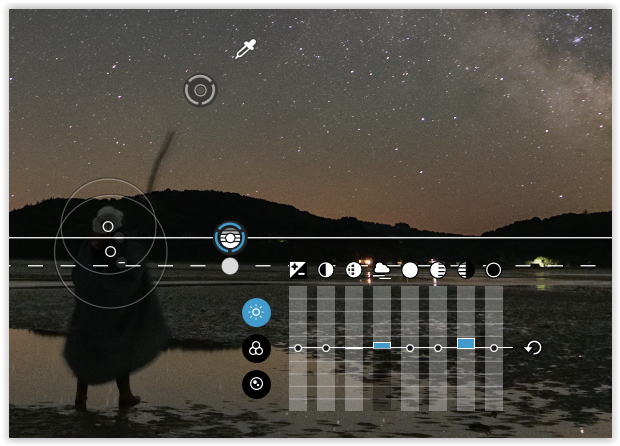
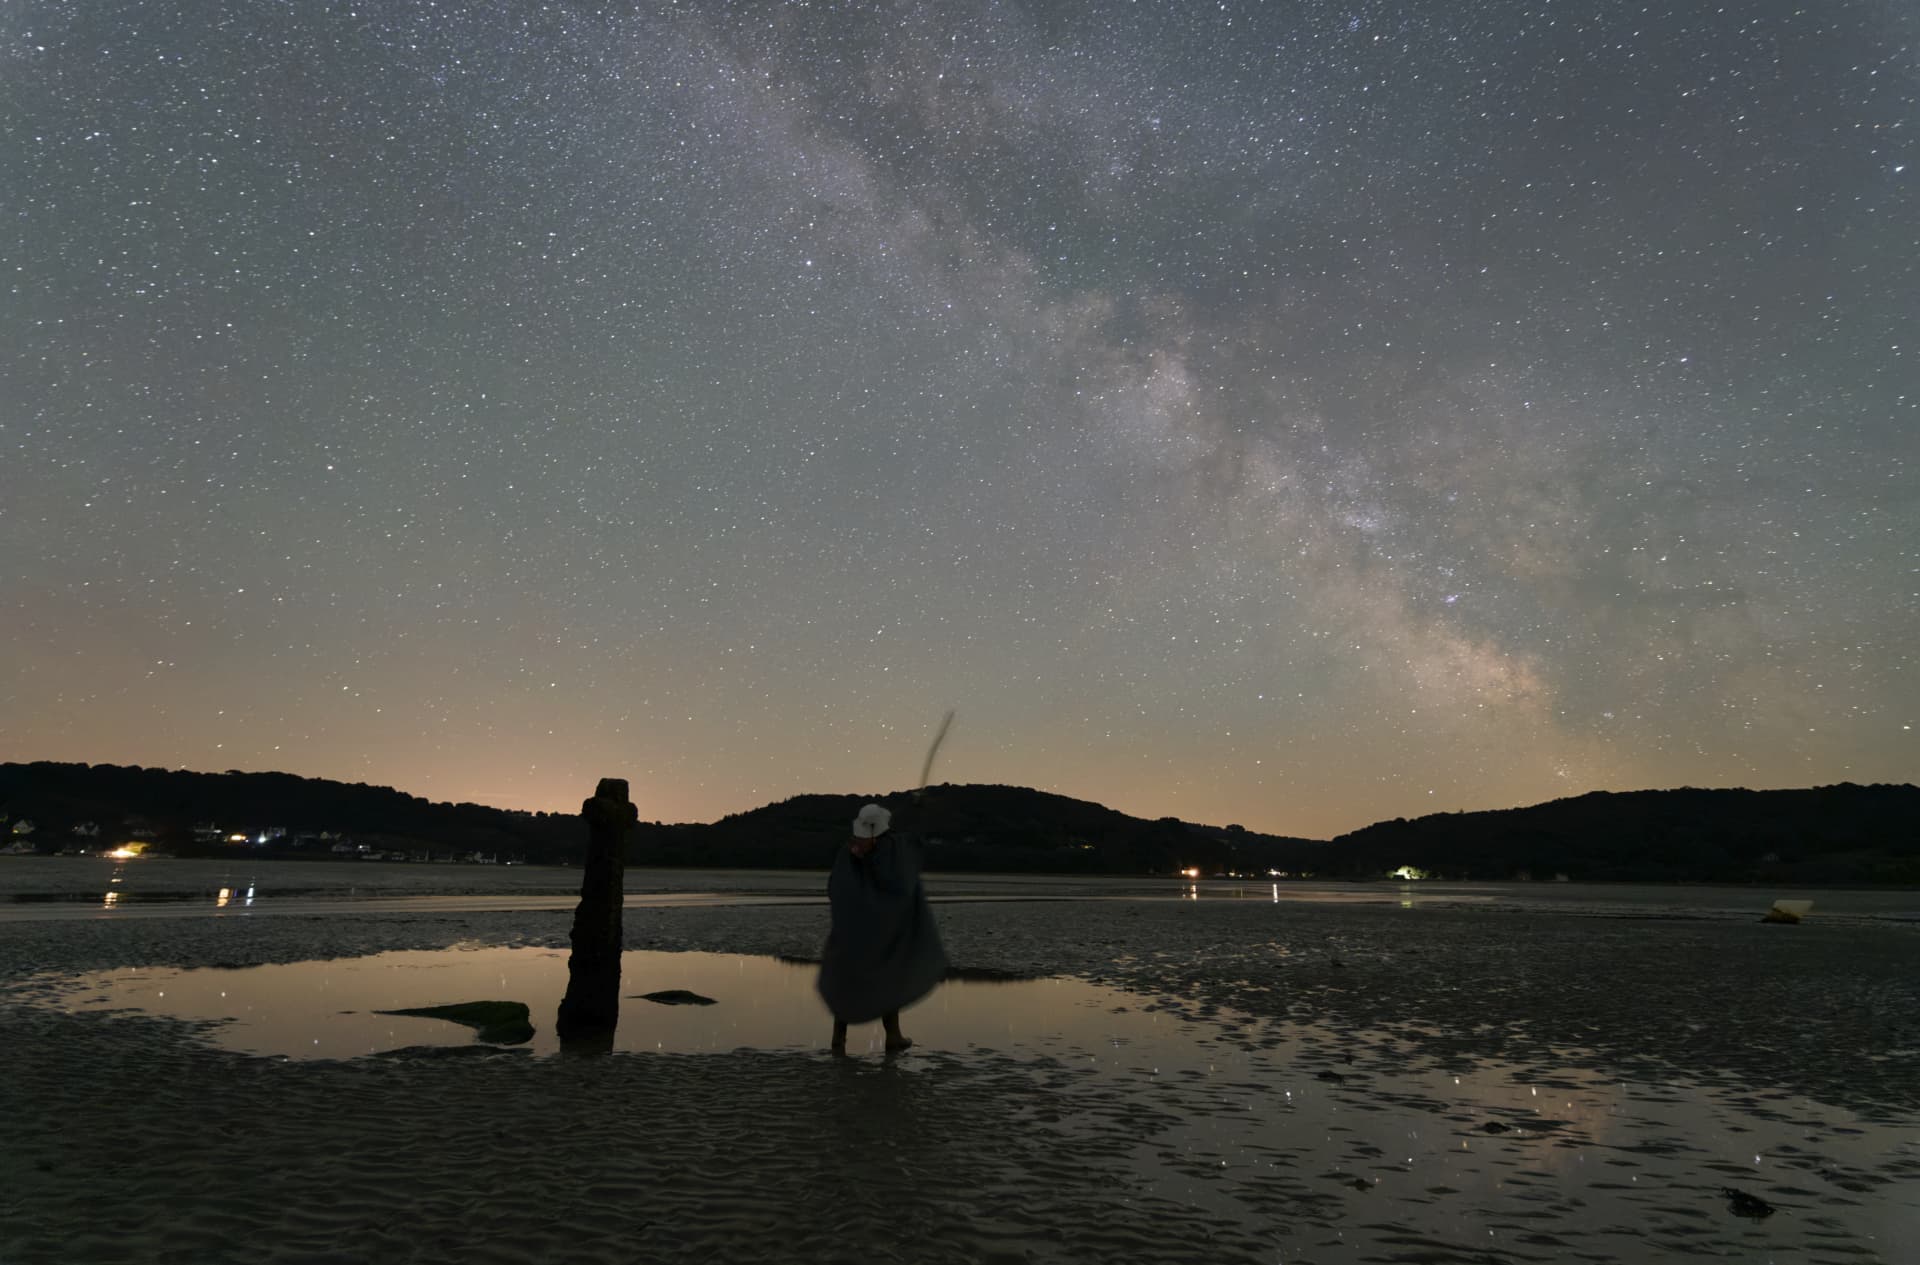
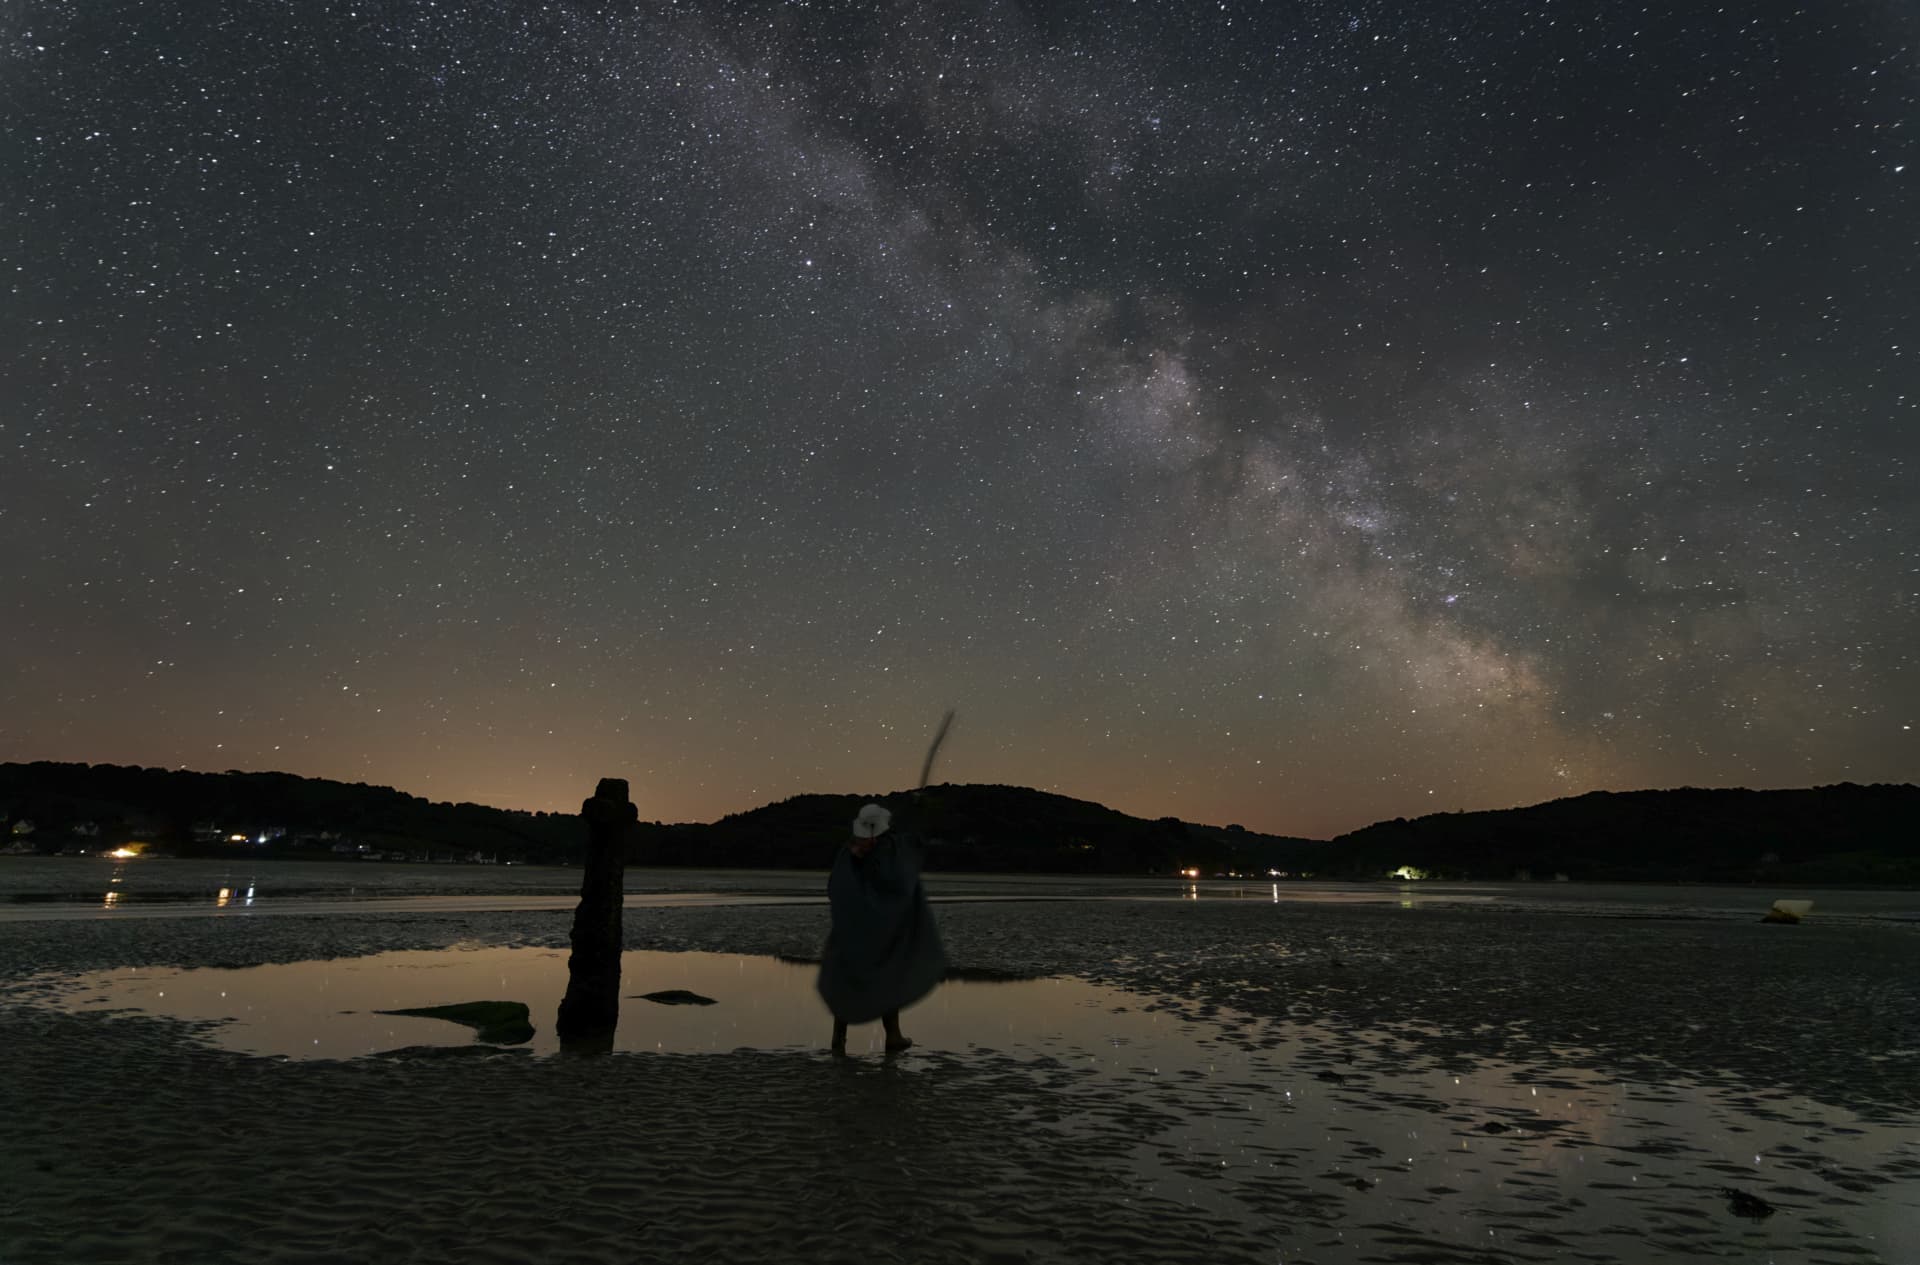
J’utilise le masque automatique pour identifier les ciels étoilés afin d’appliquer des traitements différents sur le ciel et sur le premier plan.
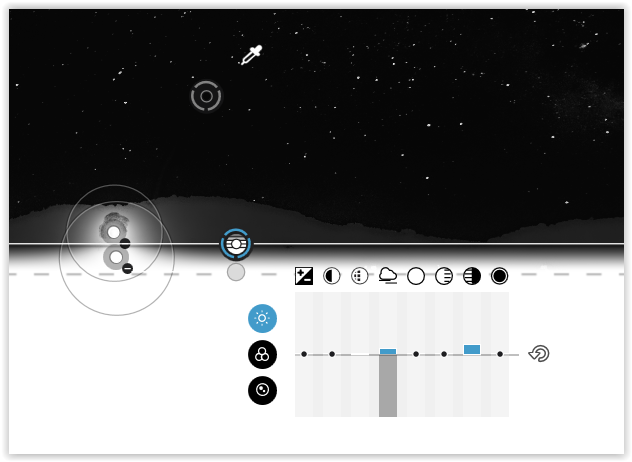
Le masque automatique fonctionne globalement bien, car le ciel est plus clair que le premier plan. Par contre, il y a un défaut juste à la frontière entre le ciel et le premier plan: il y a un liseré (de un à qqs pixels de largeur) qui est mal masqué.
C’est extrêmement gênant car les traitements étant très différents entre le ciel et le premier plan, on voit très nettement ce liséré dans le résultat final.
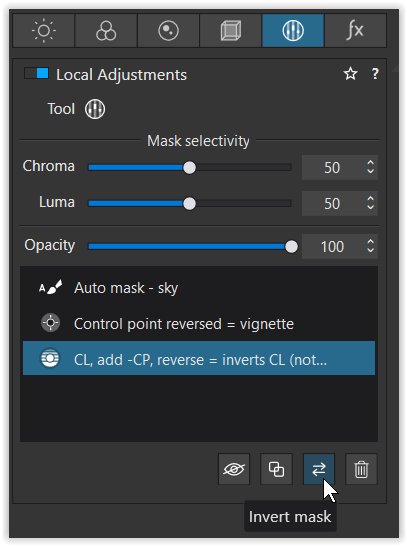
C’est un défaut qui ne semble pas dans les lignes de contrôle, mais ces lignes de contrôles sont très difficiles à mettre en oeuvre dans mon cas.
Personnellement, je pense que cet artefact est dû à un fonctionnement inadéquat du masque automatique à la frontière de la zone identifiée (érosion ou dilation mal gérée ?).
Mes questions sont les suivantes:
-cet artefact a-t-il déjà été signalé ?
-si oui, y a t il une explication ? et une correction est elle envisagée?
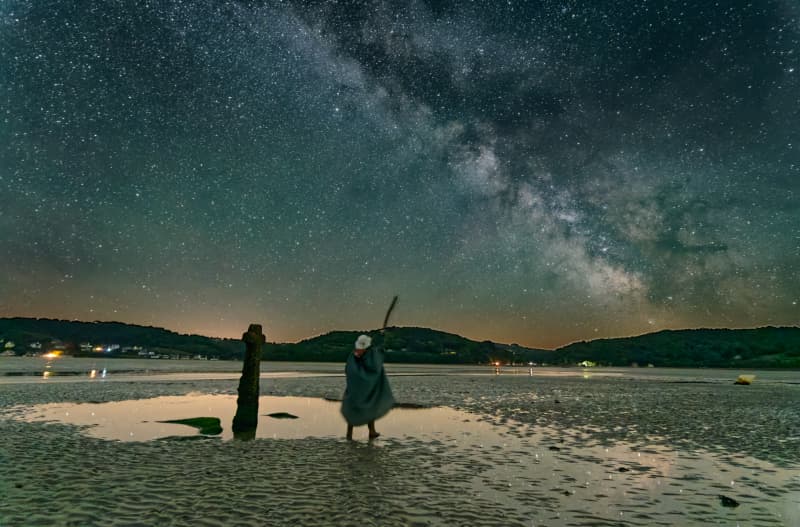
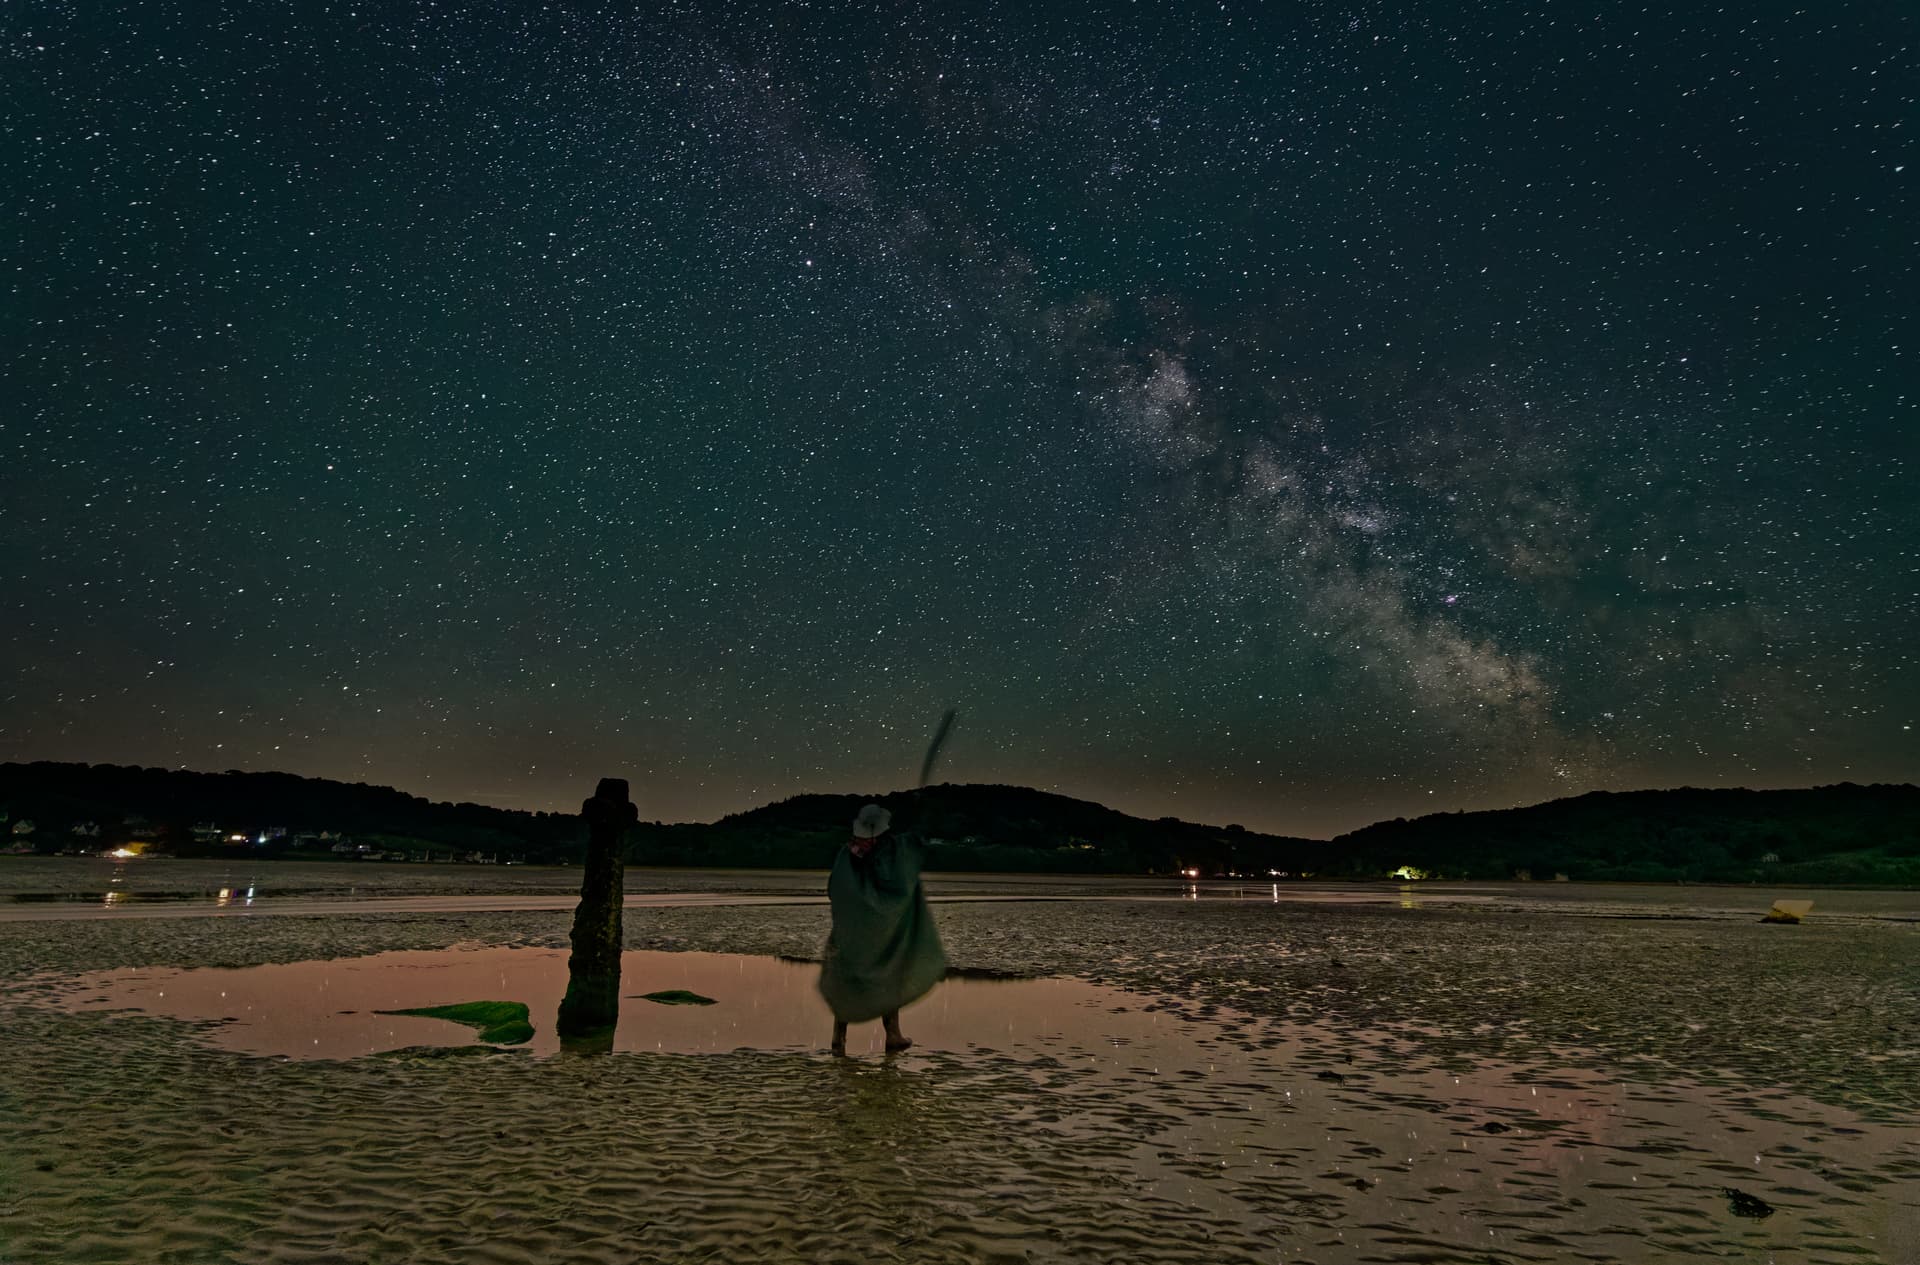
By pulling up the overall brightness that far while taking down the sky, you showed the limits of Automask, which otherwise did a good job.
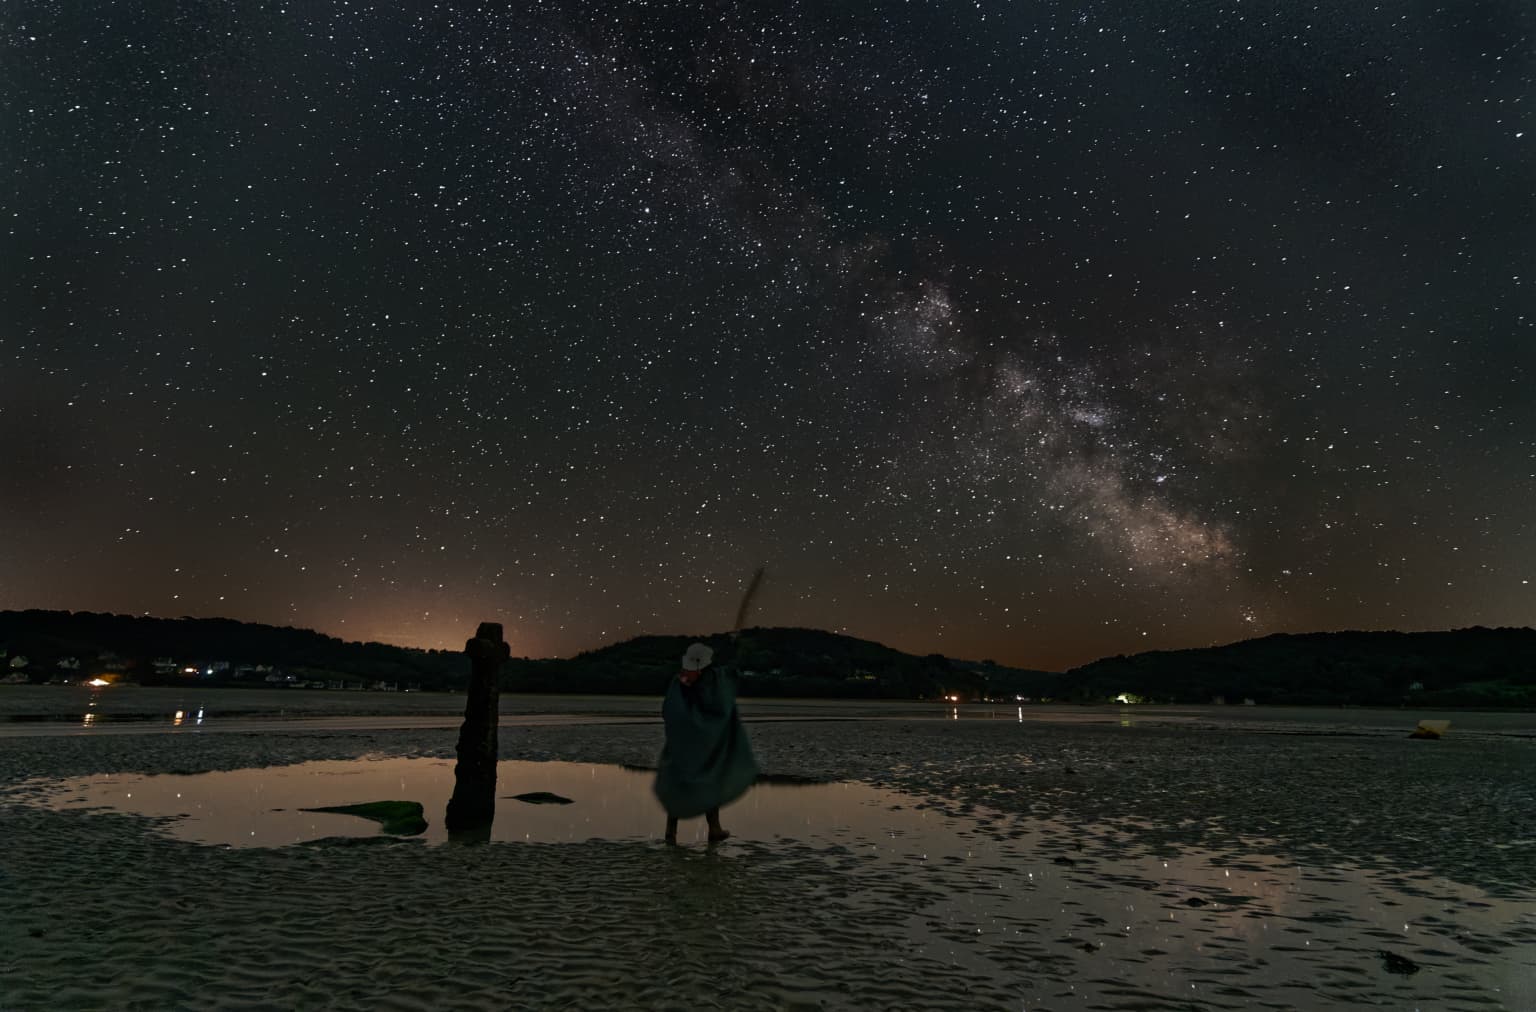
[ → VC3: I copied that mask and ‘improved’ the gradation manually at the very left side, but you still see some ‘remains’ → w/ your original settings. Also tried to use control lines for their adjustable selections. Otherwise I might do careful & time consuming repairs with a pixel editor … ]
With all respect to your efforts (!), I would keep it more believable – maybe a moody version.
I took a stab at your beautiful photo. Did you really want to make the foreground that bright? This difference in brightness is IMO what is causing the halo over the distant mountains. Auto-Mask will fail with this much difference in brightness. I used Control Lines for my version rather than Auto-Mask.
Control Lines is the better tool for this kind of difference in brightness between foreground and sky. I did not brighten the foreground as much as you did, but Control Lines will give you a much smoother transition with no halo. It is worth learning all the ins and outs of using Control Lines because it is a fantastic and extremely useful tool that can rescue a photo when Auto-Mask fails.
Comme je t’ai dit lors de notre préparation de tes images pour la mairie, je suis d’accord avec @Wolfgang et @rrblint - il faut éviter d’utiliser le masque auto mais, plutôt maitriser les Lignes de Contrôle.
Thank you for your answer Mark. Could you send me your updated DOP file so that I can see how you handle the controle lines in such an exemple.
Otherwise, the tuning in this image (big contrast in the exposition between sky and background) was just to illustrate the problem!
So, I understand that the auto-mask will fail in case a big difference in brightness. OK, but I would have thought that a big brightness difference would in the contrary help the separation between sky and background!!!
Merci Joanna. Je vais regarder comment vous utilisez (toi, Wolfgang et Mark) utilisez les lignes de contrôle.
Mais, l’explication donnée pour le mauvais fonctionnement du masque auto (trop d’écart de brillance entre le ciel et le premier plan) a de quoi surprendre car justement ce fort contraste devrait permettre une bonne séparation entre les deux!!!
herve
You are very welcome Herve. Here is my DOP file, my version is VC 3. Once you learn to use CLs you’ll never look back(and Joanna is a great teacher too).
Je ne pense pas que cela soit lié au bruit. Le liseré blanc fait qqs pixels de largeur et est tout le long de la frontière.
C’est un peu dommage que l’on ne puisse pas avoir une explication pourquoi le masque auto ne fonctionne pas correctement dans une situation qui lui était très favorable (fort contraste entre le ciel et le premier plan). Et aussi dommage que le masque auto ne puisse pas être amélioré pour bien fonctionner dans ces conditions.
Néanmoins, je vais faire un effort pour utiliser des lignes de contrôle qui sont la solution eb cas de présence d’arbres…
Merci pour votre aide
Herve
Hi Herve,
in that version there are no Control Lines. – While experimenting & writing I didn’t get a proper solution with, and having decided for a moody version anyway, I simply skipped them.
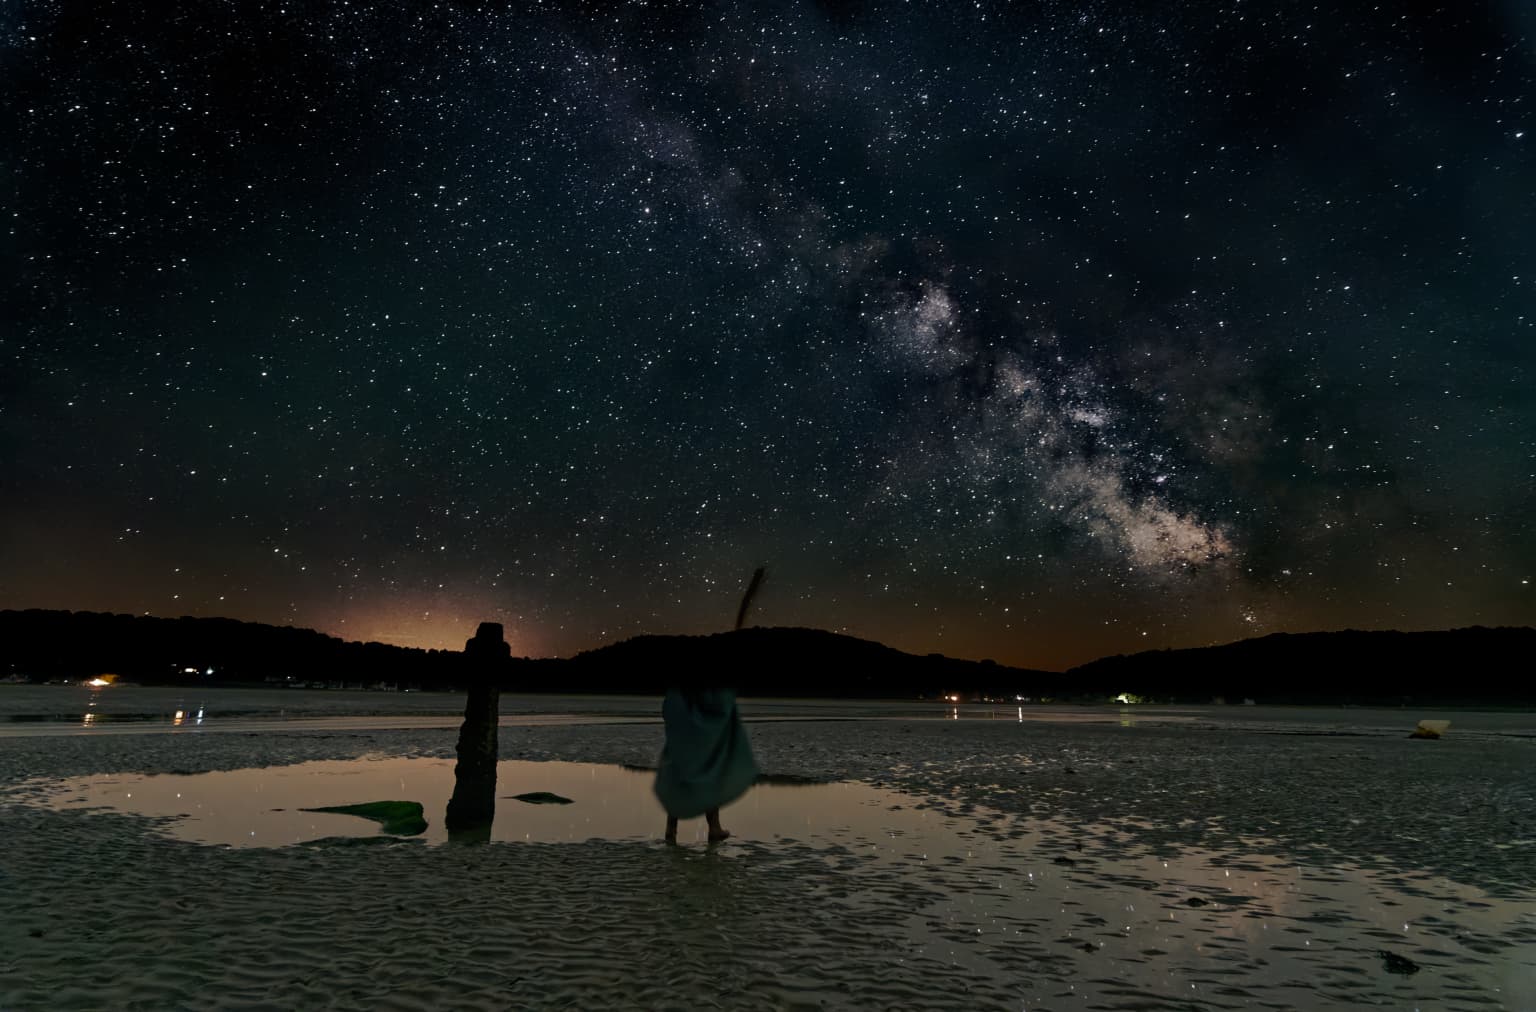
Now, as you got different versions, I put them in chronical order.
somehow I missed, that the pic had been taken at 02:46 ( )
→ changed Gamma to 1,05 and the overall exposure to + 1,0
→ still used Automask, but very different settings
→ still used HSL to enhance colour contrast, but different warm tone settings
→ still used the big soft vignette, but reduced opacity
added a Control Line now *) Control Line & Controlpoints
. Mask view (Inverted Mask & Negative Control Points)
.
Thank you Wolfgang for your comprehensive answer. I will analyse the different solutions given by you, Mark and Joanna. It will be helpful for the processing of all the starry sky photos I have done.
Herve
Je serais intéressé de voir une courte vidéo expliquant comment on arrive à VC7. J’ai pas mal de photos de mon côté de ciel de nuit et j’ai toujours du mal à faire ressortir correctement la voie lactée.
De mon coté, je fais des images de voie lactée depuis 6 mois en Bretagne.
Je fais un traitement différent pour le premier plan et le ciel. En général, j’ai besoin:
(1) d’éclaircir l’image (augmenter l’exposition)
(2) de renforcer les contrastes dans le ciel via ClearViewPlus
(3) de noircir les parties sombre du ciel via Tonalités sélective (ombre et noir).
J’applique la réduction de bruit DEEPPRIME qui est très efficace.
Et pour la balance des blancs, je tatonne (soit avec la balance des blancs automatique de l’appareil, soit avec la pipette).
Et mon problème principal est de séparer le ciel du premier plan (objet de ce post).
Par exemple, pour l’image de ce post, les réglages que j’ai utilisés pour la photo finale (voir capture d’écran ci-dessous) sont:
premier plan: expo: +1.88 microcontraste: +50 tonalité sélective (7,59,26,19) vibrance,saturation (+22,+41) WB (4890,30)
ciel: expo: +1.50 clearviewplus: +50 tonalité selective (-27,0,-74,-4) WB(4747,14)
Hi Arnaud,
I don’t know how to take an ‘explanation video’.
If you haven’t, download @herveLG 's raw-file very soon (!) plus the ‘collected’ dop-file. Please note, I was concerned about an overall ‘good’ image, which looks believable to me (no landscape specalist).
Maybe @herveLG adds his newest dop-file and you put them in a new folder.
Wolfgang
Following Wolfgang advice, I enclose an updated version of the DOP file where VC8 includes my own original tuning leading to the photo uploaded in my previous post. essai_detourage.ARW.dop (922,3 Ko)
After processing with DXO, I also use a free software (sequator: Sequator) only for windows. This software allows to further increase the contrast in the sky only (my tuning for this software are:
-high dynamic range: ON
-reduce light polution: uneven ; strength: weak ; intelligent-aggressive: décocher la case
Arnaud, I would be interested to hearfrom your own experience in milky-way processing.


 )
)