Recently, after processing images through Pure Raw 3 and adjust the shadows the image looks. completely washed out. I tried different tests and it only occurs after processing them through Pure Raw. I tested the image using Lightroom’s new denoise tool and no issues.
This is a new problem and completely stumped. I have the latest version of PureRaw and using a 2022 M1 MacBook Pro.
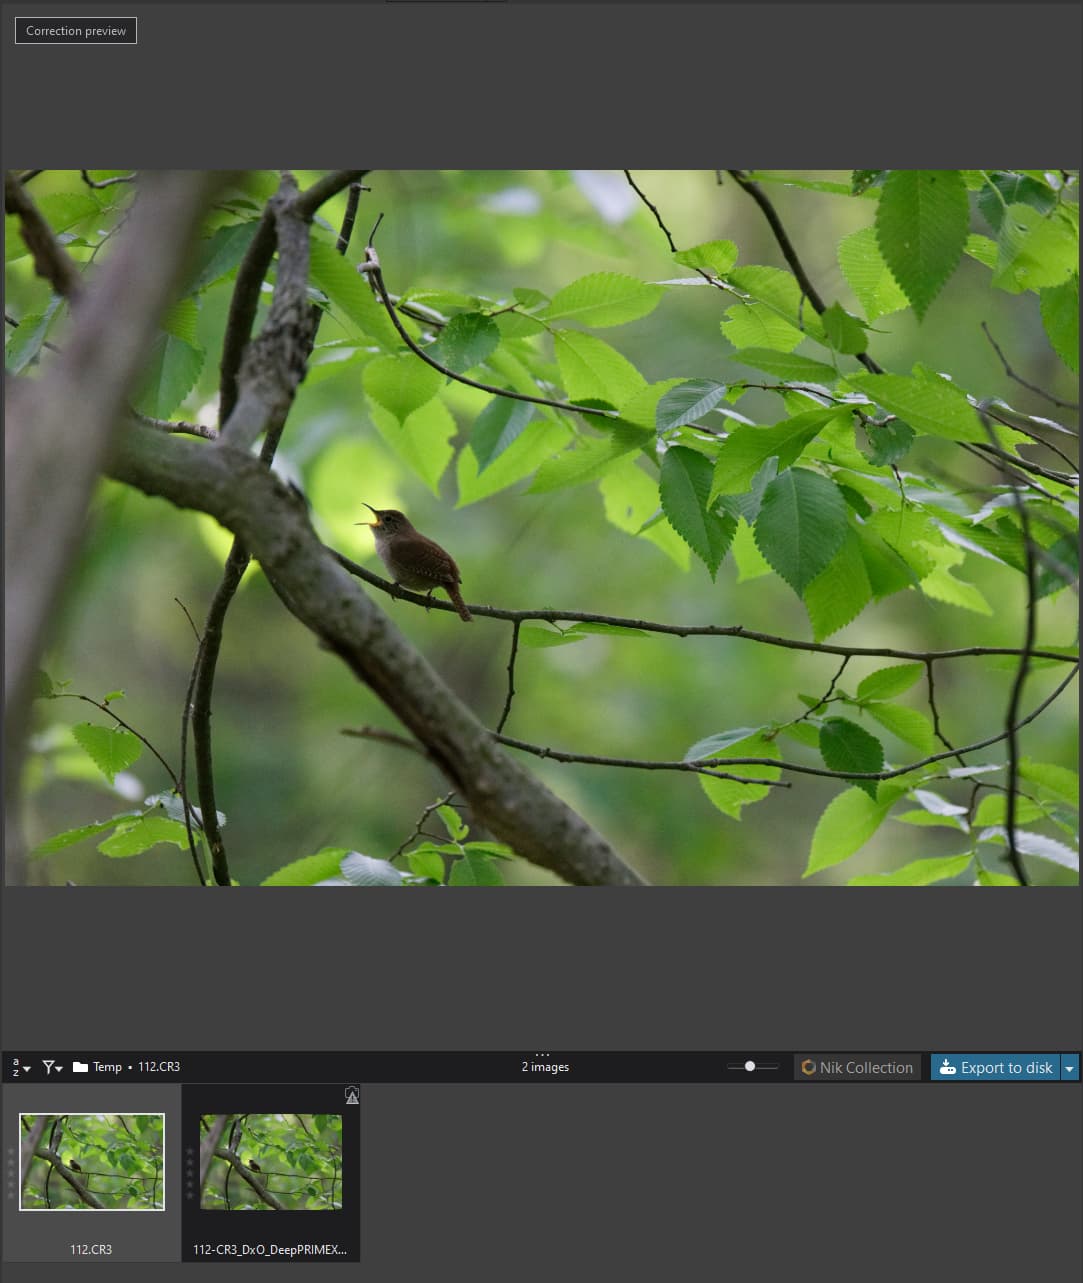
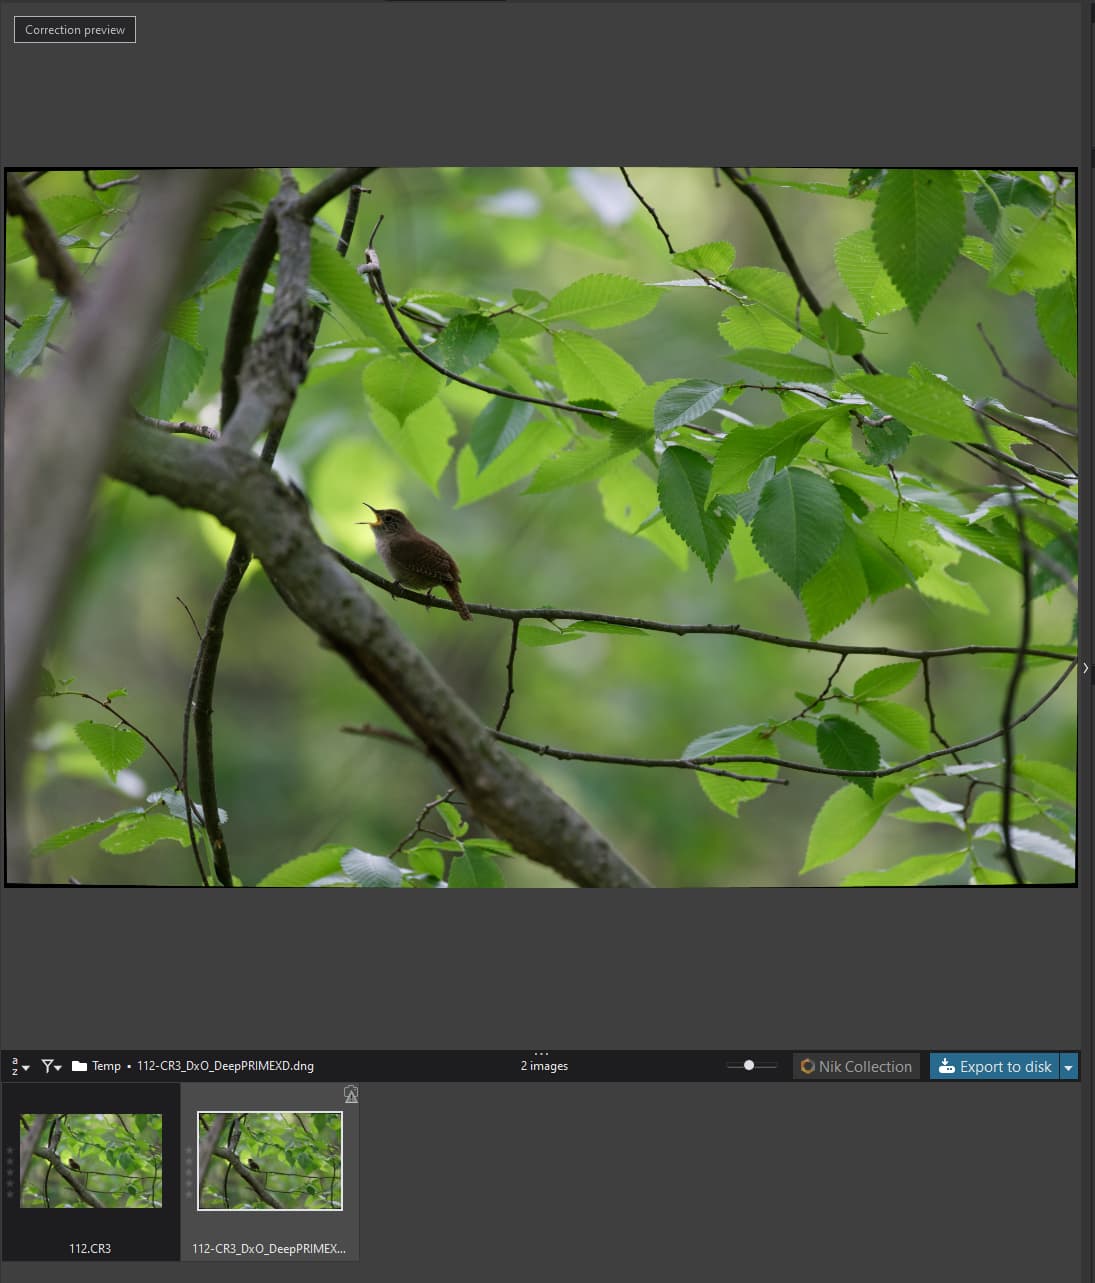
Now, apart from the distortion correction which hasn’t been cropped yet and obviously the noise reduction, colors look similar. At least not washed out as in you example.
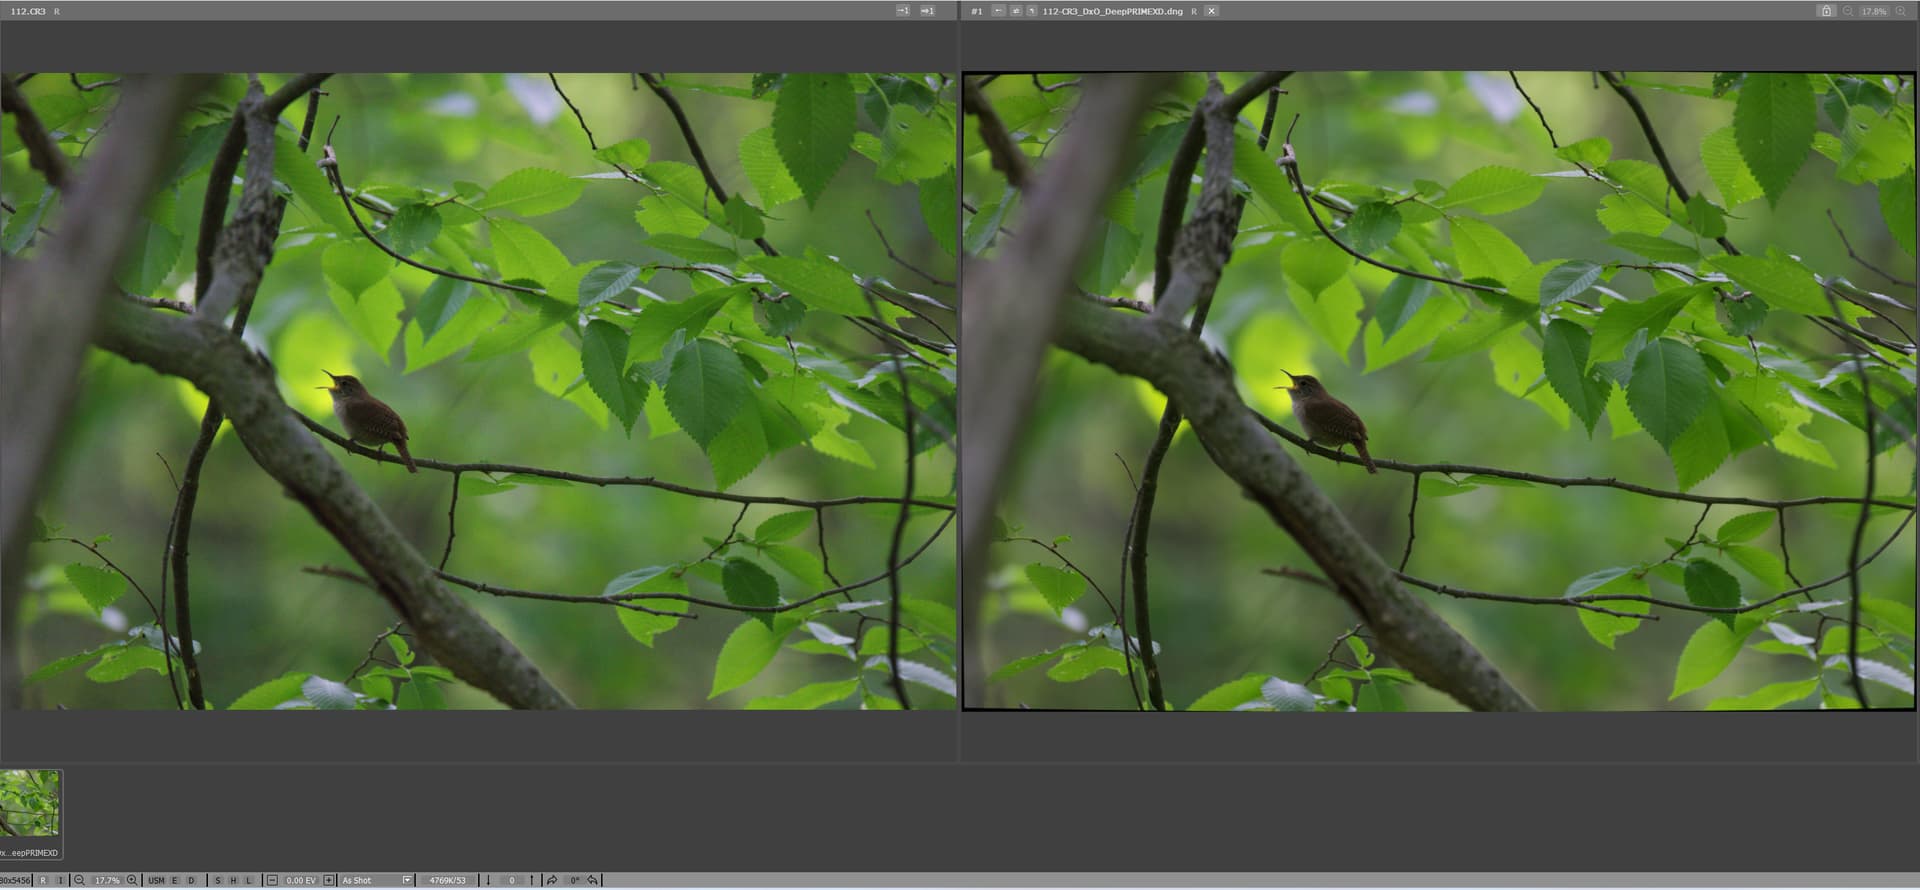
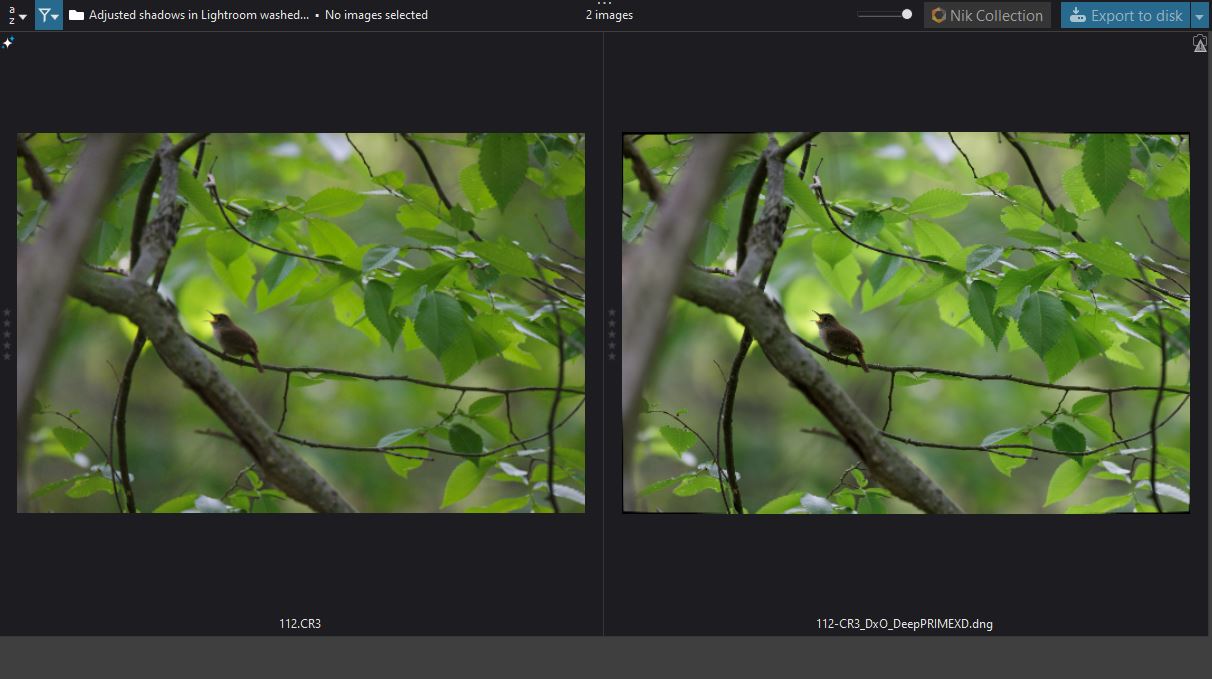
Also, FastRawViewer show little to no difference in color rendering. CR3 left, DNG right:
And it’s showing the actual RAW instead of the embedded JPEG. You can tell by the little white R in the bottom left corner of the screenshot, next to the black I. This specifies that it is showing the actual RAW.
I don’t have Lightroom installed, but like you, when seen in other apps, from DXO PhotoLab 6 to latest version of Adobe Bridge, the images seem to be fine.
I wonder if there is an auto adjustment preset or something that is causing it in Lightroom.
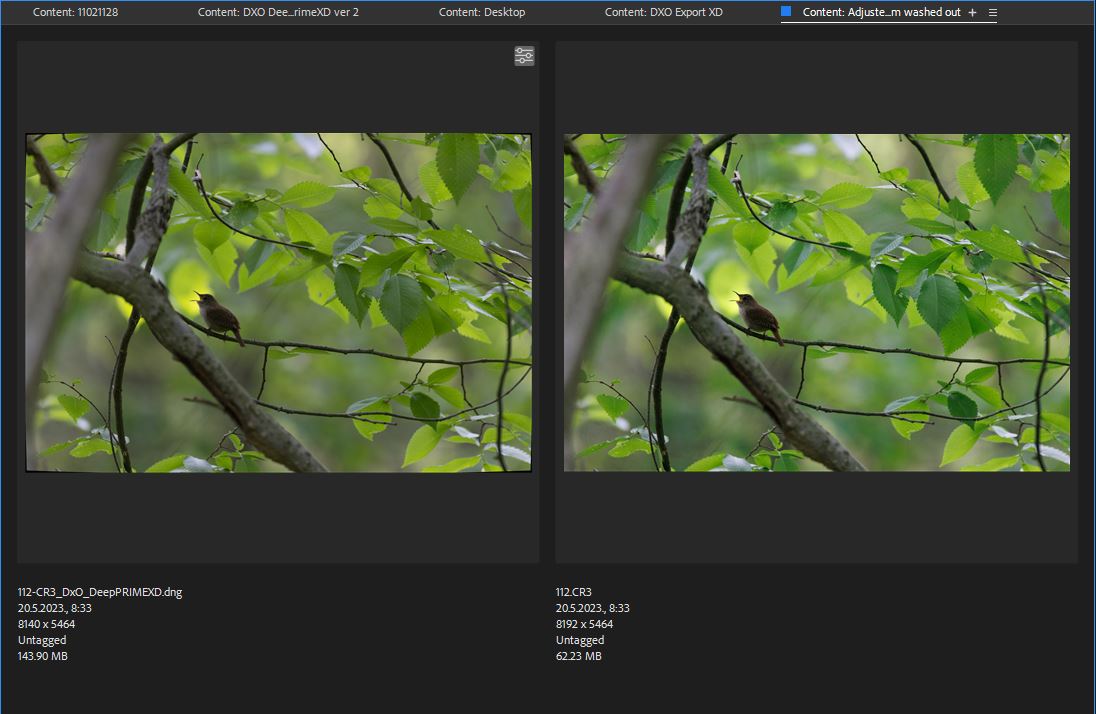
Here is screenshot from Adobe Bridge. Latest version.
I am not a Mac user, but a Windows user.
But I don’t think it’s system related.
If I start from your raw file and export to dng with PureRAW 3, I get a file almost identical to yours (except for the cropping in the original format in my case).
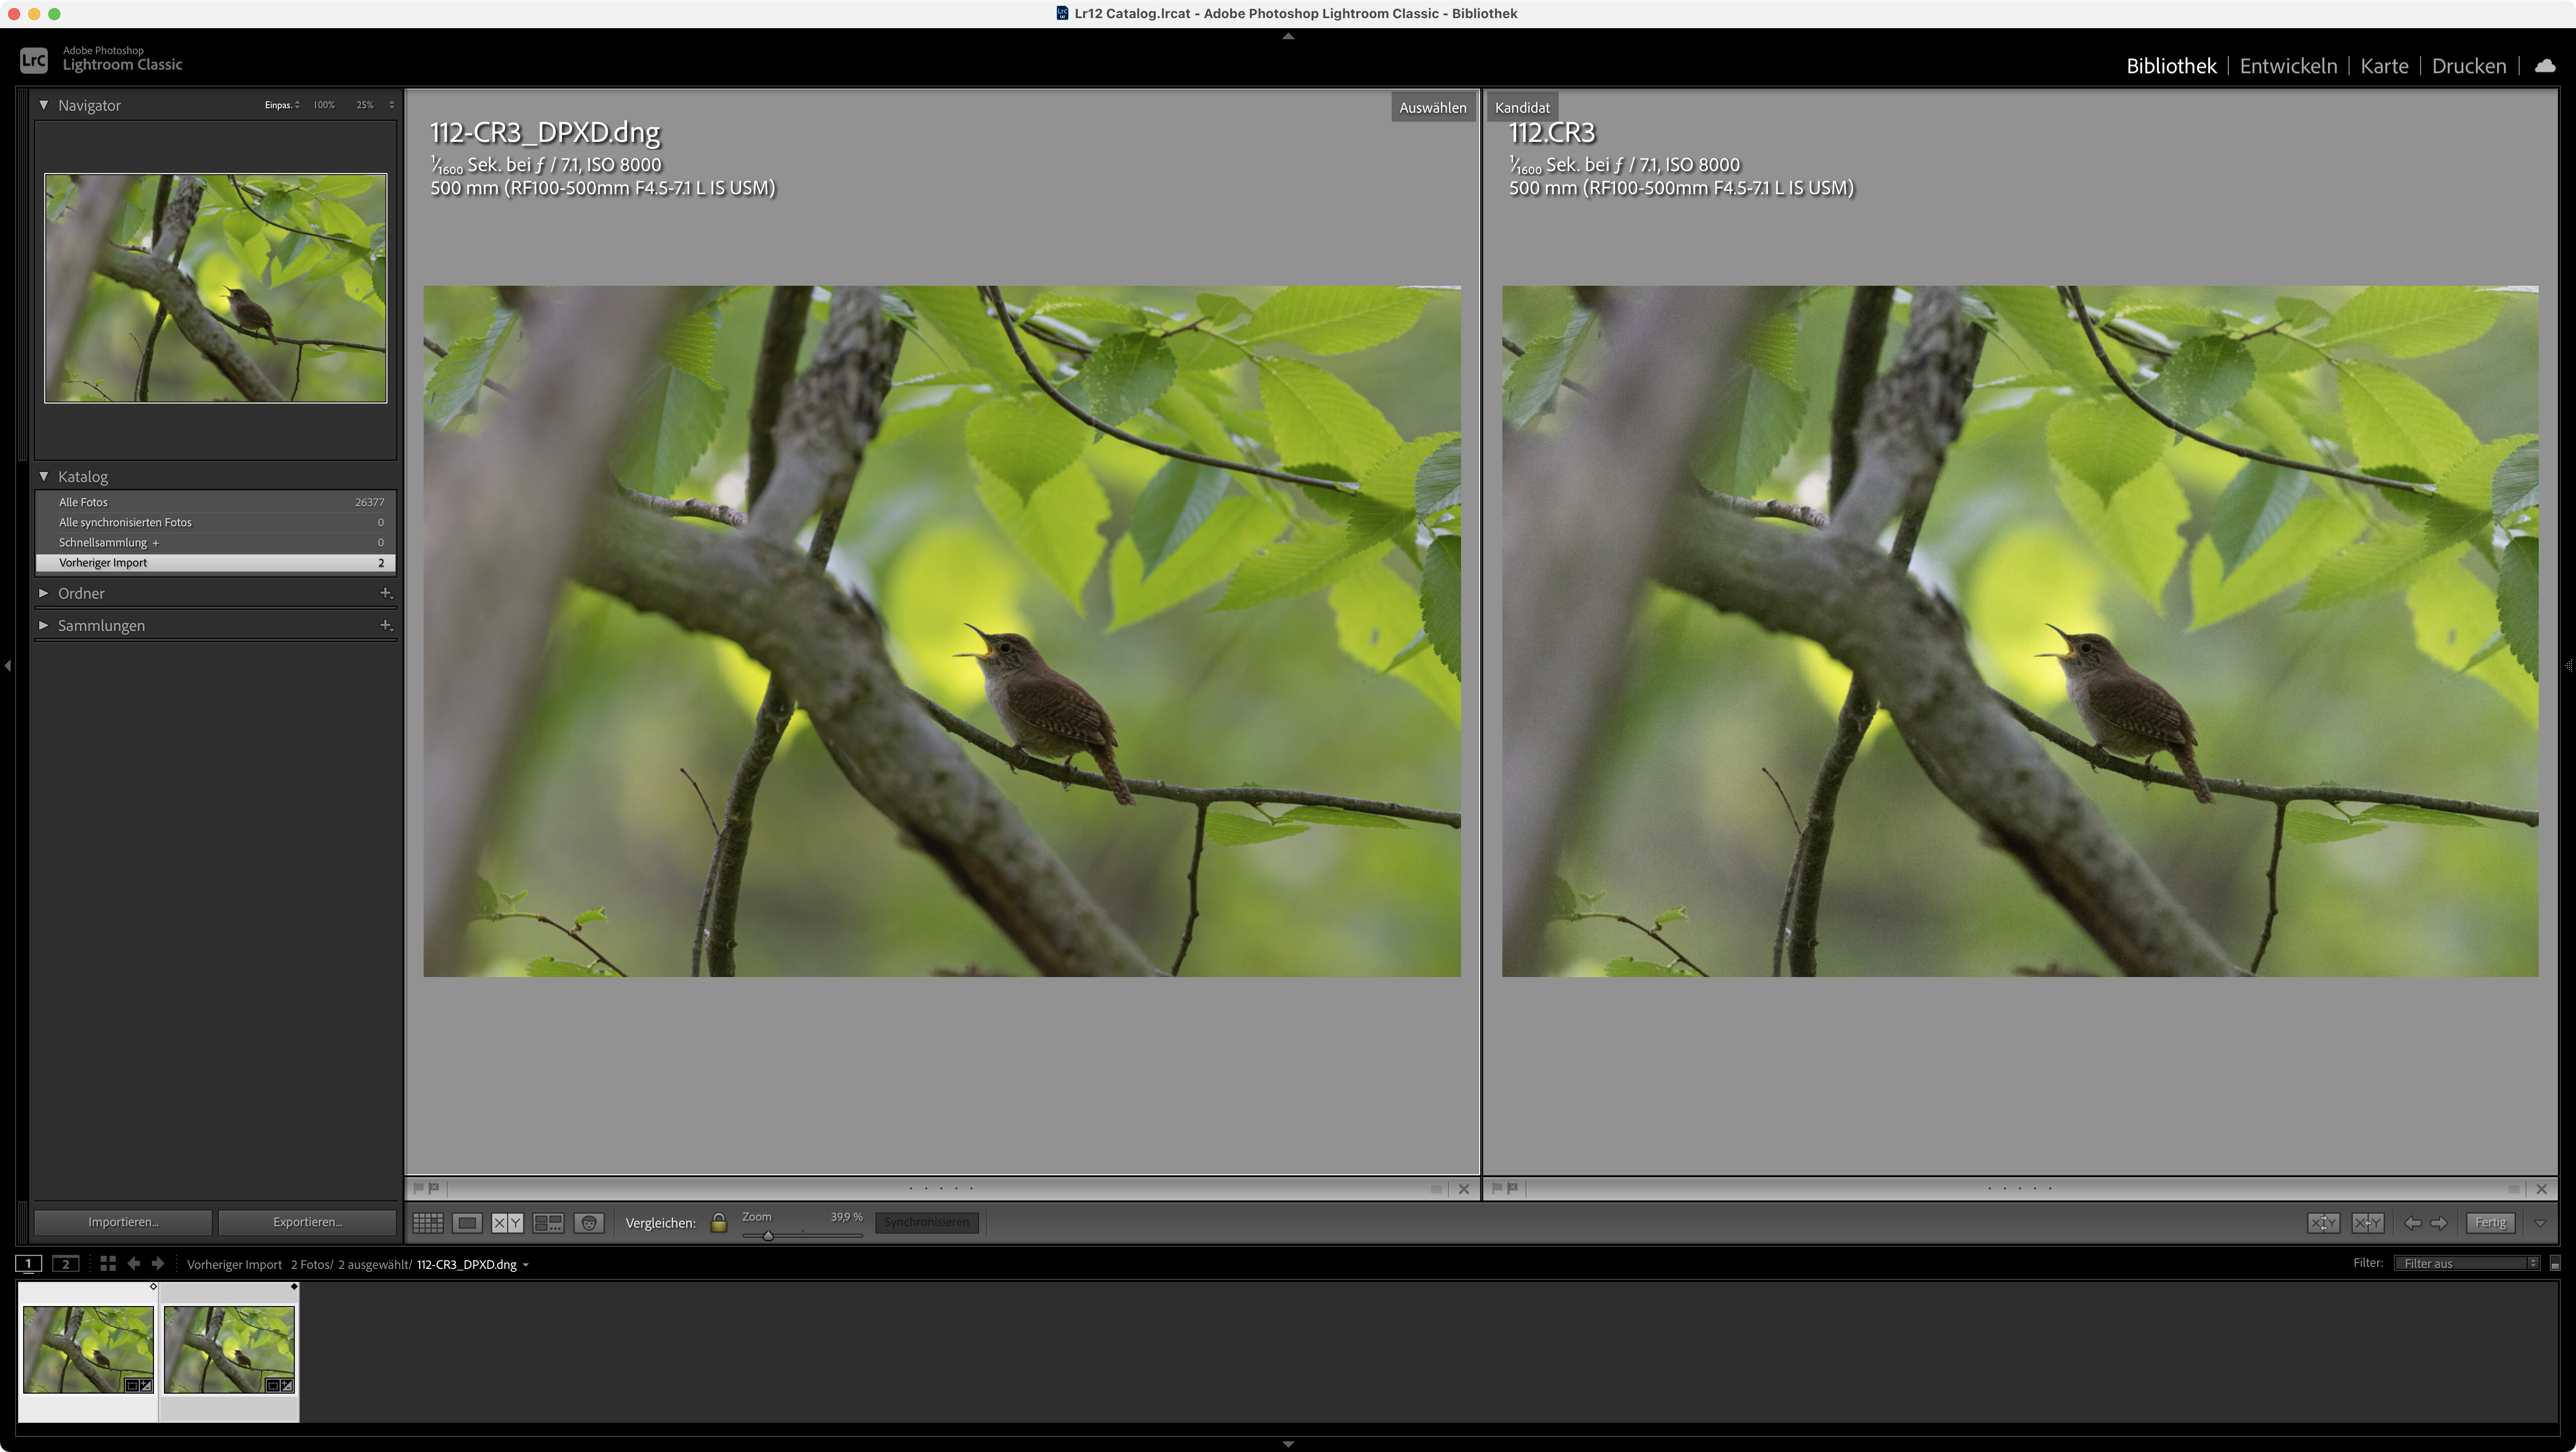
The two dngs imported into Lightroom appear exactly the same in the LR development module. They also display correctly in other viewing software.
I think there is no problem on the PureRAW side, but most likely a problem in LR, maybe settings that are not appropriate. Are all your settings zero when importing the dng?.
Note: On screen, the images display more punch, the screen capture look a bit bland in comparison.
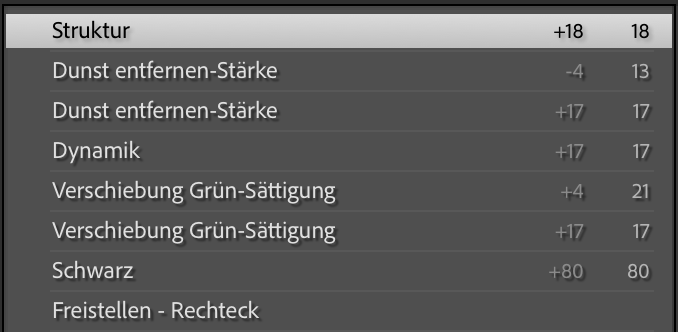
LrC reacts to those files quite differently, which means that the settings for the RAW file don’t fit the DNG file, see below. Adjusted individually, there is no issue imo. I used the settings shown below:
DNG file
RAW file
Note: Adjustments done on a RAW file and saved in an XMP sidecar can be applied by LrC to the DNG upon its return from DPR - if DPR has been called by the respective Lr plugin. Reset the DNG in Lightroom and check your preset and import settings. All of the above was done without any preset on import into LrC.
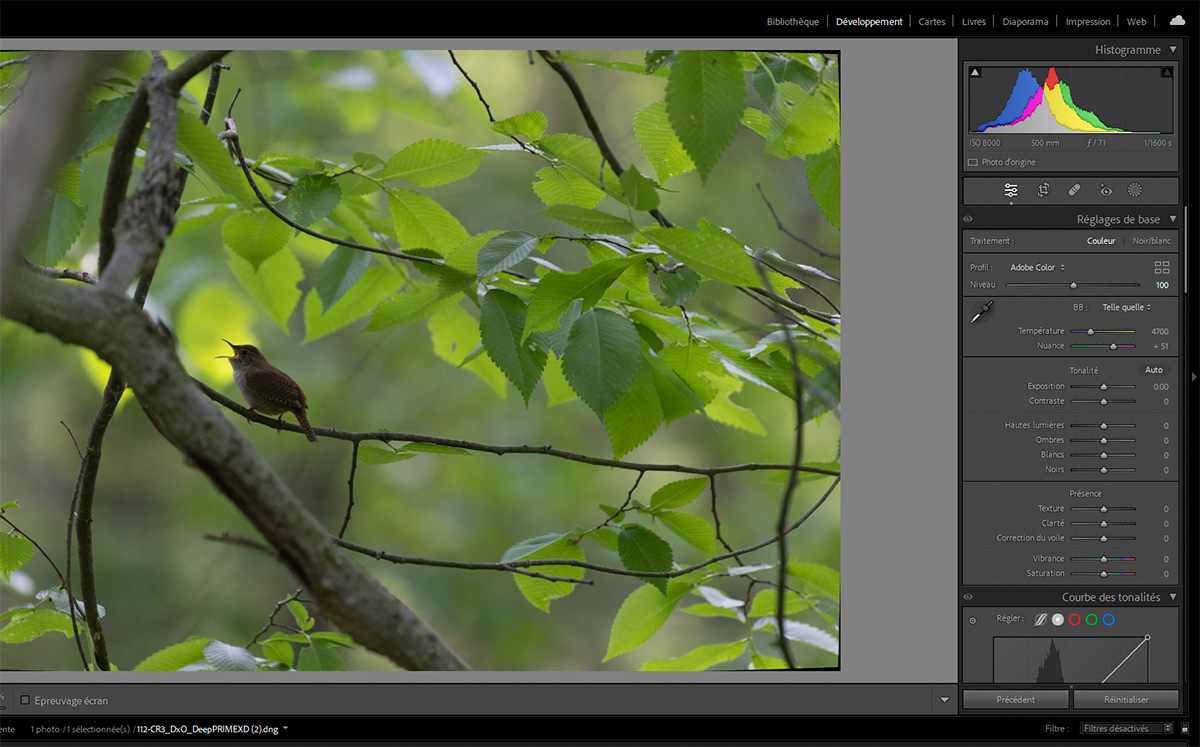
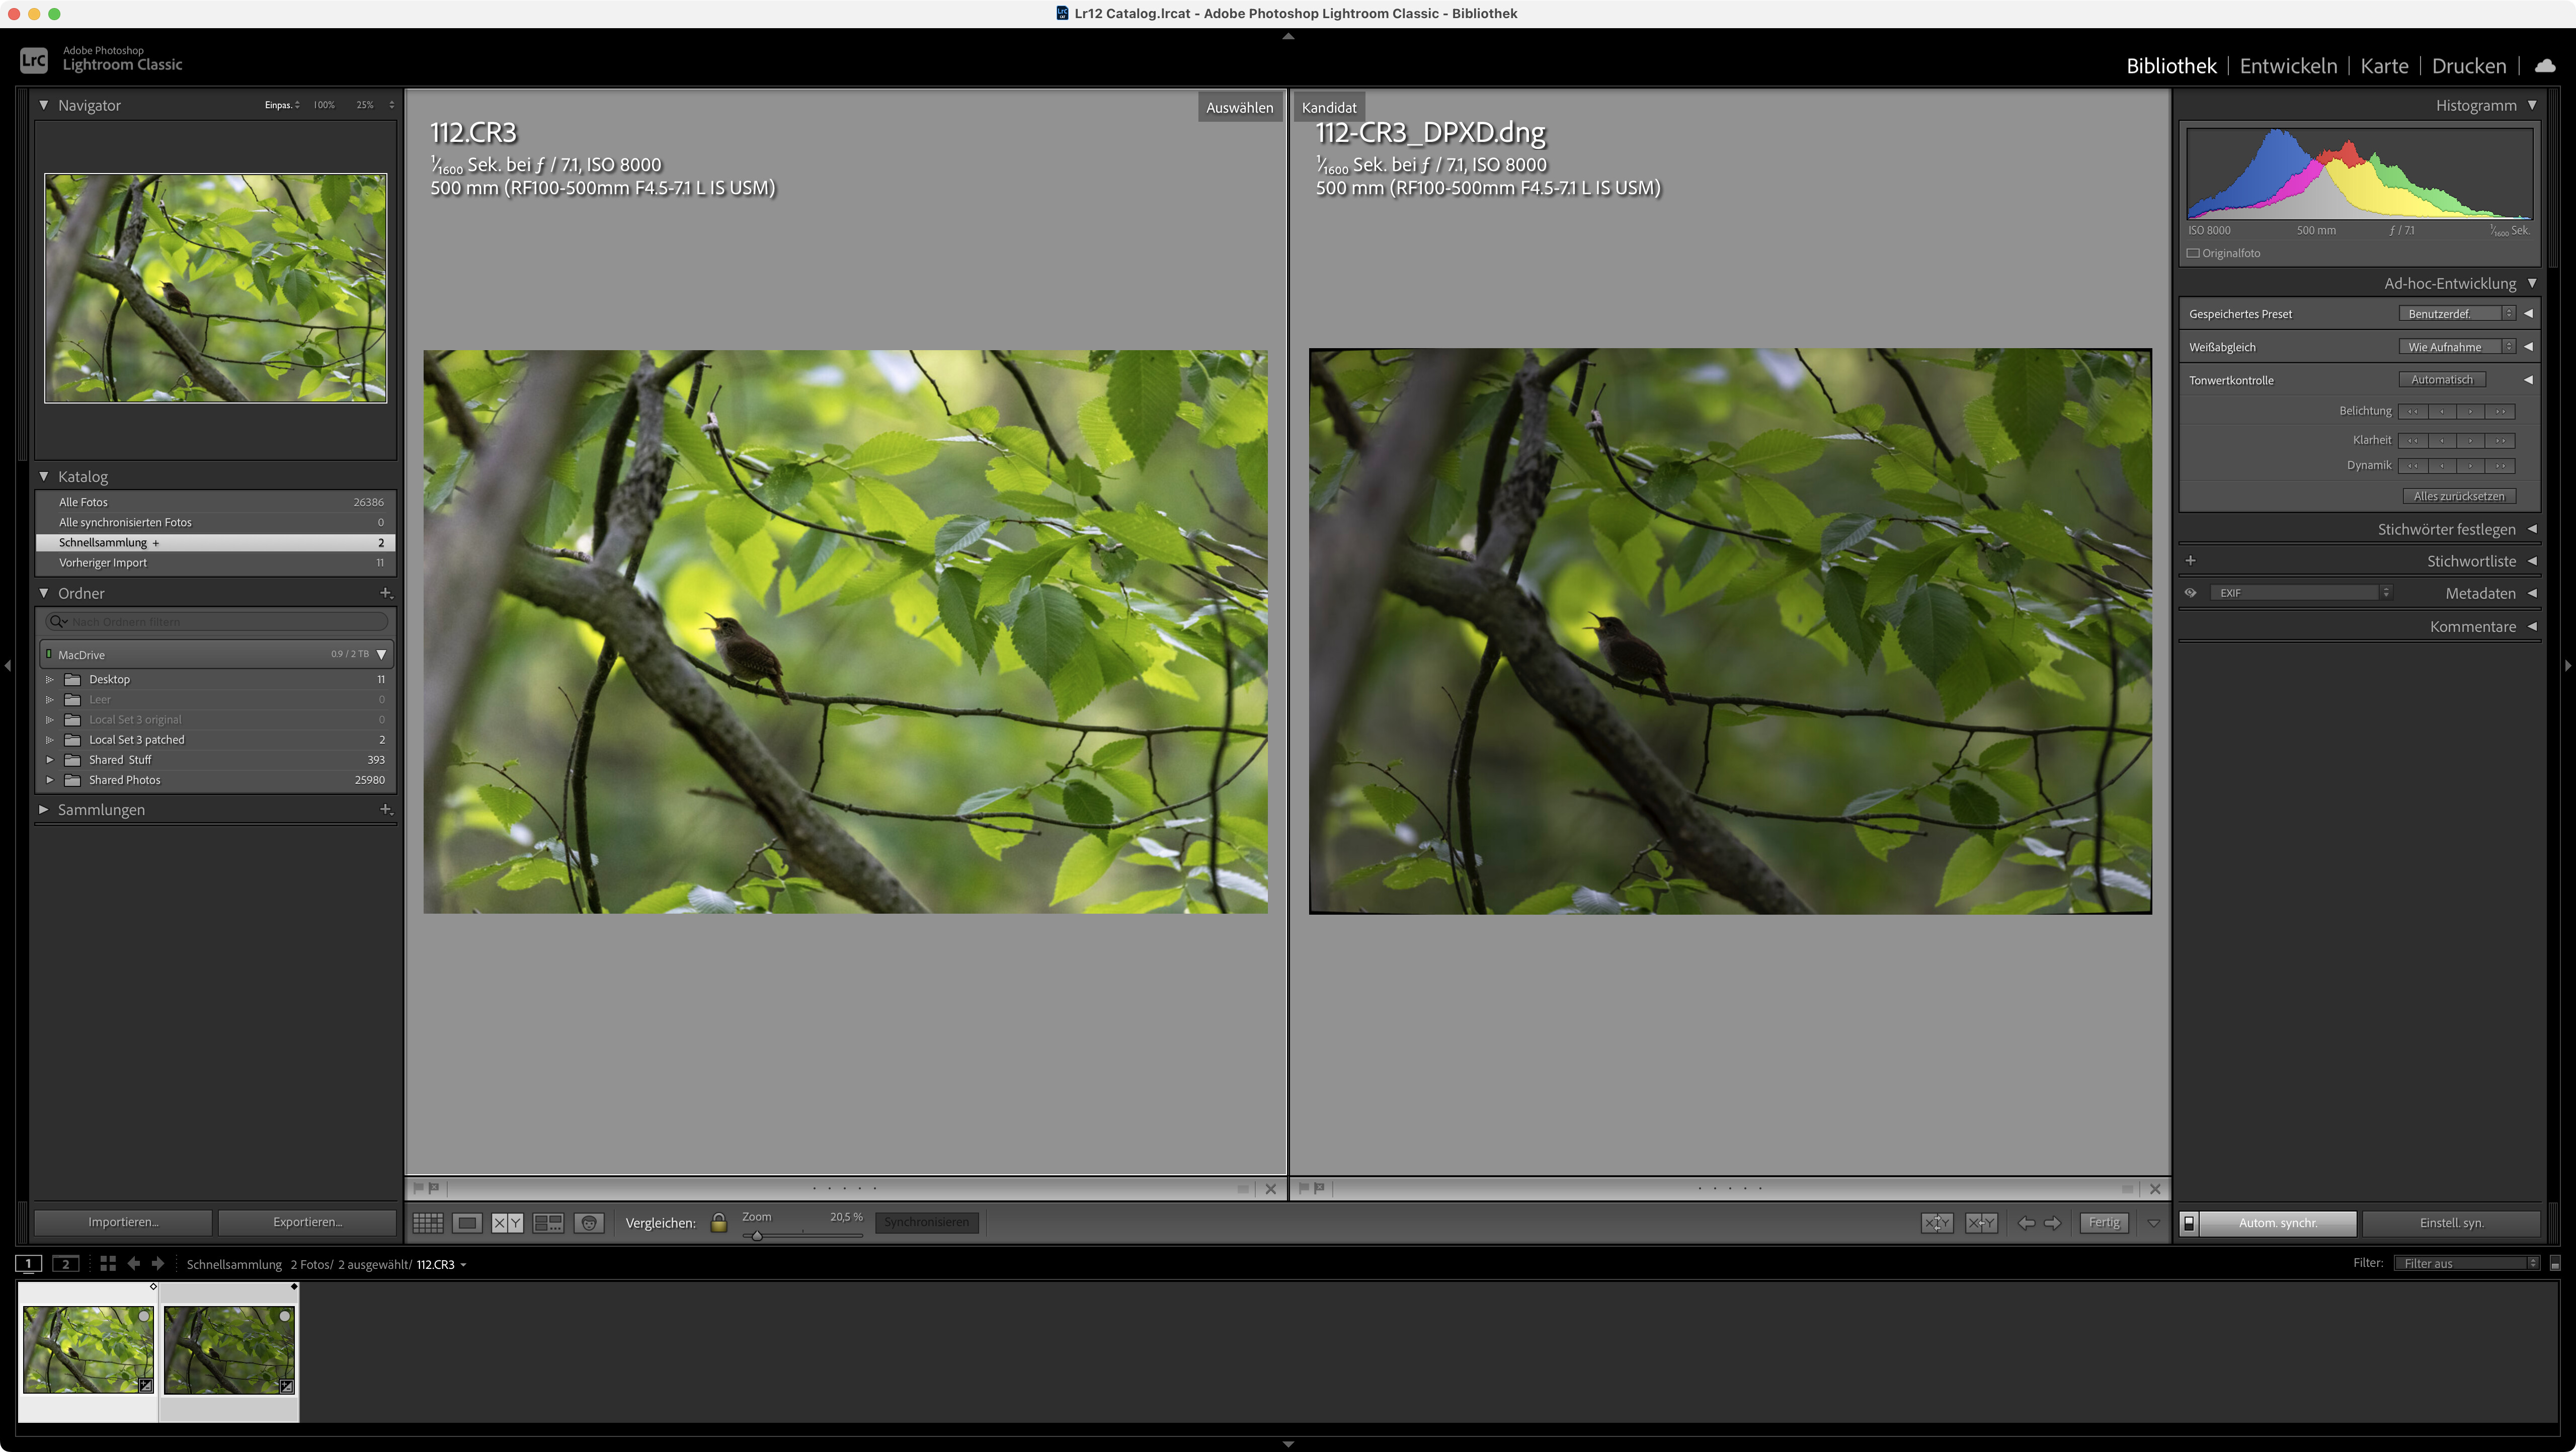
This is how the two images look when automatic tone control is applied in LrC:
Shadows pushed to the right and the looks is washed out. I adjusted the shadows on the RAW images and got the same problem so I wonder if it is an OS issue. Adjusting the RAW files in LR didn’t cause problems like this.
The export dng to Lightroom looks okay, but when I adjust the shadows that’s where the image breaks down. Were you able to adjust the shadows in PhotoLab?
I did a test using Topaz Denoise and I had no problems adjusting the shadows. I only have problems adjusting shadows on a PureRaw processed image.
I don’t understand why but I am no longer able to download PureRaw 2. I was hoping to do a test, but no go and DxO has the worst customer service. They haven’t responded to any of my questions.
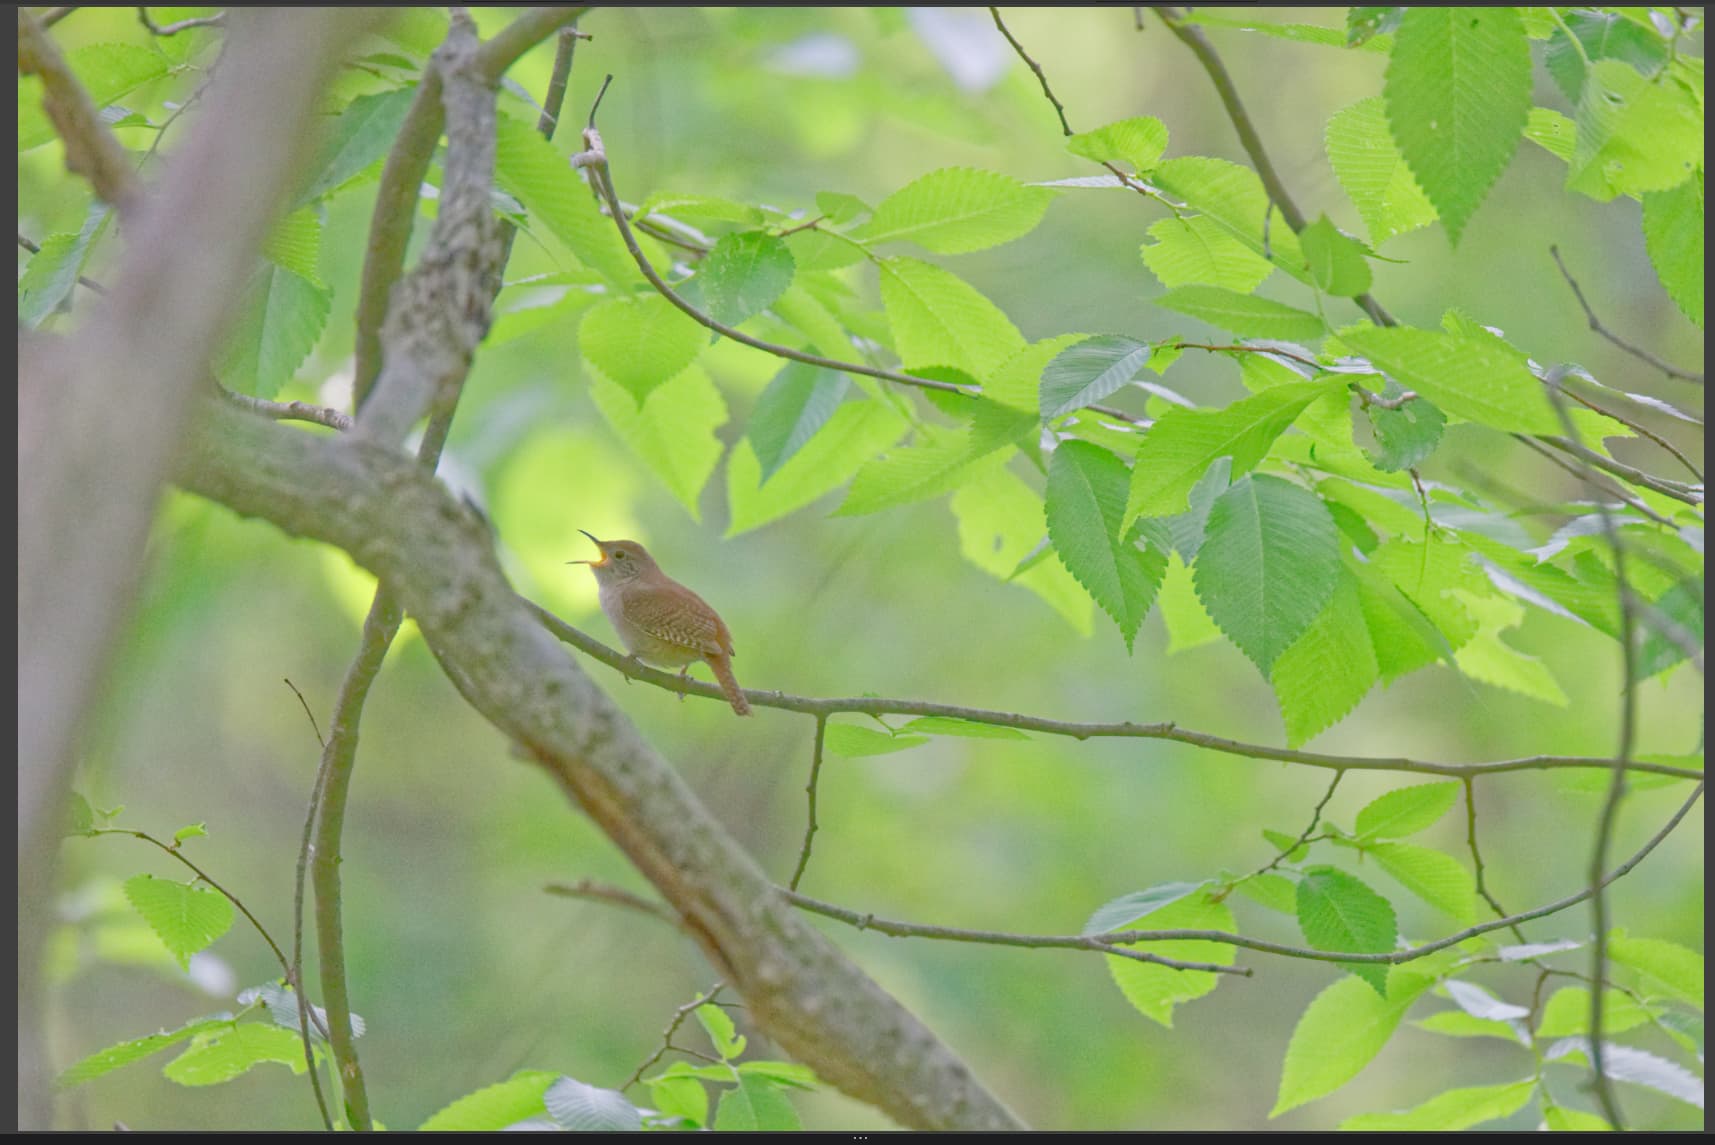
I can reproduce this if I push the shadows to +100, on both the CR3 and DNG. Then the image is washed out.
But what did you expect? It will brighten the shadows. The most of the shadows is in the leaves, so pushed to +100 they will wash out. This completely normal when pushing the shadows this much. You’ll lose contrast and colors will simply wash out.
This will happen in every program if you push the shadows this much. How much depends on the program itself. If I push the shadows all the way up in Canon’s own DPP, it will wash out less. This could be due to the extend the shadows can be pushed in the software.
RawTherapee does wash it too.
Some examples, shadows pushed to the max:
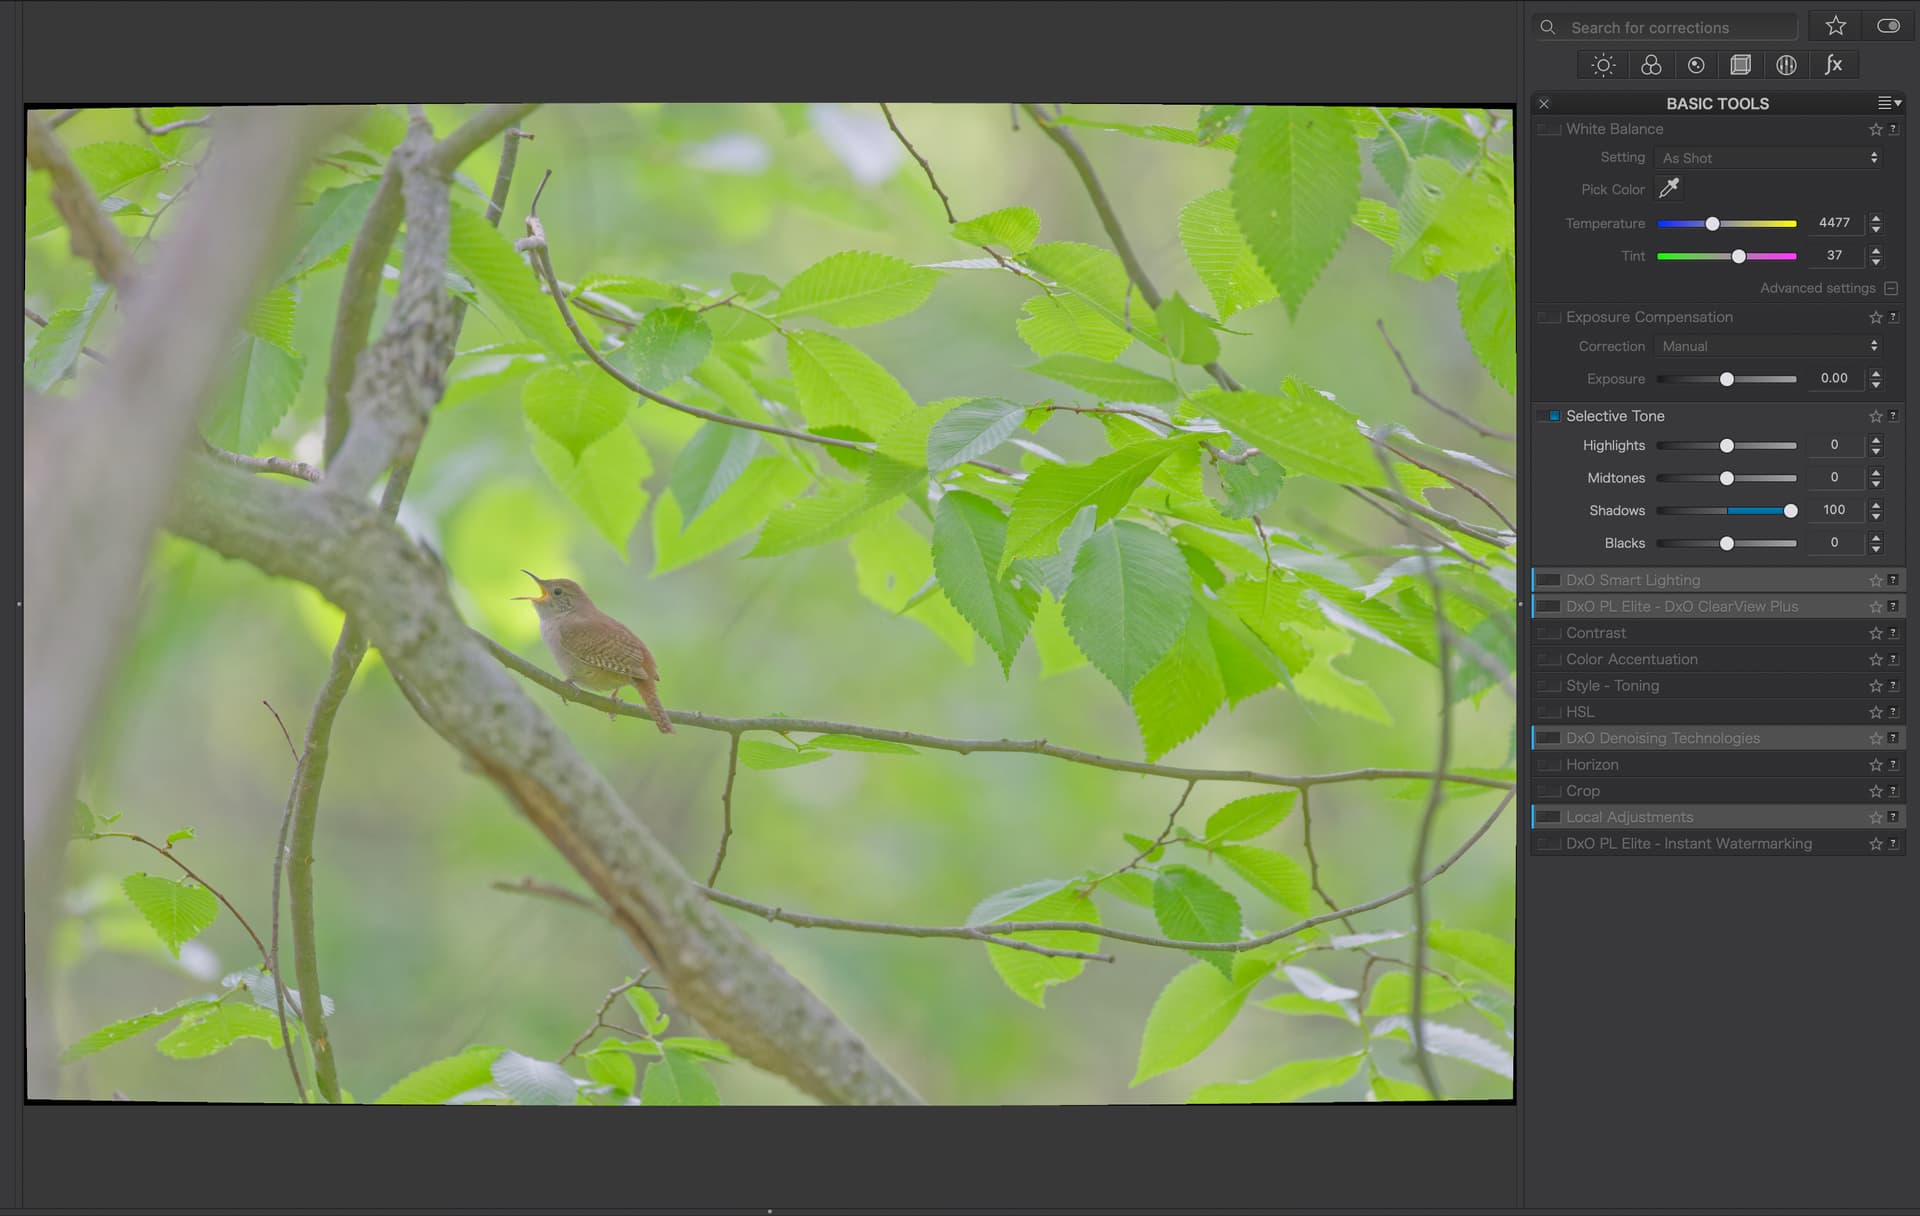
Original CR3 in PL6:
So, unless I don’t fully understand the problem, this could well be a user error. Pushing the shadows all the way up to 100 (or whatever is the max value of the software) seldomly is necessary.
Ah, That explains it. The shadows tool in Lightroom is very different from the one in PhotoLab. You should never assume that similarly named tools in two different software programs will give you the same results. They often do not. PhotoLab’s shadows tool has an increasingly major impact on midtones the higher it is set. That slider must be used with care in PhotoLab. I almost never set shadows at more then 10 or 15, and usually lower. I use the local adjustments shadows slider to target specific areas that need details lifted from the shadows. If you are going to use the global shadows slider to lift shadows you need to lower the midrange slider to compensate for high shadows slider settings .
When moving the sliders and watch the histogram one can get an idea on what range the sliders work. Compare it with LR. From what I have seen that range is much smaller in LR.
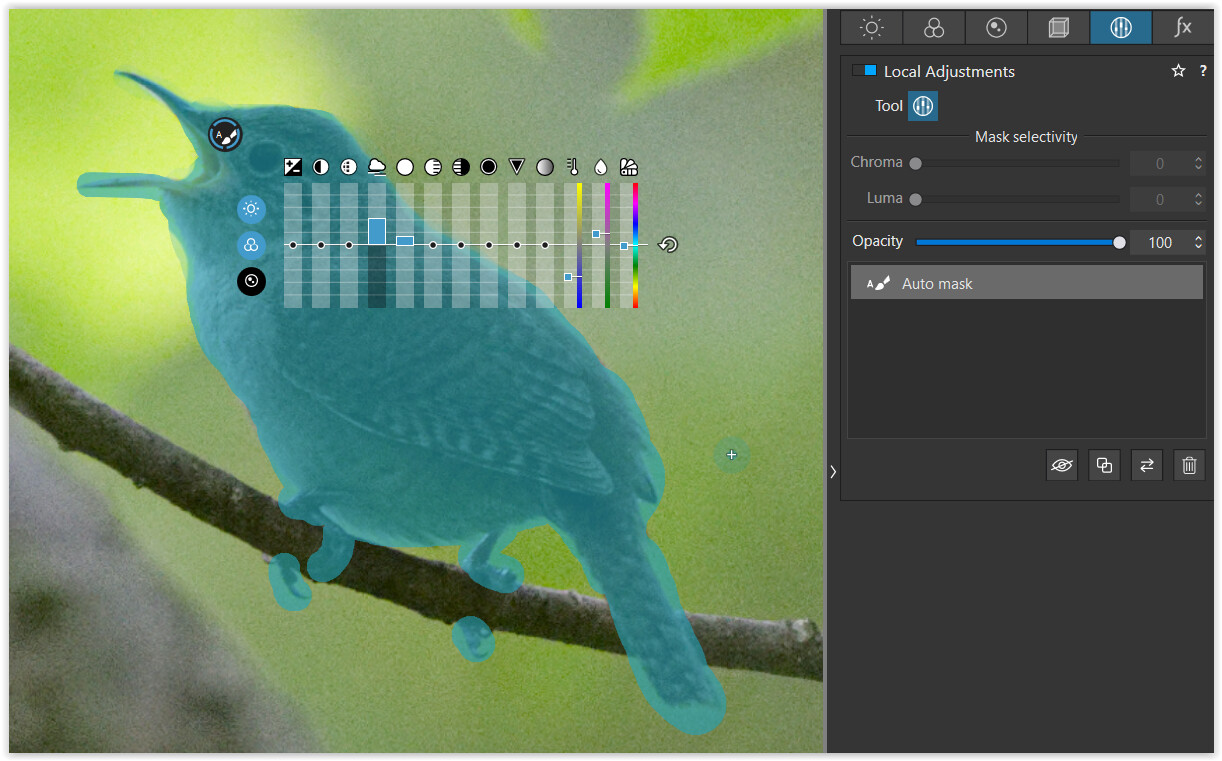
If you only want to lighten the bird then you must use local adjustments.
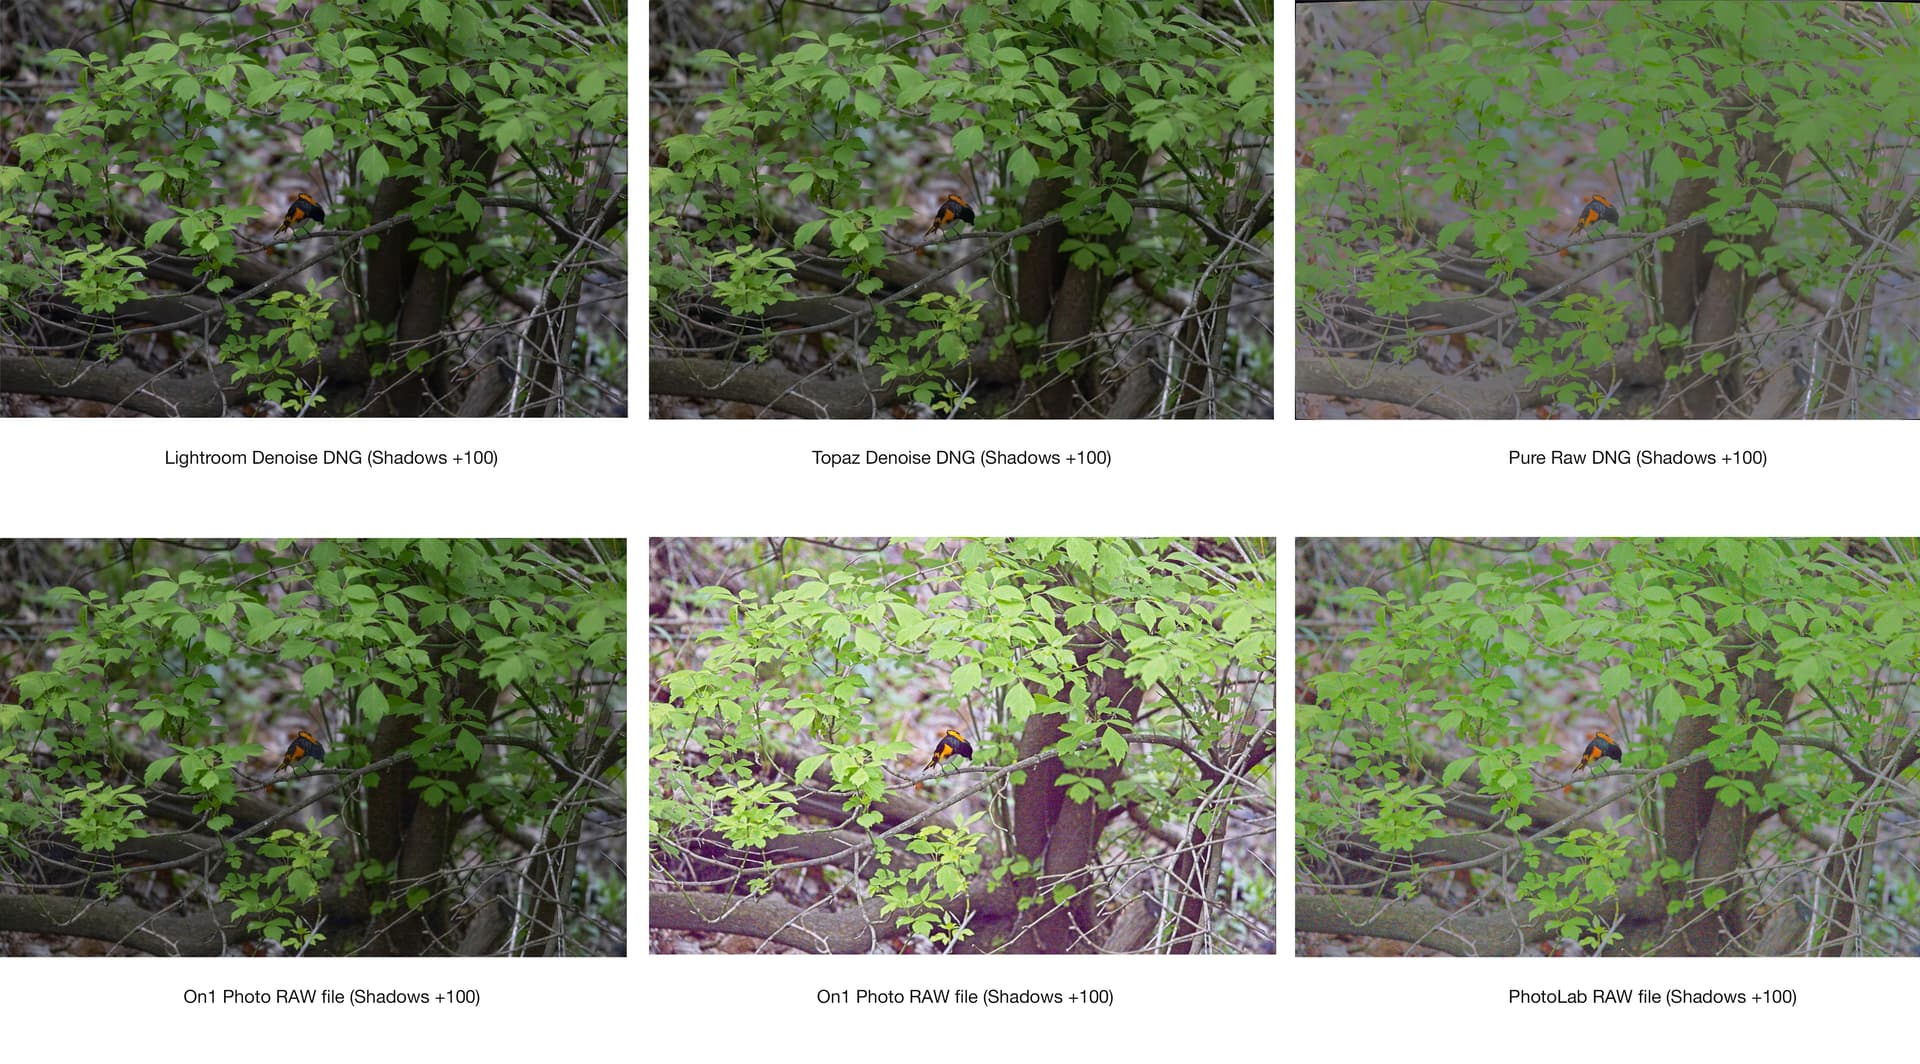
The point is being missed here. I’m doing an extreme example and I wouldn’t push the shadows to +100. The dynamic range of the image is getting changed and below is a test of 6 different options (RAW image in Lightroom, Topaz Denoise DNG, Lightroom Denoise AI, On1 RAW, PhotoLab). The PureRaw one is dreadful (top right) and my feeling is the firmware update on my Canon R5 or updated firmware to my RF 100-500 lens has messed with the profiles on PureRaw.
I’ve been doing photography and digital processing for over a decade and this is a recent development.
I appreciate everyone’s help and I hope in the future an update comes that’ll bring me back to DxO. I really love the product.
Well, 6 different programs, 6 different results. Though I can’t explain why the difference between PureRaw and PL. It must be the result of the noise reduction.
Have you looked at the range of the various sliders based on the histogram?
and Local Adjustment – Automask (on the bird to enhance some sharpness and contrast)
As already mentioned, in PL (and I suppose so in PureRaw) there is NO need for lifting the shadows that much, which as you noticed yourself only gives you a very flat rendition.
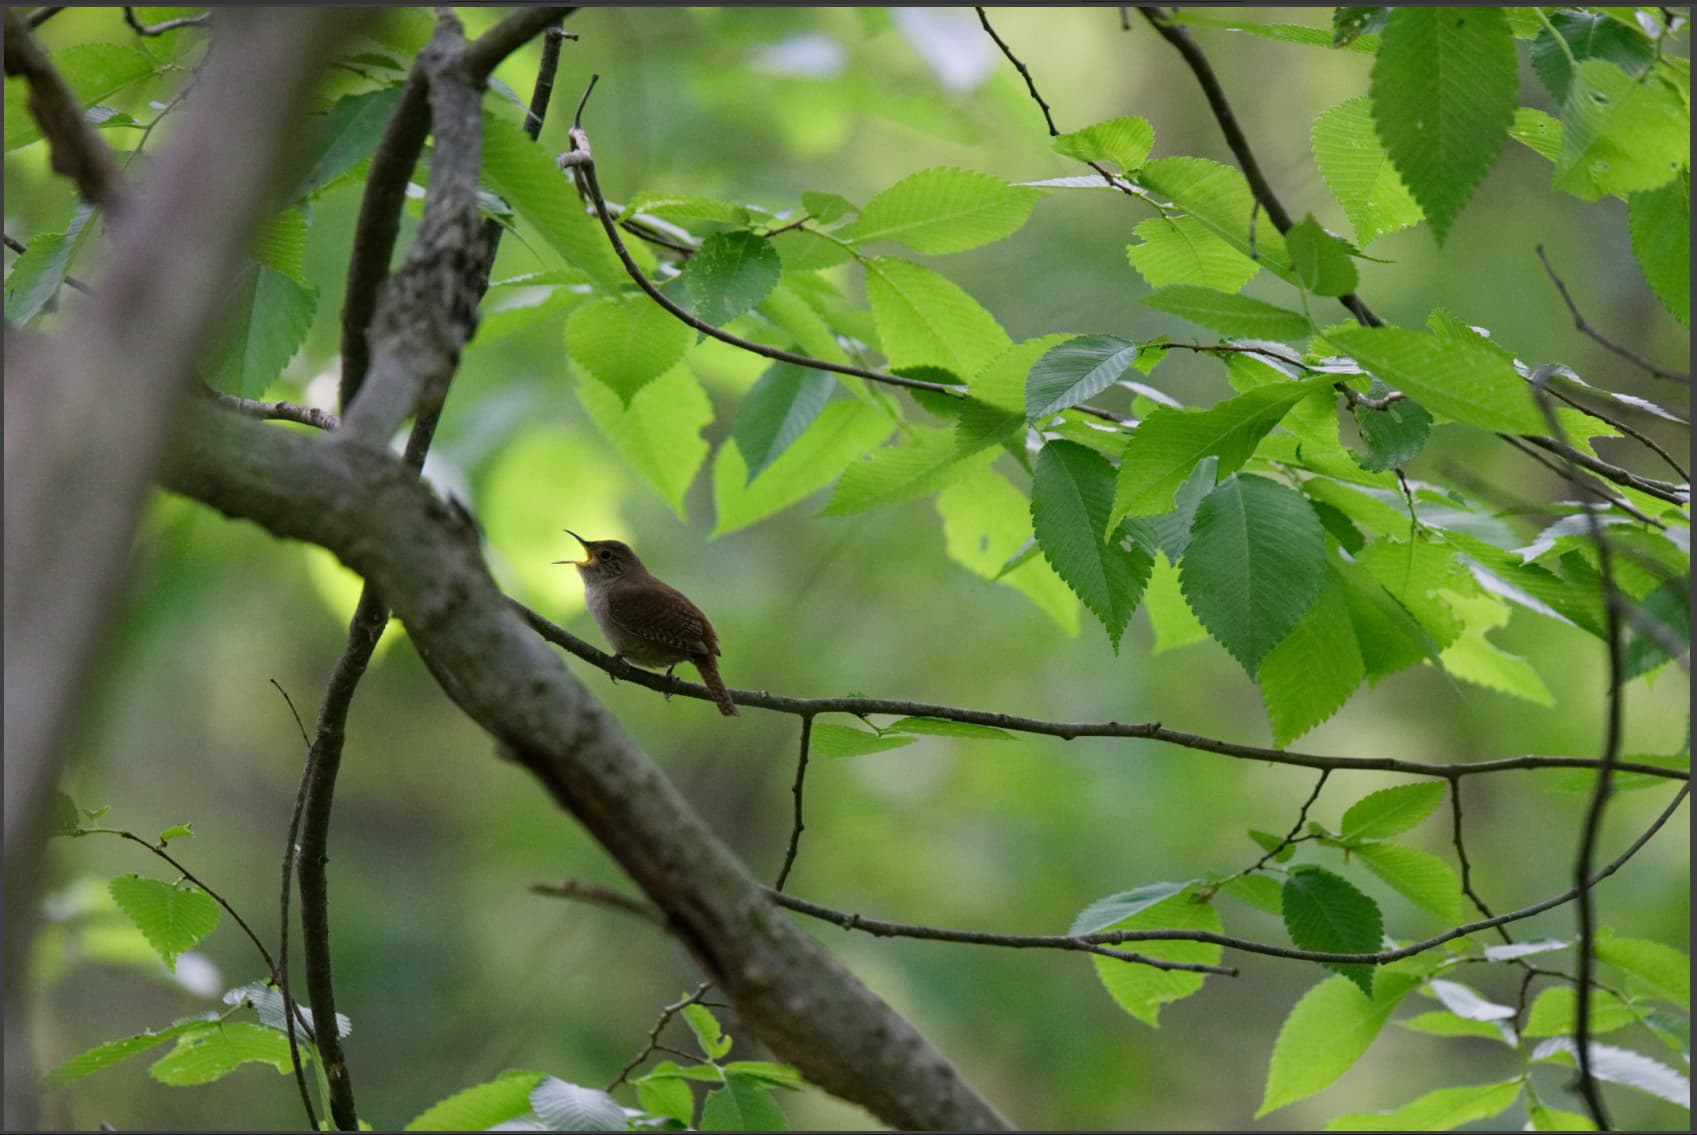
Instead, I just balanced the exposure with DxO’s Smart Lighting tool and enhanced some contrast on the bird. – To see the pic denoised, you then have to export it as JPEG, TIFF or DNG (PL → all corrections).
As you said you love the product, just use it correctly.
I tried to figure out the reason for this problem, and I was very surprised with what I found.
If I start from the transmitted DNG file, and open it in ACR, there is indeed a significant overexposure when the shadows slider is at + 100.
I then did a series of tests with the raw file, with DNG outputs from PureRAW 3 and PhotoLab 6.
I tried the possible cases of settings for the dng:
with a dng whose settings are obviously identical to the one transmitted, I find the overexposure in ACR with shadows at + 100.
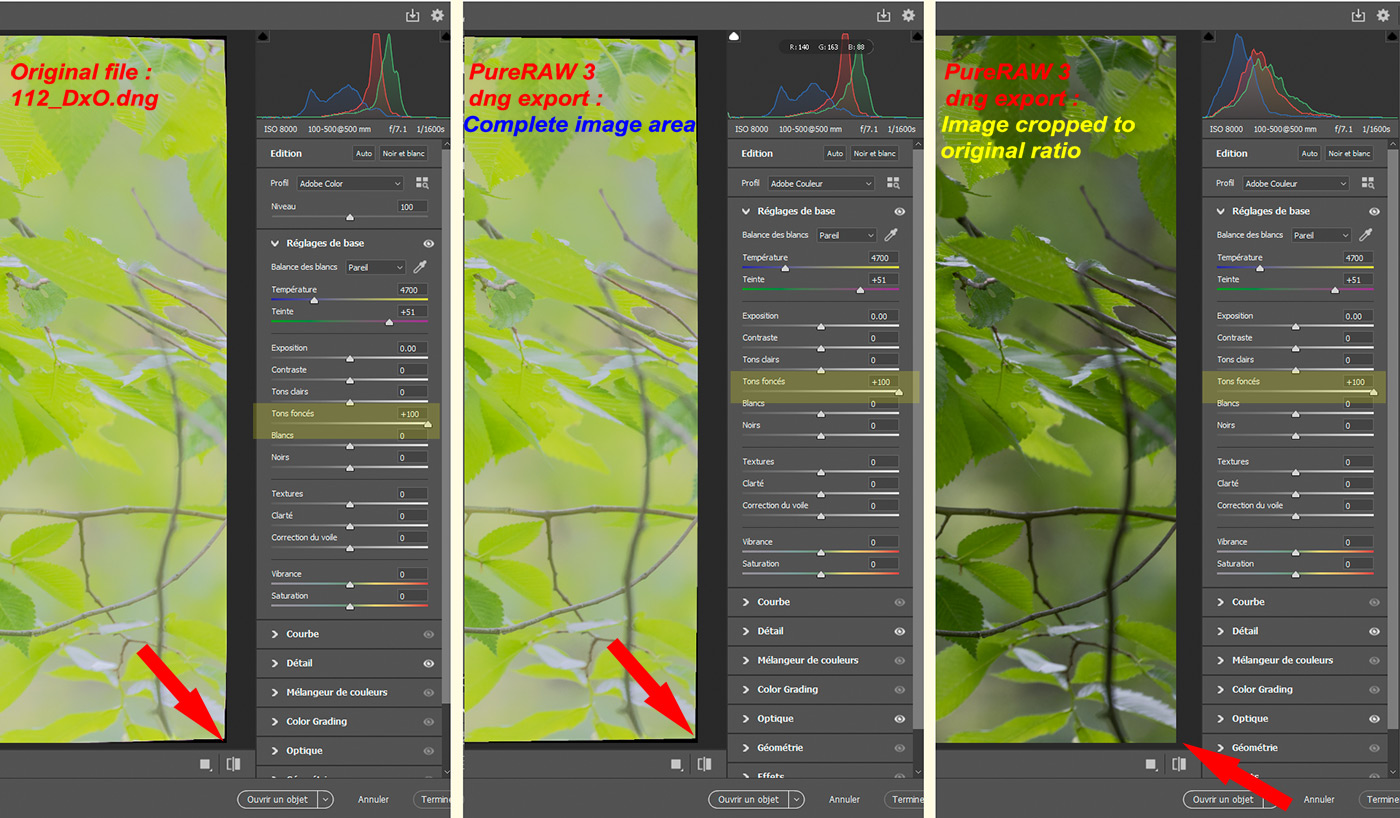
BUT, by changing the lens distortion crop setting to “Image cropped to original ratio”, the result in ACR is totally different! There is very little difference between 0 and +100.
My conclusion is therefore that PureRAW sends a dng which has no problem (I checked it elsewhere), but it is ACR which does not know how to manage the influence of the black border resulting from the adjustment in PureRAW which gives the total image area.
By opening the two dngs in PhotoLab, the behavior is neutral with this border: whether it is present or not, pushing the shadow slider all the way gives exactly the same image! It being understood that the adjustment scales are different between DxO and ACR as explained above.
So, see Adobe’s side, DxO has nothing to do with it!
The workaround is to make cropped DNGs at the original ratio or maximum rectangle, so files without the black border that ACR does not process correctly.